

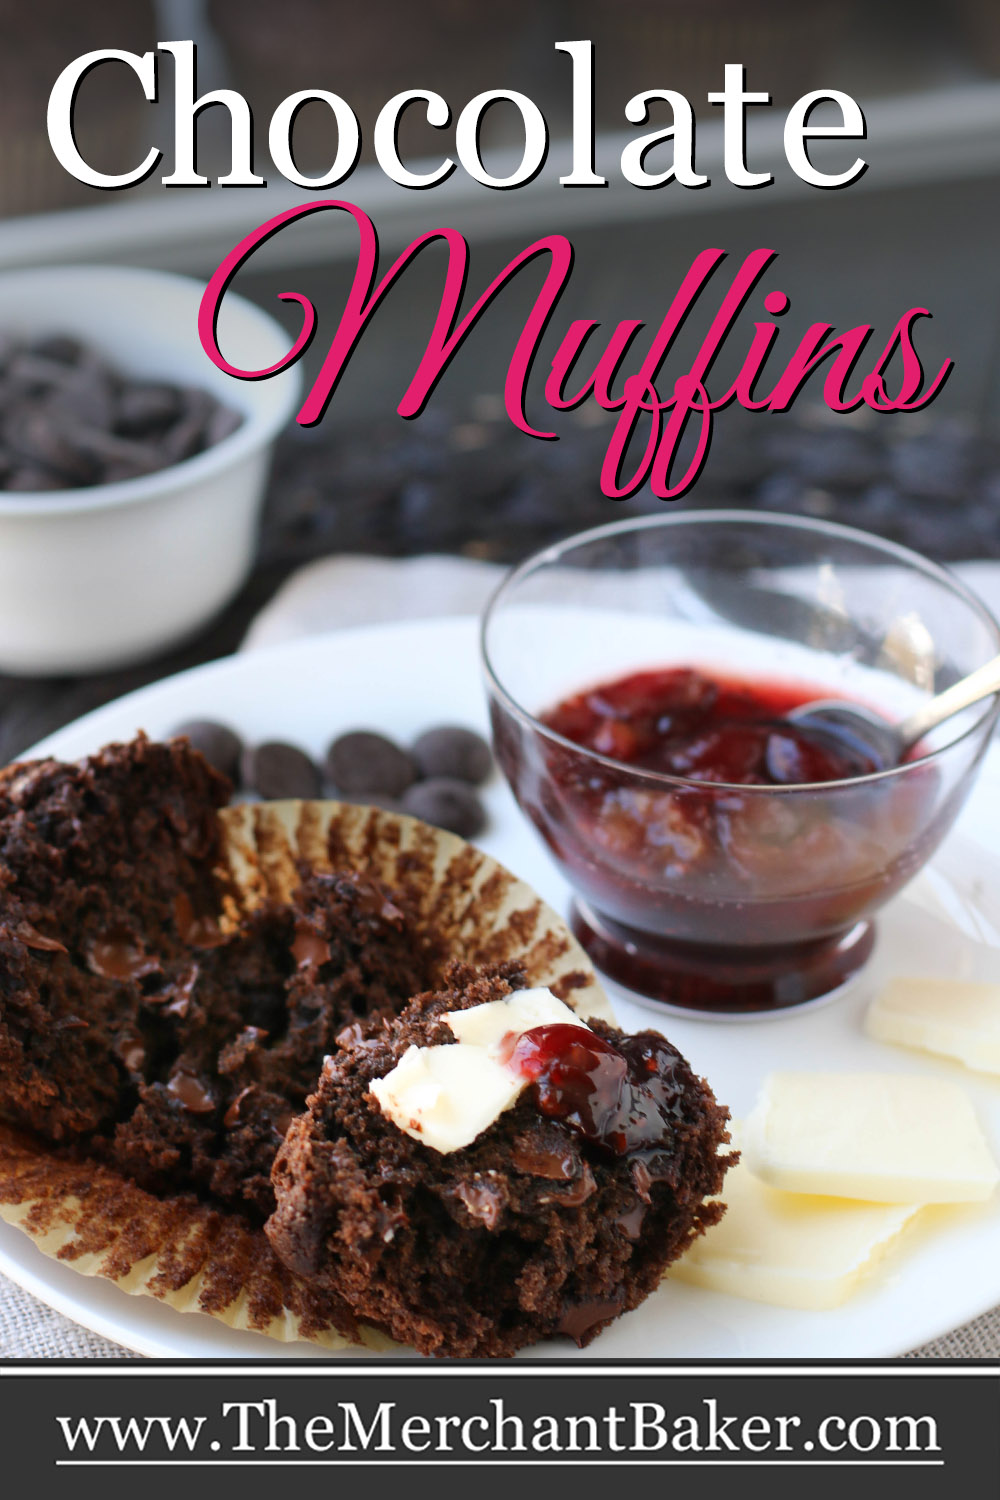

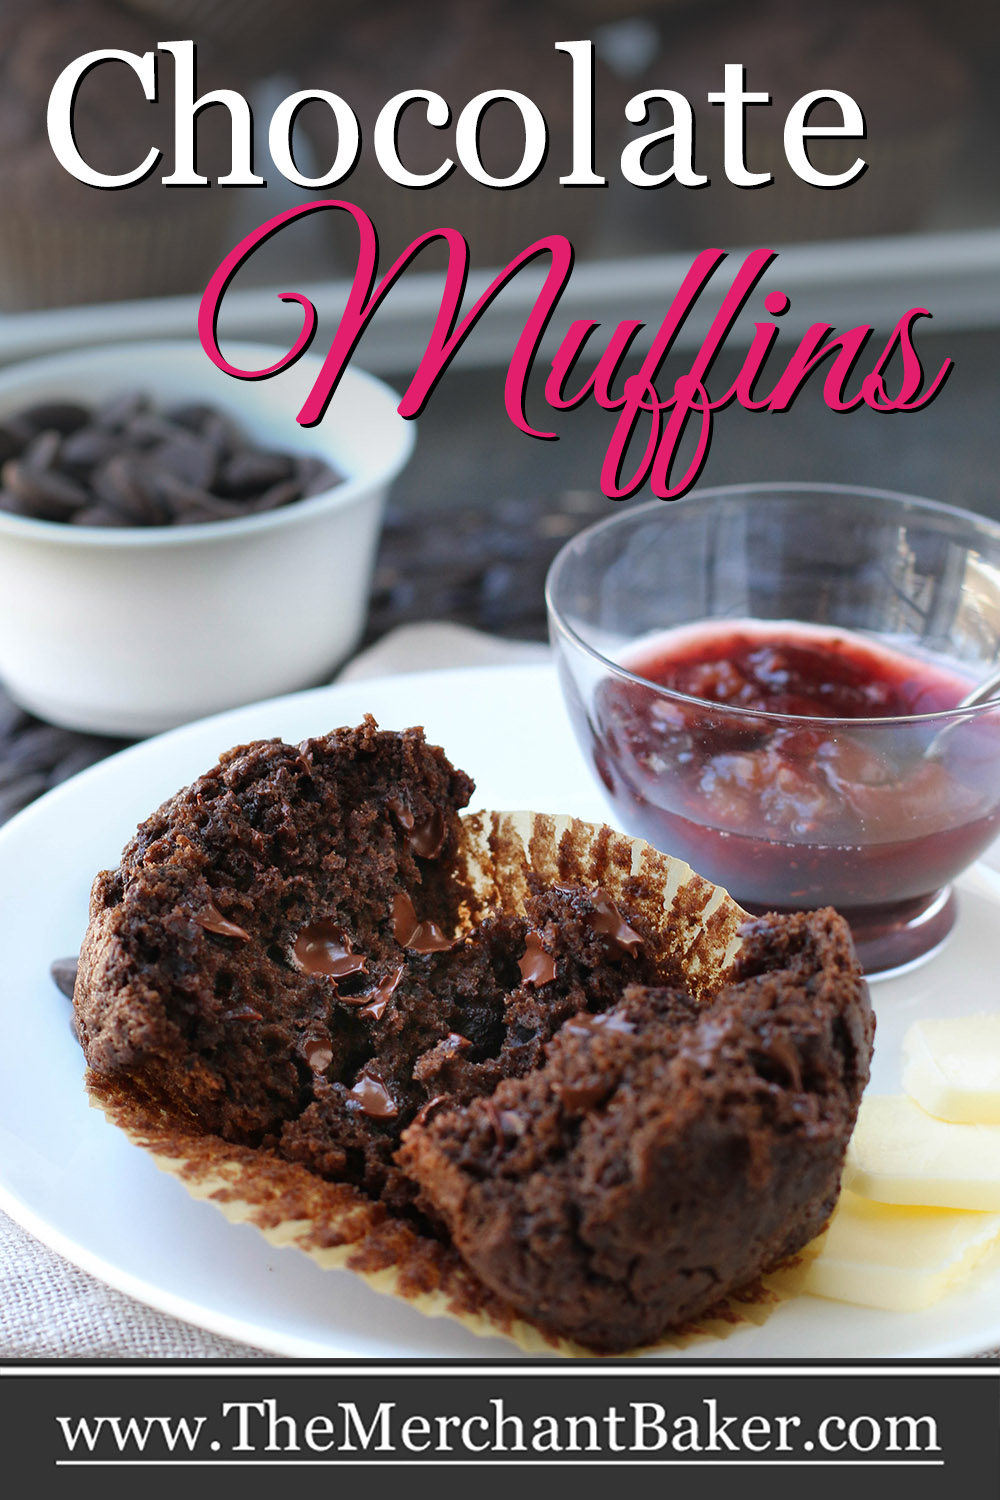

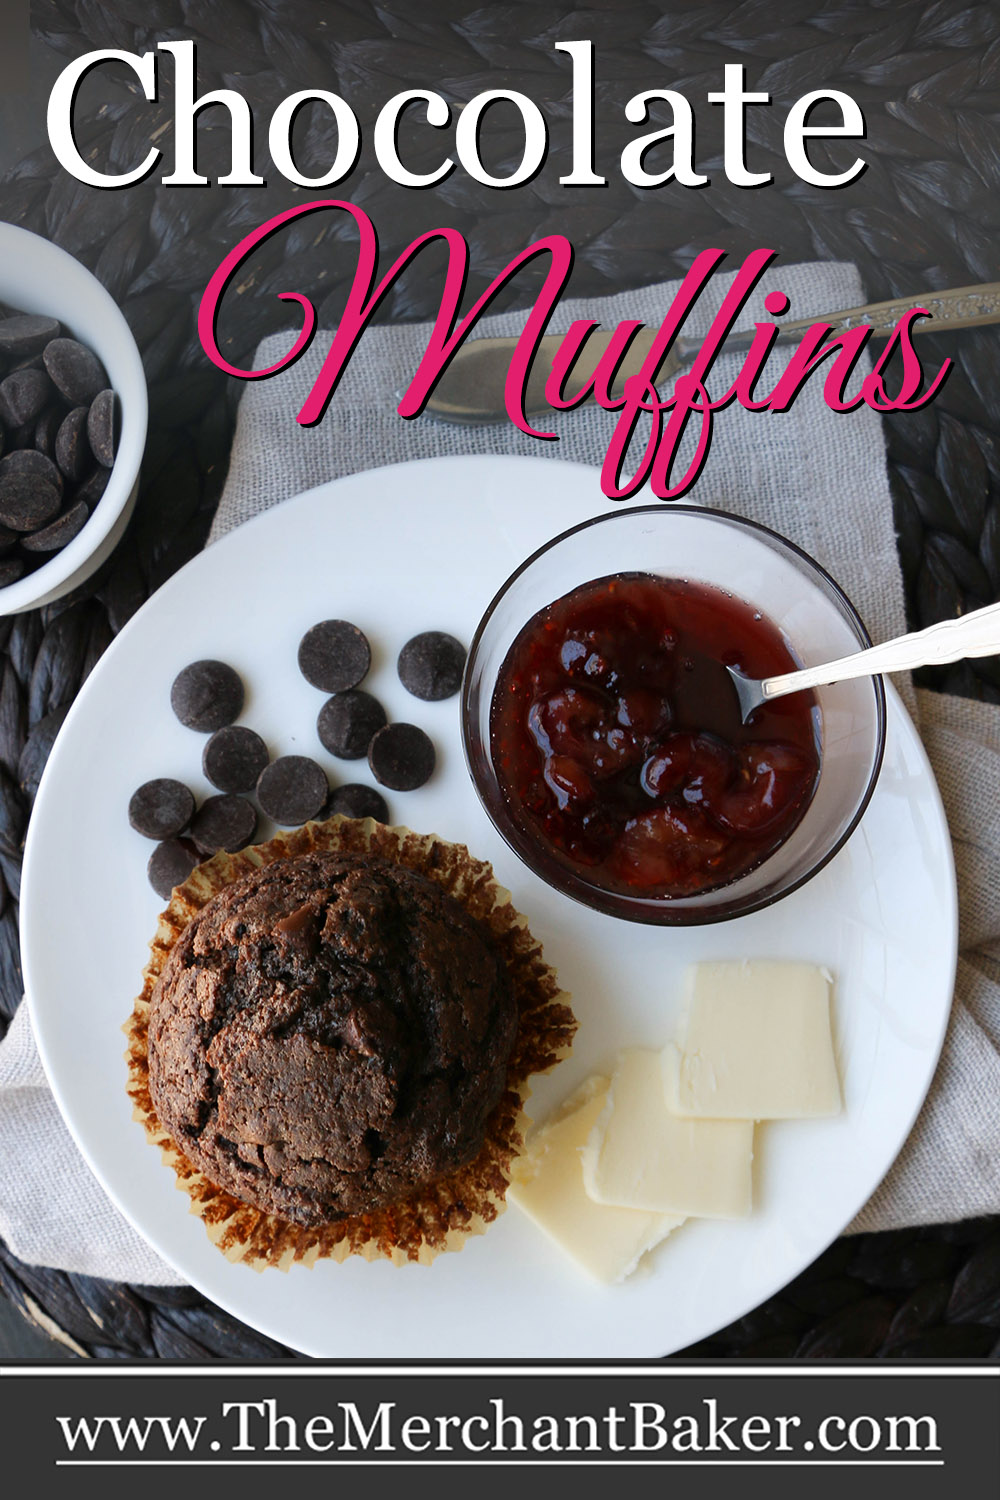

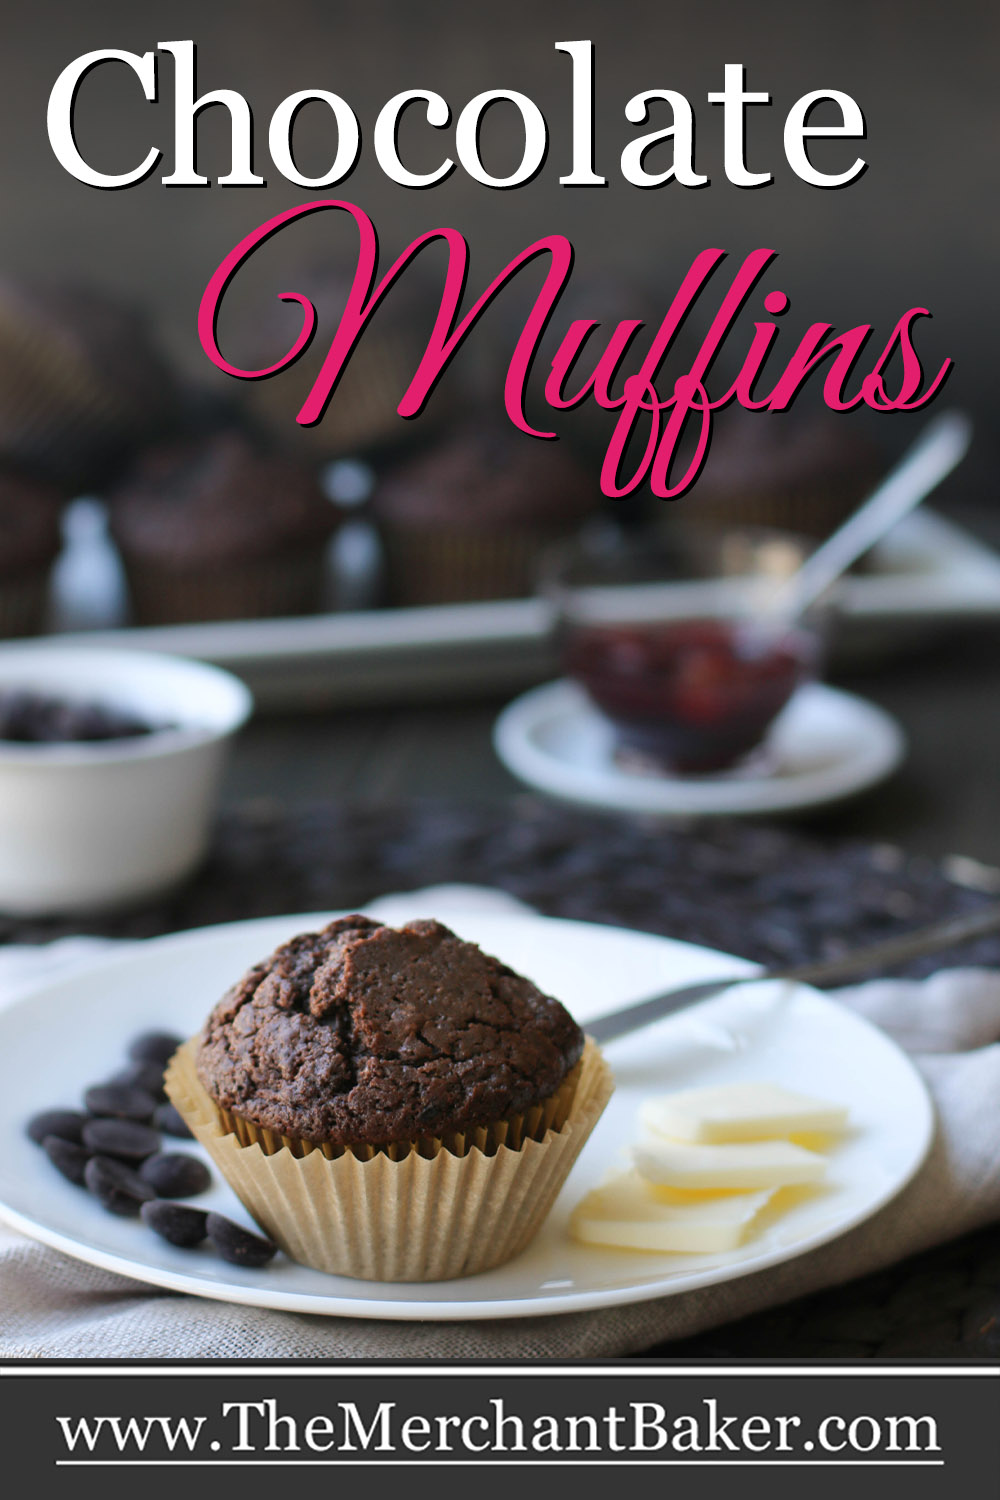

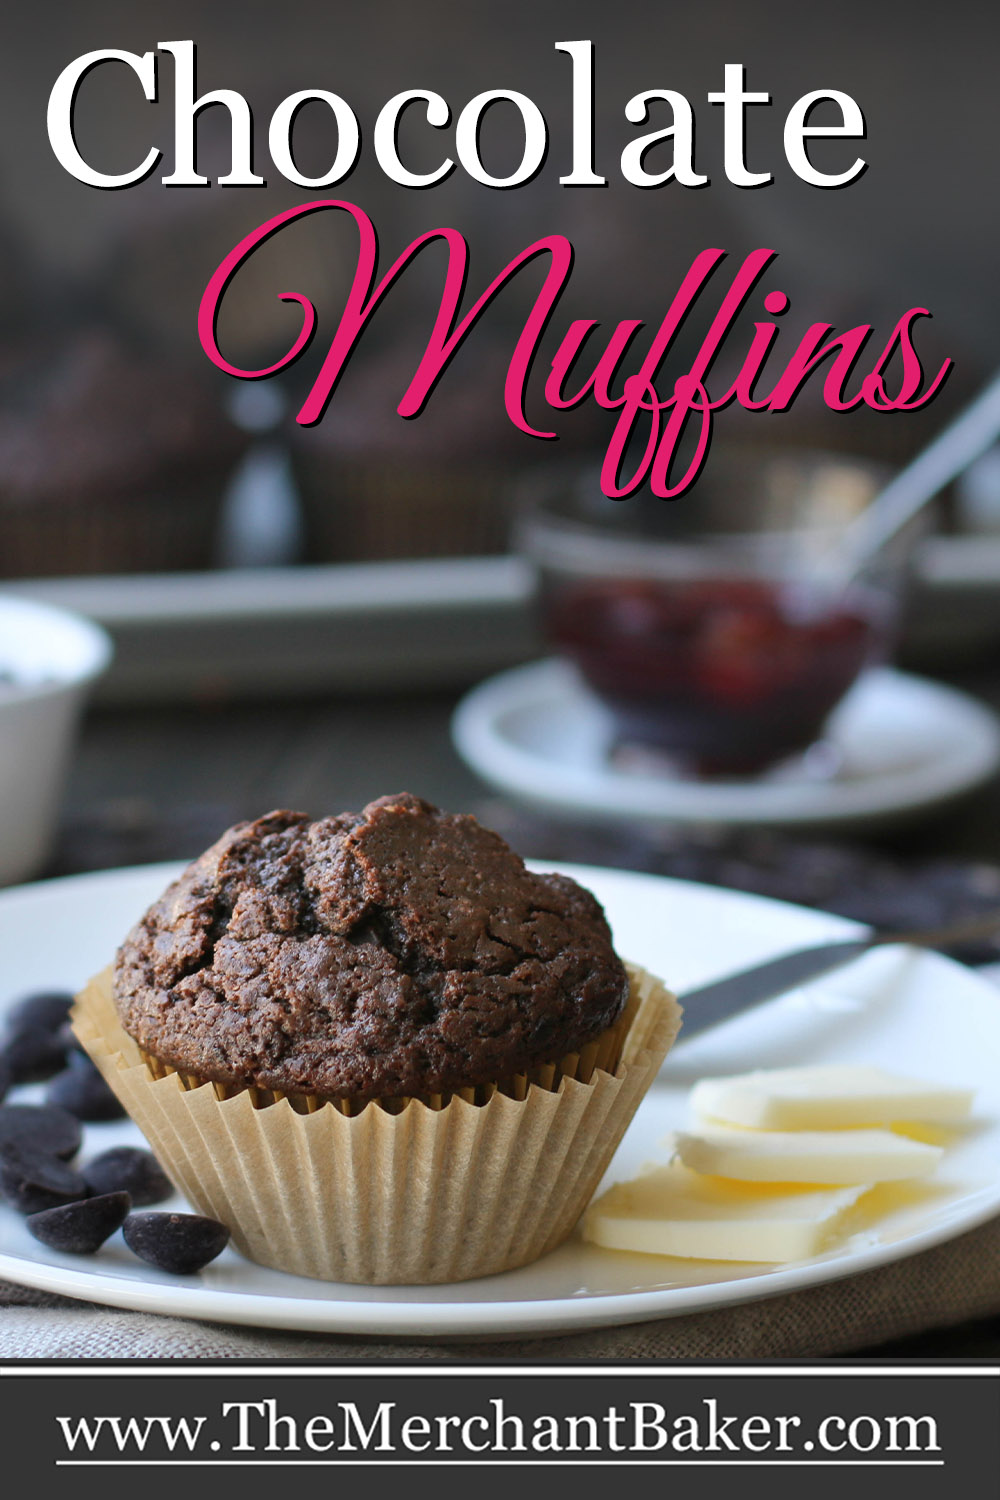
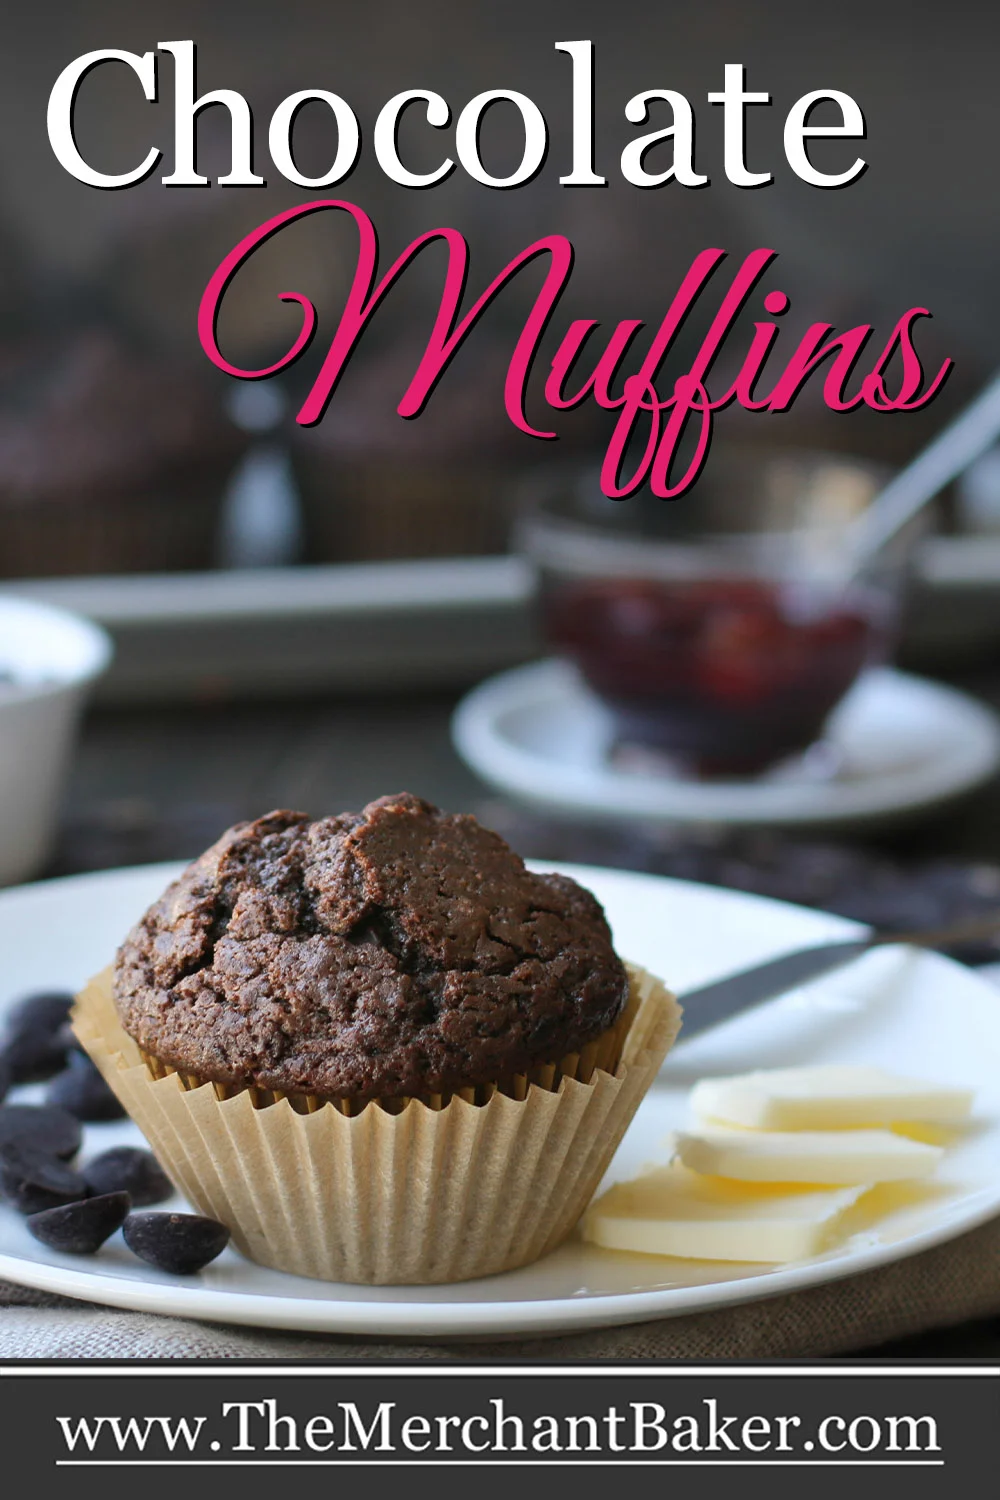

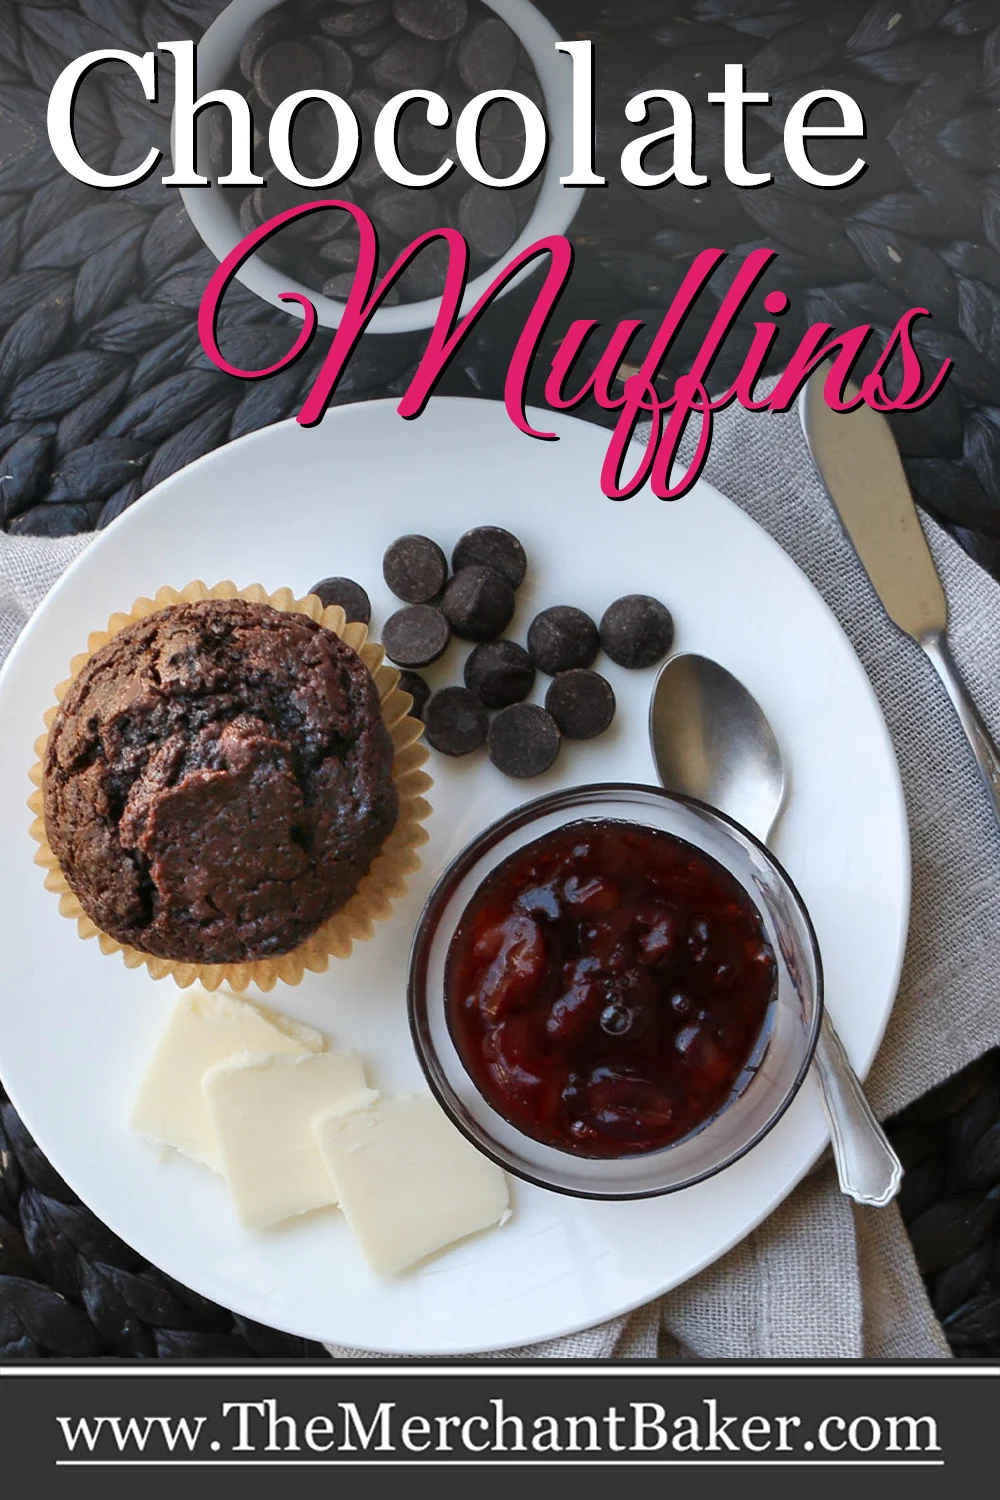


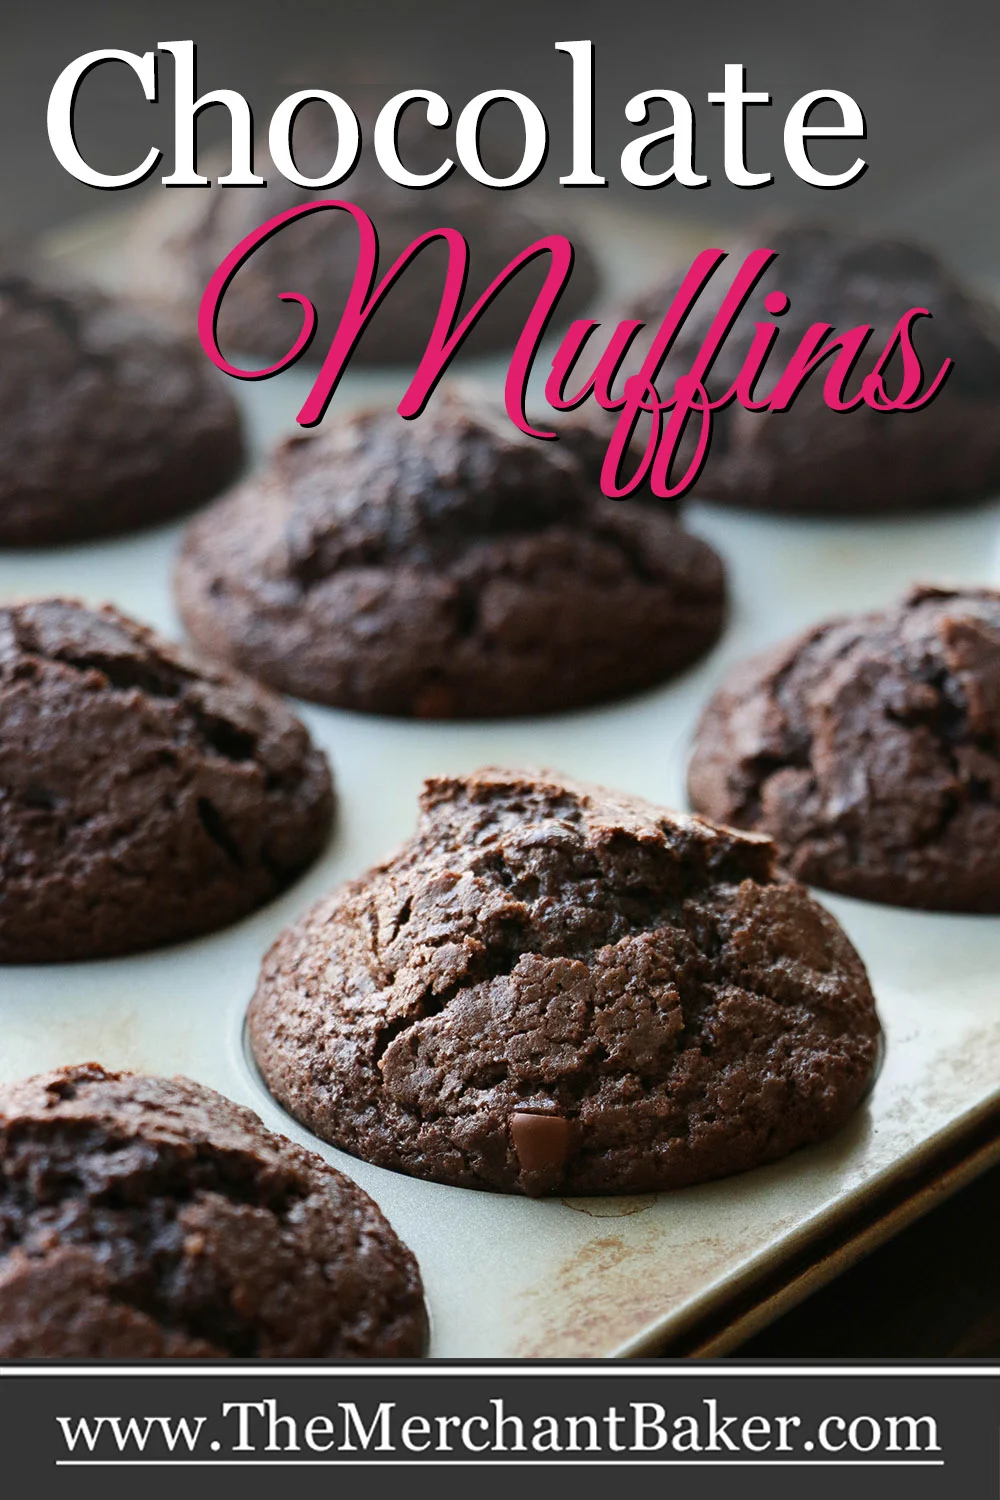


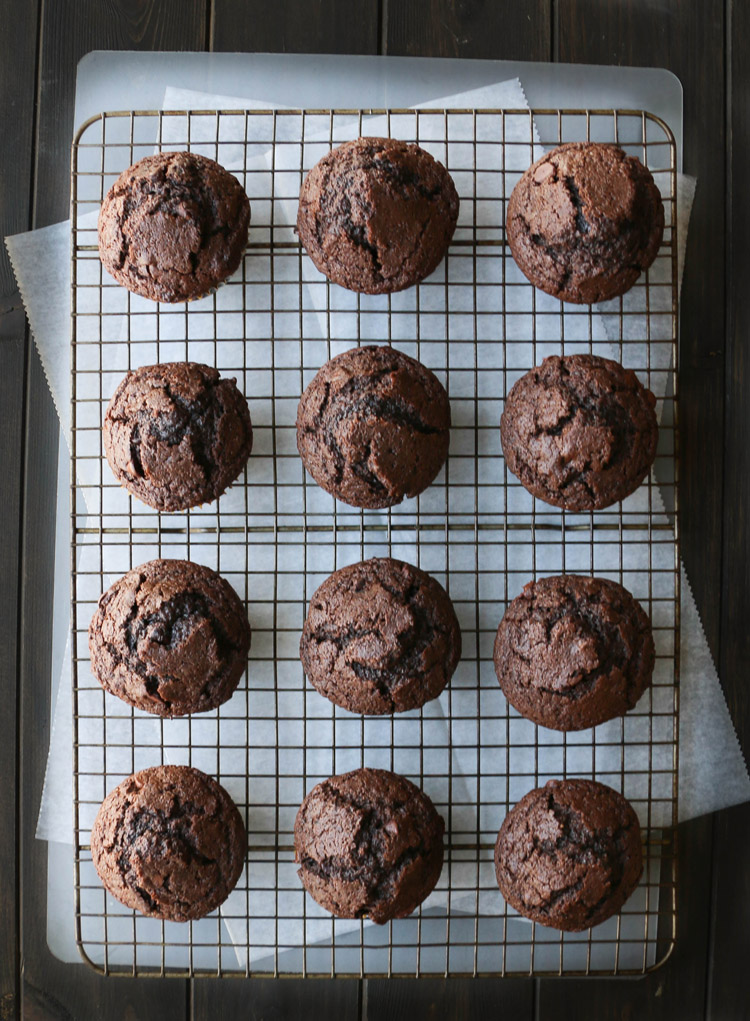
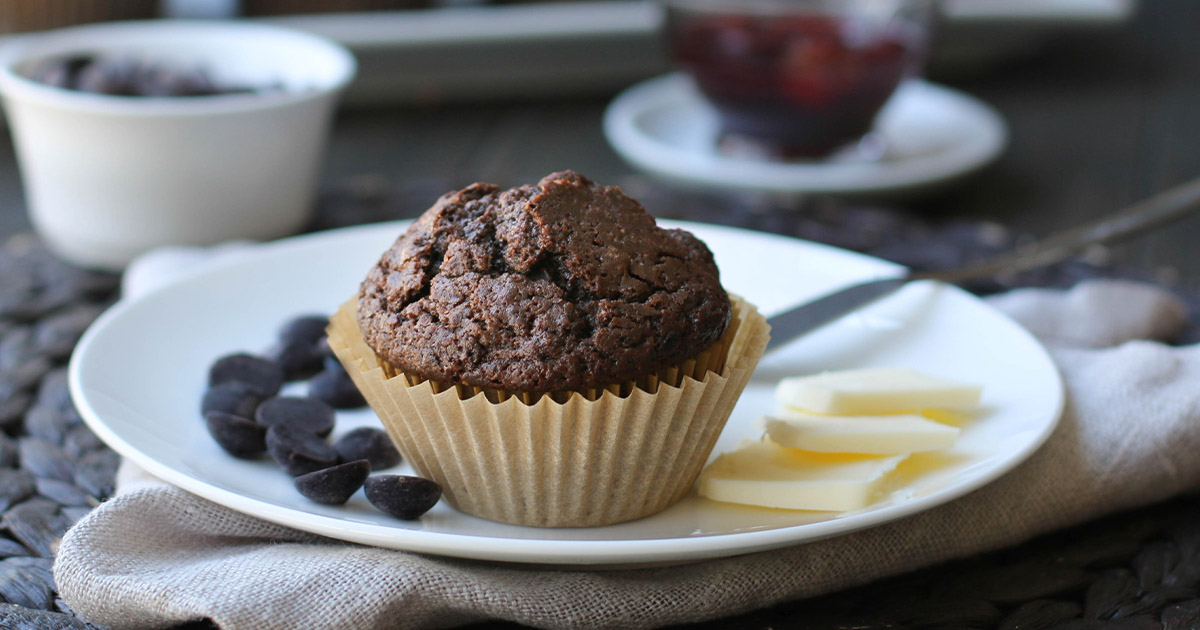
These fudgy Chocolate Muffins are filled with chocolate chips and are mixed easily by hand. The muffins are rich with dark cocoa, olive oil and Greek yogurt. They bake up with nicely domed tops and taste almost brownie like. Eat them warm…while the chocolate chips are melted and oozing chocolate throughout the muffin!
Yes, I’m still in chocolate mode over here, even though Valentine’s Day has come and gone.
Instead of dessert, though, I’m making a chocolate treat for breakfast! You know, like these Dark Chocolate Fudge Scones, but not quite as decadent.
They’re not drenched in chocolate ganache like the scones; they’re a little more respectable. ;)
So, in lieu of topping, I thought I’d simply keep the extra chocolate inside the muffin in the form of chocolate chips.

Now, I will confess that I tried sprinkling more chips on top of the muffin in the first batch. But, not only did the chips scorch from the high oven heat, they also looked like naval mines having been pushed up and out all over the muffin in a spikey fashion.
My friend suggested I share those photos. I think I’ll skip it. You’ll just have to trust me on that one.
That first batch had other issues I needed to fix as well, so it was another chance to go chipless, at least on the top.
Chocolate Muffins Get a Boost of Healthy Ingredients!
News flash! I used Greek yogurt (protein and calcium boost) and heart healthy olive oil in these muffins. You know, just keeping some balance in the splurge of eating chocolate for breakfast.
I also used all purpose flour, but you could try using whole wheat pastry flour. I’ve had great success using it in both muffins and pancakes.
Check out these Whole Wheat Banana Nut Muffins and Oatmeal Chocolate Chip Banana Pancakes as proof!
Ingredients for Chocolate Muffins
- Flour-I used all purpose
- Dutch process cocoa– I used King Arthur Double Dutch Dark Cocoa
- Sugar-just plain granulated white sugar
- Baking powder– makes sure it’s fresh (not expired)
- Salt– I use table salt. If you use a coarse kosher salt, you can use 1.5x or double the amount.
- Espresso powder-enriches the chocolate flavor
- Eggs– use large
- Greek yogurt-I used Fage 2% but you can sub sour cream.
- Olive oil-any liquid oil is fine but I love baking with olive oil
- Milk-I used whole milk. Lower fat milks can be used, but the fat here adds to the richness and moisture.
- Vanilla extract-I know, the prices have sky rocketed over recent years. It’s like liquid gold.
- Semi-sweet chocolate chips – I love mini chips for muffins but I thought they’d get lost in the chocolate batter. So, I opted for regular sized chips. Use milk chocolate if you want an even sweeter muffin.
Dutch Process Cocoa vs. Regular Unsweetened Cocoa
I used King Arthur’s Double Dutch Dark Cocoa in this recipe. The difference between Dutch processed and natural is this…Dutch processed cocoa is treated with an alkali that reduces the acidity of the cocoa.
This gives the cocoa a smoother, richer and more mellow flavor than regular unsweetened cocoa. It also makes it darker.

Because I used baking powder as the leavener for this recipe, you can substitute regular unsweetened cocoa if you’d prefer. If you do that, instead of two teaspoons of baking powder, I’d use one teaspoon of baking powder and one teaspoon of baking soda.
The baking soda is a base and will neutralize the acid in the natural cocoa powder. This will help smooth out the flavor. But other ingredients in a recipe will also help to keep everything balanced.
If you don’t have an acidic ingredient to neutralize the baking soda, you end up with a soapy flavor in your baked good. That’s why we’re not using baking soda with the Dutch process cocoa, just baking powder.
I use Dutch process more often because I simply like the flavor.
Here are some recipes that use the different kinds of cocoa:
Recipes That Use Dutch Process Cocoa
- Chocolate Sugar Cookies
- Crazy Chocolate Olive Oil Cake
- Dark Chocolate Cupcakes
- Chocolate Cream Pie
- Black Cocoa Brownies
Recipes That Use Regular Unsweetened Cocoa
(Note: In some of the recipes above, you can use either kind of cocoa. In others, you have to follow the recipe and use what I’ve suggested.)

There’s no need for room temperature ingredients!
Isn’t that fab? You don’t need to worry about bringing anything to room temperature before you begin! The reason is because we’re using oil for the fat, not melted butter.
Chocolate muffins can tend towards being dry, if you’re not careful. Oil helps keep baked goods moist, so I opted for oil in this recipe.
If you add cold eggs or yogurt to oil, no worries. If you add them to melted butter, the butter may re-solidify into little chunks of butter. That will make it hard to fully blend the ingredients.
The following paragraphs contain affiliate links. We are a participant in the Amazon Services LLC Associates Program, an affiliate advertising program designed to provide a means for us to earn fees by linking to Amazon.com and affiliated sites.
How to Make Chocolate Muffins
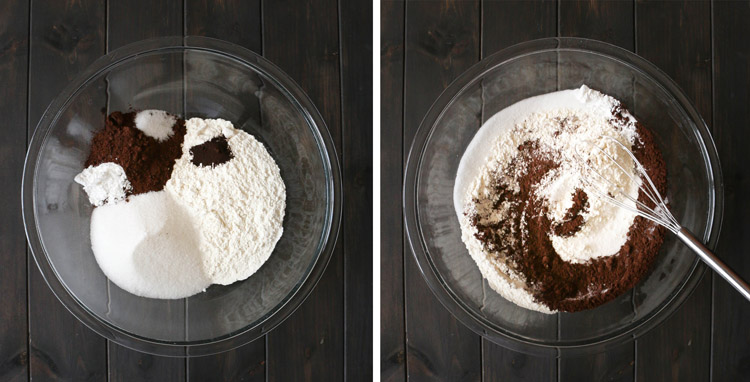
Start by whisking all of the dry ingredients in a large mixing bowl.
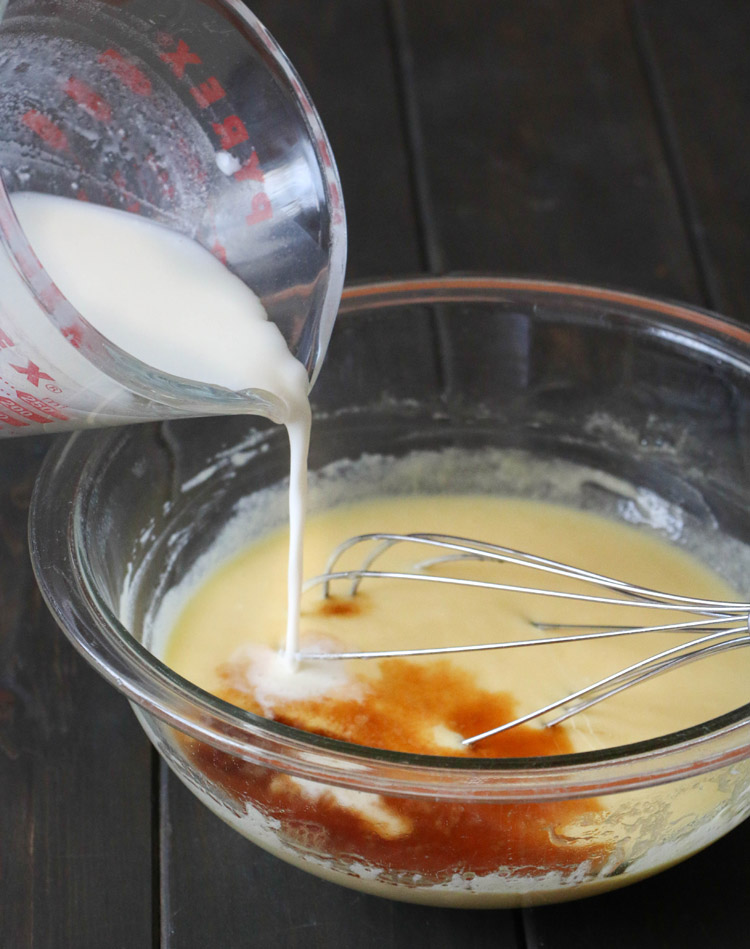
Then, in a separate bowl, whisk up the eggs, yogurt and olive oil. It’s important to not add the milk until the eggs are thoroughly combined with the other ingredients.
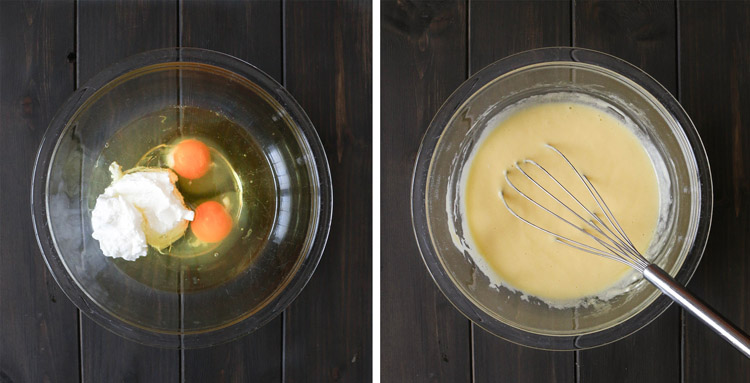
Why? If you try to combine eggs with too much liquid all at once, you’ll find yourself chasing the yolk around the bowl and it will be far more difficult to incorporate them.
If you’ve ever tried, it’s a little annoying. This mixing order makes it much easier.
This is why it isn’t necessary to bring all ingredients to room temperature. As long as you follow the order in which we mix them, you won’t have any issues.
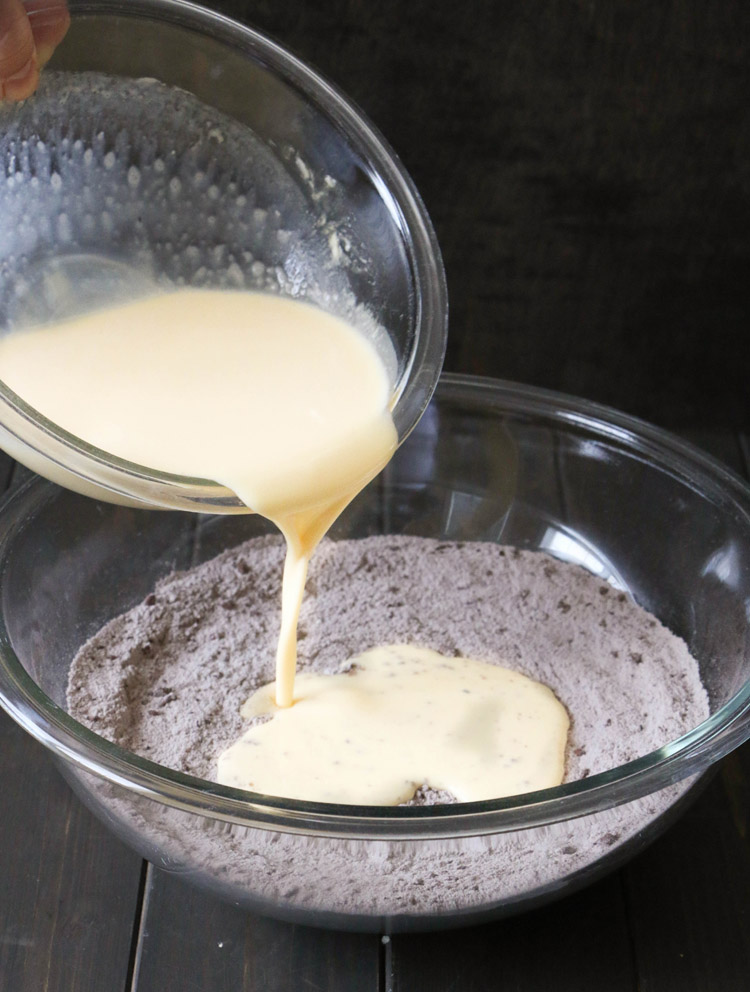
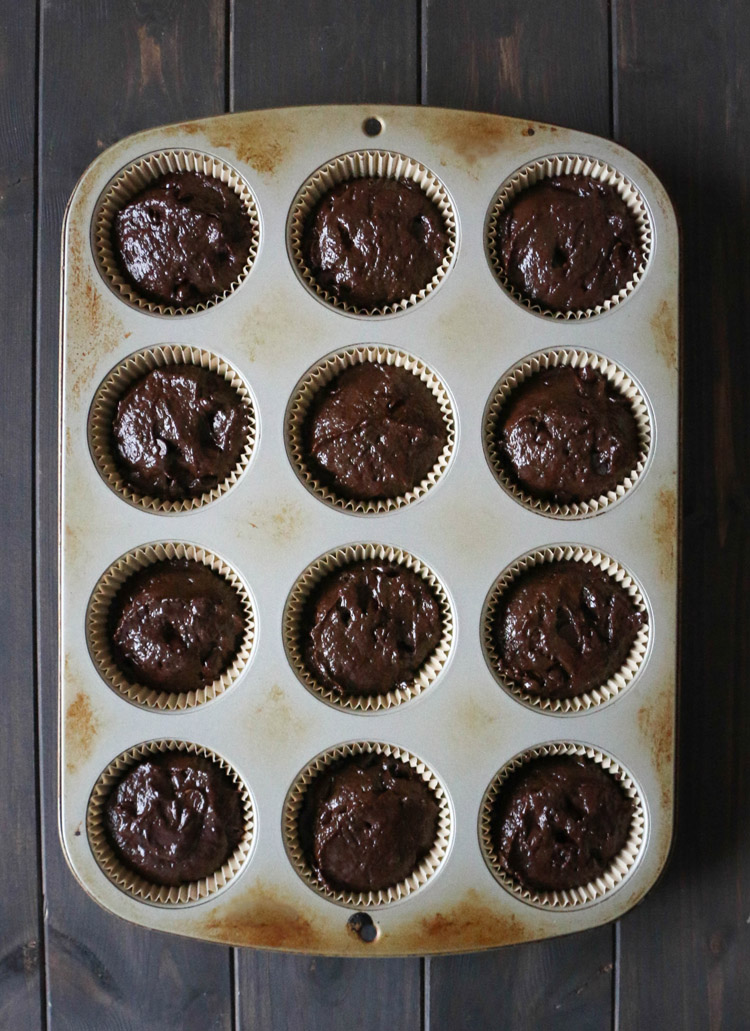
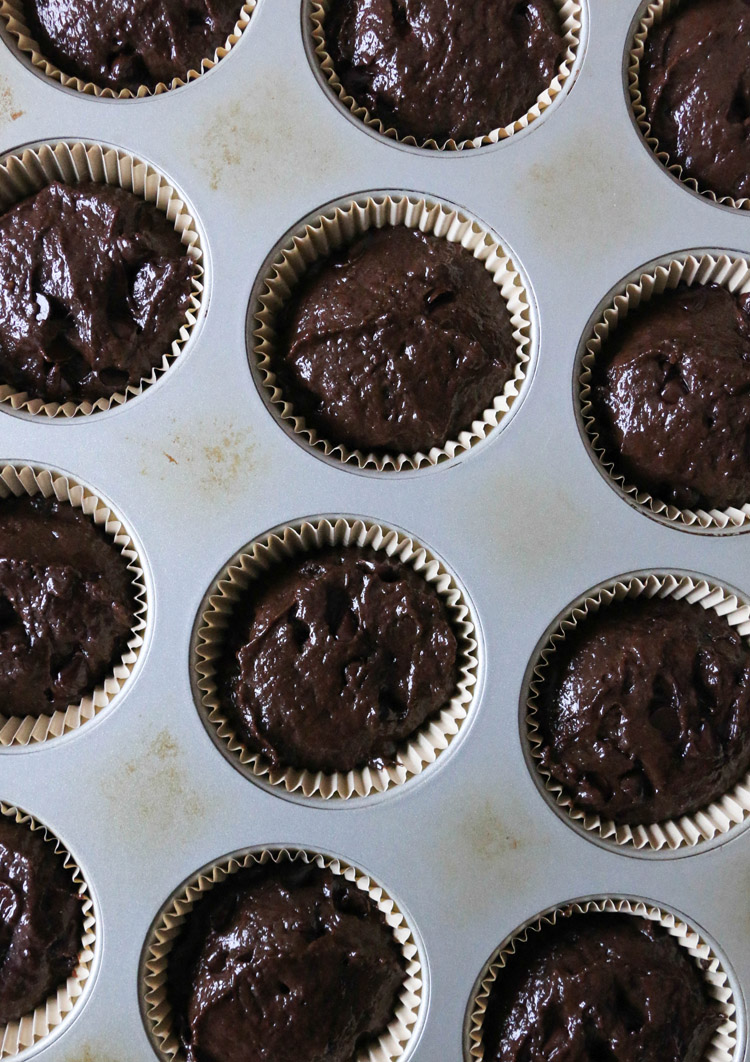
Next, we’ll add the wet ingredients to the dry ingredients. Stir just until there’s just a few streaks of flour left.
We don’t want to over mix muffin batter and we still have chips to add, which will require more stirring. The balance of the flour will get mixed in when we incorporate the chips.
I realize my photos below don’t show any flour streaks. I got a little ahead of myself on this particular batch, but I was still careful not to over mix.
It’s just a helpful tip if you’re prone to over mixing.
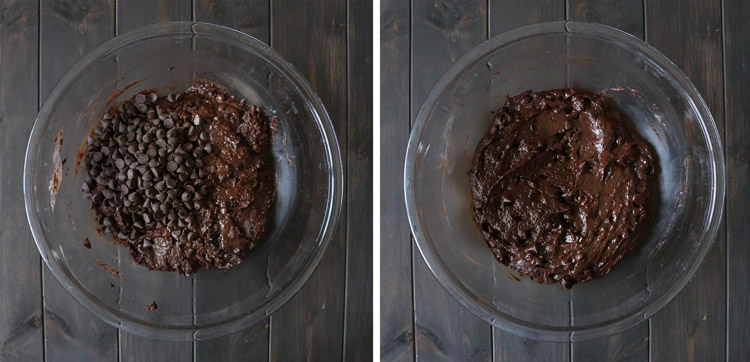
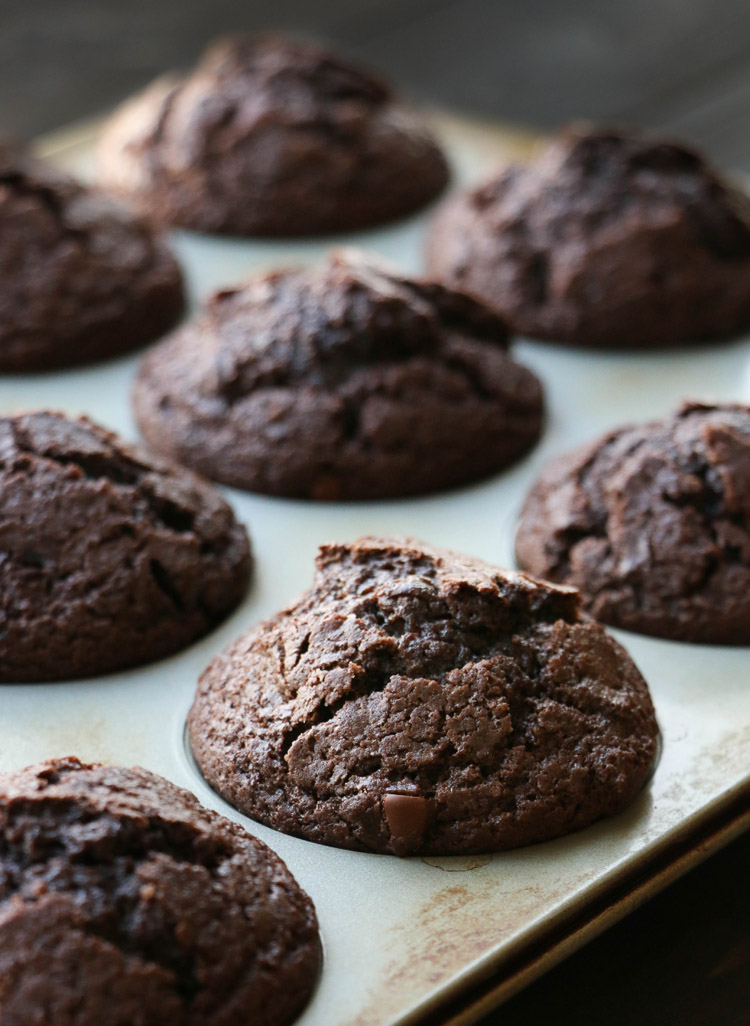
So, let’s get to it! Add the chips (I used Ghiradelli {aff link}) and stir just enough to distribute them through out the batter.
Do I need to use paper muffin liners?
Muffin liners insulate the sides from the pan generally allowing for a more even rise. I think it also helps to ensure that the sides of your muffin don’t get overbaked before the center is done.
It all depends on the recipe, however. I generally err on the side of using them.
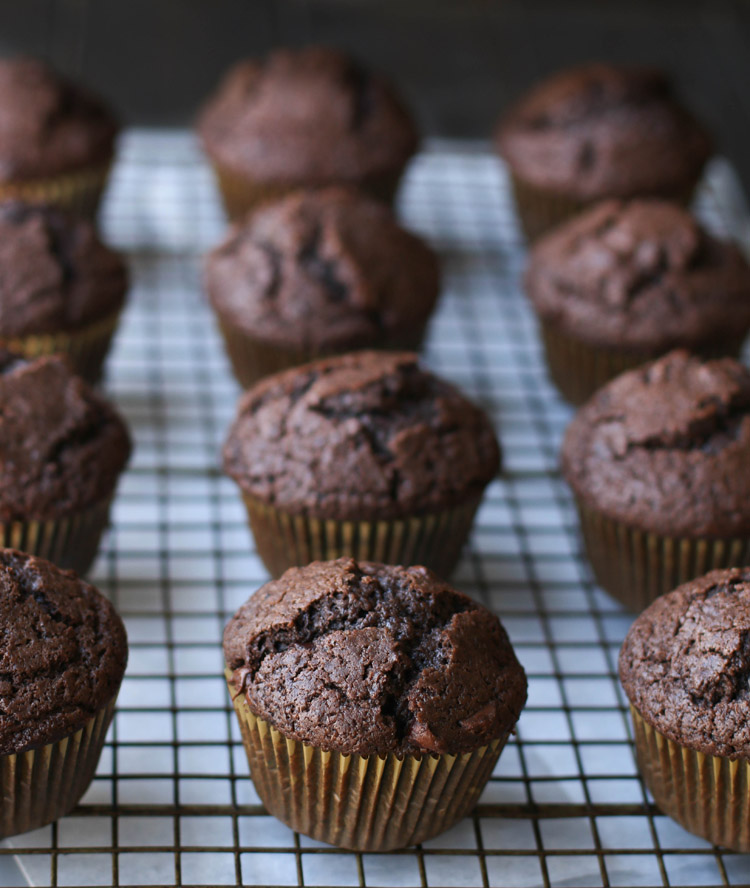
I should also let you know that nothing releases muffins and cupcakes better than parchment liners. I didn’t have enough for all 12 muffins, so I used an inferior set I had from the grocery store.
Don’t get me wrong, I was thankful to have them, but they just don’t work like my faves. In any case, it was either use those or use a hodge podge of holiday themed liners.
I love these muffin liners {aff link}. And, yes…I just ordered the 3 pack so I’ll be good and ready for my next batch! :)
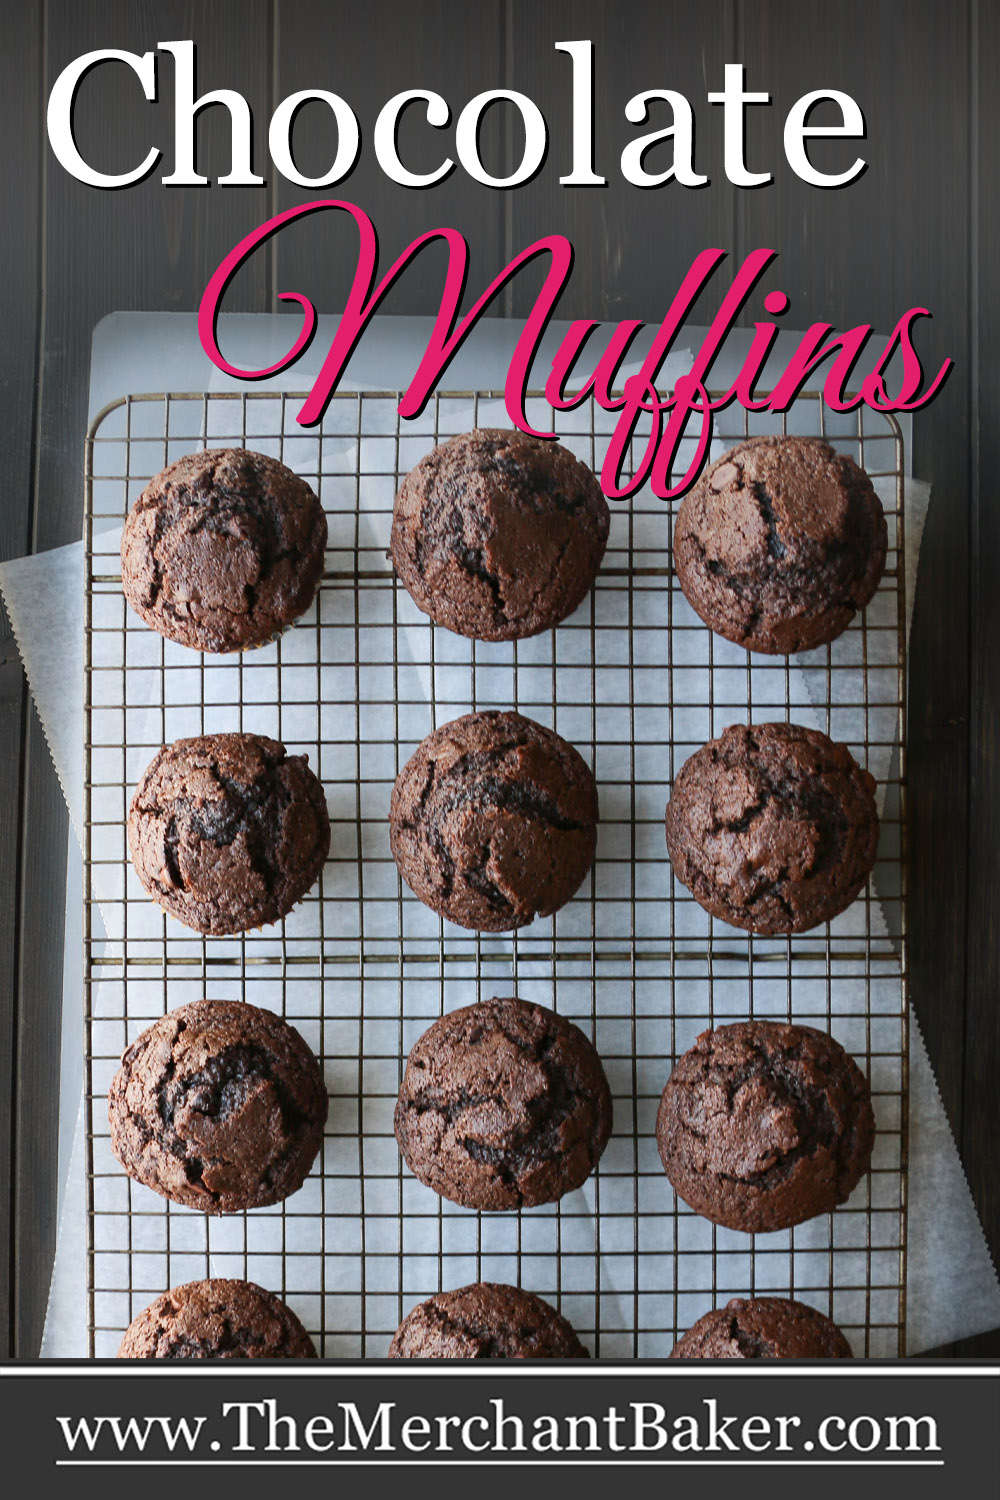
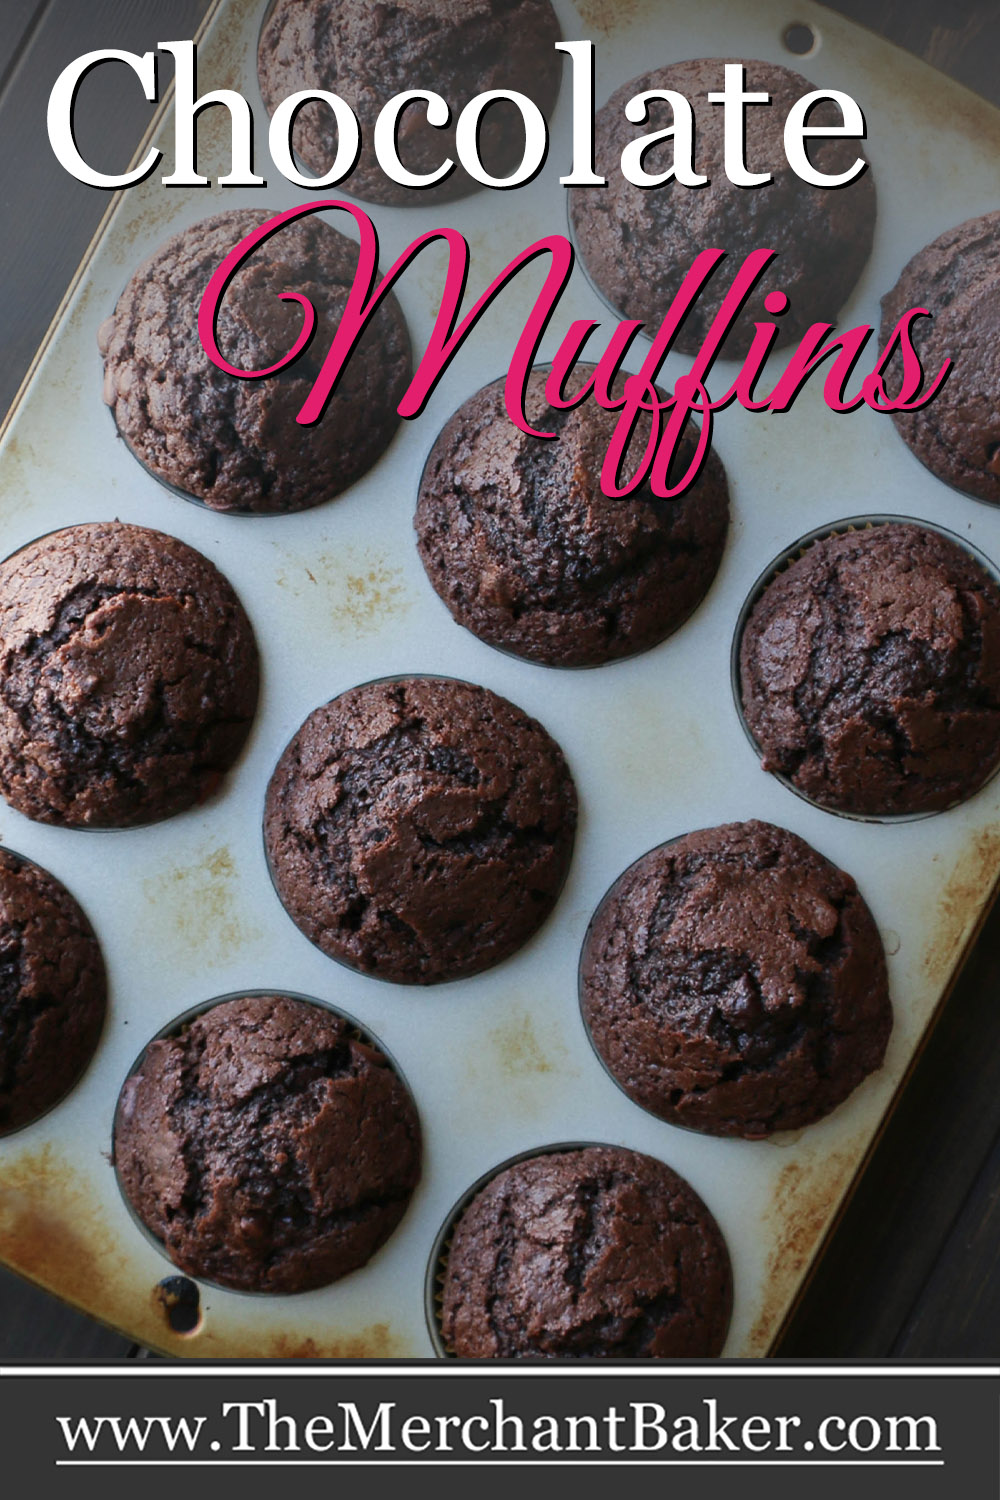
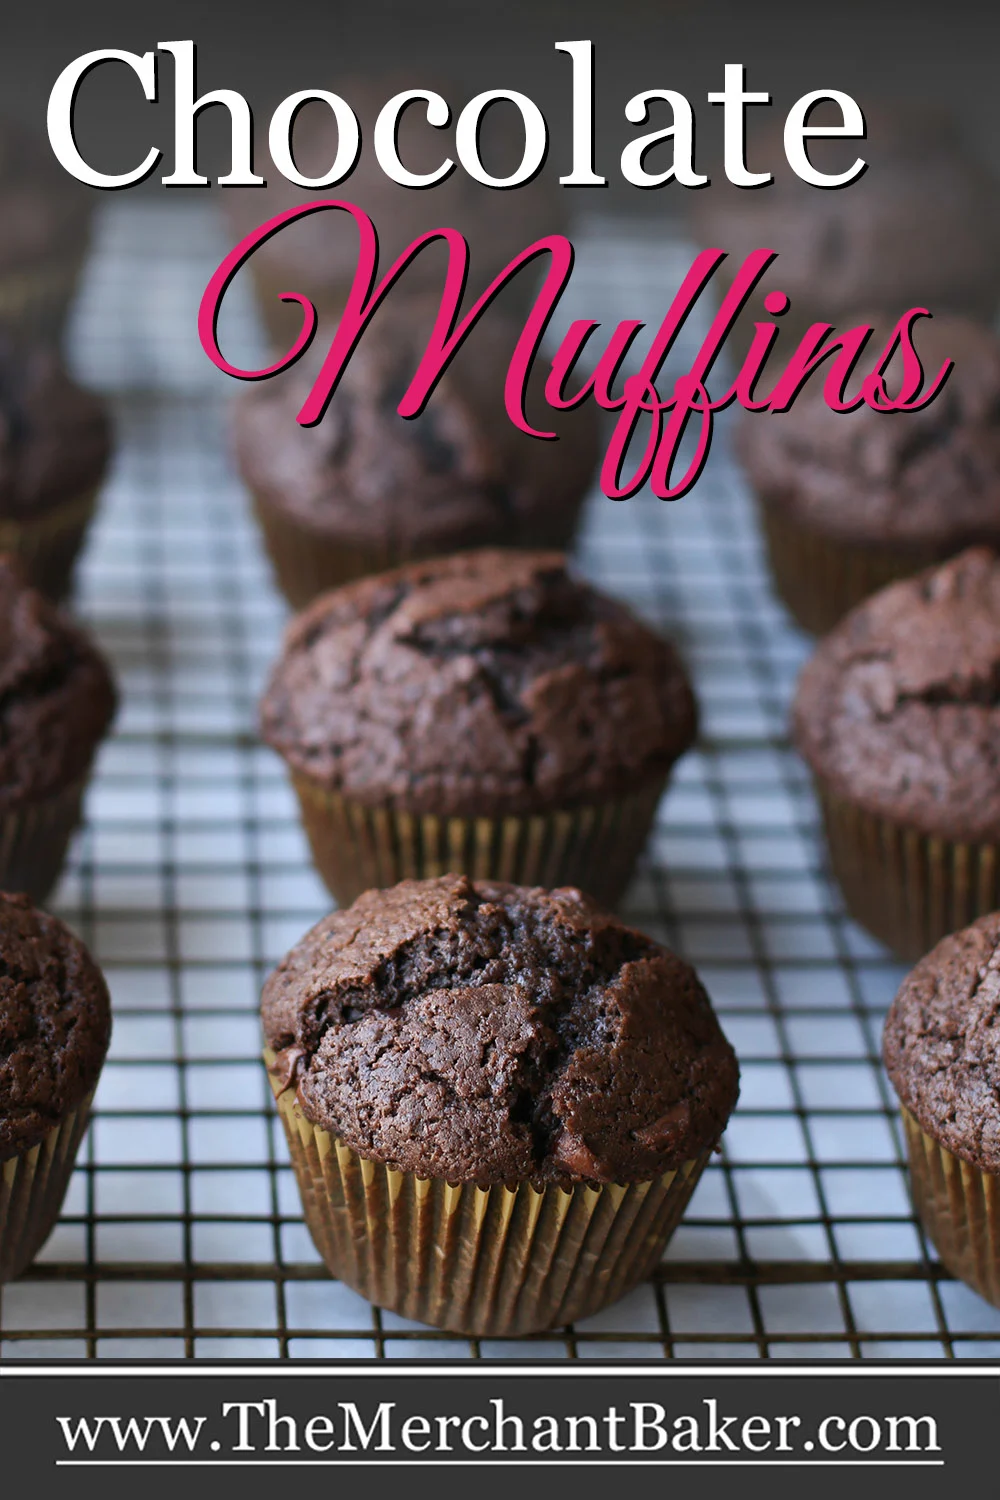
Once the muffins out of the oven, let them cool for just about 5 minutes and then get them out of the pan and onto a cooling rack. If you leave them in the pan, any cooked batter that might be touching the pan can end up sticking.
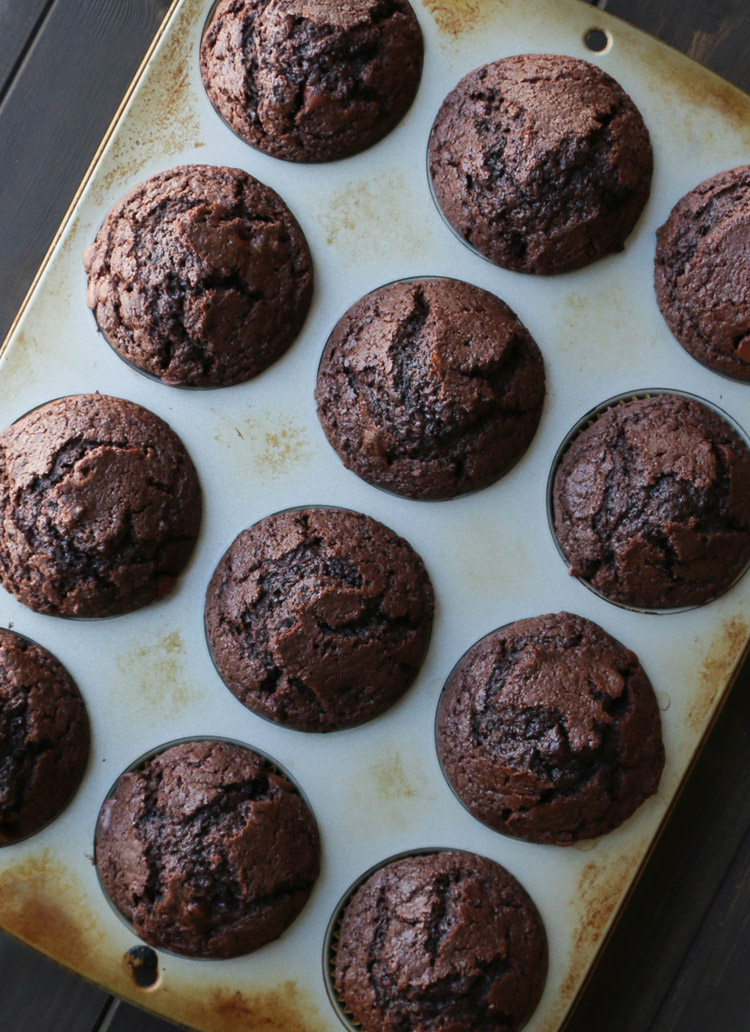
Also, muffins will begin to sweat on the bottom if left in the pan. All that heat gets trapped in the muffin cup.
That’s why you’ll see some of my muffin posts (like these Fresh Strawberry Muffins) that have muffins tipped in the muffin cup. It’s a quick way to let them cool if I don’t feel like pulling out a cooling rack.
Once they’re out you can serve them warm. I love them warm because that’s when the chocolate chips inside are are melted and yummy.
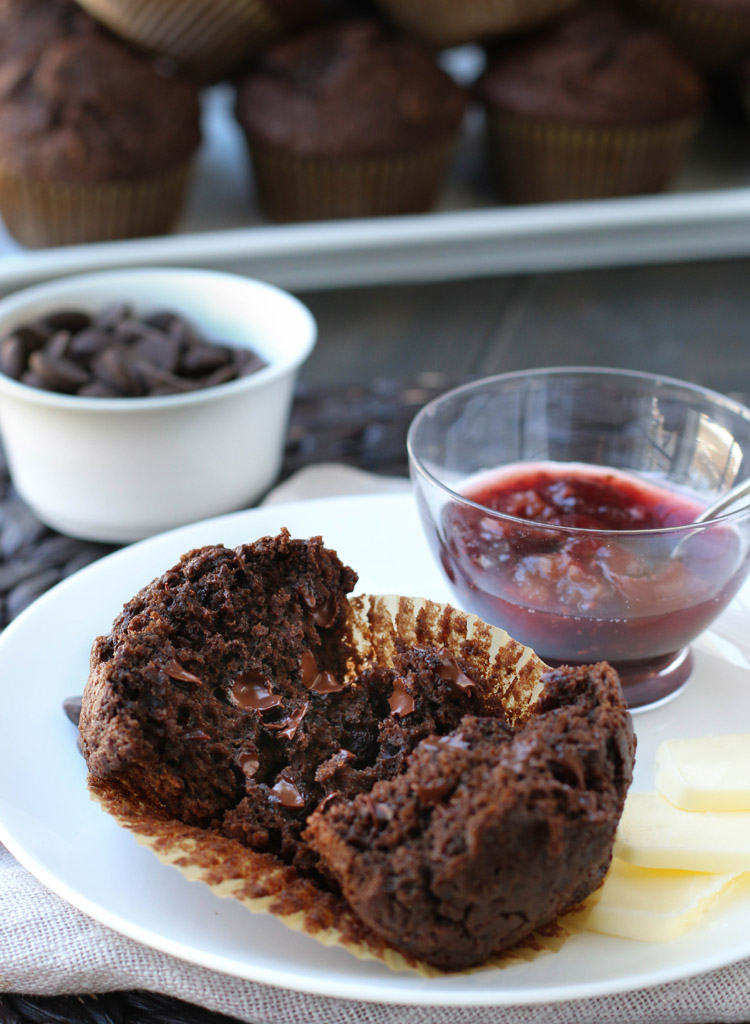
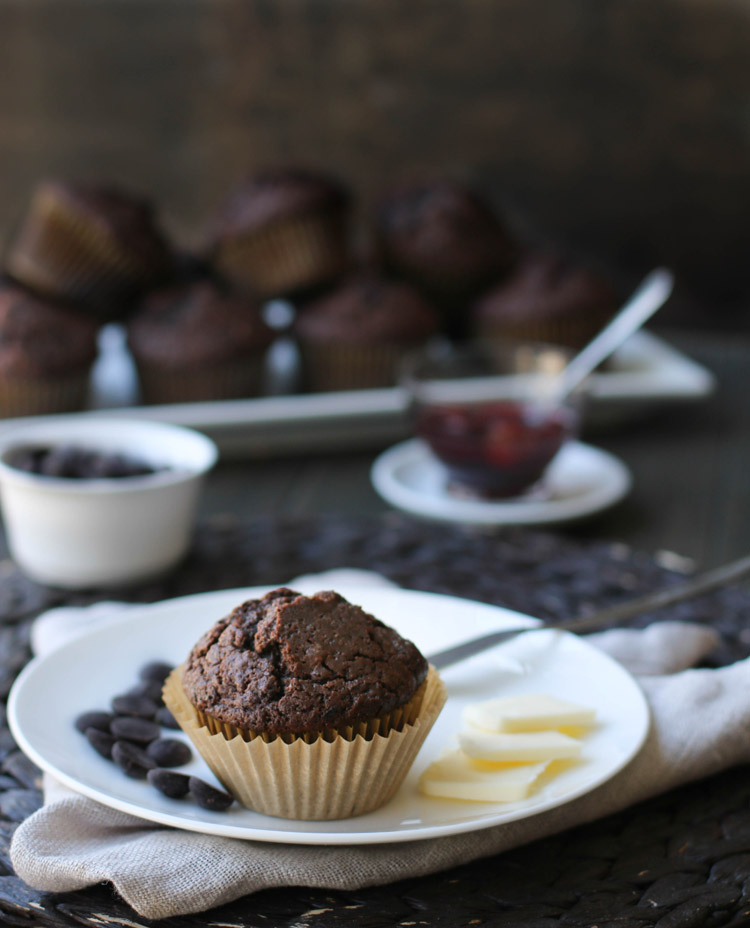
How to Serve Chocolate Muffins
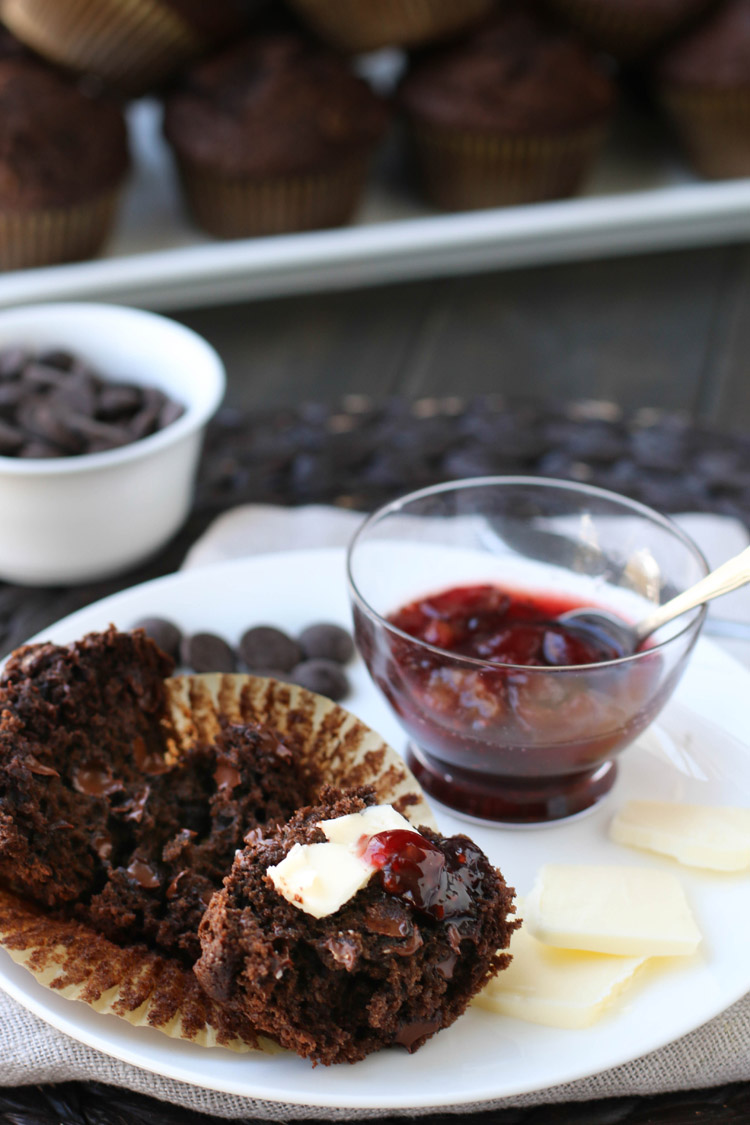
They need nothing extra, but feel free to add a little butter and jam to them. It IS breakfast, after all… The salty hit of the butter is a wonderful counterpoint to the sweet muffin.
I added a little strawberry jam to mine and it was lovely. As you know, chocolate and strawberry are a delicious combination.
The boys in my house, on the other hand, were happy to slather some peanut butter on them. I think my husband was channeling Funny Bones cakes from his childhood. Of course, these were a much tastier, homemade option ;)
My son used the peanut butter to “frost” the top of his muffin and then added a sprinkling of mini chocolate chips. Always being a little extra, that one :)
Can you freeze Chocolate Muffins?
Yes. The muffins freeze quite well. I just pop them into a zip top freezer bag and store them in the freezer for up to 3 months.
I already know they won’t last that long :)
Chocolate Muffins
These fudgy Chocolate Muffins are filled with chocolate chips and are mixed easily by hand. The muffins are rich with dark cocoa, olive oil and Greek yogurt. They bake up with nicely domed tops and taste almost brownie like. Eat them warm...while the chocolate chips are melted and oozing chocolate throughout the muffin!
Ingredients
Dry Ingredients:
- 2 cups all purpose flour
- 1/2 cup Dutch process dark cocoa
- 1 1/4 cups granulated white sugar
- 2 teaspoons baking powder
- 3/4 teaspoon salt
- 1/4 teaspoon espresso powder, optional
Wet Ingredients
- 2 large eggs
- 1/2 cup Greek yogurt (I used Fage 2%)
- 1/2 cup olive oil (or any liquid oil)
- 1/2 cup whole milk
- 2 teaspoons vanilla
- 1 cup semisweet chocolate chips
Instructions
- Preheat oven to 425 degrees F. Line 12 cups of a muffin pan with liners.
- In a large bowl, whisk dry ingredients until fully combined. Set aside.
- In a medium bowl, whisk eggs, yogurt and olive oil until thoroughly combined and creamy. Add milk and vanilla and whisk to thoroughly combine.
- Add egg mixture to dry ingredients and stir just until you have a few flour streaks left. Add the chocolate chips and stir until combined and flour is fully incorporated. Do not over mix or you'll risk a tough muffin.
- Evenly distribute muffin batter amongst the 12 lined muffin cups. Batter will fill the cups.
- Bake for 10 minutes, then, without opening oven, reduce temperature to 375 and continue baking for 8-12 minutes or until toothpick inserted in center comes out with just a few moist crumbs.
- Allow to cool in pan for 5 minutes, then remove from pan to finish cooling on a cooling rack. Best served warm while chocolate chips are melted, but room temperature is also good. Store covered at room temperature for up to 3 days or freeze for up to 3 months.
Notes
- The espresso is optional, but accentuates the chocolate flavor.
- If you use kosher salt, you may need to almost double the amount. I think I would go with 1 1/4 teaspoons. The coarse nature of chunkier salts can make it difficult to measure.
- You can substitute natural unsweetened cocoa powder for the Dutch process. The flavor will be slightly different, though. If you do that, instead of two teaspoons of baking powder, I'd use one teaspoon of baking powder and one teaspoon of baking soda.
Sim
Friday 19th of August 2022
Hi I read that different unit measurements are required to convert cups into grams for different ingredients. Is this true? May I check if you have the recipe in grams? I would like to give it s try! Thank you! Regards Sim
Ramona
Sunday 21st of August 2022
Hi Sim, that's correct. One is a measure of volume and the other a measurement of weight. Unfortunately, I don't have the recipe converted for you. You'd have to do a conversion search by ingredient. This chart might help you get started. https://www.kingarthurbaking.com/learn/ingredient-weight-chart
P J Keenum
Tuesday 1st of March 2022
Why can your recipes & pictures not be copied?
Ramona
Wednesday 2nd of March 2022
PJ, I'm not sure I understand your question...copied in what way?