These Sun-Dried Tomato Pesto Pizza Rolls are just the latest example of the wonderful things you can do with my Fluffy Buttermilk Biscuit dough.

I love a good yeast dough, but for some reason, I rarely make it. Don’t worry, at some point I’ll be posting recipes for some type of bread dough with yeast in it.
And, I’m sure I’ll write 1000 words trying to convince you of how easy it is to make a yeast bread and how you should definitely try it because it’s so amazing to make homemade bread.
But, in this post, right now, in this current phase of my life, I make biscuit dough about 1000 times more often than a yeast bread.
I make it because it’s easy, and fast and delicious. I actually prefer it to a yeast dough for my Buttermilk Biscuit Cinnamon Rolls. It’s so fluffy and moist and tender and significantly better than the biscuits you pop out of a can.
There’s no rising involved with biscuit dough. Normally, I just mix it and bake it.
Sometimes I give it a moment in the fridge or freezer if I’ve spent time filling it and rolling it. I figure, it’s been out at room temperature for longer than if I were just cutting biscuits and popping them into the oven. And you definitely want a nice cold dough going into the oven.
But that’s it. That’s the only extra step or time needed when making biscuit dough. There’s no rising, no waiting, no punching down, no kneading. Just mix, fold and roll.
I give lots of tips and tricks and videos in my Fluffy Buttermilk Biscuit post. You should definitely check out that post and master the recipe.
Because I have so many tips in that post, it might seem like it’s a difficult recipe. But it’s not. I’ve just had many people ask how EXACTLY I make my biscuits turn out as they do, so I share all of those secrets in that post.
Once you master that dough, you can make the Buttermilk Biscuit Cinnamon Rolls that I mentioned earlier. Or, you can make Cheddar Buttermilk Biscuits. Those things are swoon worthy.
Then there’s Cranberry Orange Sweet Rolls, Sour Cream Chive Biscuits and Pumpkin Biscuit Sticky Buns just to name a few more variations on the theme.
Seriously. This biscuit dough is worth learning how to make. It’s infinitely versatile for so many delicious recipes.
Today, I’m going a savory route with Sun-Dried Tomato Pesto Pizza Rolls.
I’ve been thinking about this recipe for forever. I had a bunch of different variations in mind. Would I roll them like cinnamon rolls? Would I make them more like a monkey bread or some type of pull apart bread?
What ingredients would I put into the dough vs. which ones would fill it?

Honestly, there’s plenty of ways you could go with this idea. I was inspired by a bread I’ve had from local bakery. It was a sun-dried tomato bread.
When you eat at the restaurant, they give you a basket of some of the various breads they bake. That’s how we originally discovered it.
I usually call dibs on the raisin walnut bread. My husband and son went straight for the sun-dried tomato bread. One bite and they were in love. “It tastes like pizza!”
Needless to say, we bought a loaf to take home.
Since then, I’ve wanted to make something similar. It’s been on my inspiration list for so long, I wondered if I’d ever get around to it.
I originally thought I’d make a yeast bread. That probably kept it up on the list for longer. Yeast bread. Seemed like a lot of work. (It’s not, but for whatever reason, it always seems like it.)
Enter the magical, mystical biscuit dough. The dough that can be used for just about anything. The time was right. Time to finally post my version of the yummy bread.
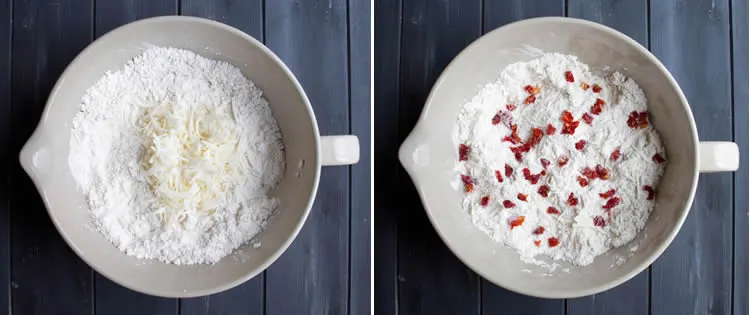
Okay then. So what goes into the dough? First, I added shredded mozzarella cheese. We love the Cheddar Buttermilk Biscuits so much, I figured, let’s keep with that idea.
Now, go ahead, buy some mozzarella and shred it yourself. I know. I hate shredding cheese. But, it’s worth it. You’ll likely buy a better quality cheese and it won’t be coated with anything like the packaged versions are.
I also added sun-dried tomatoes to the dough. I used the kind that are NOT packed in oil. Mine came in a bag and were moist, but not wet. Kind of like raisins.
I used scissors to cut them up into smaller pieces (about the size of raisins.) I wanted to make sure they were small enough to be well distributed in the dough.
Onto rolling. I didn’t use plastic wrap in my original biscuit post, but I have since become a huge fan of it. If I’m rolling pie crust, or making scones or biscuits, I put down a large area of plastic wrap on my counter.
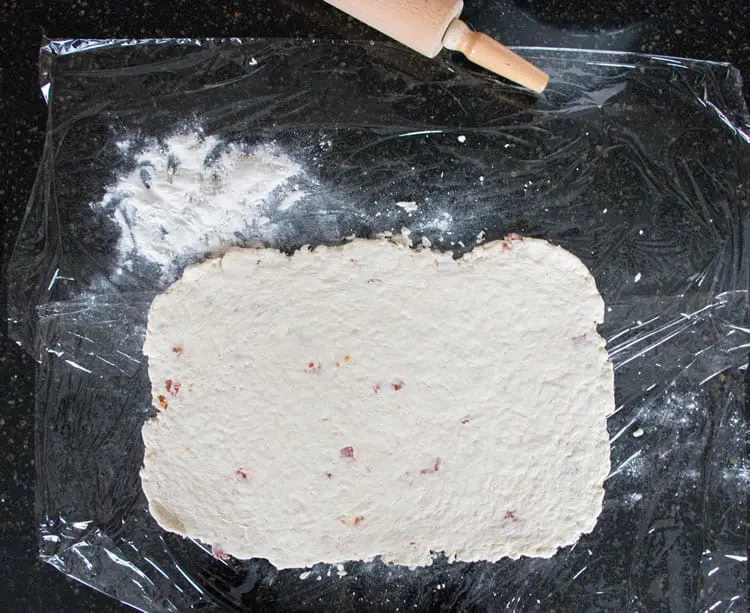
This only works well if the plastic wrap actually sticks to your counter. You don’t want it to move all over the place while you’re rolling. But, boy, it sure makes for easy clean up.
Anyway, once you make the biscuit dough and have gone through the folding steps that add to its flaky layers….
You’re going to roll it out into one large rectangle. Mine was about 14 X 10. It’s never exactly the same. I don’t try to make it be. It’s usually between 12 and 14 inches long, and it’s almost always about 10 inches high.
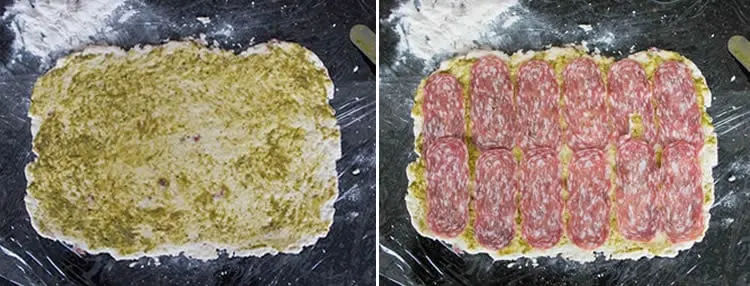
I could have put the pesto into the dough, but I decided to fill it with it instead. Pesto has quite a bit of flavor, so I only used about a Tablespoon and spread it thinly over the entire surface.
You are certainly welcome to add more pesto, if you wish. I just didn’t want it to completely over power the rest of the flavors.
Then, I had originally planned to use some thinly sliced pepperoni, but I only use nitrate free pepperoni, and the store I was shopping at didn’t have it.
And since I often go to three different grocery stores to get what I need on a weekly basis, I wasn’t really in the mood to head to a fourth.
Plus, I spied some nitrate free mild salami. And it was already thinly sliced. Yep! Salami it would be!
Layer the slices of salami over the pesto. One layer is plenty.
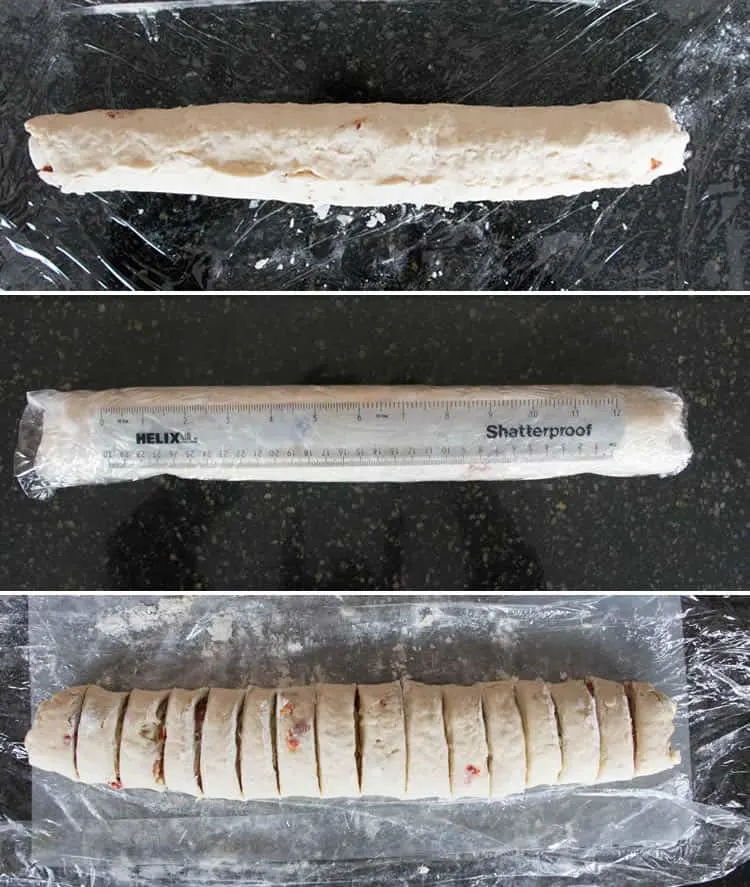
Then, it’s time to roll it up! A roll like this just doesn’t roll up all at once. You have to start at one end and roll a bit working your way from one end to the other and back.
Then, once it’s rolled and you’ve pinched the end to the roll to seal it, just roll it up in the plastic wrap it’s sitting on and stash it in the freezer or fridge just long enough to let the bits of butter in the dough firm back up.
When it’s ready, cut it into one inch slices. My roll actually extended a couple of inches while I was rolling it up, so I got about 16 slices from mine.
Remember you’ve got salami in the middle and it won’t cut as easily as the dough. Just use a sharp knife and make sure you’re cutting all the way through the roll.

I decided to bake these on a sheet pan. This way, I’d get some nice brown edges from the exposed sides as well as some fluffy soft edges from the edges that baked together.
Arrange them closely together but with some space in between. They’ll puff up and spread in the oven. You want to make sure you give them room to do that while still keeping them close enough to connect once they spread. For me, that’s the best of both worlds.
I brushed them lightly with olive oil and sprinkled just a bit of freshly grated romano cheese on top right before they went into the oven.
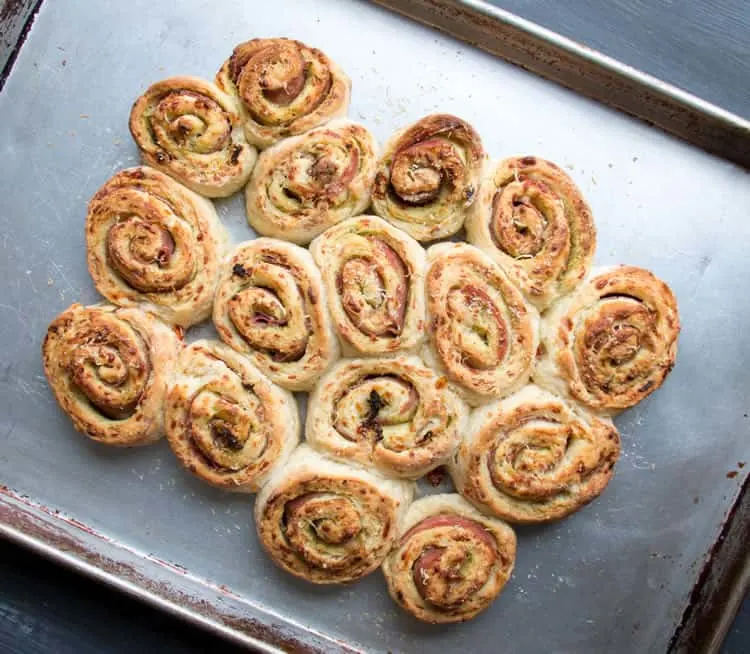
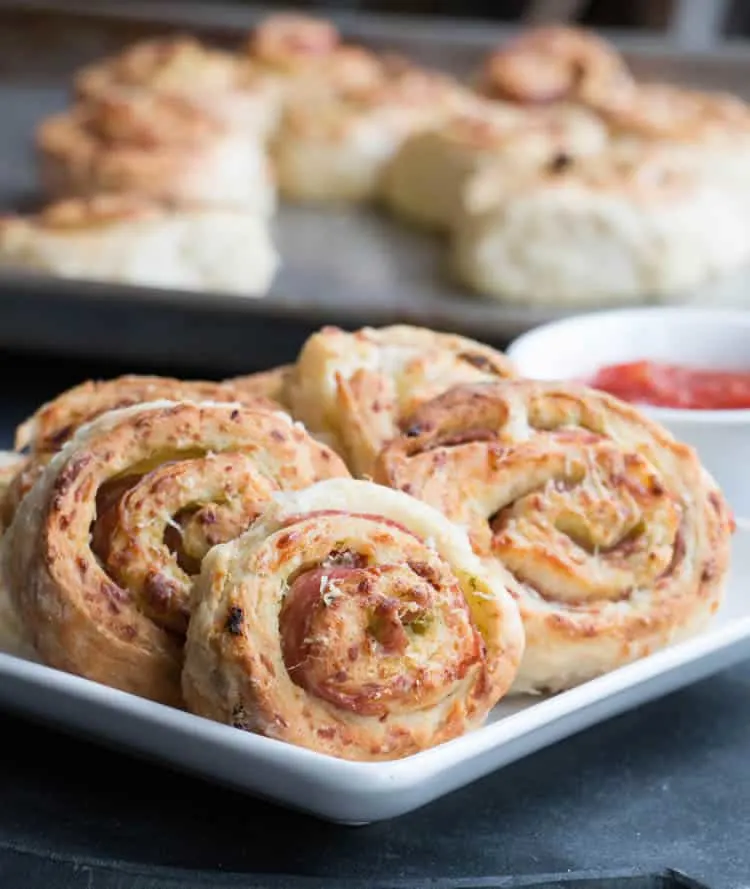
They only take about 12-15 minutes to bake. They’ll be all golden and puffy when they’re done.
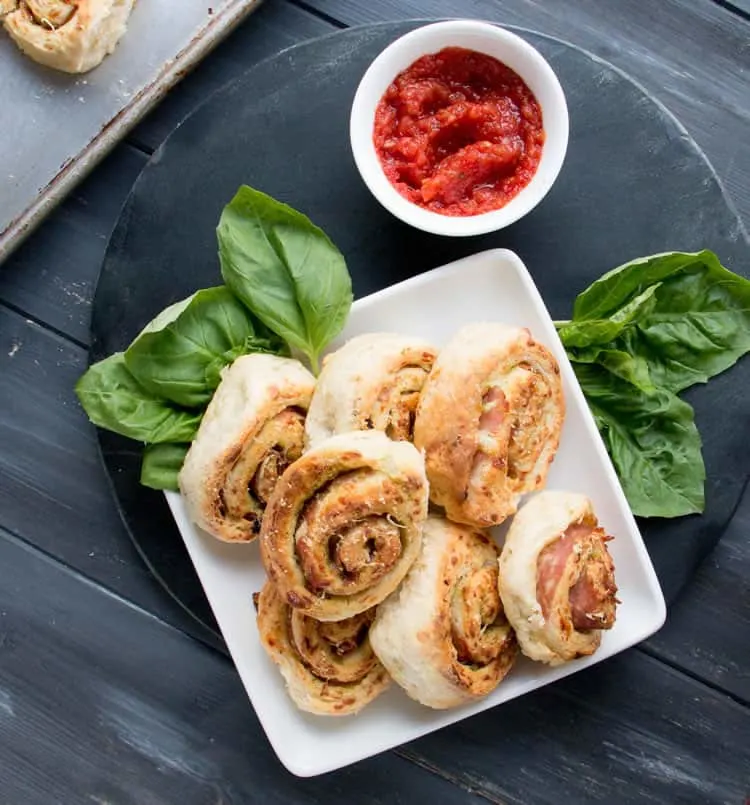
Yep, golden and puffy and cheesy and full of flavor. Sun-Dried Tomato Pesto Pizza Rolls. The inspiration bread was simply called, “Sun-Dried Tomato Bread.”
But, the boys thought, “pizza,” as soon as they took a bite. And thus, “pizza,” simply had to be in the name.
Eat them plain, dunk them in pizza sauce, eat them with soup or a salad. Eat them for a snack! They’re fluffy and savory and delicious!
Fluffy, cheesy, tender, steamy biscuits filled with sun-dried tomatoes and pesto….and salami? Yep….

I can roll with that! :)
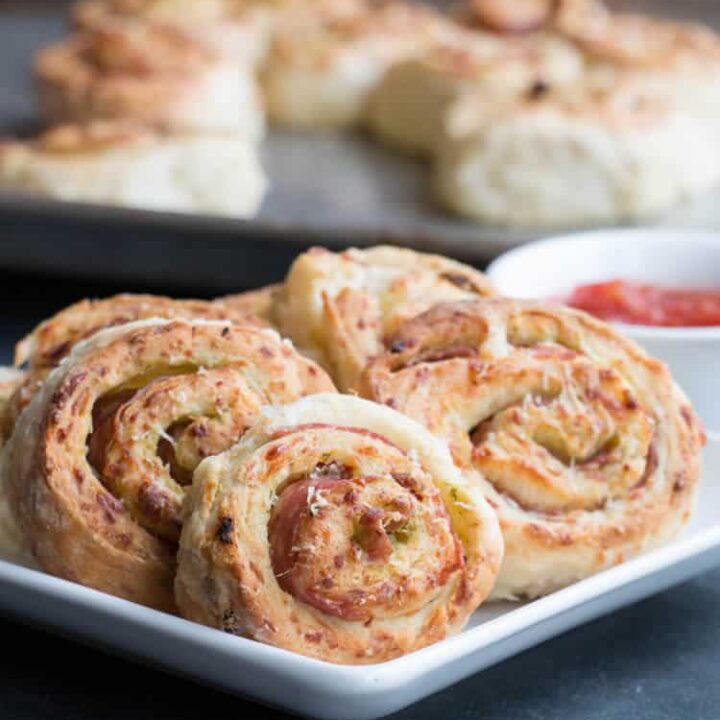
Sundried Tomato Pesto Pizza Rolls
Ingredients
For the biscuit dough:
- 2 cups all purpose flour
- 4 teaspoons baking powder
- 1/4 teaspoon baking soda
- 1/2 teaspoon salt, heaping
- 2 Tablespoons shortening, I use non-hydrogenated
- 2 Tablespoons cold unsalted butter, cut into small pieces
- 3/4 cup shredded mozzarella
- 2 Tablespoons chopped sundried tomatoes, not oil packed
- 1 cup low fat buttermilk, cold
For the filling and topping:
- 1 Tablespoon prepared pesto
- 3 ounces thinly sliced salami
- olive oil
- 1 Tablespoon grated romano cheese
Instructions
- In a large bowl, whisk together the flour, baking powder, baking soda and salt.
- Using a pastry cutter or two knives, cut the shortening into the flour mixture until incorporated.
- Add the pieces of cold butter and cut into flour mixture until the butter pieces are no larger than small peas. Toss the grated cheese into the flour mixture until well coated, insuring that there are no pieces of cheese clinging together in clumps. Add the chopped sun dried tomatoes and toss in the flour mixture. Again, insure they are distributed throughout the mixture and not clinging together.
- Make a well in the center of the mixture and pour cold buttermilk into it. Working from the outside in, bring the flour into the center with a large spoon, scooping and turning bowl until the buttermilk is incorporated into the flour. Use a light hand here. We're not vigorously stirring, but simply gently tossing the flour together with the buttermilk until it's combined.
- Place two large sheets of plastic wrap onto your work surface. Sprinkle flour over the center. Turn the wet sticky dough out onto a well floured surface. Keep a small pile of extra flour on hand to add to your surface or your hands as needed.
- Flour your hands and bring dough together, then lightly fold it in half in a gentle kneading motion. Do this about 10 times until your dough comes together and is beginning to feel smooth. This folding step helps complete the mixing process as well as creates buttery flaky layers in your dough. Just be careful not to overwork it.
- Shape the dough into a rectangle. Check your work surface to insure it has adequate flour for rolling the dough.
- Using a rolling pin, roll the dough into a rectangle about 10" high by about 14" wide. Spread the pesto evenly over the entire surface of the dough. Then, cover the dough with one layer of salami slices.
- Carefully roll the dough into a log, starting at the long end. The meat slices may try to slide as you roll, just push and tuck them back into place as you roll. When you get to the end, pinch the dough to seal it to the log and prevent it from unrolling.
- Roll the log up in the plastic wrap. Set it on a tray and freeze for about 30 minutes or refrigerate until the dough is chilled and the butter has had a chance to get firm. Start preheating your oven to 450 degrees F.
- Unroll the chilled dough. Using a sharp knife dipped in flour, cut the log into one inch slices, insuring that you're cutting completely through the meat slices.
- Arrange rolls, cut side up on an ungreased baking sheet. Allow just a little bit of space between the rolls. We want to give them room to rise, but I like the edges to meet during the baking process. Brush the tops lightly with olive oil and sprinkle lightly with romano cheese.
- Bake in preheated oven for 12-15 minutes or until golden and puffy. Serve immediately as is, or with your favorite pizza sauce for dipping.
Notes
*See my Fluffy Buttermilk Biscuits post for lots of tips and videos on how to make this dough.
*Over time, I've started to use to use plastic wrap whenever I'm rolling out pie dough, biscuit dough or scone dough. It has to be a wrap that sticks to your work surface, however, in order to be effective. It keeps my counters clean, makes for easy rolling and, if I need to refrigerate the dough, it makes for easy wrapping.
*The simple act of rolling the log up can increase the length. My log was about 14" when I started and probably over 16" when I was done rolling. Don't worry about exact measurements. Mine are always a bit different each time I make biscuit rolls.
*My roll was rolled tighter than I usually roll it. I would have preferred it if it were a bit looser. That will just give room for the dough layers to puff up. I think that tucking in the meat as I went along made for a tighter roll. In any case, it's fine. Just don't try to roll it super tight. It's not necessary.
*You can use any meat you like. I originally planned to use pepperoni, but I only buy nitrate free and the store where I was shopping only had nitrate free salami. It worked great and I actually liked its milder taste for this roll.
*Romano has a saltier taste than parmesan. Feel free to use parmesan instead, if that's your preference. Or, you can top with more shredded mozzarella, if you prefer a milder topping.
*These rolls are great as an appetizer or snack. They're also delicious served alongside a soup or salad.
The Merchant Baker Copyright © 2018


Emily
Tuesday 23rd of January 2018
Looks amazing and very appetizing. will definitely try it this week. Can I substitute butter for shortening? Thank you
Ramona
Tuesday 23rd of January 2018
Emily, you can substitute it, but the texture will be different. I've tried it with all butter and it's simply not as good as when I split the butter and shortening. To be honest, I have never been a huge fan of shortening, but when I found an organic non-hydrogenated shortening, I was more comfortable using it as a portion of the fat for my biscuits. It's what helps get that tender, lofty texture. In my original Fluffy Buttermilk Biscuit post, people wanted to know exactly how I achieve the biscuits I've made that they love so much. I share all of my tips and secrets in that post, down to the flour and baking powder. But, it will definitely work if you want to only use butter. And maybe because they're rolled into spirals instead of baking high and mighty as an individual biscuit, the texture difference will be less noticeable. Of course, the flavor always wins when you use butter, so no issue there. Do what you feel comfortable with. There's enough flavor in these rolls to be good in either case.
Karly
Thursday 18th of January 2018
Okay, wow. Just wow. These look BEYOND delicious- like, mouth wateringly delicious. Definitely need to try!
Ramona
Thursday 18th of January 2018
Thanks Karly! It's just another amazing way to use homemade biscuit dough!