You’ve gotta love a good biscuit recipe.
Because once you know how to make Fluffy Buttermilk Biscuits, you can make Cheddar Buttermilk Biscuits and Sticky Maple Bacon Biscuits.
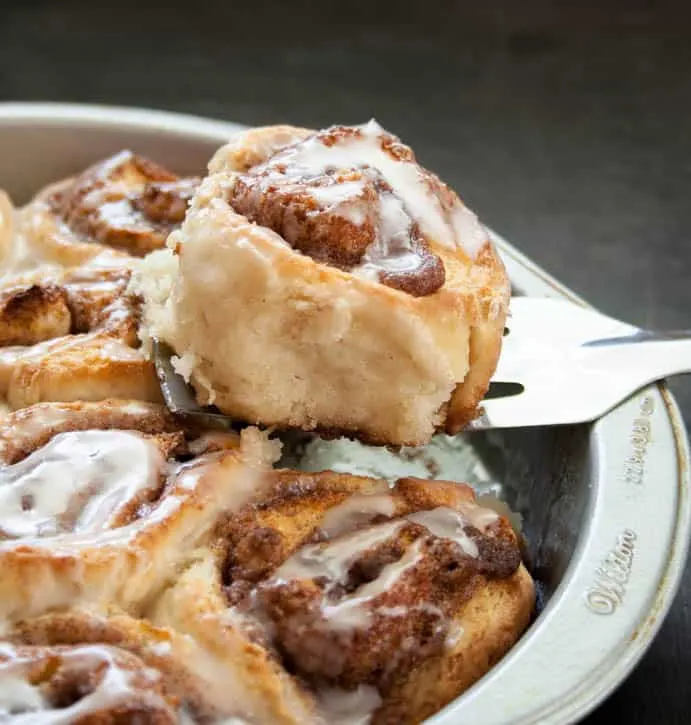
And if you’re a biscuit lover, each one of those is absolutely worth your time to make. Today, we’re going to use that same biscuit dough to make a breakfast favorite, Buttermilk Biscuit Cinnamon Rolls.
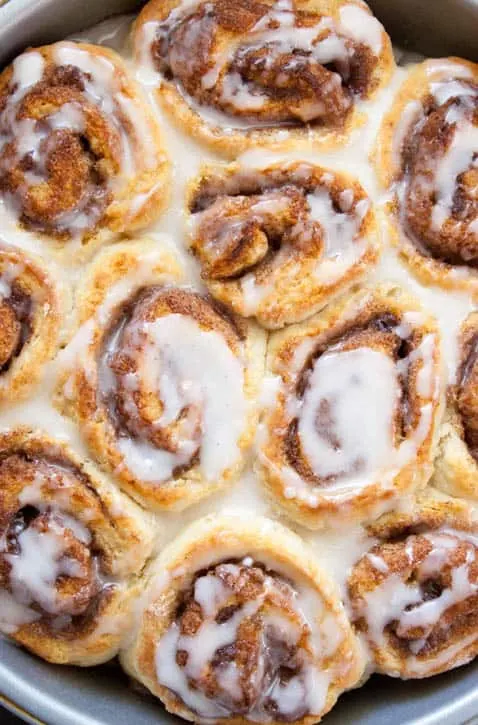
Yep. Cinnamon Rolls. But there’s no yeast, no rising, no waiting. These are a quickie shortcut cinnamon roll that you can just mix up, roll and bake…perfect when you don’t have time to wait around for dough to rise.
I love making traditional cinnamon rolls with a yeast dough, but I don’t do it often because of the time factor. The great thing about these is that you can make them almost on a whim.
There’s just something about a good cinnamon roll. Just the aroma while they’re baking is intoxicating. While I was baking these, my daughter practically cartoon floated into the kitchen lead by her nose asking, what are you baking???
The smell of cinnamon baking always gets them. (Even if it is a sweltering 96 degrees outside and I’ve got the oven on, which pretty much cancels out the air conditioning in the kitchen :)
We didn’t make homemade cinnamon rolls when I was growing up. At least, I don’t remember them. What I do remember are the ones that came out of a can with the plastic bag of icing that we couldn’t wait to squeeze all over the top.
I also remember these pecan rolls that came shrink wrapped in a foil muffin pan. They were small and very compactly rolled, so there were lots of layers, deep brown caramel like in color, but not dry. We used to eat them layer by layer, unrolling them with our teeth as we took each bite.
The best bite of all was that center piece that had the coveted goldmine of tender filling. Hard to believe so much joy could come from a shrink wrapped pecan roll.
That’s pretty much the only thing these rolls have in common with those rolls. Joy. I know there are those who adore the rolls that come from a can.
While my childhood self loved them, my adult self cannot go there. I don’t like the taste, I don’t like the texture, and I don’t like the list of ingredients.
And that’s okay, because I can whip these up pretty quickly. Although, I’ve never made them and tried to shoot them at the same time so I did have a few issues. Doughy, flour covered, buttery and sugary fingers had me washing my hands every few minutes so I could snap a shot or two of the process.
Guess what happens when you keep stepping away and prolonging the process in a warm kitchen? Your dough gets soft and begins to stick to the counter. Never happened to me before.
So then rolling, which should be a very simple process, became a bit of a feat. I knew for certain, as I tried to roll it up, that I wasn’t going to be able to get the right shots and the post would have to wait. #sometimesitsnicetobewrong

I looked sadly at my loosely rolled rolls, looking a little pathetic in my cake pan and thought I wish I had just skipped trying to take the process photos (which didn’t turn out anyway.)
I wish I had rolled the dough on a piece of parchment on a sheet pan so that I could pop it in the fridge if it got too soft while shooting…I wish, I wish…ugh!
I just put the cake pan of cut slices in the freezer to firm up for about 10 minutes and then popped them in the oven. Meanwhile, my family was wishing to know when we were actually going to eat breakfast. When I saw that the rolls baked up so beautifully, I told them we were going to have brunch instead and I needed another hour :)

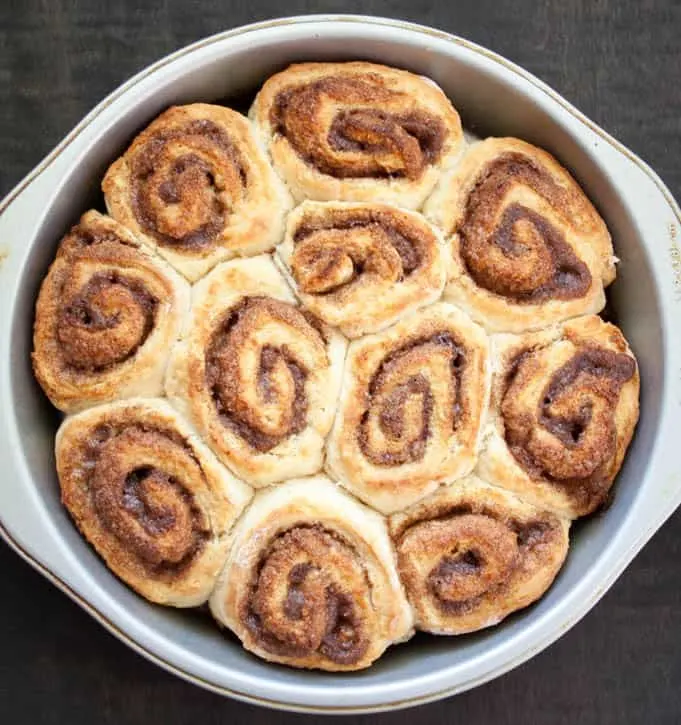
Why am I telling you all this? Because even though things did not go perfectly…you can see what came out of the oven. A beautiful pan of Buttermilk Biscuit Cinnamon Rolls.
In other words, don’t sweat the small stuff on this one. If you make a good batch of dough, and you’re baking it with butter and sugar and cinnamon, you’re good.
So, I got the camera back out and captured the yum. Then I put the camera away, whipped up some eggs and sausage, cut up some fresh fruit and finally…”breakfast” was served. (Hey, when you get a fresh pan of homemade Buttermilk Biscuit Cinnamon Rolls as part of the deal, breakfast is always…

better late than never :)

Buttermilk Biscuit Cinnamon Rolls
Ingredients
- One batch of Fluffy Buttermilk Biscuit Dough from this recipe - https://www.themerchantbaker.com/fluffy-buttermilk-biscuits
For the filling:
- 2 Tablespoons unsalted butter, melted and cooled
- 1/4 cup brown sugar
- 2 Tablespoons sugar
- 1 1/2 teaspoons cinnamon
For the glaze:
- 1/2 cup powdered sugar
- 1/2 teaspoon vanilla
- water or milk, just a few spoonfuls
Instructions
- Preheat oven to 450 degrees F. Lightly spray or butter a 9" round pan.
- Melt your butter before you begin so that it has time to cool down.
- In a small bowl, mix up your filling ingredients (brown sugar, sugar and cinnamon). Set aside.
- Prepare biscuit dough as recipe directs through to step #9 where you'll have just finished gently kneading and folding the dough over. At this stage it will be read to roll.
- On a floured surface, roll dough into about a 12" x 10" rectangle or until your dough is just a little more than 1/4" thick. Mine ended up being about 12 1/2" X 11". It doesn't have to be exact.
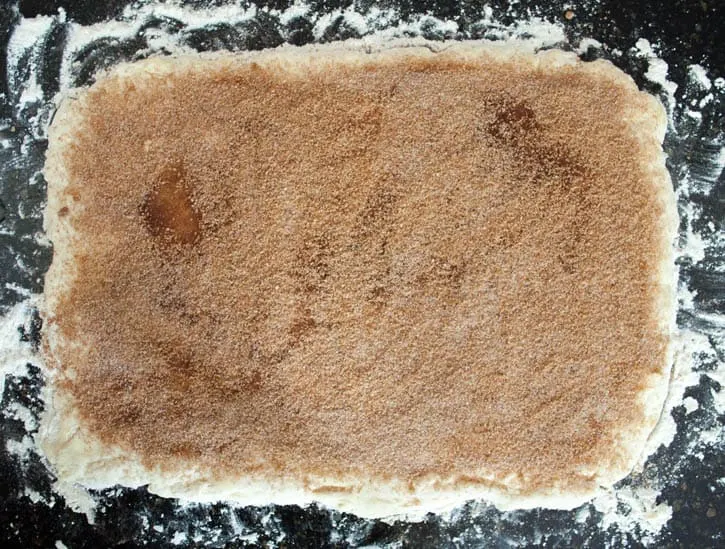
- Spread melted butter all over the dough leaving a little space at the upper and lower edges so that it doesn't squeeze out when you roll it. (I used my hand to quickly spread the butter, but you can brush it on or use a spatula.)
- Evenly sprinkle your brown sugar/sugar/cinnamon mixture over the melted butter.
- Starting from a long side, roll up the dough tightly but without stretching it. (As pointed out in the post, mine was not rolled as tight as I would have liked, but all worked out fine.)
- You should now have about a 12" long rolled up log. Cut a little off each end to even up any uneven edges. (See notes, you can save these little slices and bake them separately, if you wish.)
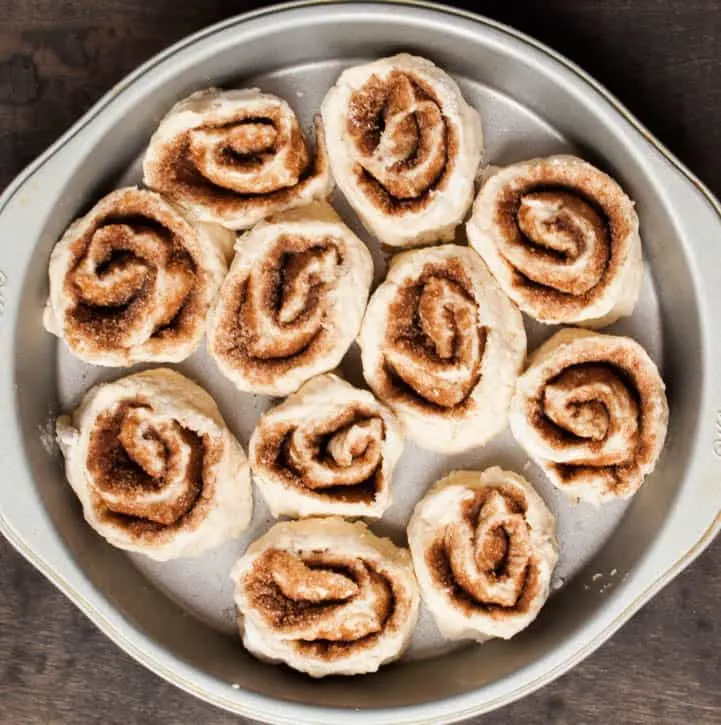
- Slice the log into slices about 1 to 1 1/4" wide. How many slices you get will depend upon how long your log ended up being. You just want them all to be about the same size so that they bake up evenly. I got 11 slices out of mine.
- Place the slices flat in the baking pan. It's okay if the sides just touch, but you don't want to crowd the pan. The biscuits need room to rise and expand while baking.
- Bake for about 13-15 minutes or until lightly golden.
- Prepare your glaze by whisking the powdered sugar, vanilla and water or milk until you have a thick drizzling consistency.
- Drizzle or spread over the entire top of hot, fresh from the oven rolls.
- Serve immediately.
Notes
*Biscuits are best served immediately but leftovers can be reheated the next day, covered with foil in a 350 F degree oven.
*You want your bits of butter in your dough to be firm when you bake these. If they are all melted from too much time out or too much handling, then you need to put them back in the refrigerator or freezer to firm them back up. It's never an issue for me because I work quickly. I had an issue this time because I spent too much time to stop and shoot different steps.
*If you're worried about your dough getting too warm during the process, roll it out on a floured sheet pan or a floured piece of parchment that you can transfer to a sheet pan. Then you can pop it in the refrigerator/freezer to firm up before rolling.
*If your dough is cold enough to roll, but it's gotten very soft from being out to long, you can also refrigerate/freeze the biscuits after you've rolled, sliced and put them into the pan. I did this when I made mine.
*The amount of biscuits you yield from this recipe will vary simply based on what size your dough is when you roll it and how thick your slices are when you cut it. It may differ a bit each time you make it unless you decide to be extremely exact each time you roll it. I only measured it for the post to give you an idea. I usually wing it and do it by eye, so I may end up with anywhere between 9 and 12 rolls. If you accidentally (or purposefully) roll it from the short side, then you will end up with slightly larger biscuits with more layers, but you will get less biscuits. Either way, you'll be fine.
*I saved the uneven ends I sliced off and baked them separately. I would have just tucked them between the "good" rolls in the pan, but it didn't make for a nice photo, so I baked them up on a separate pan in my toaster oven because they would bake up so much faster than the full pan and I didn't want to keep opening the big oven to check them. And yes, when all the rolls were gone, the kids were fighting over who got those last cinnamony bits of goodness.
*When you make your glaze, add the vanilla first then add small spoonfuls of milk/water until you get your desired consistency. If you add it at the end, after you've gotten your desired consistency with the milk/water, it's just going to make your icing thinner.
*If you love lots of glaze and want enough so that it drenches your rolls and soaks into all the nooks and crannies, then you'll need to double the glaze recipe. As stated, the recipe makes just enough to drizzle over the entire top. It is not enough to really soak in, but it was plenty for us.
Recipe adapted from Fluffy Buttermilk Biscuits
The Merchant Baker © 2015



Amy France
Friday 15th of April 2016
Oh my!! This is now our favorite ...EVER! No wait for the dough to rise! And our family (of 7) has decided we love the light texture of the biscuit instead of the heavy yeast bread! Thank you for sharing! Do you think there would be any problem doubling/tripling the recipe? I'm making 3 separate batches right now. Thank you again!
Ramona
Friday 15th of April 2016
Amy, I might have to agree with you. When we have them, I always say that I think I like the biscuit rolls better than the yeast rolls, they are just so good! I've doubled it before, but I only did it once and while it was good, I didn't think it was as good as when I made a single batch. Mind you, if you read my Fluffy Buttermilk Biscuit post, you'll see that I got really picky about the process and ingredients to get the biscuit I loved, so I may have been a little too judgmental on the outcome of doubling. I think you can try doubling to see how you like it.The issue is with the leaveners. They don't necessarily need to be doubled or tripled when you scale up. I rarely need more than a single batch, so I haven't spent too much time figuring out the perfect ratios to scale up. It sounds like you'll be making them often enough to experiment, though. Try doubling everything except only 1 1/2x for the baking powder and soda. See how it works, then adjust as necessary. When you triple, triple everything but double the baking powder and soda. If you have success, please come back and share! And if I ever try a big batch, I'll definitely update the notes.
Sharon
Saturday 3rd of October 2015
Thank you for this awesome recipe!! I also love how it uses less fat. So we live at a high altitude -- 6700 (u may remember I emailed you about your altitude). I made the King Arthur Flour recommended adjustments and used their white flour (added three Tablespoons) and regular baking powder (only a little over a Tablespoon for us here) and they came out super tall! So thank you! I will try w/ KAF baking powder and your recommended standard flour and see what happens too.
Ramona
Saturday 3rd of October 2015
Yay! I'm so glad they worked out for you! There's nothing like a nice, tall, fluffy biscuit. Every shift will change it a little. You many be lucky and have hit on your perfect combination the first time out. Thanks for the feedback. I was wondering how the whole altitude adjustments would work out for you :) Nice to know they work!