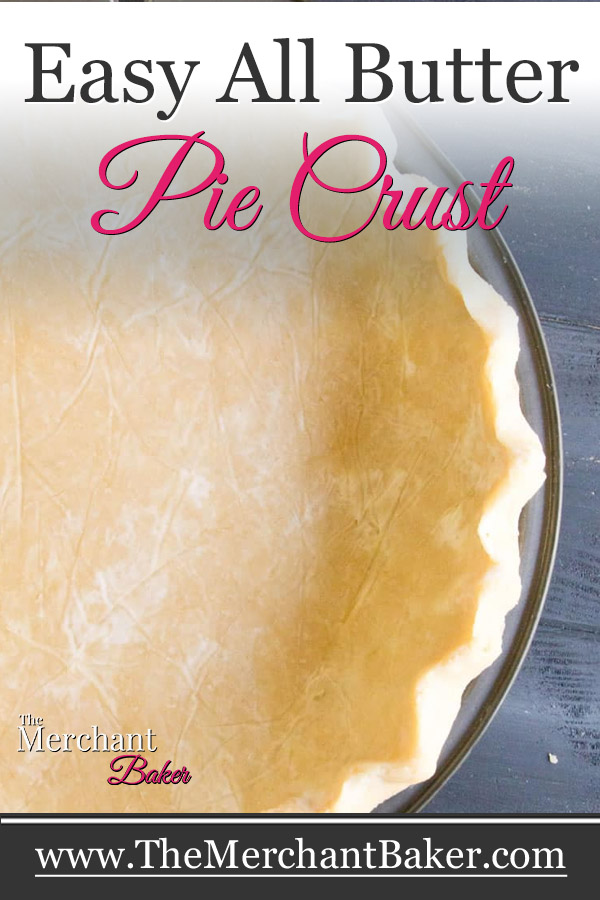


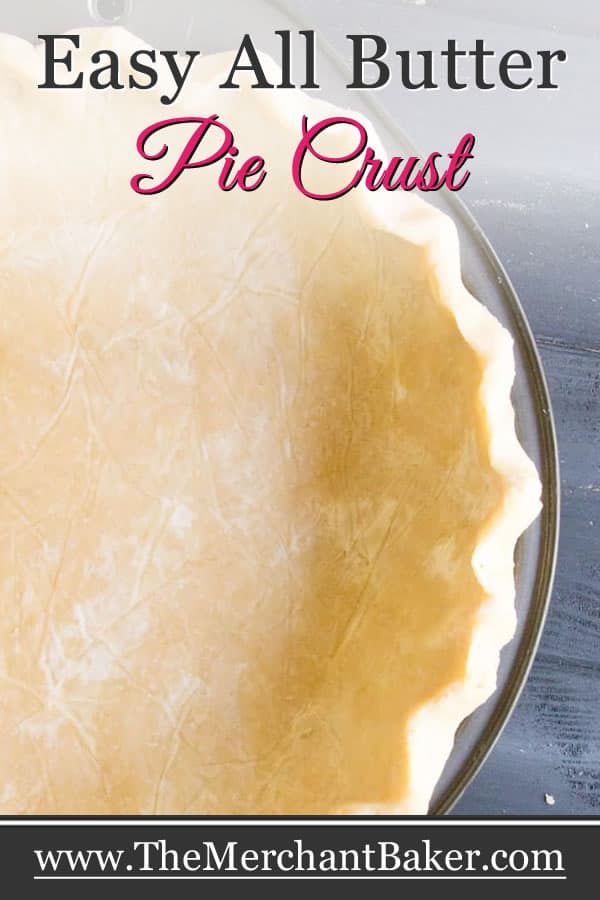


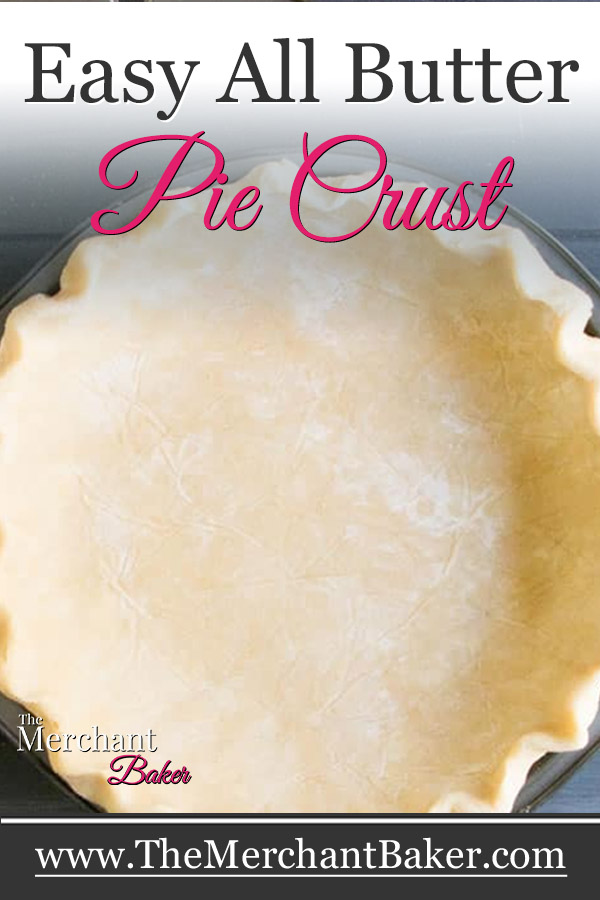

Yes. That’s right. EASY all butter pie crust!
I offer up my sister as testament to how easy this process can be. I only showed her how to make it one time in her kitchen and she was off to the races!
One thing about my sister? She does not suffer complicated food prep. Ever. For any reason. And yet, my sister has mastered making pie dough! Willingly.
So, trust me. If she can do this, so can you. And today, I’m going to show you how.
I’ll warn you in advance that this is a long, long post. The length of the post does NOT mean it’s complicated. I’ve simply got lots of tips to insure your success. So, grab a drink and get comfy. We’re gonna spend some time chatting about pie crust.
I love pie, but over so many baking years, I rarely ever made them. I was too busy making cakes and cookies and other non-pie desserts to actually think about making pie.
And pie crust? I always thought, “Ugh! Do I want to bother making a pie crust? And what’s the perfect recipe and what’s the perfect process?”
I read about this one and that one. Some have vodka as the secret. Some have lard as the secret… and not just any lard, it’s something called, “Leaf lard.” Leaf lard??? I assumed it was plant based. Lol! How the heck do they do that?
Turns out, leaf lard does not come from leaves. It’s simply lard that comes from a different part of the pig. It was just too much to worry about while I was trying to develop my perfect scone or my favorite brownie.
But I have a friend, who is a serious pie maker. During peak pie seasons, she’ll text me pics about this pie or that pie. They always look amazing!
It seems as if there’s a whole lotta pie going on at her house that I know I’m missing out on because I don’t live next door :(
So, a couple of summers ago, I decided to roll up my sleeves and get on the pie wagon. And no, I haven’t been depriving you of this recipe or technique for two years. I’ve already shared it in my Blueberry Galette post. And I used it again in Caramel Apple Crostatas.
However, it’s buried in those posts. You might never find it if you were specifically looking for pie crust. I thought it deserved its very own place in the sun. A place where I could dive deeper into the process. (And, I made a video to go with it!)
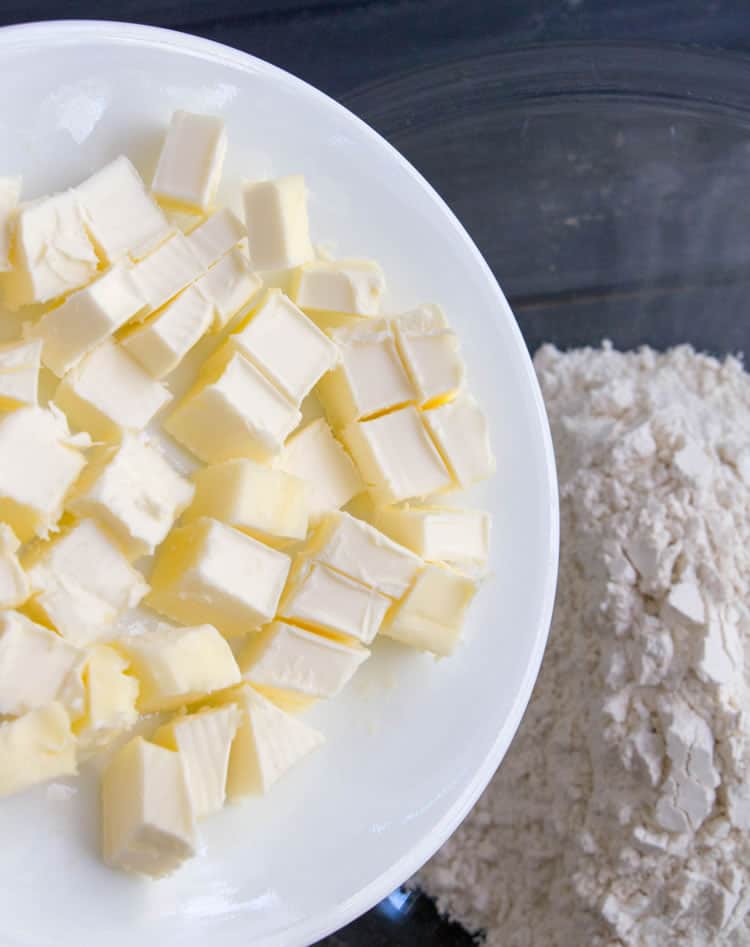

Let’s begin with what’s in this crust: flour, butter, sugar, salt and water. That’s it! Five ingredients!
And we can have a lengthy discussion about whether it’s better to use shortening or butter in pie crust. I’m going to skip that and say I like the taste and the light texture that I get when using butter.
They say shortening will give you more flakiness, but I find that using an all butter crust gives me plenty.
Oh, and I’m not a total shortening hater, either. I use some non-hydrogenated shortening (along with butter) in the crust of one of my favorite slab pies, Apricot Cherry Slab Pie. Bonus with a crust that has some shortening? It might hold the shape of your fancy fluted edges better. I love it. Really. No complaints.
It’s just that I really love, love, love an all butter pie crust. (And it’s one less ingredient to think about.)
We start with whisking the dry ingredients together. Then, we need a stick of cold, unsalted butter. Cut it into small pieces, then toss it into the dry ingredients.
The following paragraphs contain affiliate links. We are a participant in the Amazon Services LLC Associates Program, an affiliate advertising program designed to provide a means for us to earn fees by linking to Amazon.com and affiliated sites.

Tools for Cutting Butter into Flour:
- My tool of choice is a pastry cutter. I like this one{aff. link) and this one. {aff. link} (I linked to one with a wooden handle, which is the one I had before the one you see in the photos. I like the wooden one because it has a thumb rest and makes it more comfortable to use.) It’s an inexpensive tool that’s made for the job. I find it efficient, effective and it’s easy to clean. It really only takes a minute or two with the pastry cutter. And, if you like biscuits and scones as well as pie crust, you’ll get plenty of use out of it.
- You can use two knives. This is effective, but it will take you longer, so it’s not as efficient as the pastry cutter.
- You can use a food processor, but be careful. You should still be striving for various sizes of butter throughout the mixture. They should be visible. You don’t want to process it down to a sand. So, use the pulse button and use it sparingly. I would only use the processor to cut in the butter. Add the water by hand so as not to over process the mixture. For me, it’s not worth the extra dishes to wash unless I’m making lots of pie crusts. Then I’d use the processor to cut the butter into each batch of dough, then add the water by hand.
(If you choose to use a pastry cutter…As you’re blending, you’ll find that the butter will occasionally get stuck among the tines of the cutter. Just use a knife to clear it and keep on blending.)
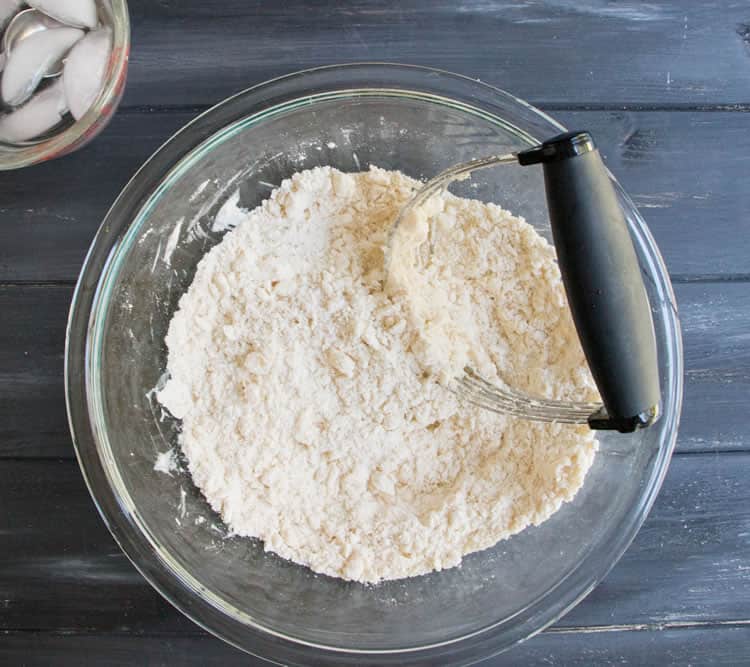
You’ll blend until you have various sized pieces of butter, none larger than a pea. Now you’re ready for water. It should be ice water, which will help keep the butter cold.
Adding the Ice Water:
The amount of water may vary, possibly each time you make it. Sometimes I’ve only needed 5 Tablespoons. Other times, I’ve needed up to seven or eight. Too much is not good. Too little is not good. How will you know?
By the look and the feel. When you add the water, you’ll add it one Tablespoon at a time. Sprinkle it lightly over the flour mixture and fluff with a fork over and over to distribute the moisture.
Do not pour all of the water into a puddle. It will be much harder to distribute and will likely over saturate one area of your mixture.
Once the moisture has been distributed, sprinkle another spoonful over the top of the mixture. Fluff, fluff, fluff with a fork, then repeat as needed.
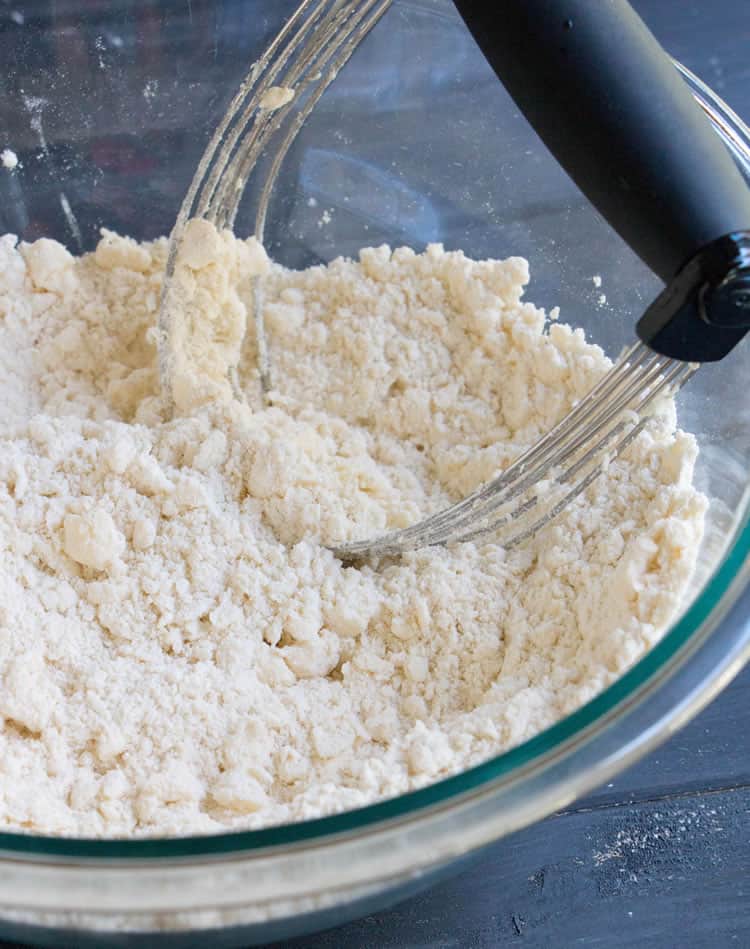
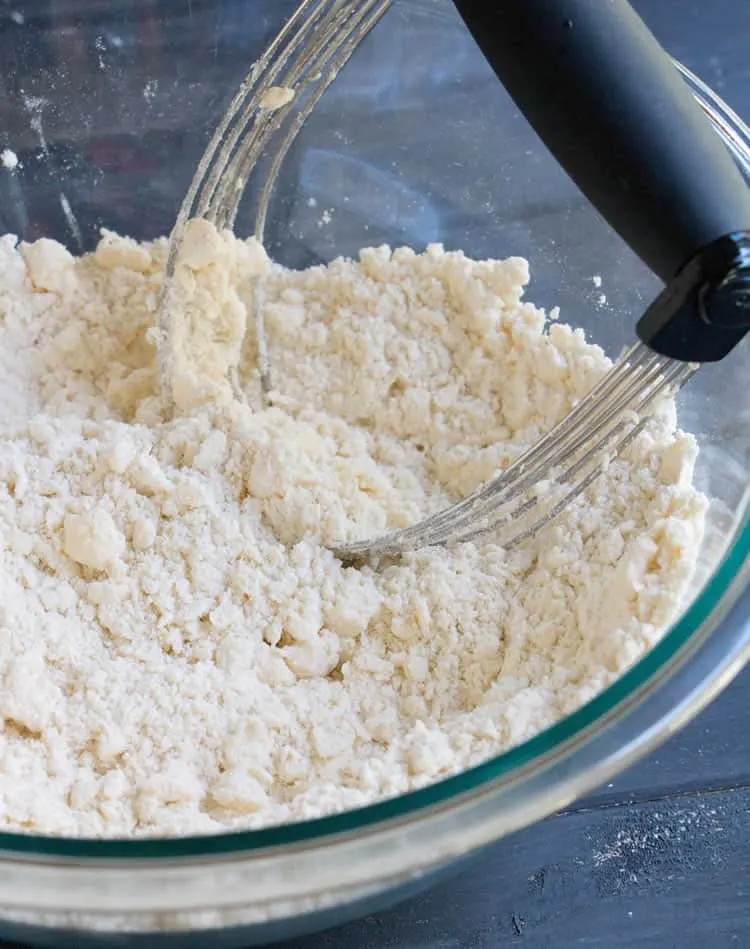
You should need at least 4 Tablespoons of water, so you don’t need to be too concerned until you’ve incorporated that 4th spoonful.
After that, look for the dough to start looking shaggy. I never really knew what shaggy meant until I experienced it. And for you, you get a photo.
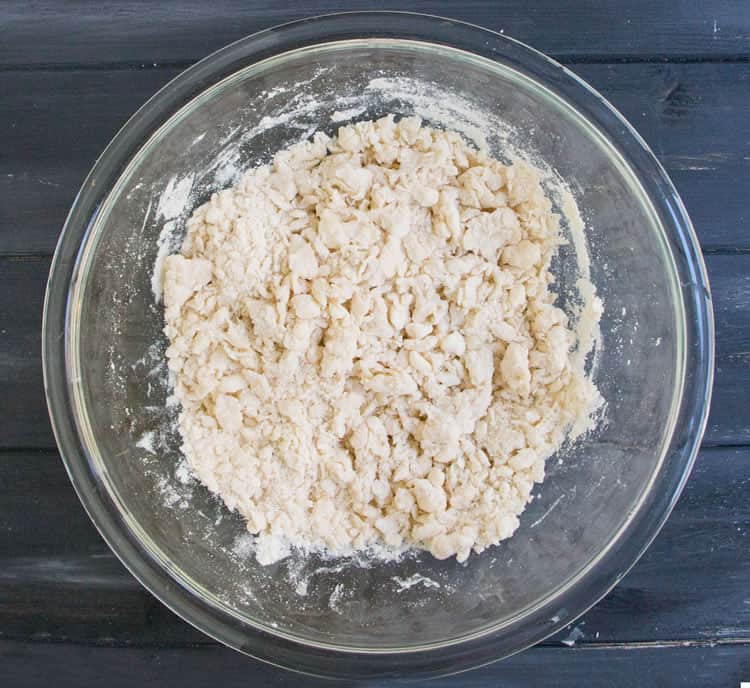
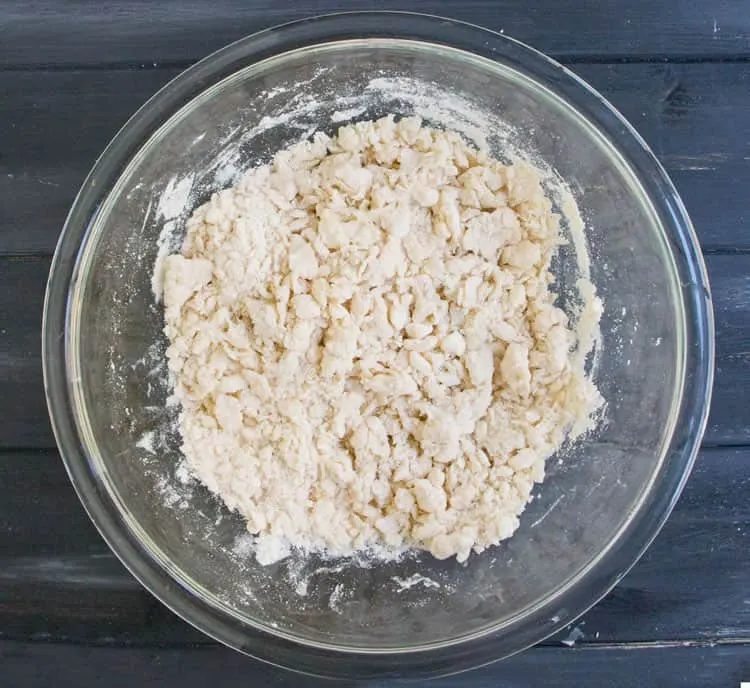
Little bits of the mixture start clinging to each other in what sort of looks like scraggly little dumplings. If that’s not what your dough looks like, proceed with another spoonful of water. Remember, you can always add more water, but you can’t take it out.
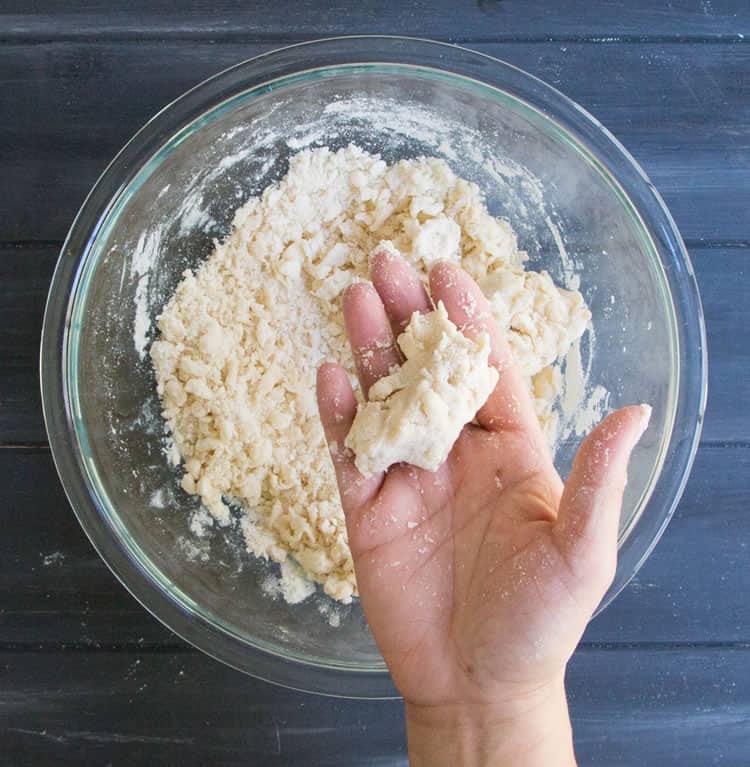
If you think you are there, grab a handful of the mixture and squeeze it. When it holds together, you are ready. If it is still crumbly, add another spoonful of water. Fluff, fluff, fluff, then check again.

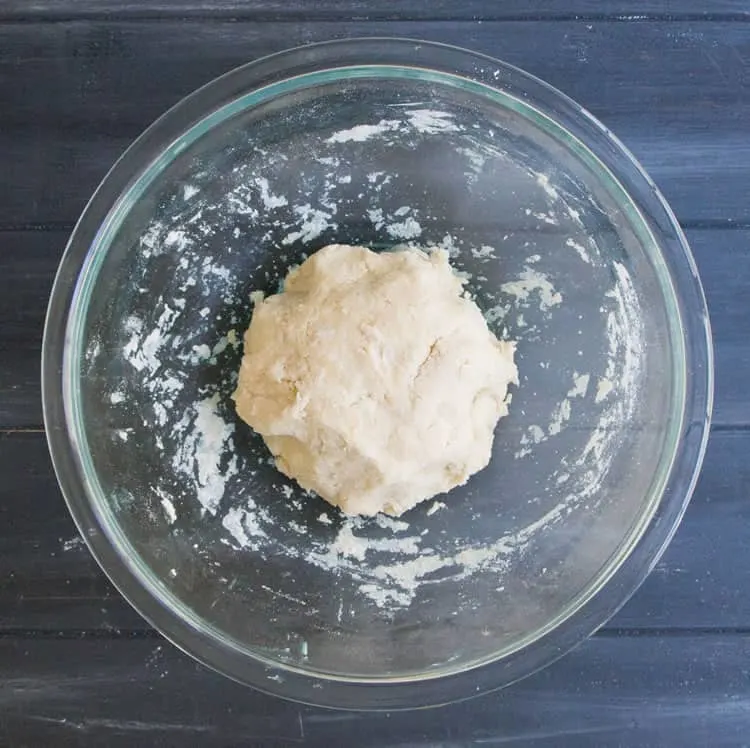
Once you’ve added enough water, gather your dough into a ball, turning it over and over to pick up drier areas along the way, pressing them into the ball.
Yes, that bowl full of shaggy flour mixture you see above is able to be brought together in the ball you see below.

Why Easy All Butter Pie Crust is so EASY:
- I roll BEFORE I refrigerate. There’s no super cold dough to beat into submission. Normally, in a traditional pie crust recipe, you’d wrap the dough up after you gathered it into a ball. Then you’d chill it before you rolled it out. That’s where it gets tricky. So let’s skip the tricky part and roll FIRST.
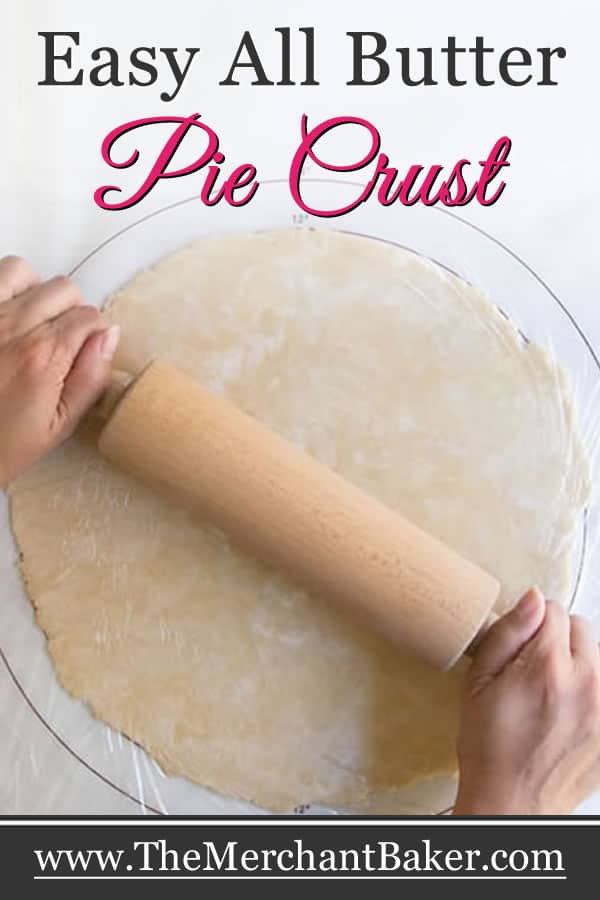
- I use PLASTIC WRAP to roll out the dough. That means no extra flour to dirty your counter and no flour to dirty your rolling pin. Yes! A clean rolling experience! No scraping flour up off your counter!
- With plastic wrap, you don’t have to worry about the dough sticking to the counter or using too much flour.
- The plastic wrap makes this recipe almost as easy to roll out as play dough.
- When you use plastic wrap, the dough is easier to pick up and turn. It’s also easier to move from counter to refrigerator.
- Can we talk about the plastic wrap again? Yes! It also makes it easier to place the dough into your pie pan. No folding or draping over your rolling pin. No crazy maneuvering while you worry that your dough will rip or tear.
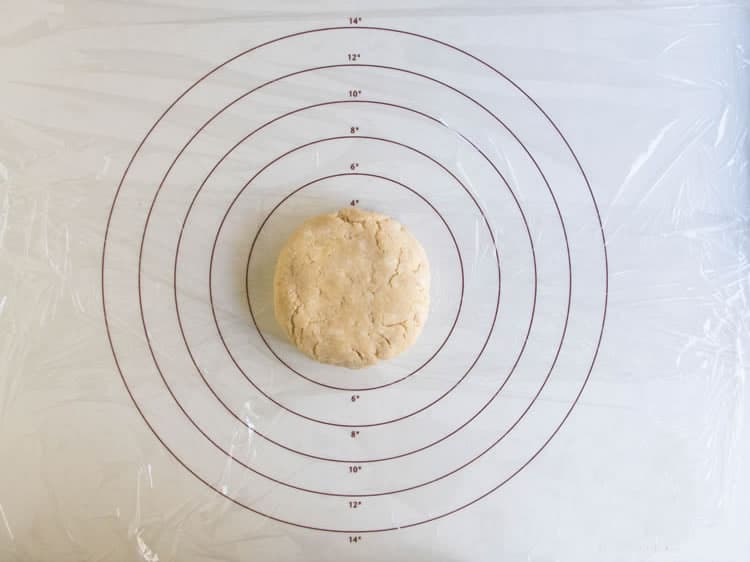
You’ll need some good clingy plastic wrap, one that will stick really well to your rolling surface. Mine sticks great to my counter top but for this post, I’m using a silicone baking mat. The mat’s great because you get built in measurements. If I weren’t using a mat, I’d check the size of my circle with a ruler every so often.
Here’s how it’s done:
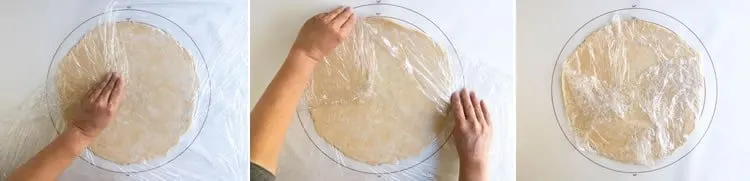
Place two large overlapping sheets of plastic wrap on your surface. Place the ball of dough into the center of the area and then cover with two more sheets of overlapping wrap. Press the ball into a round disk (assuming you’re planning to roll into a circle.)

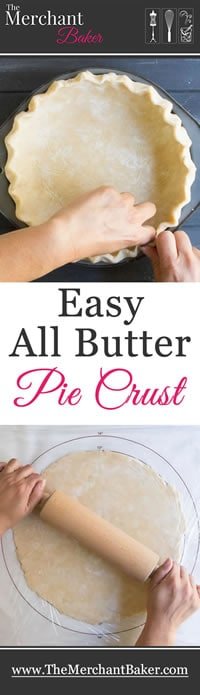
Tips for rolling Easy All Butter Pie Crust:
- Use even pressure when rolling.
- Roll from the center out to the edges. I like to roll in a clockwise direction, from the middle up to the 12, from the middle down to the 6, from the middle out to the 3 and the 9, then continuing to roll to the different points around the clock. This will help you to roll into an even circle.
- You can just roll to the different points on the “clock”, or pick up the dough and rotate it to help you roll to the different points on the “clock.” (I usually just leave it where it is and just change the direction I’m rolling.)
- Lighten your pressure as you get to the edge. You should never roll right over the edge or you’ll squeeze it down to a super thin layer.
- Lift up the plastic wrap, separating the top layer from the bottom layer, as needed to keep your dough from getting trapped between the layers.
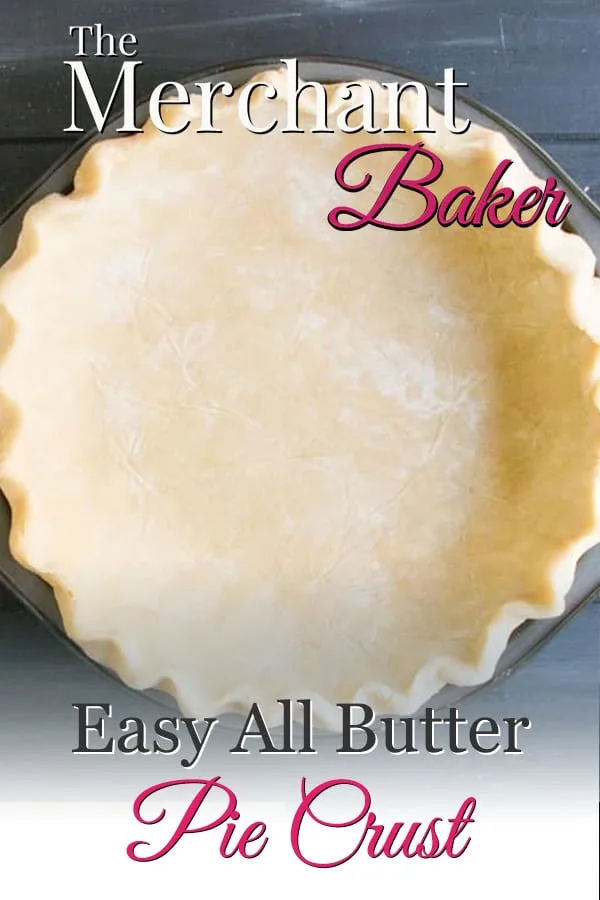
- Roll the dough to 12″ in diameter. That’s the perfect size for a single crusted pie using a 9″ x 1 1/2″ pie pan.
Once you’ve gotten the dough rolled out, (and you’re thanking me because both your counter and your rolling pin are still clean :) it’s time to wrap up the dough.
Conveniently, it’s sandwiched in between plastic :) so all you have to do is fold up the edges of the wrap.

Set the dough on a flat baking sheet and send it to the refrigerator to chill, allowing the flour to hydrate for at least an hour or two. I often leave it in there overnight and then fill and bake my pie the next day.
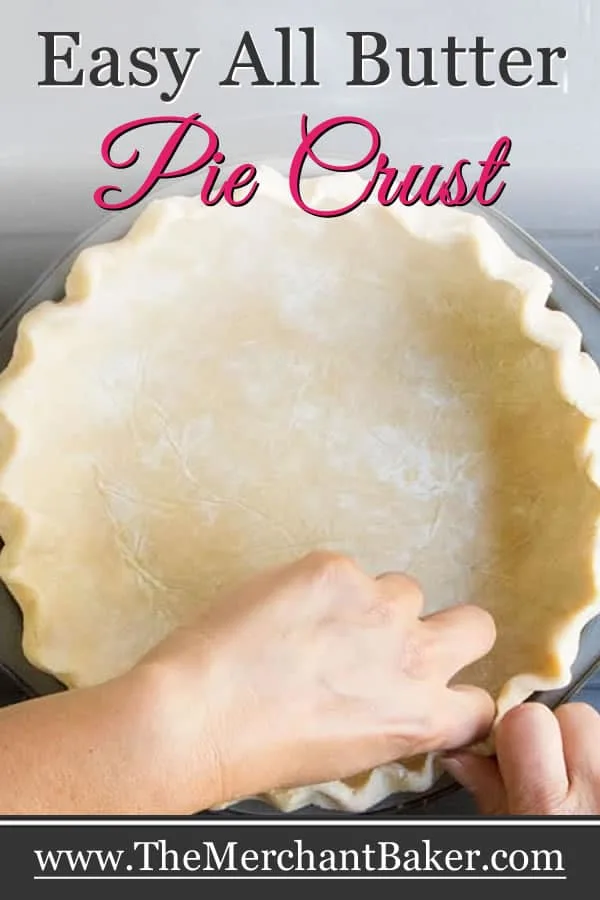
When it’s finished chilling, unwrap the dough and pull the top sheet of plastic off. Now you can center your pie dish over the circle of dough and flip it with the baking sheet as I do in the video. Or, because it’s pretty easy to handle, just place the unwrapped side of the dough into the pie pan and pull the top layer of plastic off.
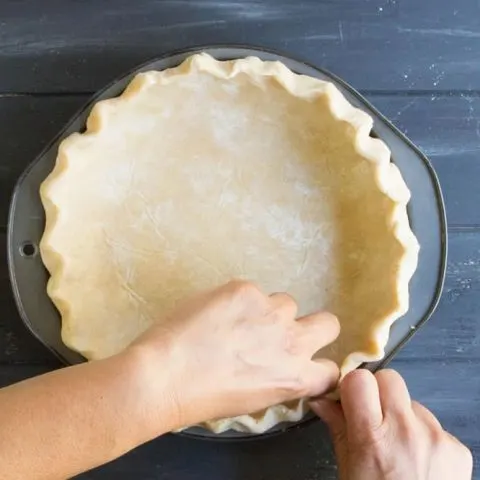
Do not stretch the dough while placing it. Instead, lift it and gently press it into place. If you stretch the dough, it will simply shrink back while baking. So no stretching! Just lifting and placing.

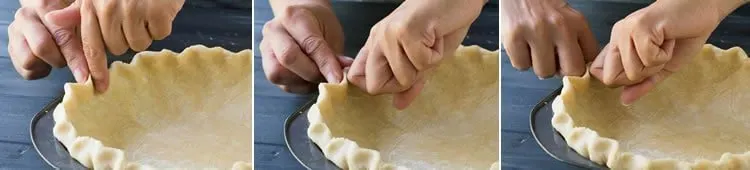
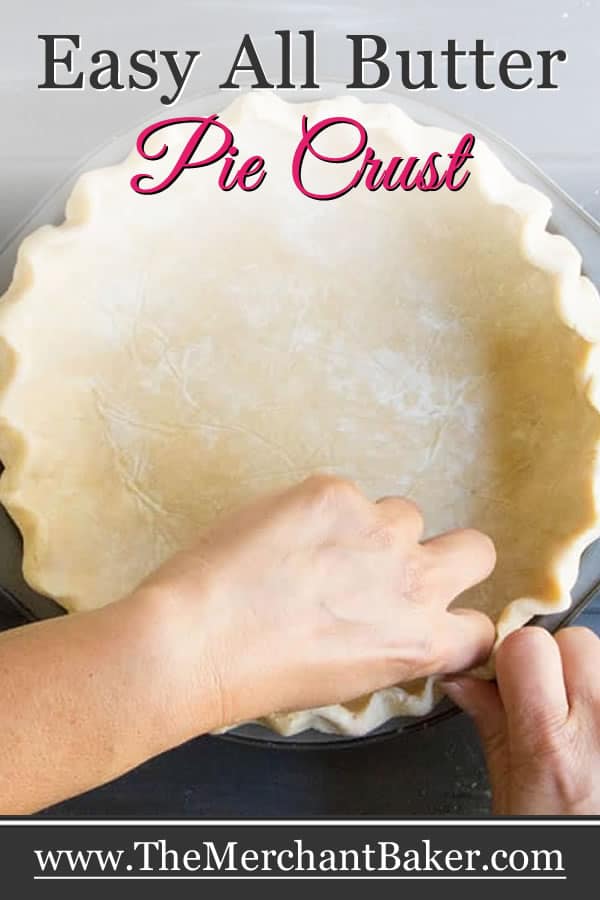
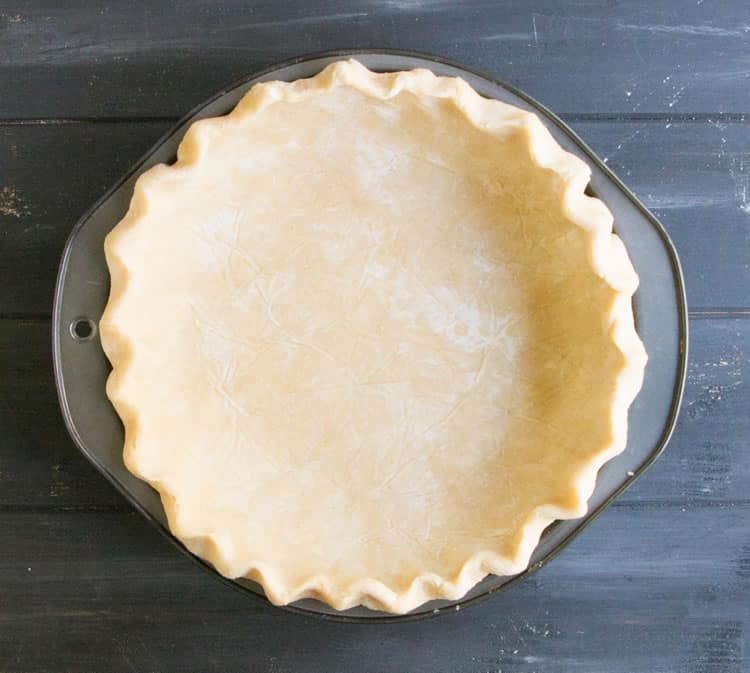
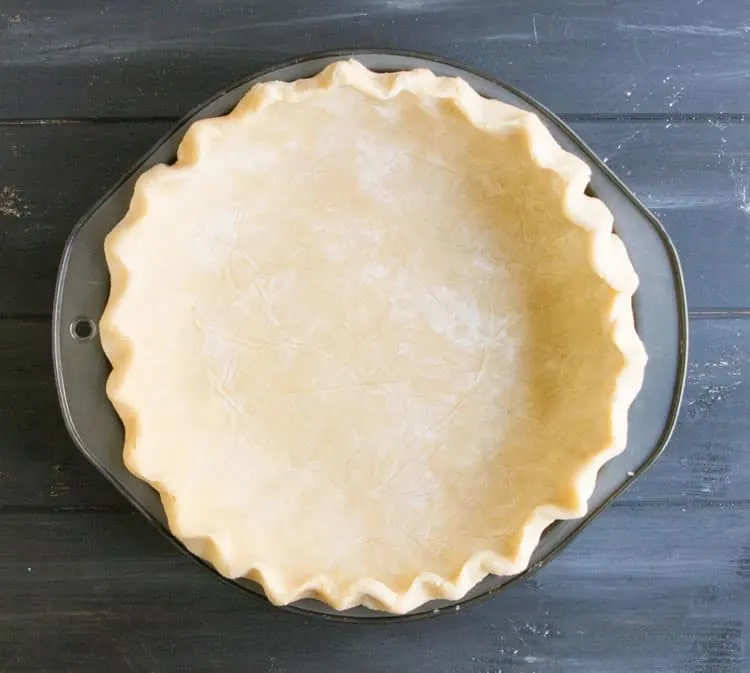
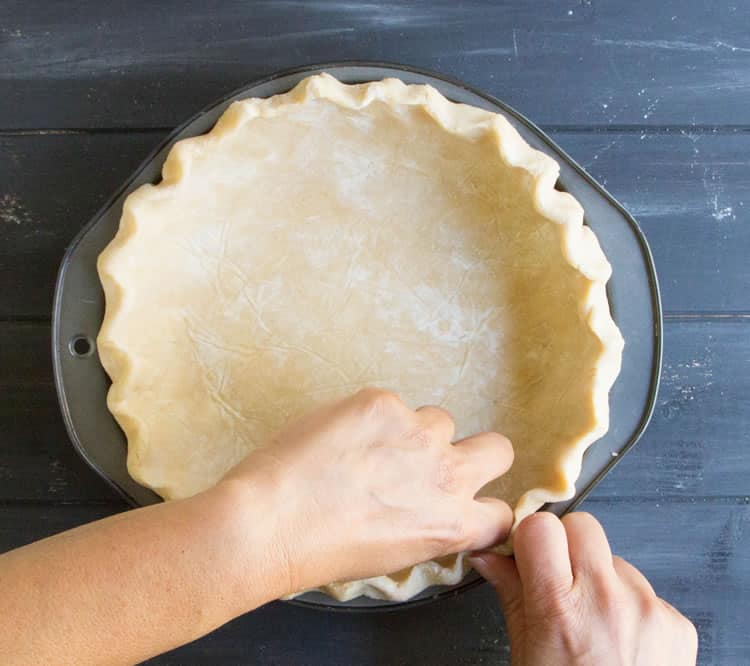
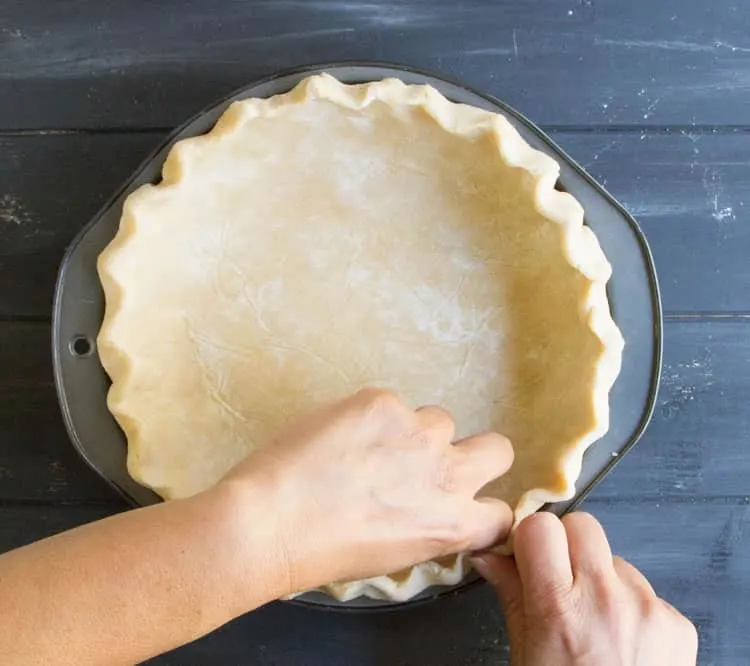
Fluting the Edge:
There are many, many ways to make fancy edges but I’m just going to cover a classic fluted edge.
- First, fold or roll the excess dough around the edge under itself. This will create a thick edge that’s ready to flute.
- To flute, you can use your fingers, your knuckles or knuckles on one hand and fingers on the other. Basically, you’re just gently pressing the edge into a “v” shape. You’ll press the inside of the “v” with one finger, while forming the outside of the “v” with two fingers. I don’t like my nails to mark the dough, so I often use my knuckles to prevent that.
- I’m picturing three ways to make that “v”, but you can do whatever seems comfortable to you.
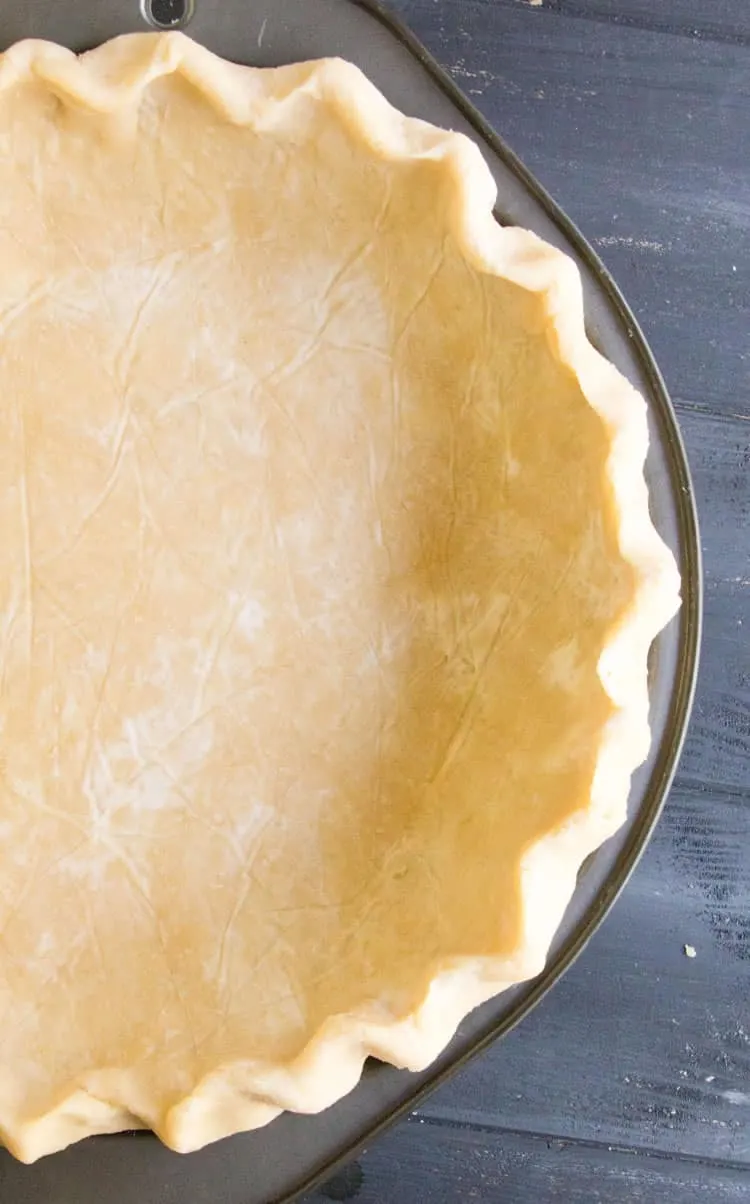
Once you’ve finished fluting, cover the dough with some plastic wrap and put the whole beautifully fluted pan back into the refrigerator, just to make sure it’s thoroughly chilled before you fill and bake it.
That’s it, kids. Easy All Butter Pie Crust. Each time you make it, it will get easier and easier. I promise.
Take the leap. Do not fear pie crust. Follow the directions. Watch the video. Make mistakes. You’ll learn from them. Your reward?
Pie, my friend. Pie. And that age old saying, “Easy as pie,”

will finally make sense :)

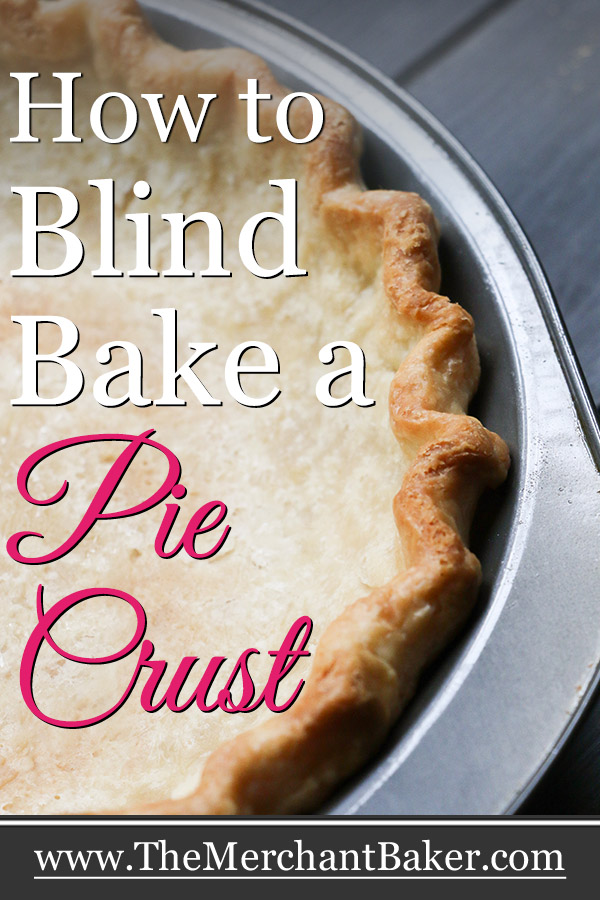
Easy All Butter Pie Crust
Easy All Butter Pie Crust. Delicious, easy to roll, flaky, buttery crust with no mess! Conquer your fear of crust with this tip filled recipe and video!
Ingredients
- 1 ½ cups all purpose flour
- 1 Tablespoon granulated white sugar
- ½ teaspoon salt
- 8 Tablespoons unsalted butter, 1 stick, cold and cut into small pieces
- 5-8 Tablespoons ice water
Instructions
- In a medium bowl, whisk together flour, sugar and salt.
- Add cold butter pieces and cut into the flour mixture using a pastry cutter, two knives or a food processor.
- Fill a cup with iced water and using a measuring spoon, drizzle a tablespoon of water over the flour mixture. Toss with a fork to distribute the moisture. Repeat this process adding a tablespoon of water at a time and tossing the mixture until your mixture looks shaggy and there are no dry piles of flour at the bottom of the bowl. It shouldn't look wet. You should be able to grab a handful of the mixture and squeeze it in your hands and have it hold together. For me, this took about 5-6 Tablespoons of water, but it varies each time I make it. Start checking for texture after 4 Tablespoons.
- Bring mixture together into a ball.
- Tear off two sheets of plastic wrap and over lap them to create a large rolling area. Place the ball into the center of the plastic.
- Tear off two more sheets of plastic wrap and cover the ball of dough, overlapping the plastic so that you have another big area of wrap sandwiching dough. Lightly press on the ball to flatten it into a disk.
- Using a rolling pin, roll the dough into a 12" circle. Roll from the center out, easing up on the pressure as you near the edges so that you don't roll them too thin. Your rolling pin should not roll past the edge of the dough and back onto your counter. That would squeeze your dough into paper thinness. Think of the circle of dough like a clock and roll out to the 12, then pick your rolling pin up and go back to center to roll down to the 6. You can change your rolling position or just use the plastic wrap to pick up and rotate your dough to help you roll out to the different points on the "clock." Always roll from the center out and resist the temptation to roll your pin back and forth. You want it to be rolled out to a uniform thickness so that it bakes evenly.
- When you've finished rolling out the dough, fold both layers of plastic wrap up and over the circle of dough to wrap it up. Place on a flat baking sheet and refrigerate it for an hour or two or overnight.
- When your dough is ready, remove the top layer of plastic wrap. To place the dough into a pie pan, center the pan upside down on top of the dough. Using the baking sheet for stability, hold the bottom of the pie pan and flip the dough over. Remove top layer of plastic.
- Gently fit the dough into the pan without stretching it. Just lift and gently pat it into place.
- You will have excess dough on the edges. Roll or fold these under until they meet the edge of the pie pan.
- Using your fingers, flute the edge. See post or video for details.
- Once you've finished fluting the edge, your dough has probably warmed up from handling. Cold dough is best, so cover the pan with plastic wrap and refrigerate for another 30 minutes to an hour, or until thoroughly chilled, before using in your favorite pie recipe.
Notes
- Refer to the blog post and video for many tips for success.
- You'll need plastic wrap that clings to your rolling surface to keep the dough from moving around while you're rolling it.
- This recipe makes enough for a single crust pie baked in a 9" x 1 1/2" pan.
- You can double the recipe for a double crust pie. Just double the ingredients and follow the directions. Once you gather the dough into a ball, divide it into two pieces, one for the top crust and one for the bottom. Allow a little more dough for the bottom crust. I think a 40/60 top to bottom ratio works well.
- If you're using salted butter, reduce salt to 1/4 teaspoon. I use regular table salt in this recipe.
- All butter is not created equal. Some have more fat, some have more water. Different brands of butter may yield different results. My standard butter is Land O'Lakes. For organic butter, I like Trader Joe's.
- If you'd like to use the crust for a savory recipe, omit the sugar.
- Make ahead tip: Freeze the unbaked pie crust right in the pan. First, put it on a tray to freeze it, uncovered. Then, wrap it well in plastic wrap or foil. Place it in a freezer bag and freeze for up to 3 months. Thaw overnight in the refrigerator before baking.
_The Merchant Baker Copyright © 2017_

Terrie
Saturday 6th of September 2025
I’ve been trying to find the video but I can’t find it. Perhaps, I’m blind. 😊
Ramona
Saturday 6th of September 2025
Hi Terrie, I looked on my phone and on my lap top and it shows up near the beginning of the post. Try refreshing the page. It's definitely there! :)
wendy
Sunday 14th of April 2024
Did a 2-crust pie and t turned out hard and overbake. should I have baked the bottom crust 1st, let cool then add the filling and top crust and bake. Unsure need some help 1st time making pie crust.
Ramona
Sunday 14th of April 2024
Wendy, for a two crust pie, you don't need to prebake the crust. It's hard to troubleshoot further without more information. Generally, for a two crust pie, you put the first crust into the pan, fill it and then place the top crust on then seal/crimp the edges and cut a few slits in the top to release steam. Hope that helps!
Susan
Tuesday 27th of September 2022
Hello I was wondering if this recipe can be used for making little fried apple pies like turnovers. I use can biscuits for my turnovers and they are really good but would love to use a homemade version and this one looks really easy. I fry my turnovers in skillet instead of baking too do you think this would work. Thanks 😊
Ramona
Tuesday 27th of September 2022
Hi Susan, I haven't tried frying this dough yet. I know that some recipes for fried pies contain shortening in the dough, so I'm not sure if an all butter dough or even the ratio of butter to flour in this recipe would hold up to frying without becoming greasy. I love a fried apple pie and hope to have one up on the site someday. But as for today, I don't have any previous testing for this recipe as far as frying success. If you test it out, please come back and share your experience. Update: Just wanted to let you know that I did happen upon some all butter recipes, somewhat similar to mine that seem to have been successfully used for fried pies. So, I am a little more confident that it might work out for you :)
Jess
Sunday 17th of April 2022
I just made this pie crust with GF flour and the consistency was absolutely perfect and very easy to work with. I was able to put it immediately into my pie plates and into the fridge. Can’t wait to see how it bakes up.
Ramona
Sunday 17th of April 2022
Oooh! Let me know how it bakes up! I've never used GF flour but I'd love to know how this works!
Bonnie Dietrich
Saturday 5th of March 2022
I forgot to put the salt in it
Ramona
Sunday 6th of March 2022
Oh Bonnie! That's a bummer! The crust definitely needs the salt for proper flavor. Hopefully you'll give it another try. I totally understand the frustration of forgetting an ingredient.