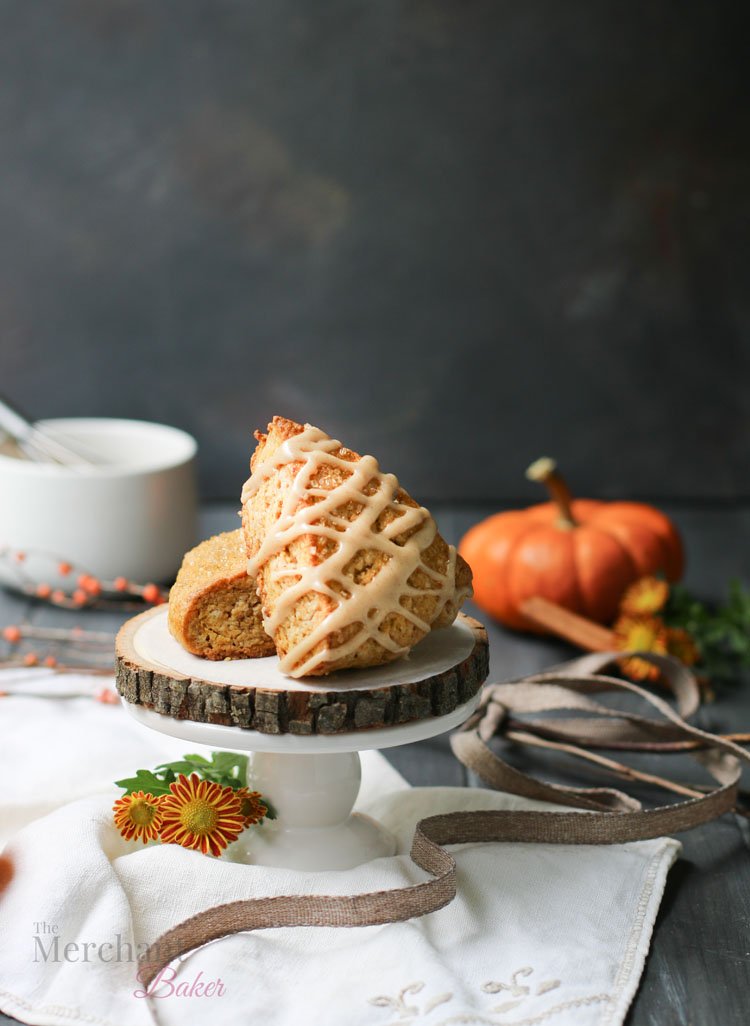
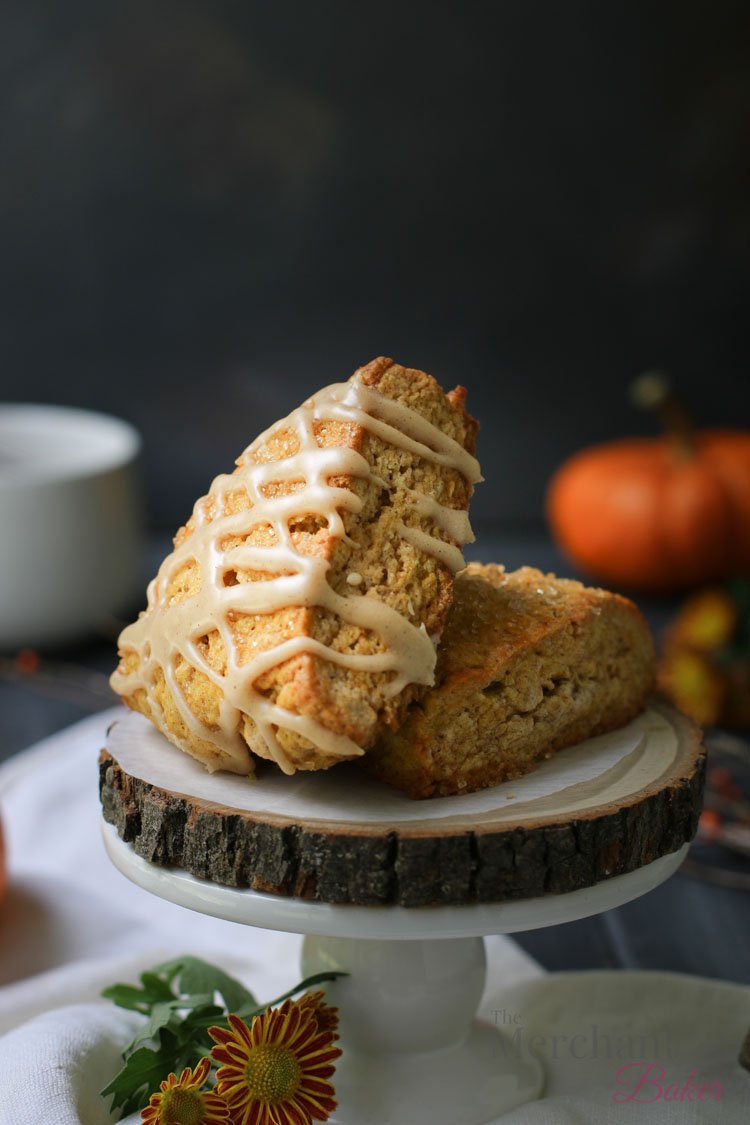
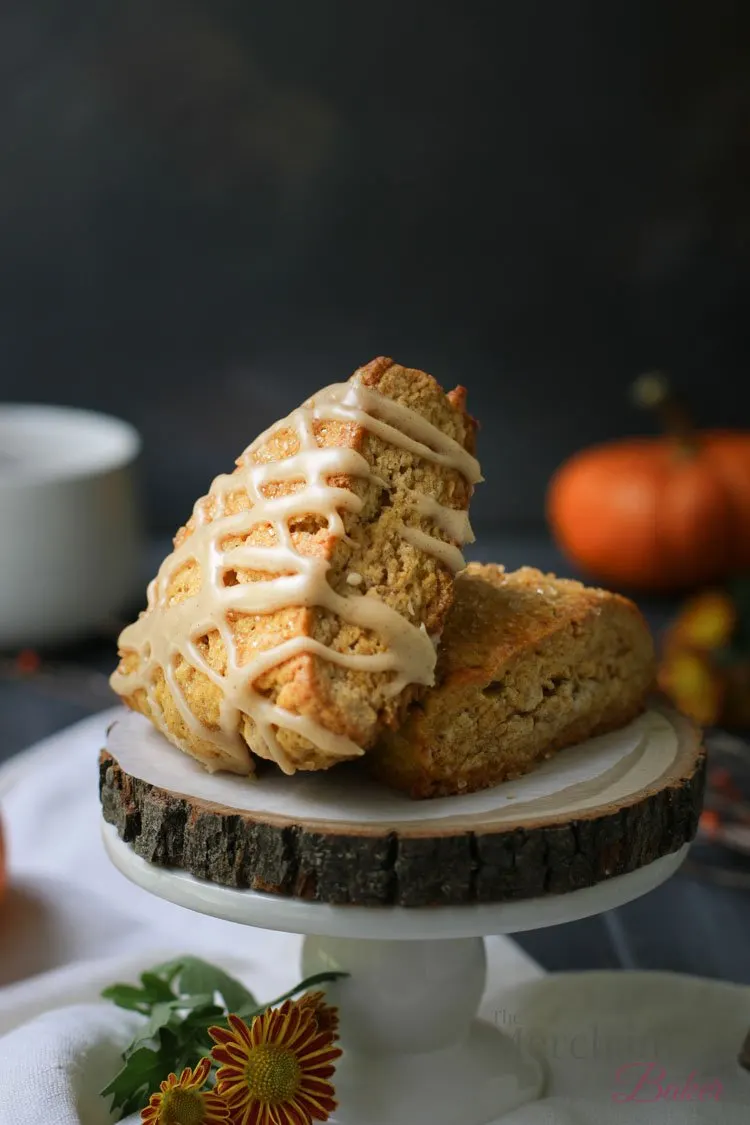
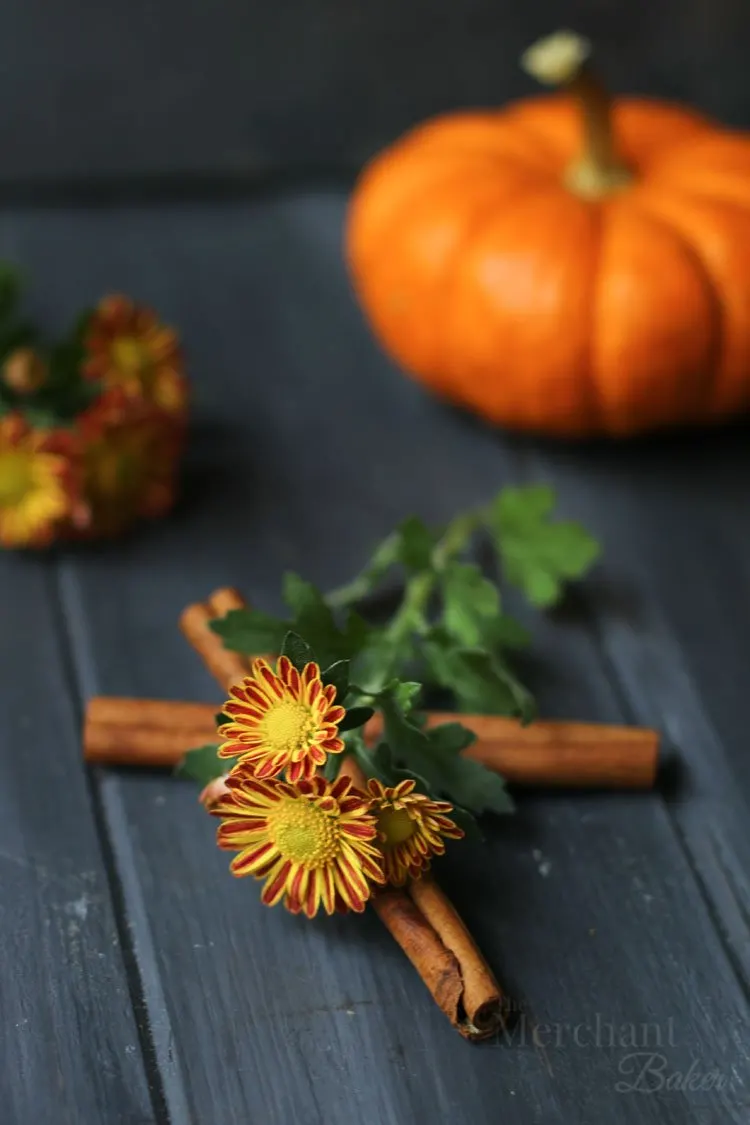
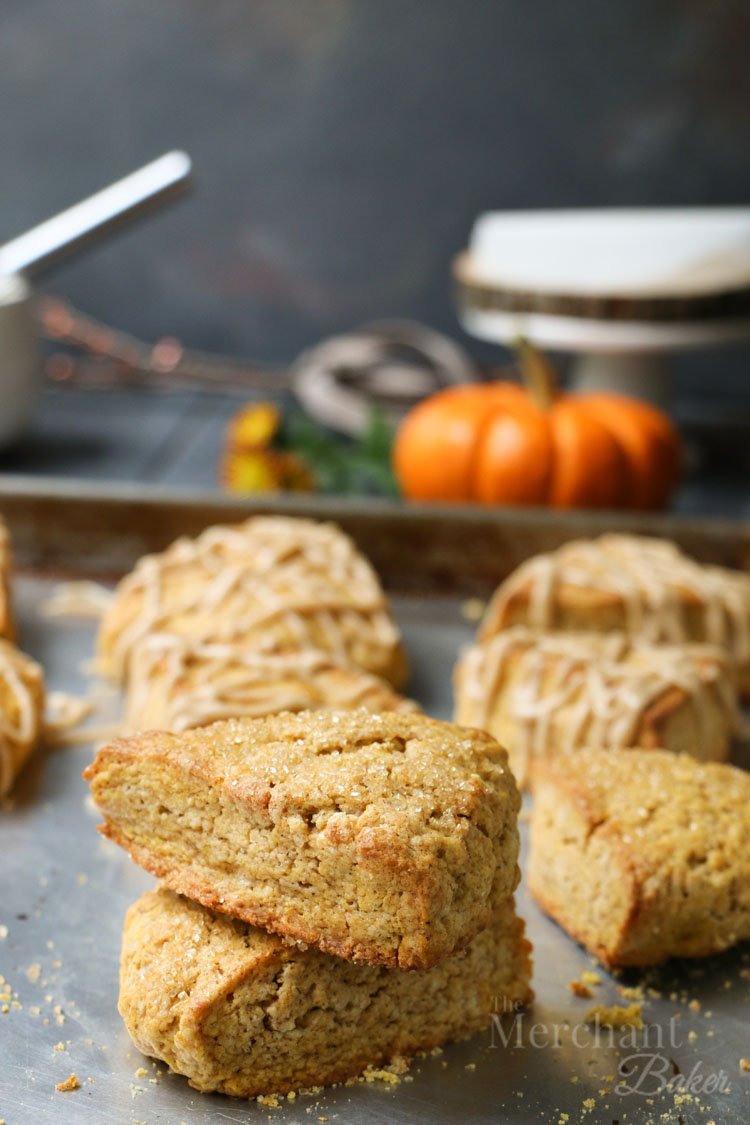
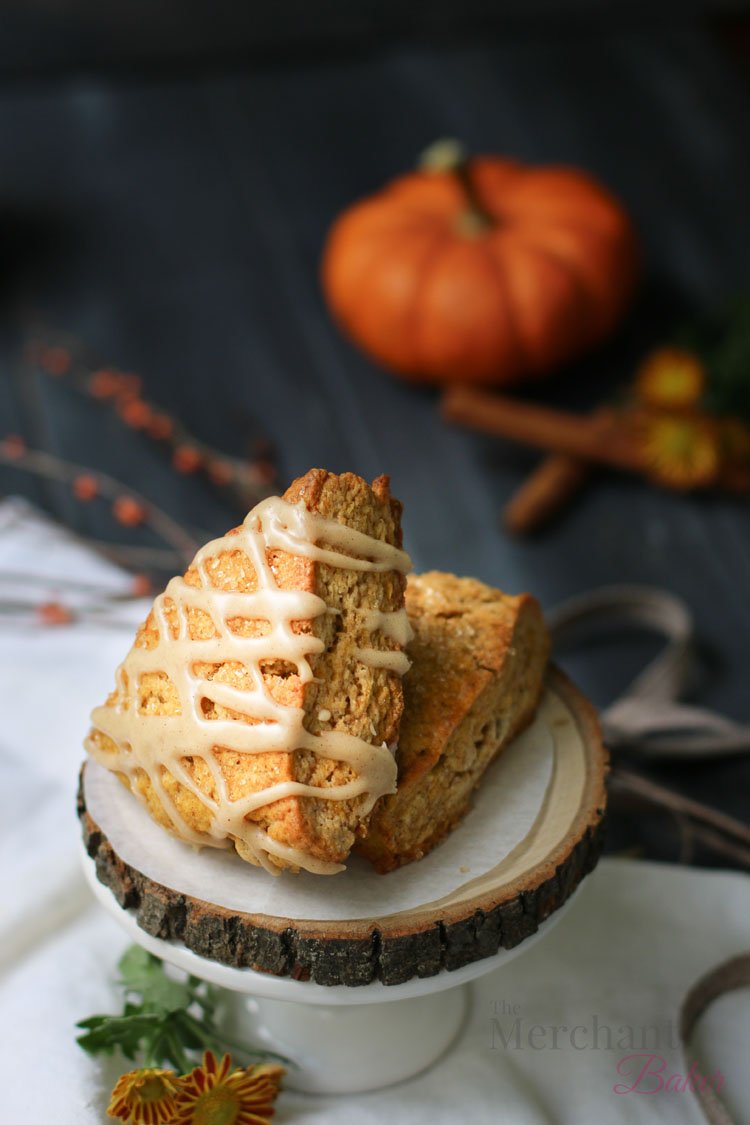
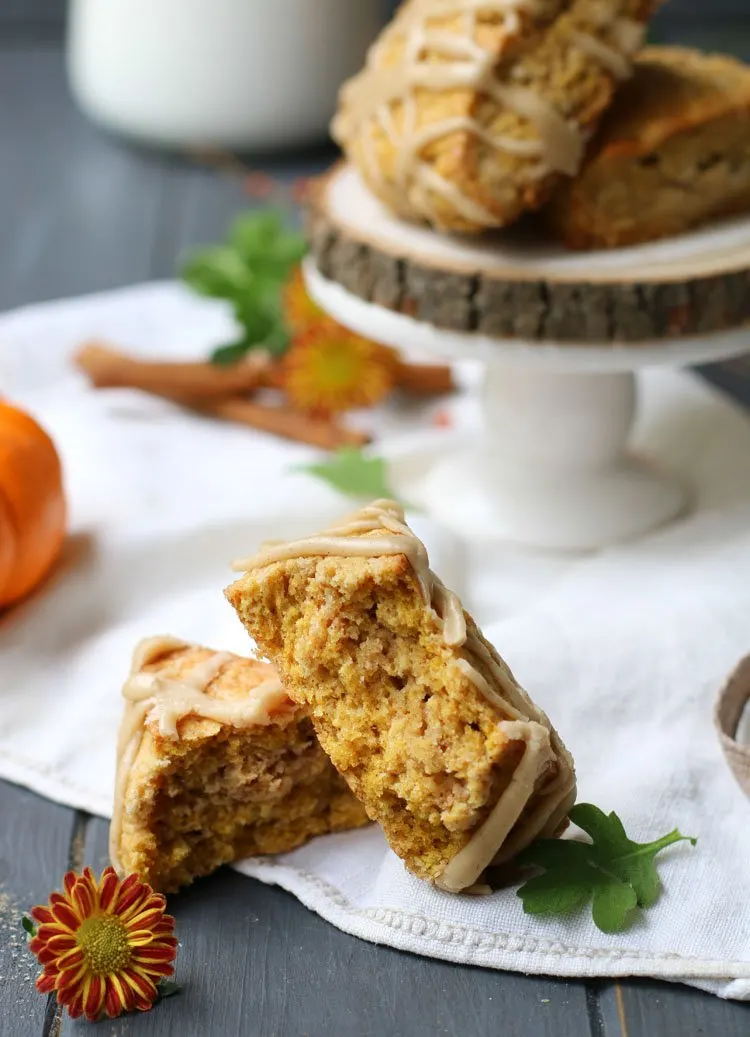
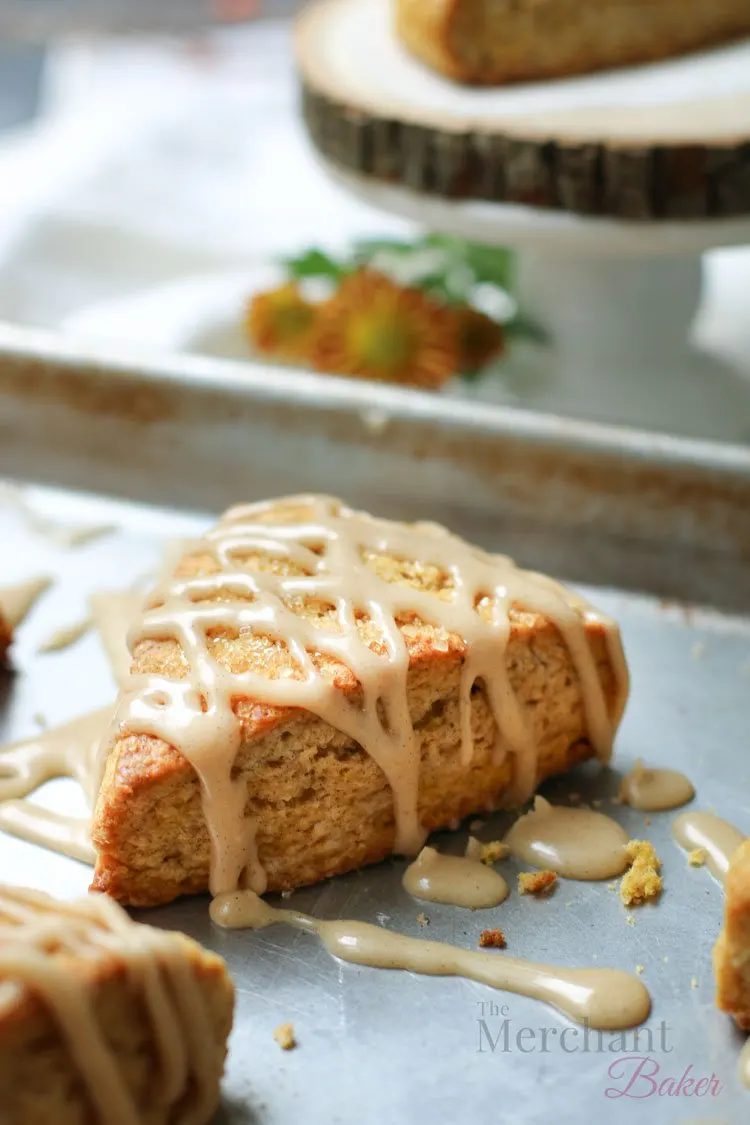
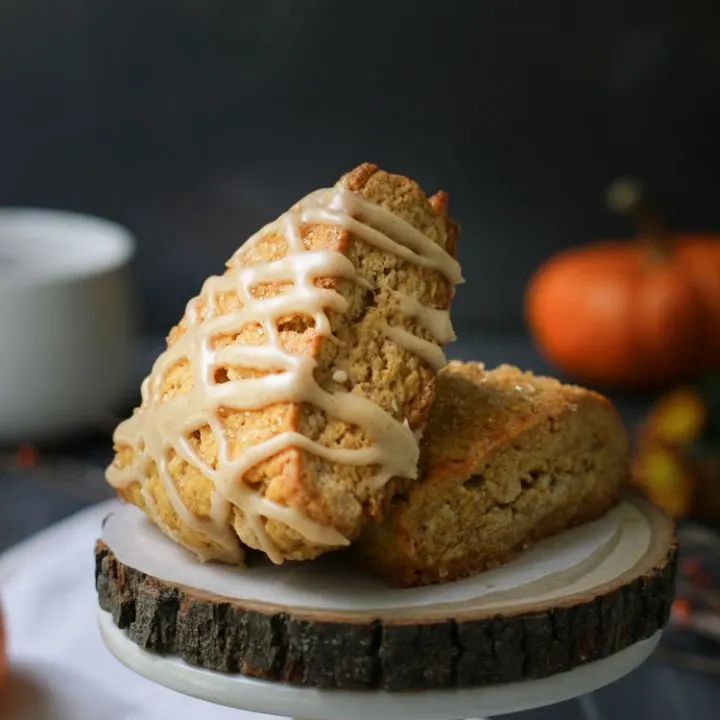
The Best Pumpkin Scones address the challenge of excess moisture in pumpkin puree while achieving the buttery richness that make my scone recipes the favorite of many. These scones are nicely spiced and are as delicious drizzled with a brown sugar cinnamon caramel icing as they are sprinkled generously with turbinado sugar.
At long last, I’ve developed a pumpkin scone that I feel is worthy to stand next to my other beloved scones recipes! You have no idea how excited I am to finally share it with you!
I have been working on this recipe on and off for at least 3 years. Why did it take so long?
It’s always the same answer, my friends…recipe development fatigue. I am passionate about recipe development and I want to get things just right.
After so many trials, the enthusiasm can begin to wane taste buds begin to tire . The frustration is real when time after time, trial after trial, the end result just doesn’t live up to my expectations.

Of course, I also have the issue that my taste testers, who help me validate my position, also get fatigued.
At that point, I simply set the challenge aside for another day. Usually, that ends up being the following year when fall rolls around and I’m thinking that I still haven’t conquered a post worthy pumpkin scone.
The truth is that all of the trials to get to The Best Pumpkin Scones were perfectly edible and quite tasty.
I recently made a batch that was as flat as a pancake, cakey as a muffin and could never ever pass as a scone. I frosted them and put some fall sprinkles on top and boom! They were a hit when I served them to guests.
I didn’t tell my guests that they were scones. Thankfully, they never asked what they were.
They sort of looked like a bigger, thicker, different shaped version of one of those store bought Lofthouse cookies. But everyone loved them. I can even admit that I enjoyed them myself.

But, they were not anywhere near what I was looking for in a scone. That was the least scone-like scone of the trials.
There were other versions that were perfectly fine. Everyone loved them. They were perfectly shaped and flavored and baked up so wonderfully. But they were not what I wanted. They were too fluffy and not rich enough.
Yes, I can discuss the hidden nuances of every single scone test… nuances that might go unnoticed by the average scone lover. In fact, on many a trial, my taste testers would say, these are great! You can stop now!
But no, I was looking for something more elusive and it had to do with aaallll the things…texture, flavor, spice, richness and moisture.

If I wanted a fluffy pumpkin something, I already had Pumpkin Buttermilk Biscuits. And those biscuits make the most AMAZING Pumpkin Biscuit Sticky Buns. I certainly didn’t need a pumpkin scone that was closer to my biscuit recipes than my scone recipes.
As I’ve said many times before, I like my biscuits fluffy and light and my scones buttery and rich.
Yes, I do; I love a short scone. That means a high fat to flour ratio. That’s why they call shortbread, “short bread.” There’s lots of butter.
And for all of my scone fans, you know my first scone odyssey led me to My Favorite Cinnamon Scones. There was a ton of trial and error to get to that scone. And that is a short scone indeed. I think it has the highest amount of butter than any of my other scones. It’s really rich and delicious!

That recipe was really a challenge. I was working on it long before this blog and long before the internet exploded with scone recipes. Trust me, I did the research. There were no recipes that got me to the promised land.
At the time, I was trying to recreate Panera’s cinnamon scone, you know, the original one that was rectangular shaped and wasn’t covered in icing. Since then, their scone has changed twice. It’s pretty much unrecognizable now from its original form. It’s disappointing because I would still buy that scone today if it was still available.
Once I conquered the cinnamon scone, I moved on to other scones…I made egg nog scones and dark chocolate fudge scones and fresh strawberry cream scones and brown sugar butter pecan scones. (Those brown sugar butter pecan scones have been one of the most popular scone recipes on my site.)
Need more scone ideas? Check out the recipe index for the scone and biscuit category. There’s lots there to love.
But pumpkin scones? That was a bigger challenge. The challenge was dealing with all the moisture in pumpkin puree. That extra moisture made my scones more cakey than I wanted.

Challenge: How to deal with the excess moisture from pumpkin puree
I tried a lot of things. I tried reducing the amount of puree. At one point, I began to wonder if I shouldn’t just eliminate the puree all together and just make pumpkin spiced scones sans pumpkin. But, I really wanted pumpkin to remain in the recipe.
So, I tried draining the puree in a sieve. That didn’t remove enough moisture.
I also tried cooking all of the moisture out of the puree. I did that on the stove as well as roasting in the oven. Boy, you’d be surprised how much water is in puree. By the time you cook a lot of the water out, you’re not left with much.
But, what’s left is definitely concentrated. I thought rehydrating that concentrated pumpkin with the cream in my base recipe would do the trick for my scones.

They were great! But, still not what I was looking for. Of course, the other issue was the recipe was becoming a little high maintenance with that extra step of cooking the water out of the pumpkin.
I mean really, are you going to stand over a stove and cook all of that water out and then wait for the pumpkin to cool before you even begin your scone recipe? Probably not. Okay. Maybe once, but not often.
I will also mention that the pan that you cook the pumpkin will need to soak before you attempt cleaning all of that cooked on dried pumpkin. That’s definitely not worth it.

In the end, once I rejiggered the whole rest of the recipe, I simply removed the moisture I needed by using paper towels.
Yep, I just squeezed the moisture out of the pumpkin, much like you would do when you’re squeezing the moisture out of thawed frozen spinach. You’ll be left with nice dry clump of pumpkin.
I say, “clump,” because when you’re left with that mass of pumpkin that’s holding together after you’ve squeezed the liquid out, you’ll know you’ve extracted enough moisture.

The Secret Ingredient to The Best Pumpkin Scones
Now, even after squeezing all that moisture out of the pumpkin, I still wasn’t achieving the rich flavor and texture I wanted. I tried reducing the cream and playing around with pumpkin and cream and butter ratios.
I tried it without the egg, then with only the egg yolk or the egg white. I played with increasing the sugar, not for sweetness but for tenderness, moisture and leavening. None of those trials by themselves achieved my goal.
I needed to address many of those things, but I still needed to remove more liquid. So, I eliminated the cream.
Yes, I removed the cream entirely and replaced it with….wait for it….cream cheese!!!
The cream cheese worked beautifully! It allowed me to keep the fat ratio generally intact without all the added moisture present in heavy cream.
And it didn’t matter that my squeezed pumpkin wasn’t as bone dry as my cooked down pumpkin. All of the levels were now balanced. Eureka!
The baking ratios of the rest of the ingredients were part of the secret. But, the cream cheese? That was a game changer!

Tip: Freeze scones before baking
I generally freeze scones for about a half hour to an hour before baking. That’s to insure all the fats are nice and cold before I pop them in the oven. Cold butter and fat means more lift in the oven. Even though I don’t want them to be like fluffy biscuits, I still want lift and rise. I’m not into hockey puck scones.
Freezing scones first also allows me to get nice, clean cuts.
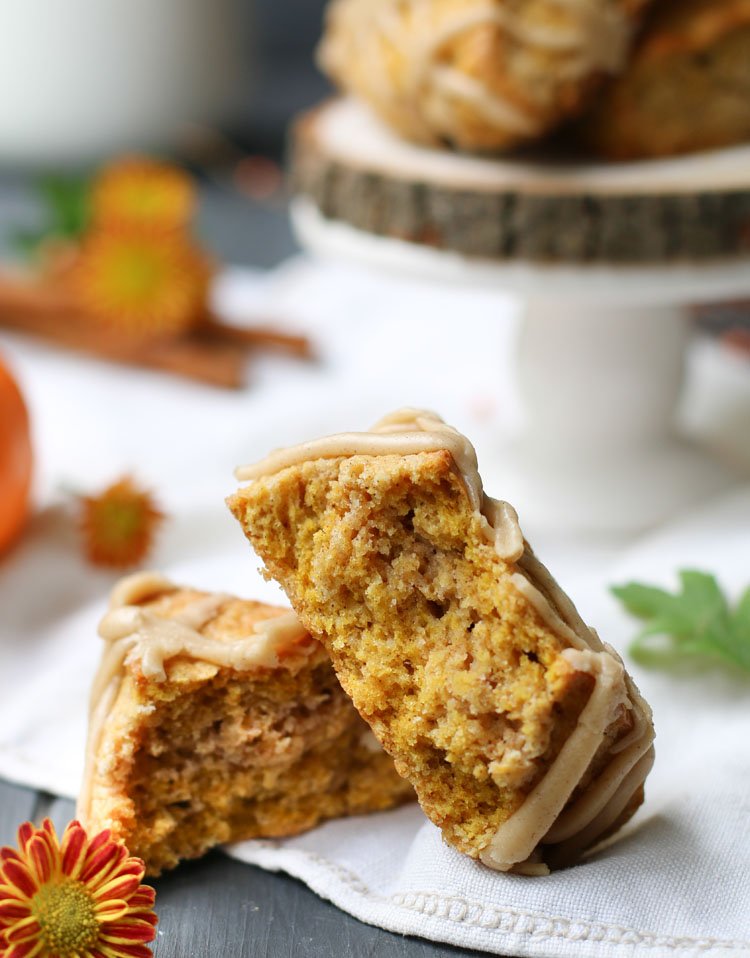
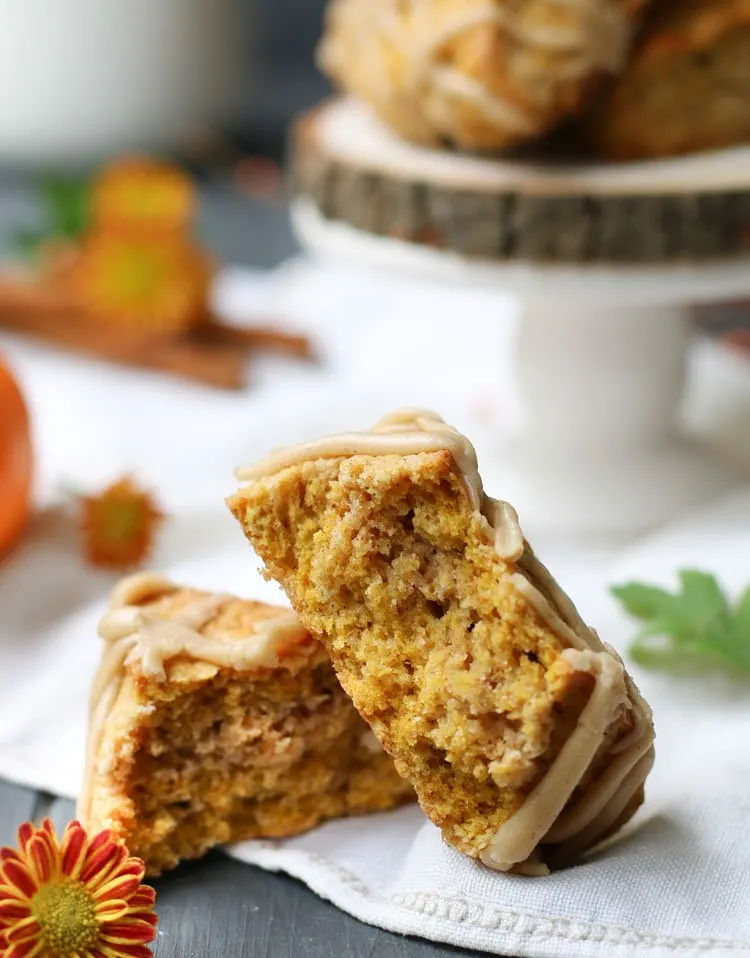
I knew this scone was a winner because the texture from the freezer was nice and firm. With other attempts, the scones were always too soft (too much moisture) to firm up the way I expected them to.
But these babies were perfect! I got those nice, clean cuts. But I wouldn’t know for sure until I baked them.
As expected (or hoped, pleaded, begged?) they baked up with crisp, clean edges and a perfectly rich interior. Yay! Mission accomplished!

Can I freeze unbaked scones for longer storage?
Yes. You should be able to freeze unbaked scones for up to three weeks according to King Arthur Flour without any significant effect on rise.
However, I’ve never personally done it myself to share that experience. The soonest I’ve needed to make scones in advance is the day before. I usually just go ahead and bake them, then ice them the following day.
If I were to freeze them for longer storage, I’d probably freeze the whole, plastic wrapped disk in a freezer bag, insuring all the air was removed from the bag. Then, I’d cut them later….before baking.
I would remove them from the freezer and then preheat the oven. By the time the oven is preheated, they should be able to be cut and ready to bake. You may have to add a few minutes onto the baking time to compensate for starting from frozen.
Topping the scones
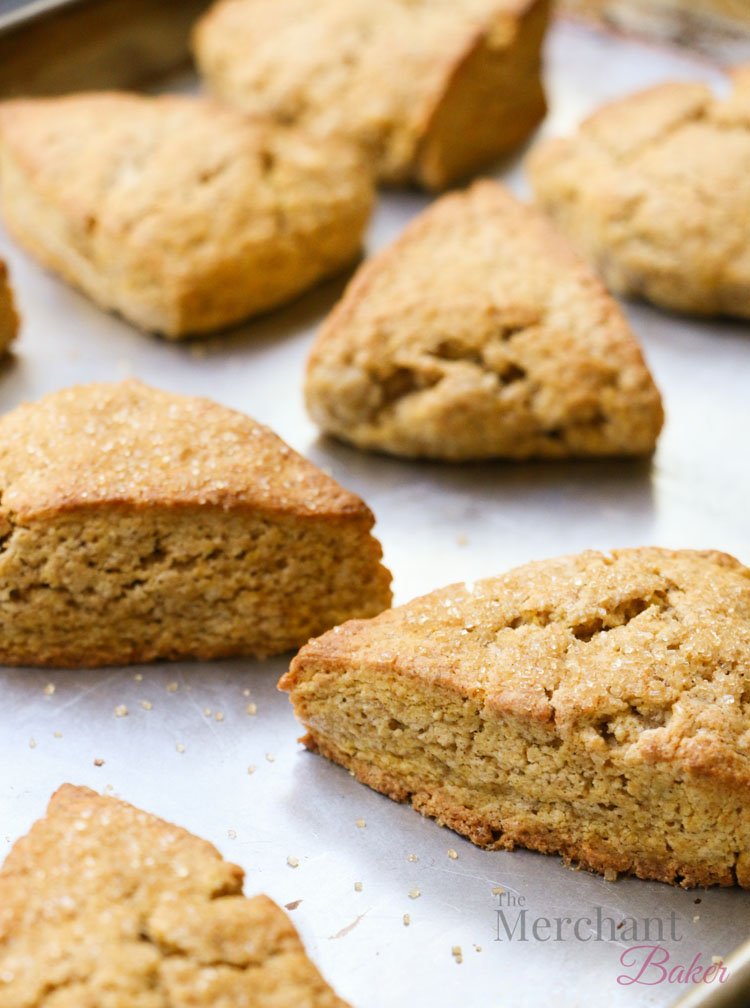
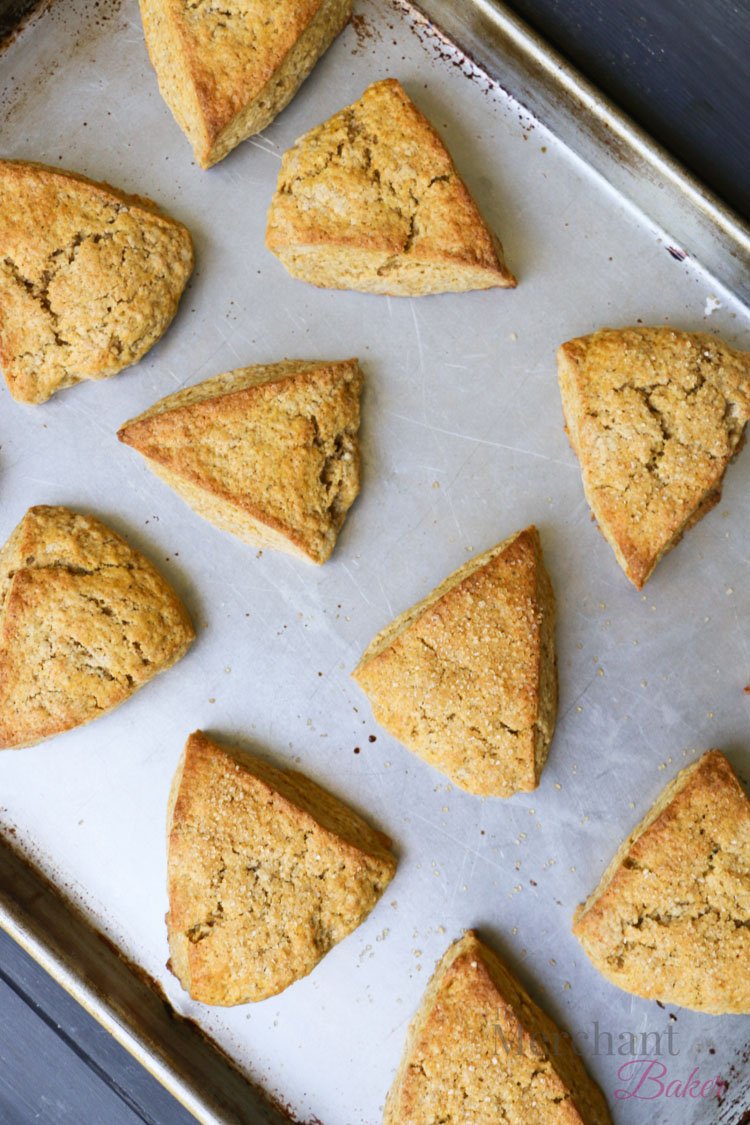
I sprinkled half of the scones with turbinado sugar and left half bare. I almost always brush my scones with heavy cream before baking, but since this recipe doesn’t include cream, I left it out. If you have some on hand, feel free to brush before baking and before sprinkling with sugar, should you choose to go that route.
This scone has a higher amount of sugar than my typical scone. Again, I didn’t do this solely for sweetness, but for tenderness, rise and moisture. I thought they were delicious with just the raw sugar topping.
However, I knew many would love these scones with some type of icing. I don’t generally make my scones super sweet. I like them lightly sweetened with any additional sweetness coming from a smattering of coarse sugar or a simple icing.
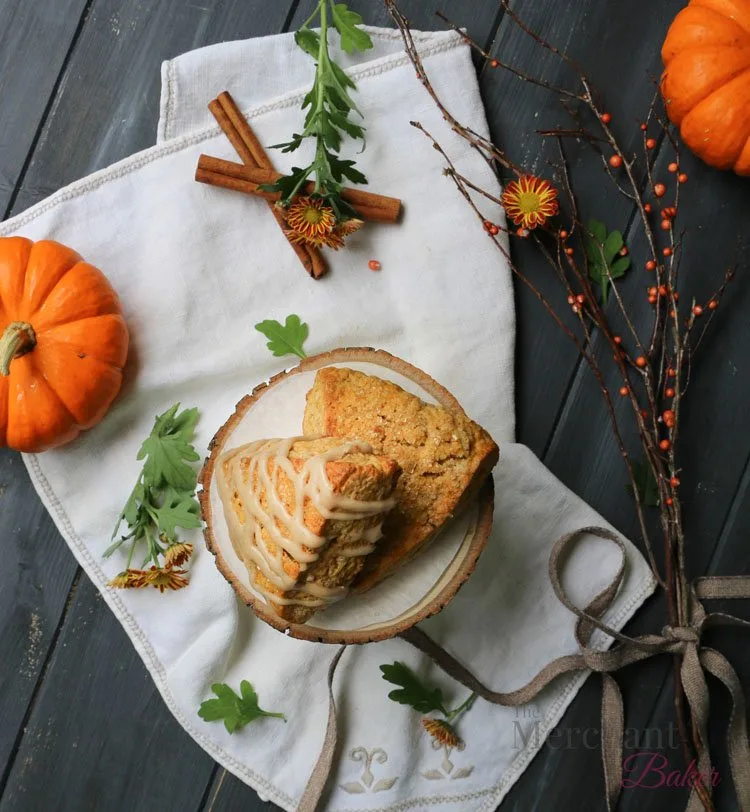
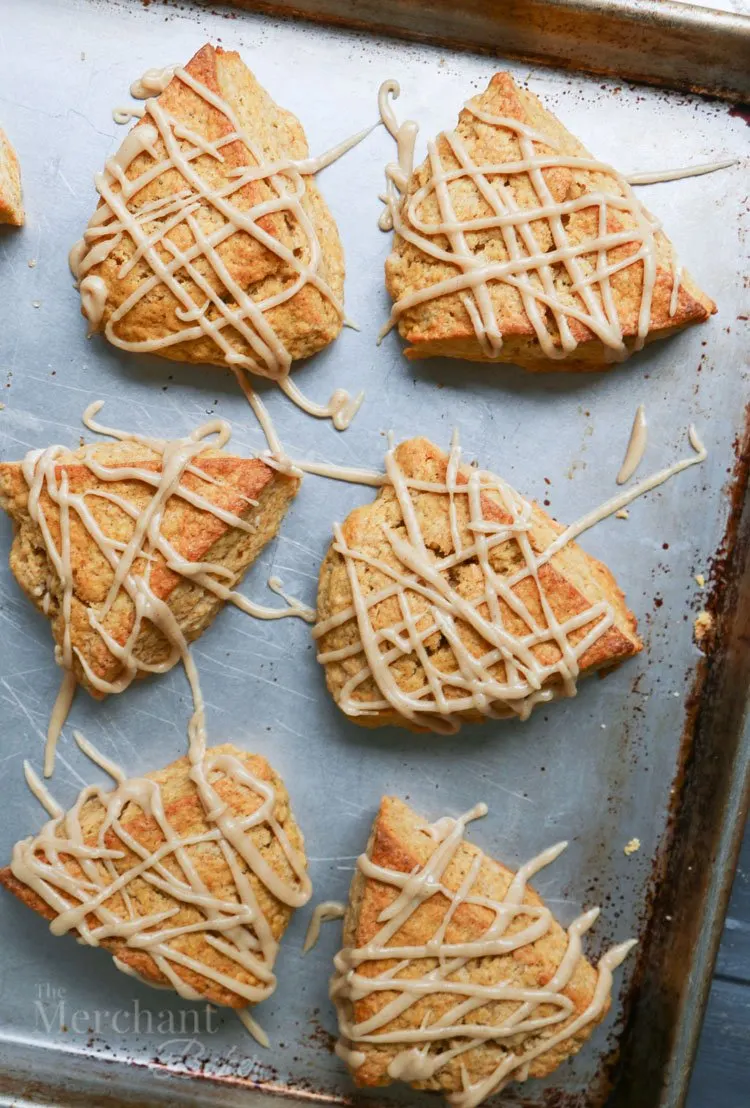
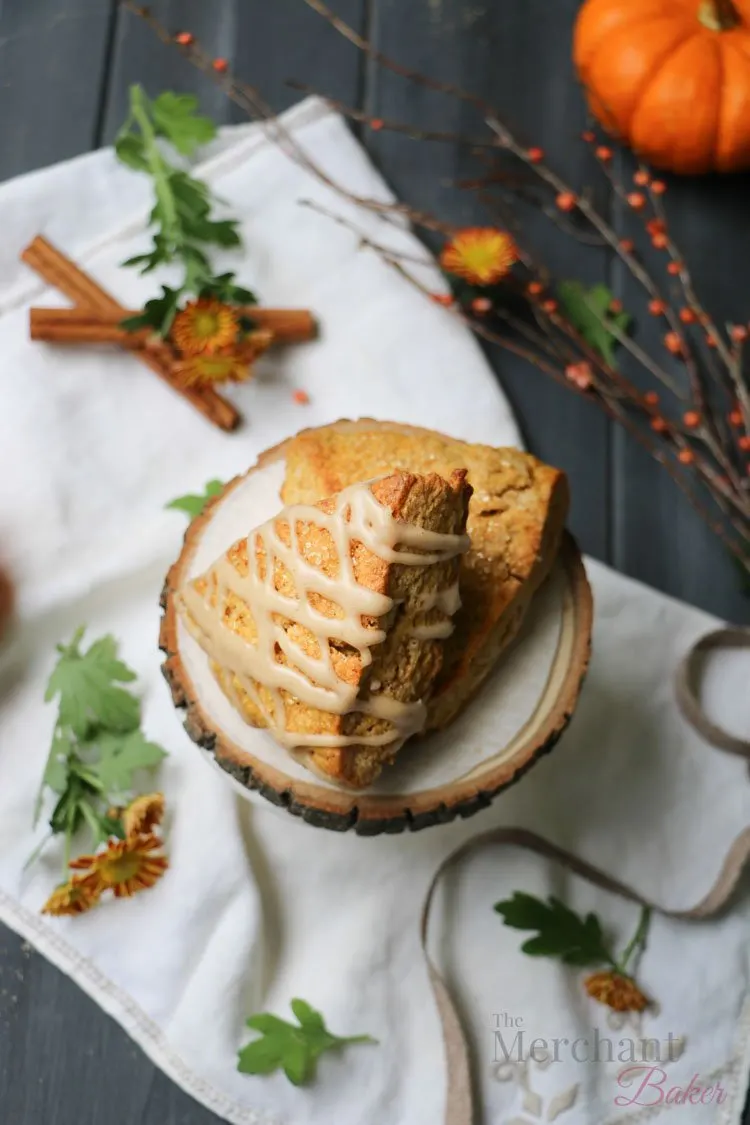
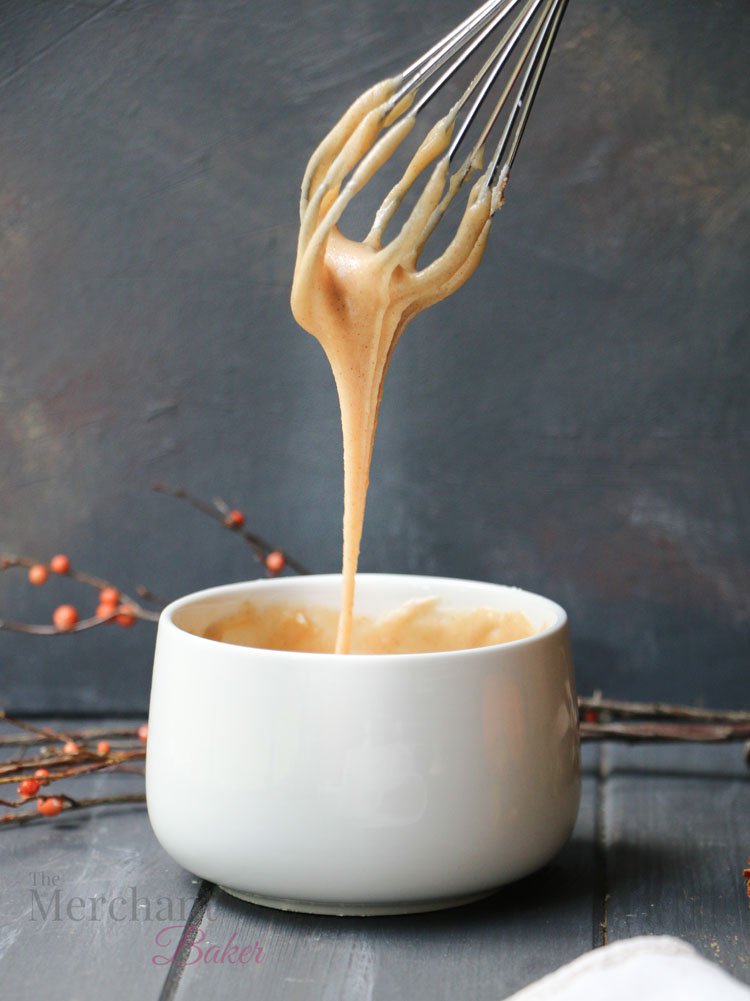
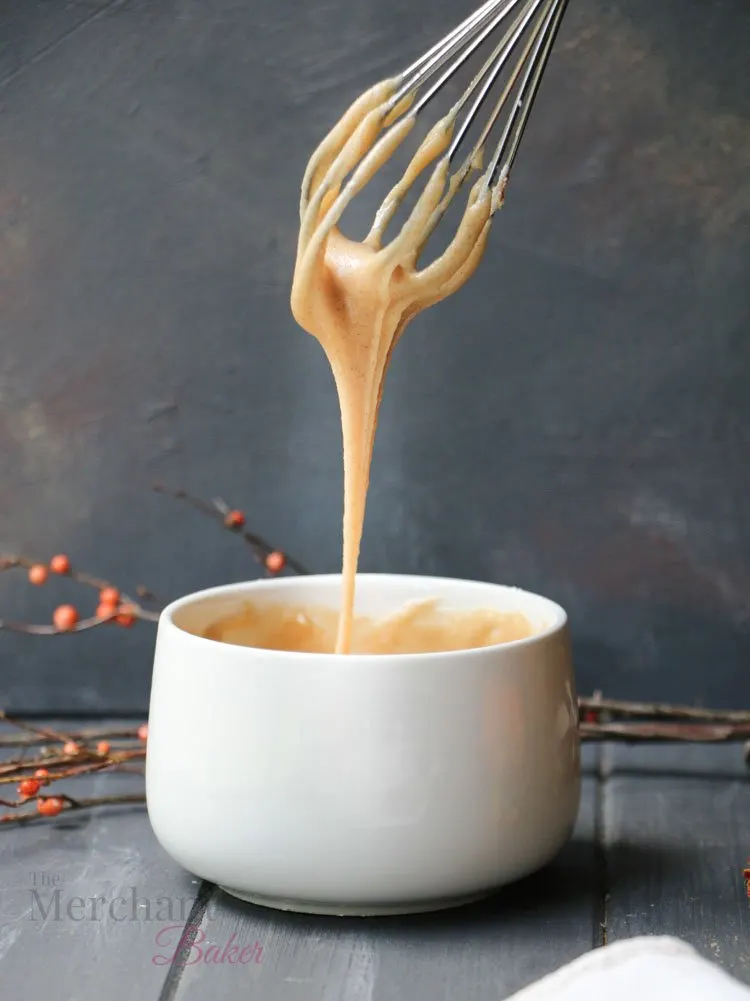
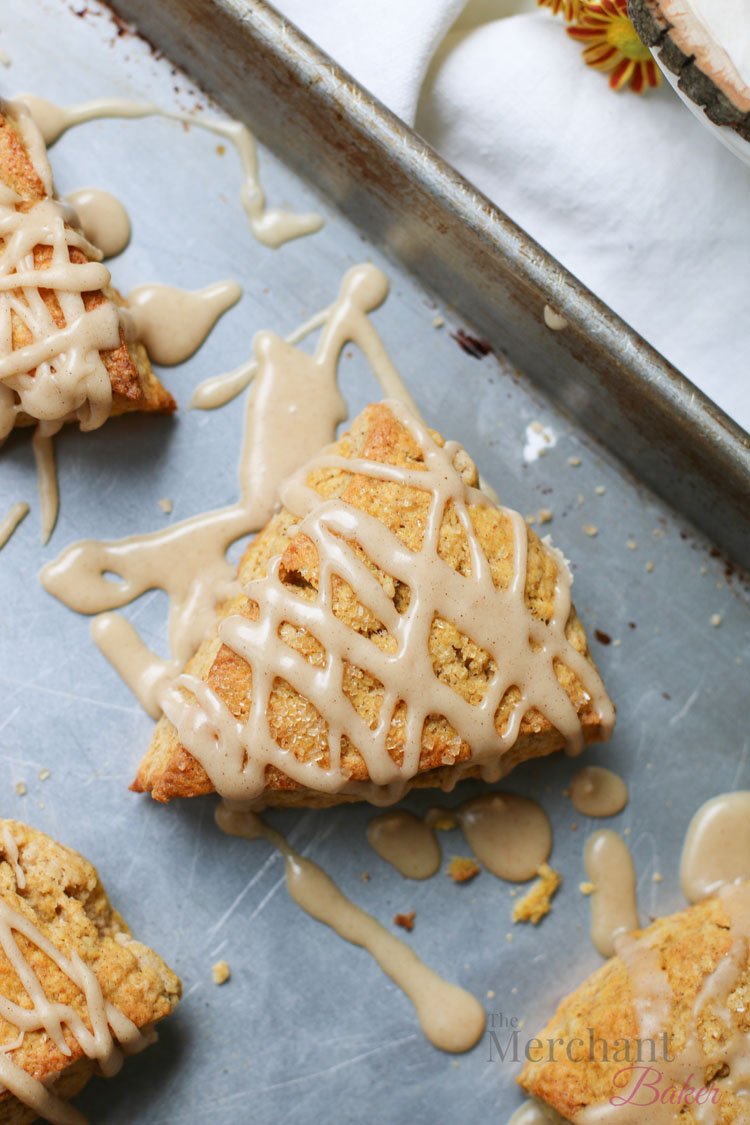
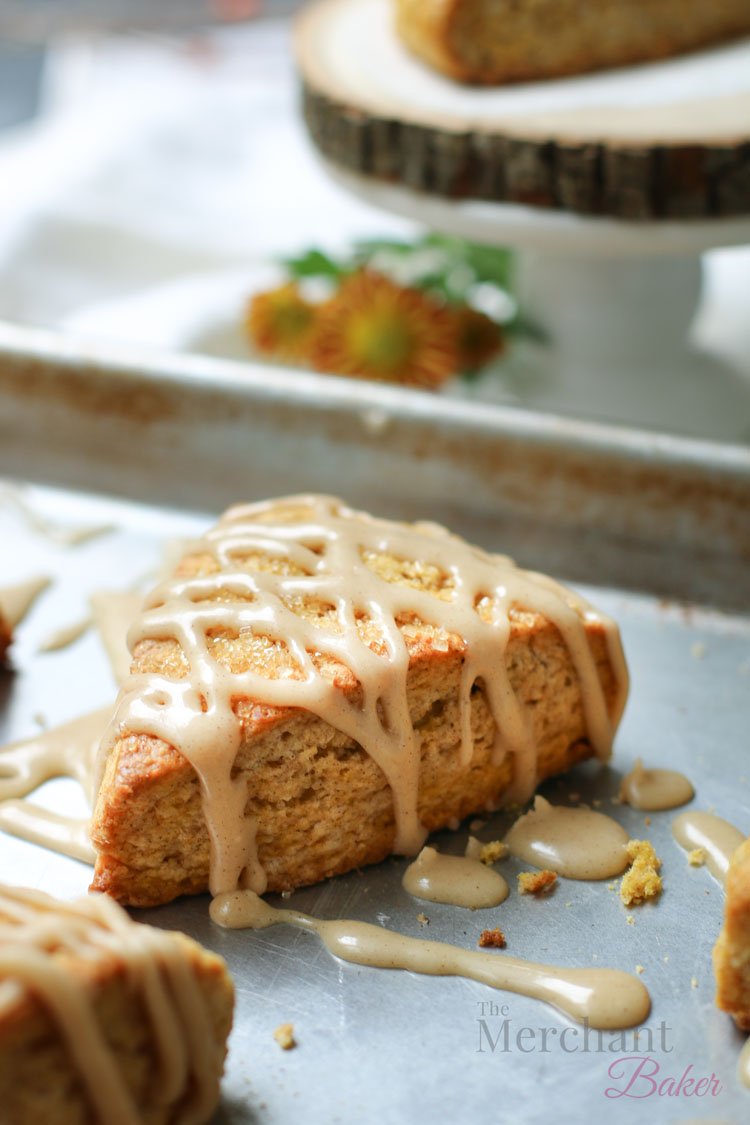
For these special scones, I decided that a brown sugar cinnamon caramel drizzle would fit the bill nicely.
The icing comes together quickly on the stove top, and trust me, it’s worth the time for all the extra flavor you’ll get.
I loved the scones both ways. They were perfectly delicious with the crunchy sugar topping and they were a little more splurgey and delicious topped with the icing.

The difference between first day scones and second day scones
The first day, the scones will be a little crisp around the edges and rich and tender, slightly fluffy in the middle. They are delicious.
On the second day, the fats solidify more. This happens with all of my scone recipes. The scone loses some of it’s crisp exterior and the scone becomes a little more dense. My husband prefers the second day scone.
The people that love my scones have no idea if they’re first day or second day. They love them all, as do I.
But for you first day scone lovers, you can bring back that first day scone goodness by just giving the scones a few minutes in a hot (like 400 degrees F) oven. You know, the same way you bring that artisan loaf of bread back to life.
Normally, I would tell you to skip the icing if you’re going to reheat them the next day and then ice them afterwards. Some of my icings are simple confectioner’s sugar icing, and when you reheat them in the oven, they just melt. That doesn’t mean I still won’t do that, but there’s a moisture issue there and you have to commit to wanting that result.
The extra bonus of brown sugar cinnamon caramel icing
But, but, but! There’s an extra bonus with this brown sugar cinnamon caramel icing…
If you reheat the scones that are already iced with this delicious stuff, it doesn’t just melt…it forms a crispy caramelized crust on your second day scones!
So, you revive the outside texture of your second day scones while getting a whole new take on the topping! Oh my gosh, it was so good that I actually considered making it a permanent part of the recipe!
But no need. You might as well have all the options open to you. Have your crisp outside, rich inside scone on day one. Have your room temp moist, dense, rich scone on day two. Or, have your rockin’, crisp, caramelized scone.
Trust me. They’re all good. They’re all The Best Pumpkin Scone.
And at long last, they’re finally worthy to share. If you love my other scone recipes, this is definitely one to add to your list.

The Best Pumpkin Scones
Ingredients
- For the scones:
- 1/2 heaping cup pumpkin puree (not pumpkin pie filling)
- 1 large egg
- 2 1/4 cups all purpose flour
- 2/3 cup sugar
- 1 Tablespoon baking powder
- 1/4 teaspoon salt
- 1 3/4 teaspoons cinnamon, I used Vietnamese
- 1/2 teaspoon freshly ground nutmeg
- 1/2 teaspoon ground ginger
- 1/4 teaspoon ground allspice
- 1/4 teaspoon ground cloves
- 4 ounces full fat block cream cheese
- 8 Tablespoons (1 stick) cold unsalted butter, cut into small pieces
- For the brown sugar cinnamon caramel icing:
- 2 Tablespoons salted butter
- 1/4 cup brown sugar
- 2 Tablespoons milk
- 1/2 Tablespoon light corn syrup
- 3/4 cup confectioner's sugar
- 1/4 teaspoon vanilla
- 1/4 teaspoon cinnamon
Instructions
Make the scones:
1. Squeeze pumpkin puree between a few layers of paper towels over a bowl to get most of the moisture out. When you're done, remove paper towels. The pumpkin should hold together when you squeeze it with your hand. You should have about 1/4 cup of squeezed pumpkin left. You may need to squeeze more pumpkin than called for in the recipe if your puree as more liquid. Just squeeze enough to end up with 1/4 cup.
2. In a small bowl, whisk squeezed pumpkin with one egg until thoroughly combined. This may take a minute, but you want to insure the mixture is thoroughly mixed. Set aside.
2. In a medium bowl, whisk together flour, sugar, baking powder, salt and spices.
3. Using a pastry cutter or two knives, cut in the cream cheese until flour has been fully coated and there are no chunks of cheese left. Add cold butter pieces and continue cutting into flour until butter pieces are the size of small peas.
4. Make a well in the center of the flour mixture and pour in the pumpkin/egg mixture. Lightly toss the mixture bringing the dry sides in and over the wet ingredients in the middle, turning the bowl as you go, distributing the moisture throughout.
5. The mixture will seem too dry, but resist adding any additional liquids. Just use your hands to begin bringing the mixture up and over the center, then pushing down before turning the bowl and repeating in a light mixing motion until the dough comes together without any dry ingredients left on the bottom of the bowl.
6. Divide the dough in half and gather into two separate balls. Place each ball on a large sheet of plastic wrap. Form each ball into a round disk about 1" thick. Wrap each up in the plastic wrap and freeze for 30 minutes to an hour or until firm.
7. Preheat oven to 400 degrees F.
8. Unwrap each disk of dough and cut into six wedges. Place wedges on an ungreased baking sheet, leaving a couple of inches between the scones. If desired, instead of icing later, sprinkle generously with turbinado sugar.
9. Bake for 14-17 minutes or until scones have risen, have a light, golden exterior and golden brown edges. Allow to cool on baking pan, or wait 10 minutes and remove to rack to finish cooling.
Make the icing:
1. In a small sauce pan, melt the butter, brown sugar and milk over medium heat. Bring to a boil, whisking continuously. Once the mixture comes to a boil, remove from heat. Whisk in corn syrup, confectioner's sugar, vanilla and cinnamon. The mixture will be thin at first, but will thicken as it cools. Check consistency by whisking and letting the icing fall from the whisk. You want it thick enough to create drizzle lines on your scones, but not so thick that it won't drizzle. Mine cooled for about 5 minutes before it was ready. Watch it closely. If it thickens up too much, you can reheat it, but the texture will be much better the first time around. Drizzle icing over scones and allow to set before serving.
Notes
*Measure your flour correctly. I used the spoon and sweep method. Lighten up the flour by stirring, then lightly spoon the flour into a measuring cup. Sweep excess flour off the top of the cup with the straight edge of a knife. One cup of flour weighs 4.25 ounces for me. If using a scale, I used 9.56 ounces of flour total.
*This recipe calls for both unsalted and salted butter. If you need to use salted butter in the scone dough, eliminate the 1/4 teaspoon of salt. If you need to use unsalted butter in the icing, add a pinch of salt.
*You can substitute all of the individual spices with 3 1/4 teaspoons pumpkin pie spice.
*You can use pumpkin pie spice instead of cinnamon in the icing.
*You can bake the scones with the sugar topping AND then ice them. Some of mine had both toppings.
*The better quality spices you use, the better flavor you'll get in your baked goods. I use good quality Vietnamese cinnamon, China powdered ginger from Penzey's spices and I freshly grate my nutmeg.
*I didn't take any process photos of the mixing and cutting steps. You can check out my Egg Nog Scone post for photos of shaping, wrapping and cutting.
Dionakaye
Wednesday 20th of August 2025
Wow! It's been almost five years since anyone has posted anything about this recipe??!! I have been eyeing it for more than a few months and am now endeavoring to make these wonderful looking scones!
Question: It seems there is a lot of manhandling of this dough prior to baking it since you discourage from adding any additional liquids. What are the chances the scones will come out tough and not tender?
Thank you, Ramona!
Ramona
Wednesday 20th of August 2025
Hi Dionakaye, In the post, I write about the higher ratio of fat to flour which creates a rich scone. This is not like my biscuit recipes, which require a lighter touch. If you follow the directions, you're simply bringing the dough together, almost like a cookie dough. Avoid over mixing and melting the butter with warm hands mixing for too long, but don't worry about doing what you need to do to bring the dough together. I've never had an issue with any of my scone recipes being too tough. I hope you decide to try this one!
Pat
Sunday 4th of October 2020
These are fantastic! Crisp on the outside and soft on the inside. I did add some pumpkin emulsion to the pumpkin/egg mixture. Will definitely make again.
Ramona
Sunday 4th of October 2020
Glad you enjoyed them, Pat! I'm sure the emulsion added an extra boost of flavor :)
Enid
Thursday 2nd of July 2020
Hi. I just read this recipe and want to make it. However there's a discrepancy between the list of ingredients and the cooking steps. In the list of ingredients you specify 1/2 heaping cup pumpkin puree, the cooking steps specify 1/4 cup of pumpkin puree. I wonder if you could let me know which is the correct amount. Thanks!
Ramona
Thursday 2nd of July 2020
Hi Enid, the recipe is actually correct. So, the ingredients say 1/2 cup of puree. The first step of the directions instruct you to squeeze the pumpkin between paper towels until you're left with about 1/4 cup of pumpkin. Basically, you're squeezing water out which will turn 1/2 cup of pumpkin into much less. In fact, the directions further say that you may need to use slightly more pumpkin to get to your 1/2 cup especially if your puree is particularly watery. You will be surprised how much water is in some pumpkin puree. Does that make sense? Let me know if I can help further.
Ruth
Thursday 7th of November 2019
Ramona, these scones look luscious AND I want to make them! Just a quick question. When you were experimenting, did you by any chance try briefly cooking the pumpkin in a sauce pan over low heat to remove some of the liquid. This just sounds easier to me than the paper towel method. Do you think it wound work?
Ramona
Thursday 7th of November 2019
Hi Ruth! You'll see in the post that one of the methods I used to remove liquid was, indeed, cooking the pumpkin on the stove top. So, yes, I absolutely tried that. Of course, then, you have a pan to clean. You also have to wait for the pumpkin to cool before adding it to the scone mixture. At that time, I was also trying to remove significantly more moisture than I did towards the end of the trials. Now remember, I was changing multiple variables with each trial, so it's possible to learn something different from each trial and take what you like best into the next trial. So, you could just cook the pumpkin down, but you could use the paper towel method instead and be done before your pan even heats up. After all of the different trials, I have to say that the paper towel method worked the best. It removed the right amount of liquid and was the fastest, easiest and cleanest method as well. So that method, along with using cream cheese, instead of heavy cream as I do in many of my scones, turned out to give me the texture I was seeking. Let me know how they turn out for you!