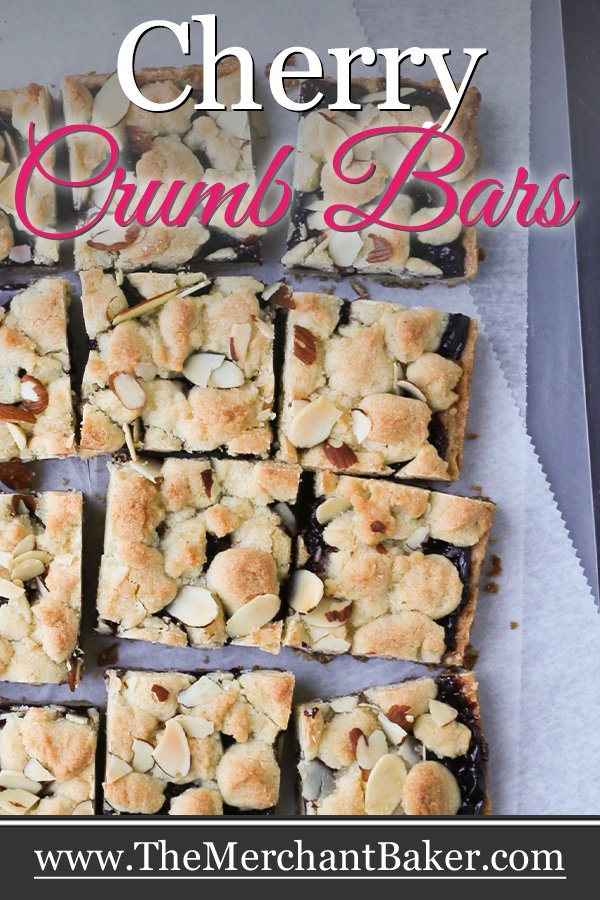

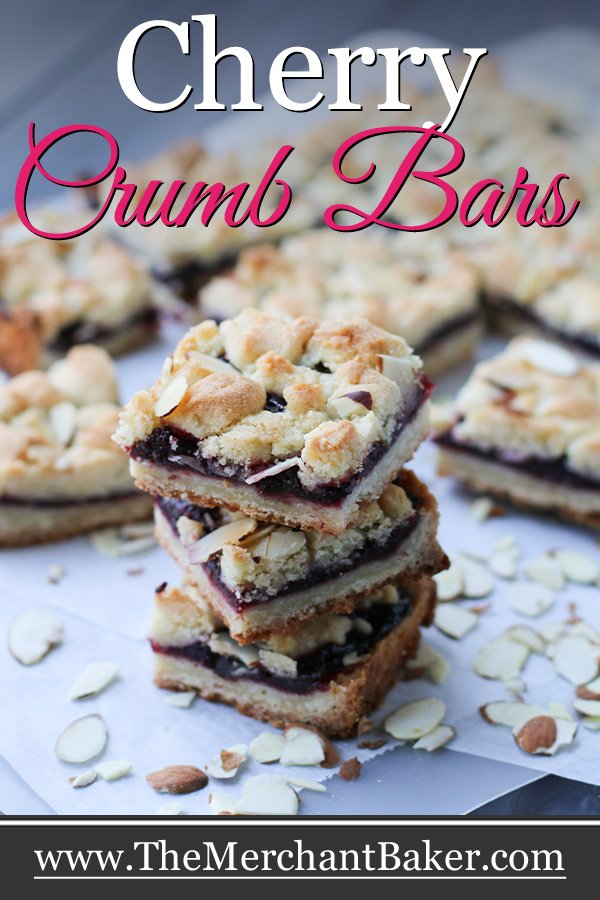


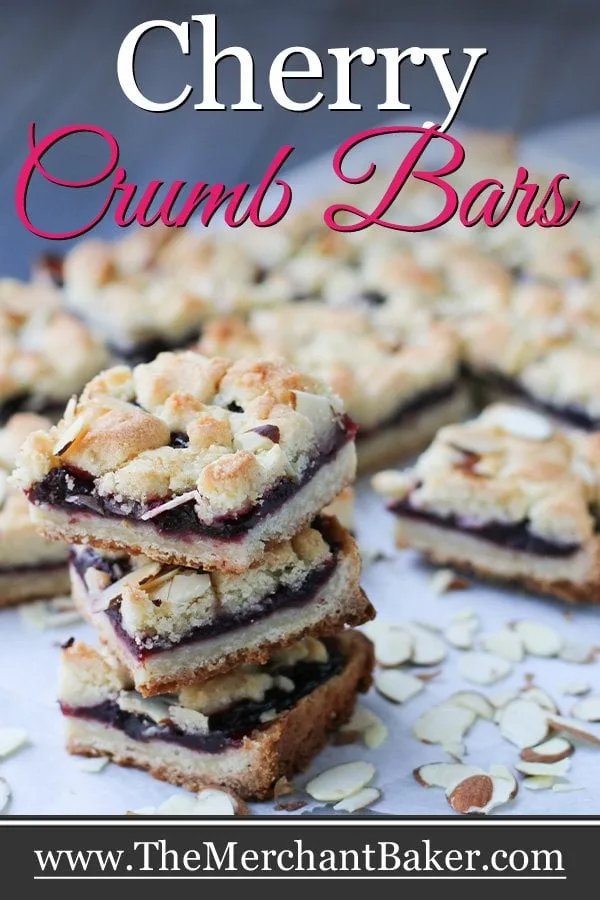

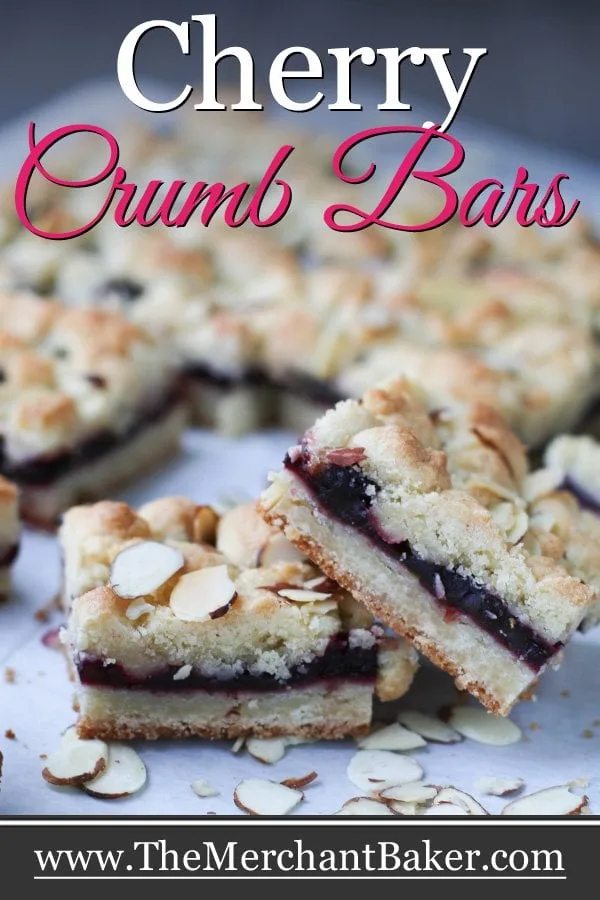
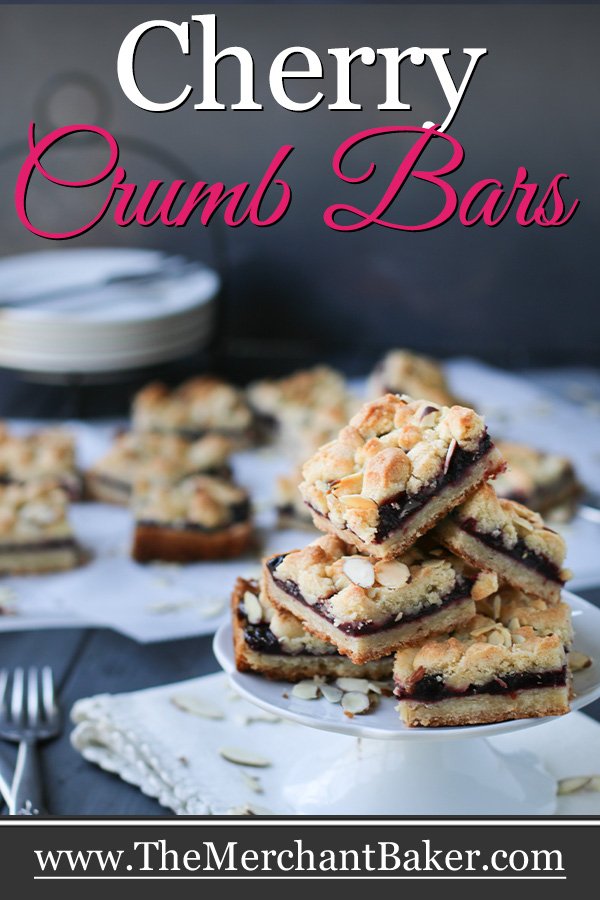

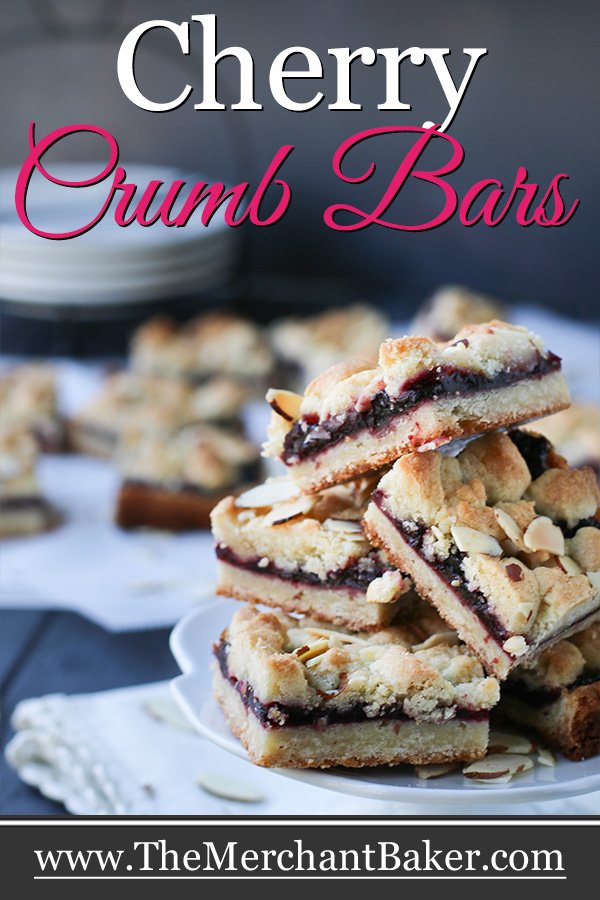
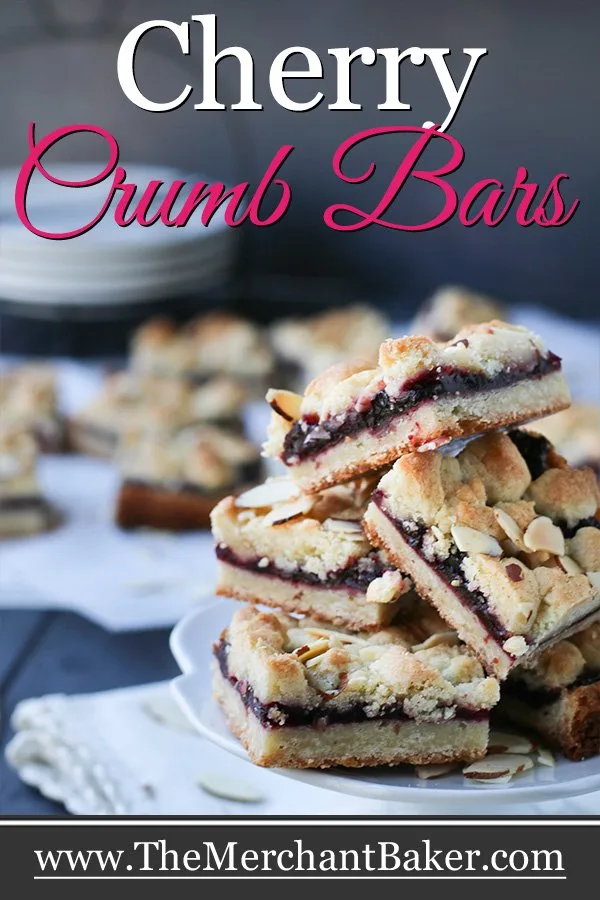

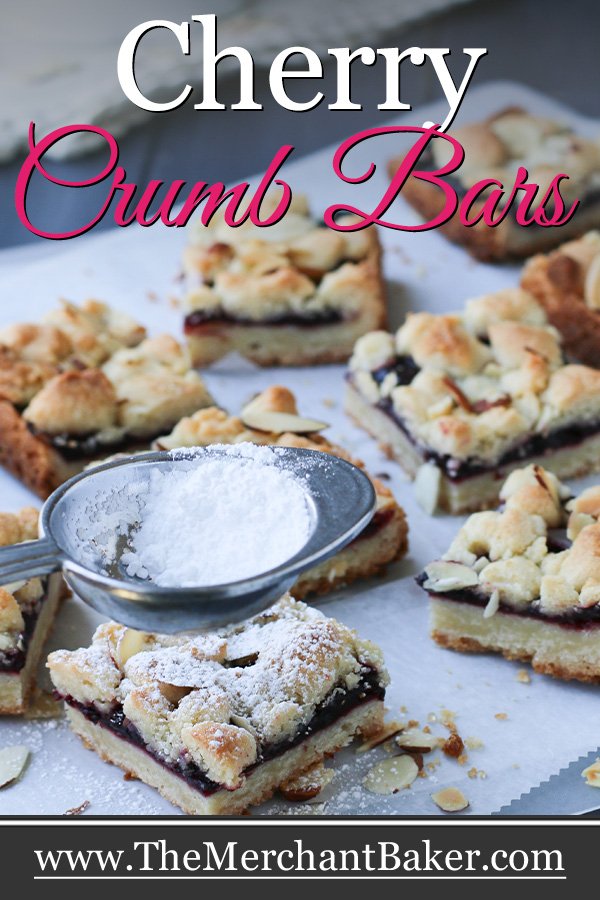


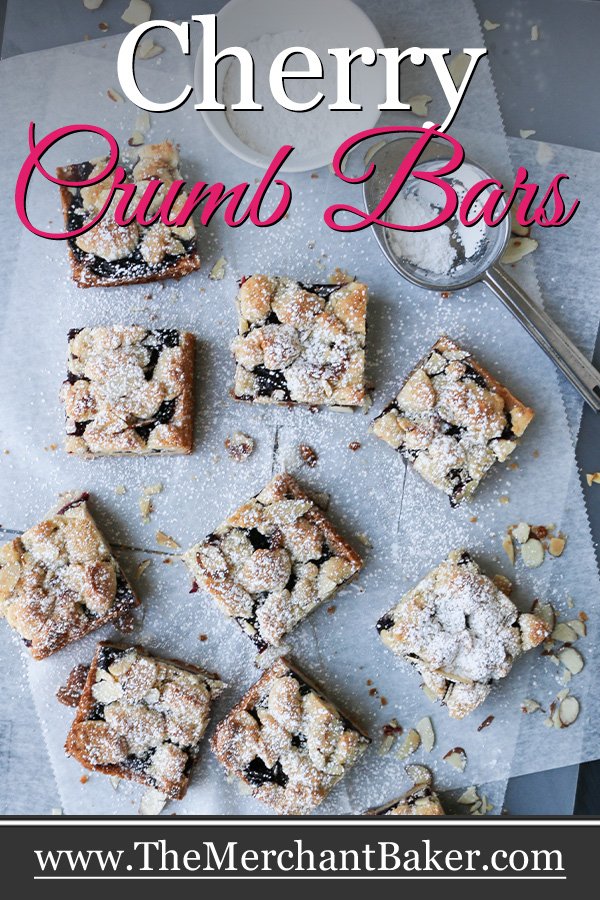

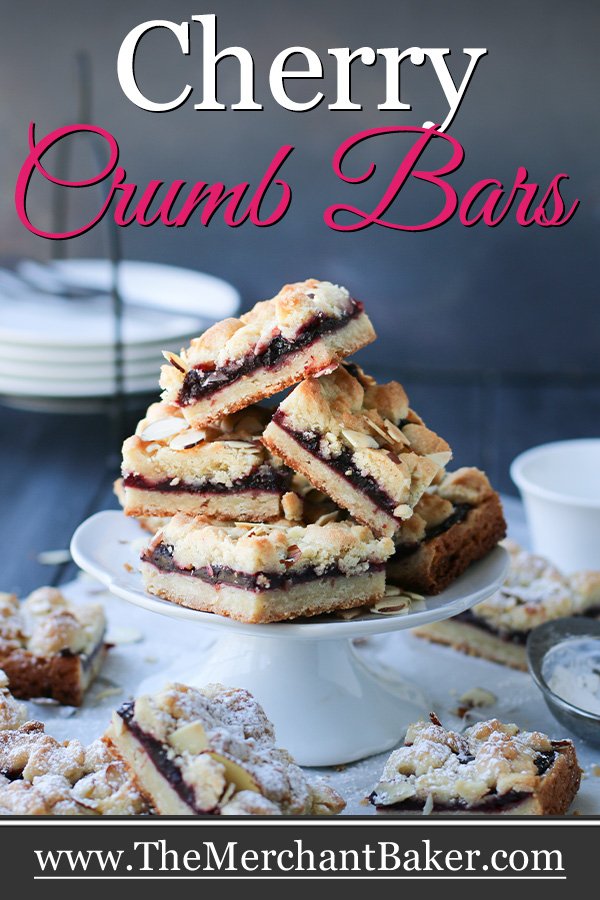

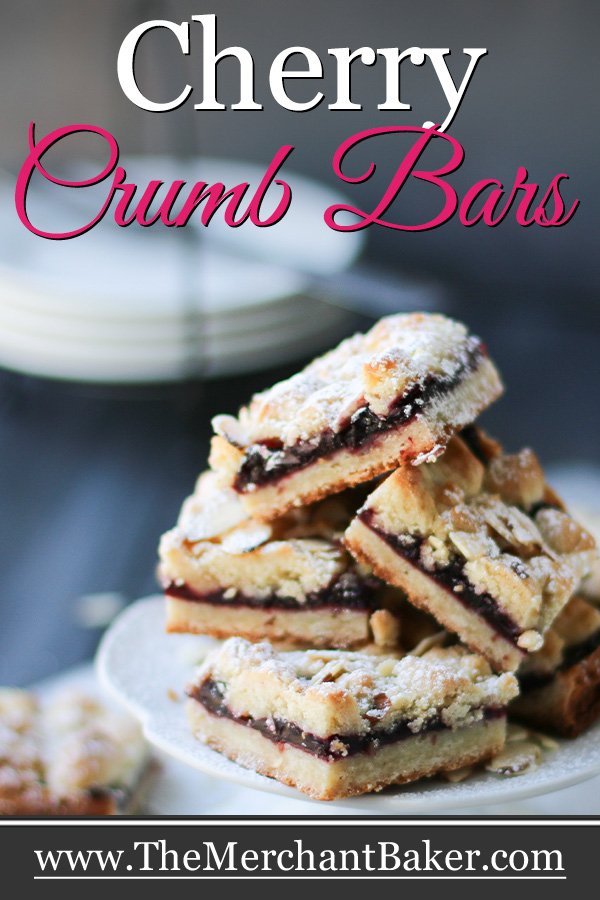


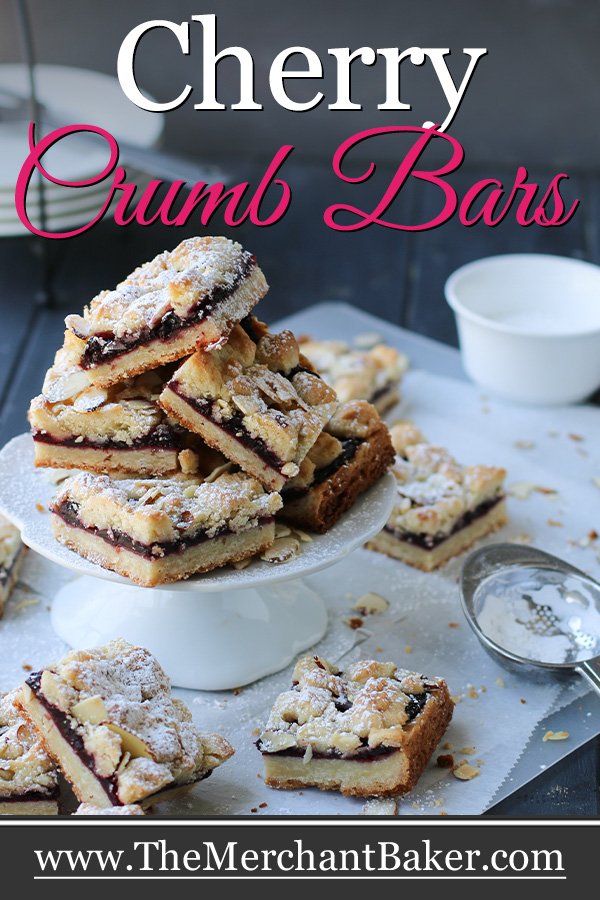

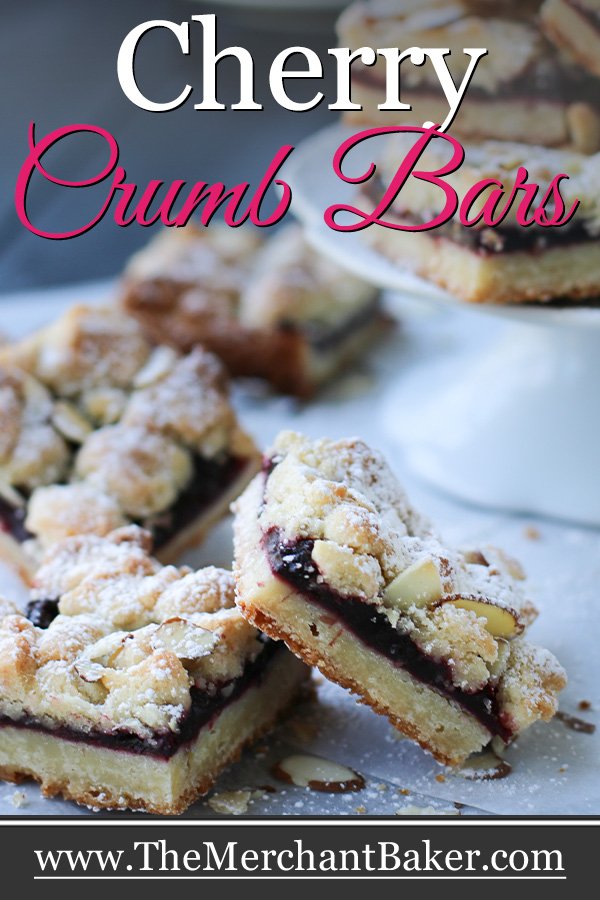


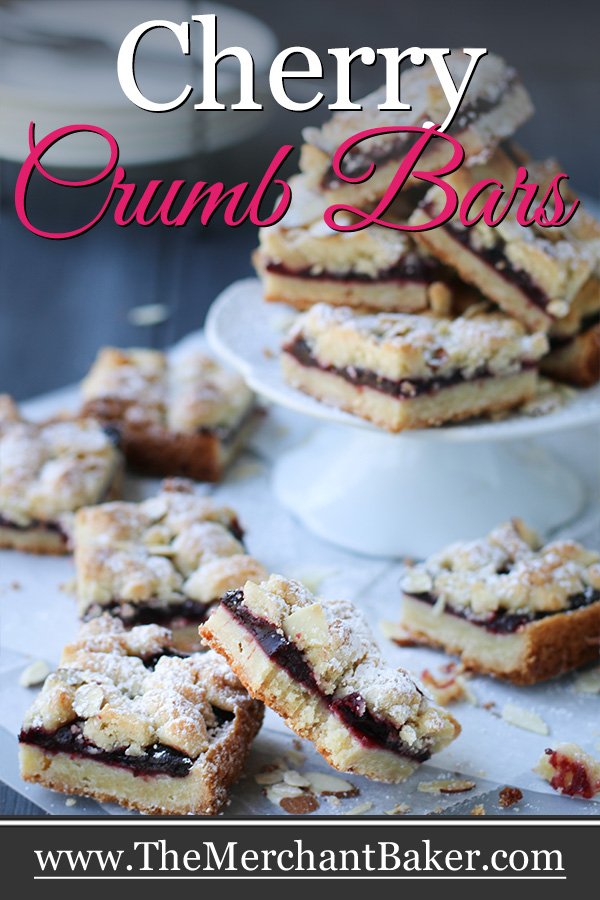


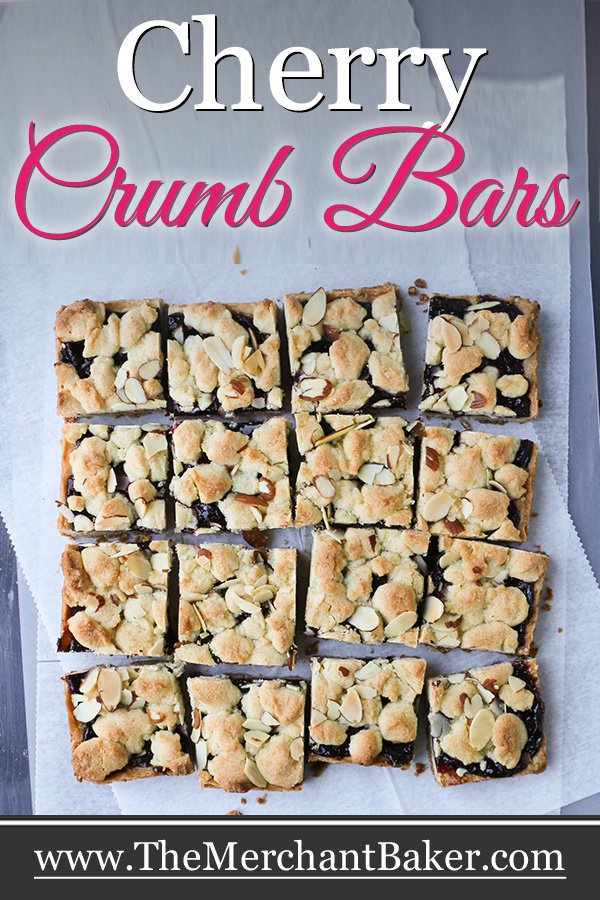

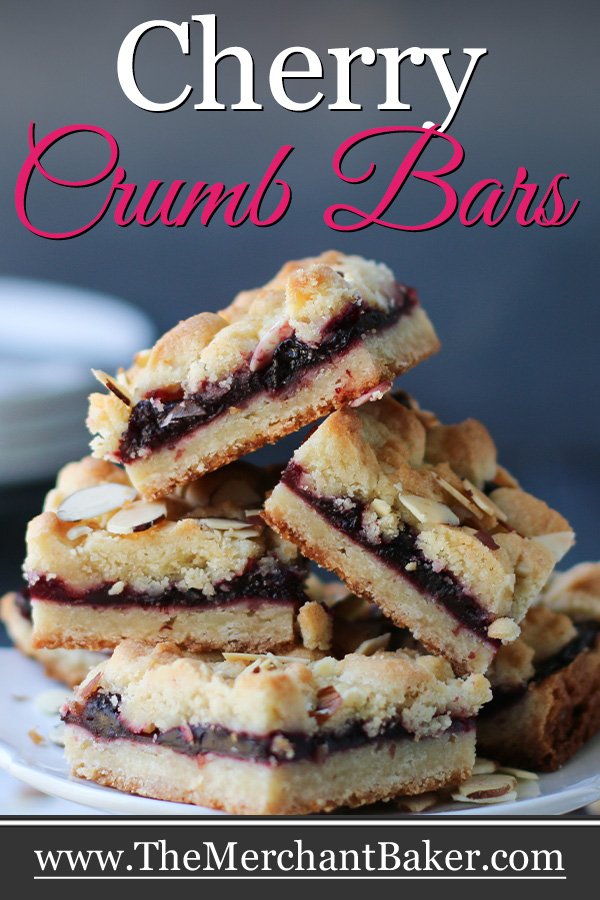
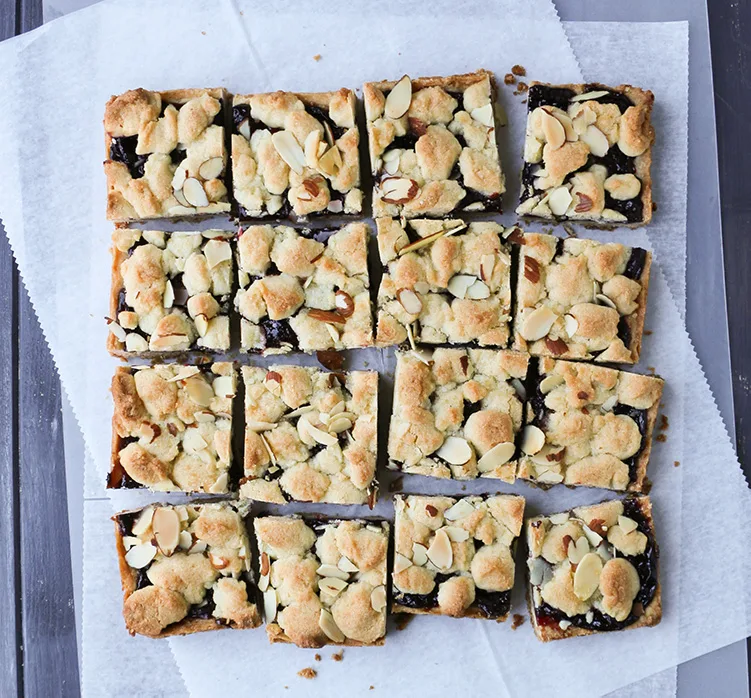
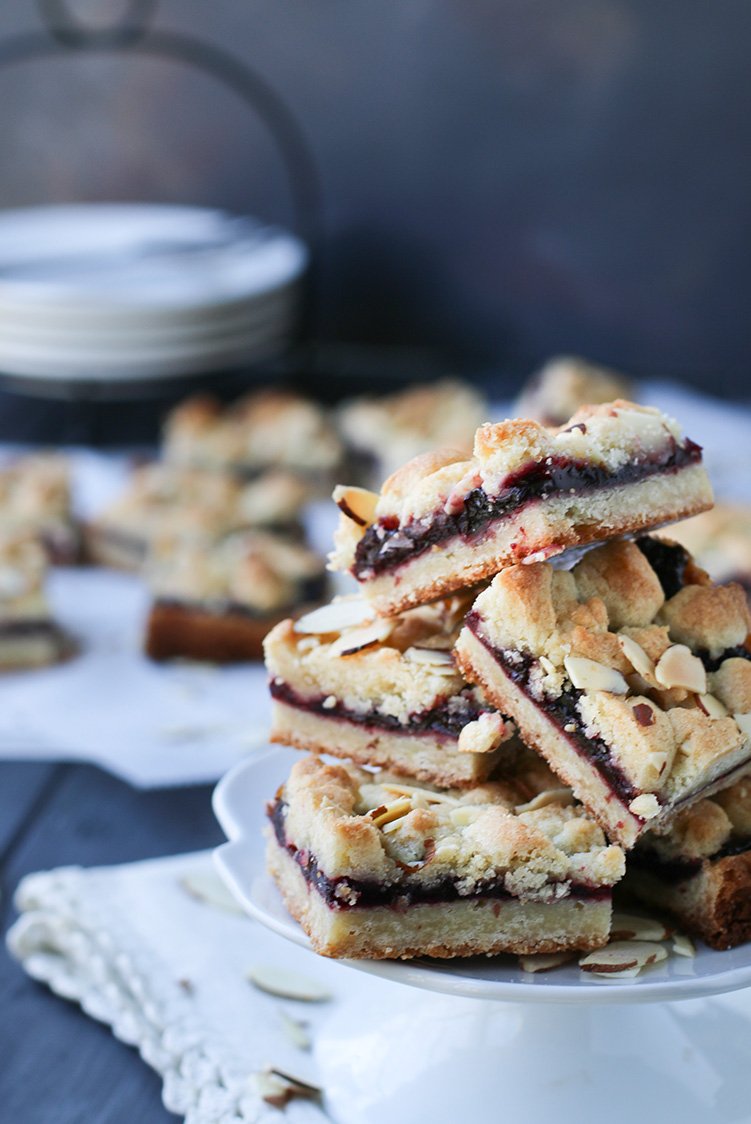
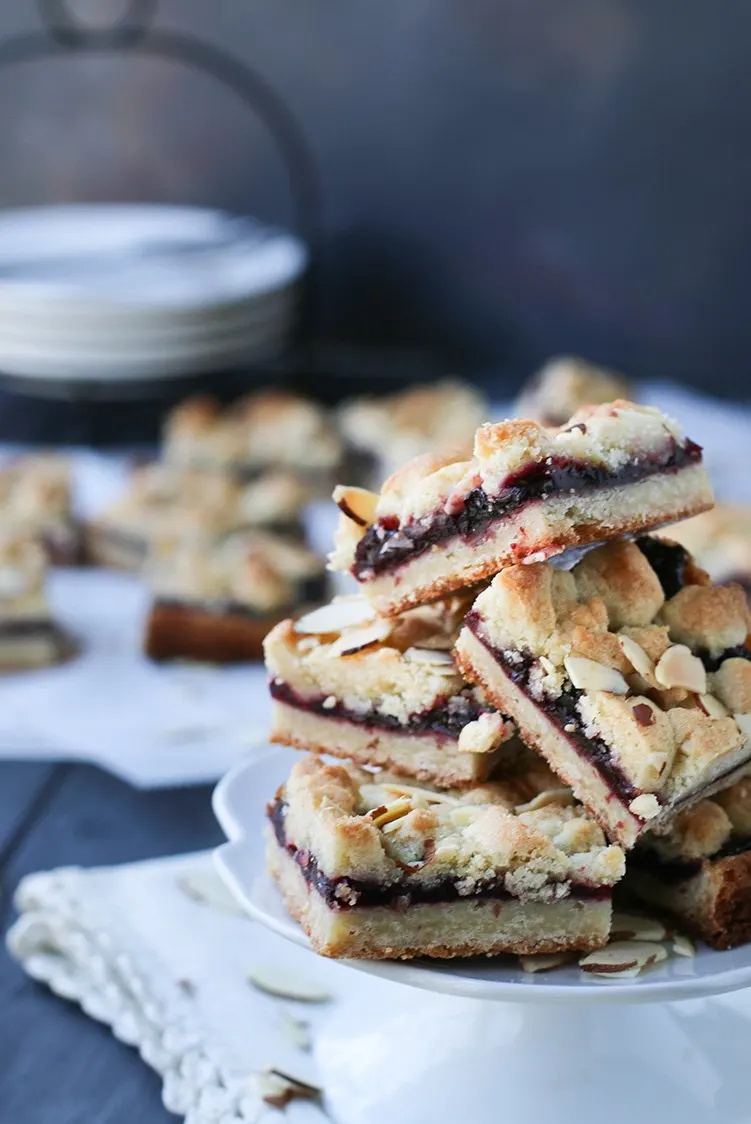
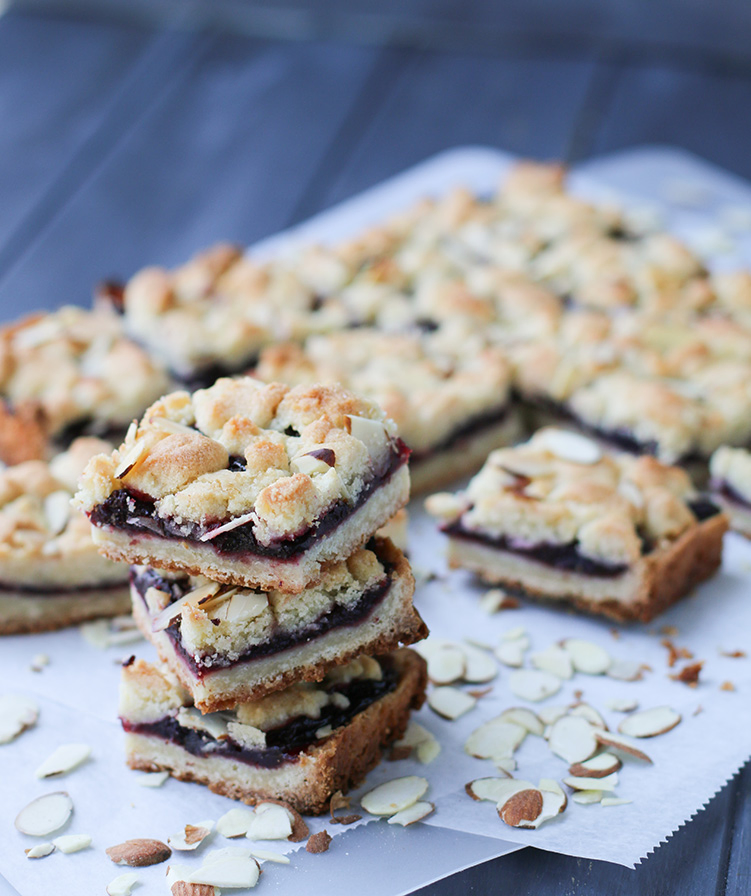
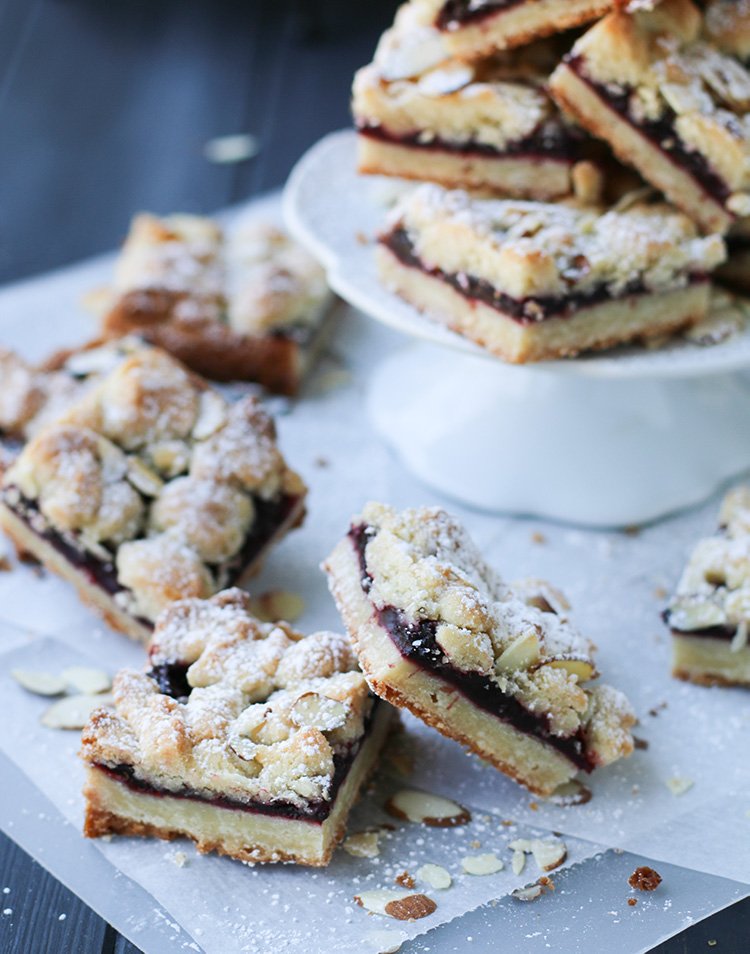
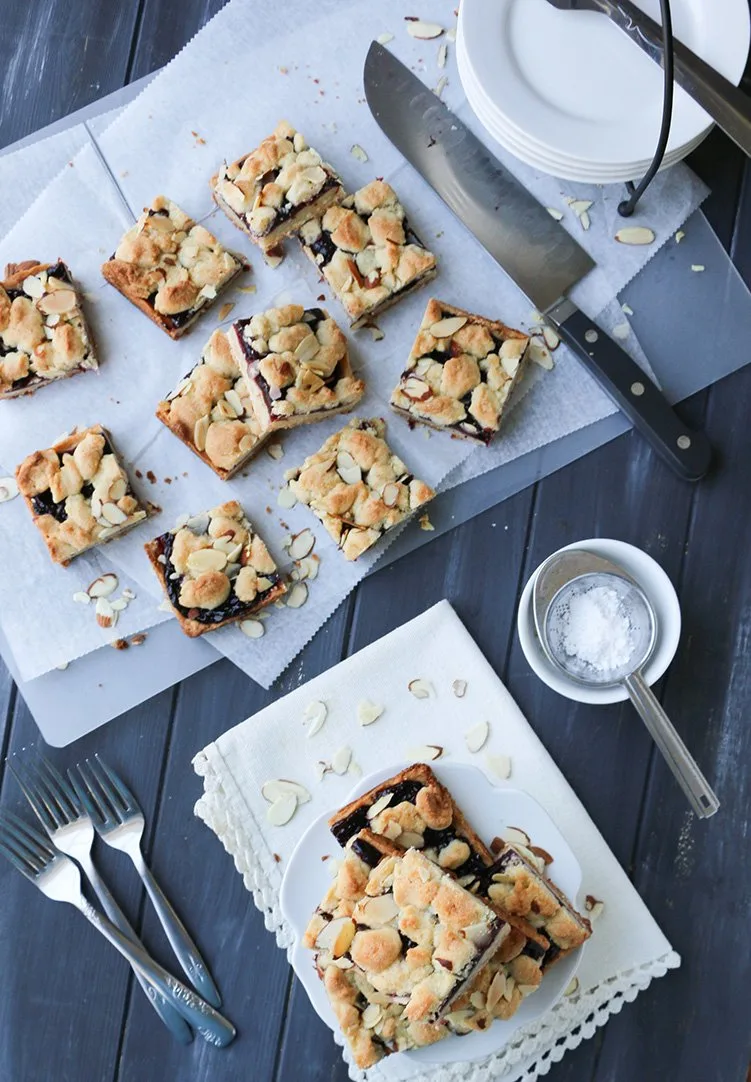
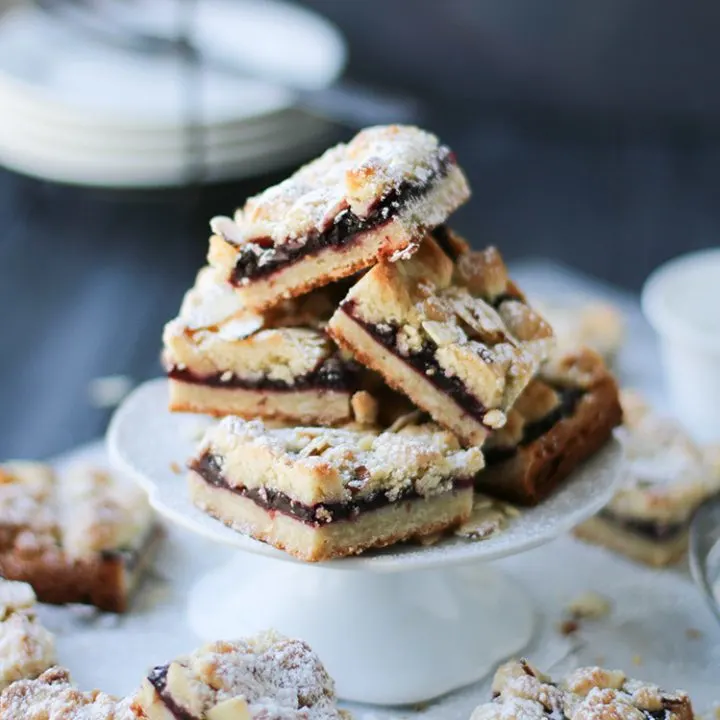
Cherry Crumb Bars are filled with an easy, stove top cherry pie filling. A tender cookie crust serves as the base of the bar. Then, almond flour is added to reserved dough from the crust and scattered like cobblestones over the pie filling. Once they’re baked and golden, cut them up into easy to eat bars. They’re like portable slices of cherry pie!
I had originally planned this post for February…you know, right around the whole President’s Day time frame. It’s always a good time to add something to my cherry recipe arsenal.
One of the first recipes I posted that involved cherries was this Apricot Cherry Slab Pie. Slab pies are so delicious!
They’re a great pie to serve to a crowd because they’re so easy to slice up. I like to think of them as a giant pop tart. Delicious!


Granted, most of us aren’t serving crowds these days, but there’s nothing that says that you can’t make a smaller slab. My Lemon Lime Cream Slab Pie is simply a tart recipe that was doubled. It’s easy enough to cut it back in half.
Then I made a Sugar Cookie Cherry Cobbler. I’m definitely a biscuit cobbler kind of girl, but the sugar cookie spin on it was fun and everyone loved it.
I’ve posted a Fresh Sweet Cherry Sauce that is amazing on ice cream, or as a topping for Chocolate Chip Cherry Cheesecake…
The cherry sauce is really easy to make. And, you can use fresh cherries or frozen cherries. I love a fresh cherry, but I have to tell you…the ease of frozen cherries that don’t need pitting is a bonus! And it makes just as delicious of a sauce.

So, I wanted to make Cherry Crumb Bars using that sauce as the base for a pie-like filling. I wanted to be generous with the filling. I didn’t want a small ribbon of cherry running through my bar; I wanted something more substantial.
You’ll need to make the filling before you begin the recipe, so let’s start there.

How to Make Stove Top Cherry Pie Filling
Don’t let this extra step dissuade you. Making cherry pie filling on the stove top is quite easy. It all happens in one pot, and if you use frozen cherries, the process is even easier.
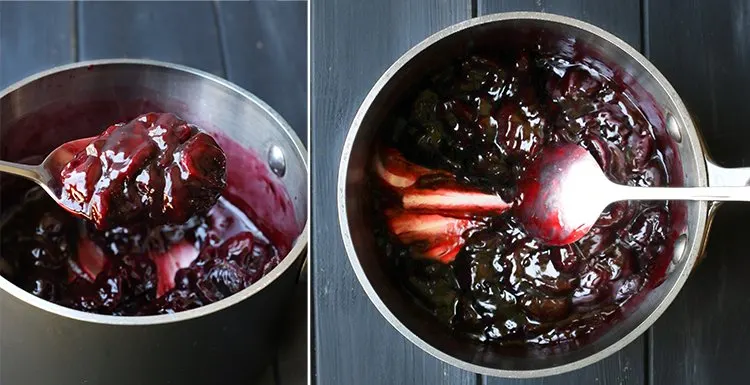
I used frozen sweet pitted cherries. The cherries I bought were whole. Whole cherries would be a bit too bulky for the bar. So, I quickly sliced them (while frozen) in half and tossed them right into the saucepan along with sugar, lemon zest and salt.
Bring to a boil and allow to simmer for 1-2 minutes. As they cook, they turn such an amazing color! I love that deep rich cherry red. Beautiful!


As they cook, the cherries will give up a lot of liquid. Remove some of that juice and mix it up with some cornstarch.
Add the cornstarch mixture back to the saucepan and stir well. Bring it back to a boil, then reduce to a simmer until thickened, stirring occasionally.
You’ll know it’s done when it’s thick enough to scrape the bottom of the pan and leave a trail. This happens quickly. Don’t overcook it or your mixture will become too thick and you’ll dry it out.
We need this mixture to cool, so let’s get it out of that hot pan and into a heat proof bowl. That will speed things up while we make the crust.

What can I use if I don’t want to make the pie filling from scratch?
I’m going to maintain that making that filling from scratch is the best move, but I can appreciate a shortcut just as much as the next person. So…
- Yes. You can use canned pie filling. I’m not a huge fan, especially of canned cherry pie filling. So, I can’t recommend one for you. But, here’s a link that compares four brands that might lead you to the one you’ll like best.
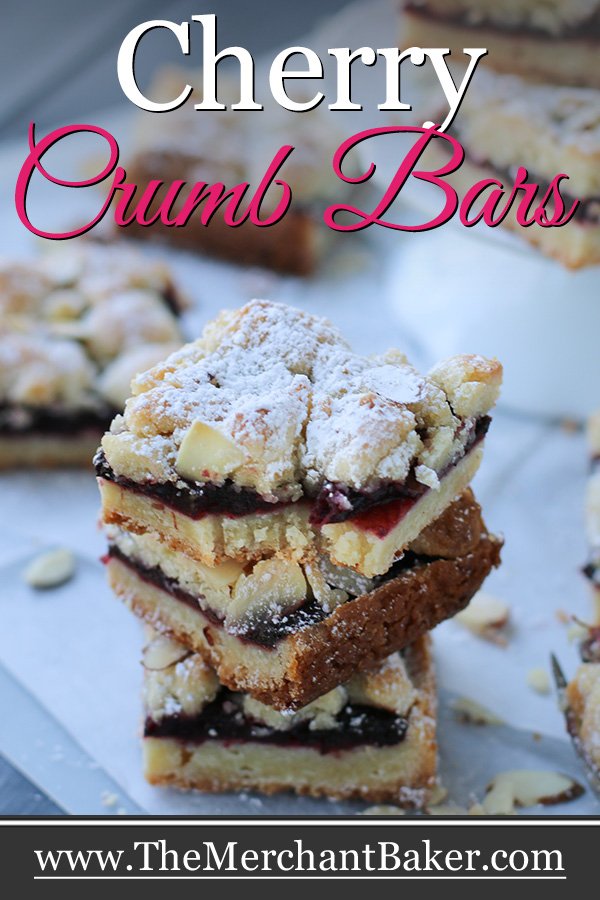
- You can also use jam. (Do not use jelly as it will simply melt during baking.) This is a fun substitute because there are so many different flavors available… apricot, raspberry, blackberry, strawberry and more. I would start with about a cup and go from there. You don’t want to go crazy and add too much. You can see from the photos in this post that I had a generous layer, maybe just under 1/2″.
Making the Crust for Cherry Crumb Bars
While the pie filling is cooling, make the crust.
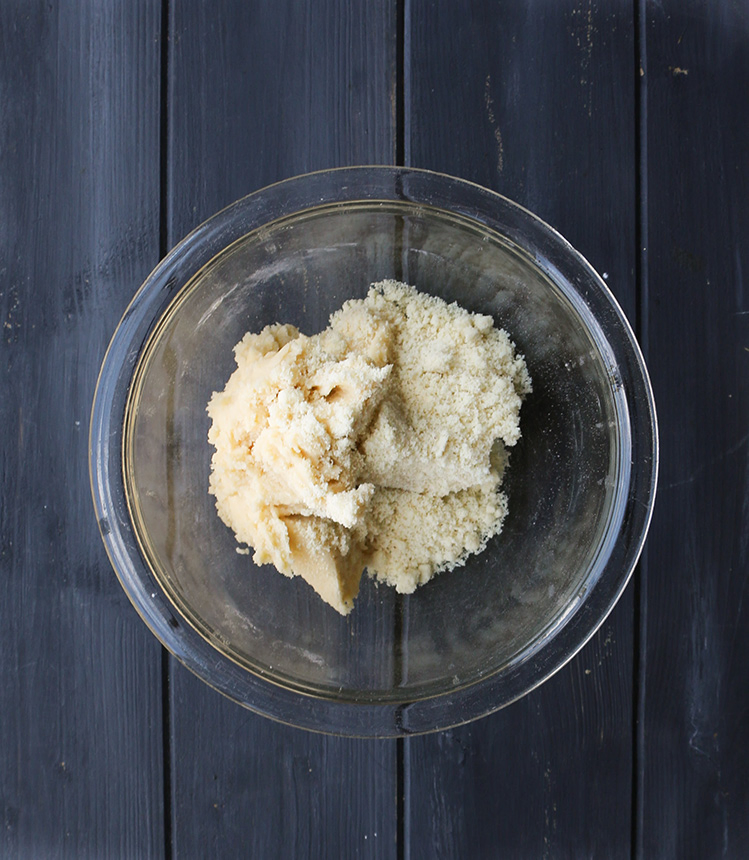
The crust mixes up like a typical cookie dough. Beat the butter with the sugar, add eggs and flavorings and then end by mixing in the dry ingredients.
I added almond and vanilla flavorings. Almond is a classic pairing with cherry and it smells so good when it’s baking!
You’ll end up with a soft dough. Now, before you proceed, remove about 3/4 cup of that dough and set it aside to use for the topping.

Tips for pressing the crust into the pan
- The first tip is to drop big spoonfuls of dough all over the bottom of the pan. You’re going to have to press the dough into an even layer, so you might as well give yourself a head start. It will be faster to get to “even” if you’re not starting with a giant hunk of dough in the middle of your pan.
- Use plastic wrap to press the dough. Yes, you use your bare hands to do this. But, if you take a sheet of plastic wrap to press it in, it’s a much cleaner and less sticky affair. Just place the sheet over the dough, picking up and moving the plastic wrap around the pan until you’ve got a nice even layer.
- Remember that you don’t need to press any crust up the side of the pan. Just press it into the bottom.

Parbake the crust
Before we top the crust with our luscious cherry pie filling, we’re going to parbake it. That means we’re going to give it a quick bake before we proceed with the rest of the recipe. “Par” bake simply means “partially” bake.
This gives the crust time to set up a bit before we cover it with something juicy. I do the same thing with my Raspberry White Chocolate Almond Blondies. You’ll often “parbake” graham cracker crusts as well.
Once the crust comes out of the oven, it has to cool. Then, top it with the cooled cherry pie filling.

Making the crumb topping
I’m going to confess right here that this isn’t a crumb topping in the uber traditional sense. It’s not really super crumbly like my Chocolate Chip Crumb Cake type of crumb topping.
I didn’t want it to be the exact same texture as the crust, so I took the reserved crust dough and mixed in almond flour. This is an easy way to leverage the dough you’ve already made while still giving the topping a little of its own personality.
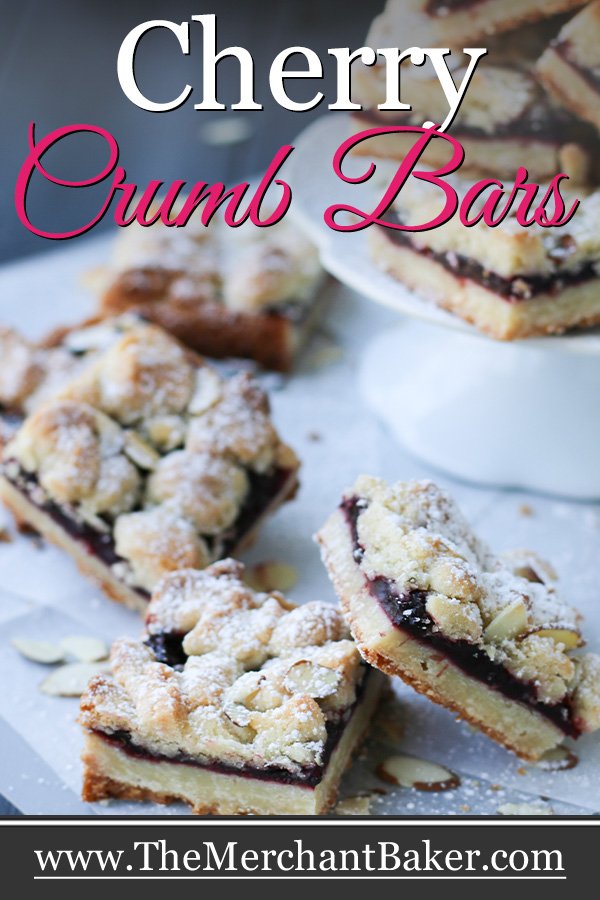
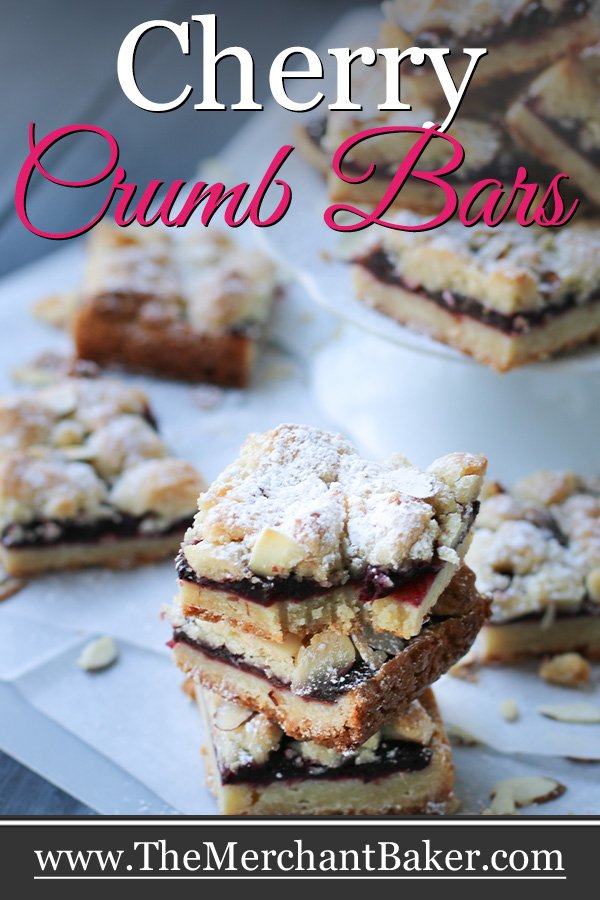
So, it’s not as crumbly of a topping as it is sort of cobblestone-y.
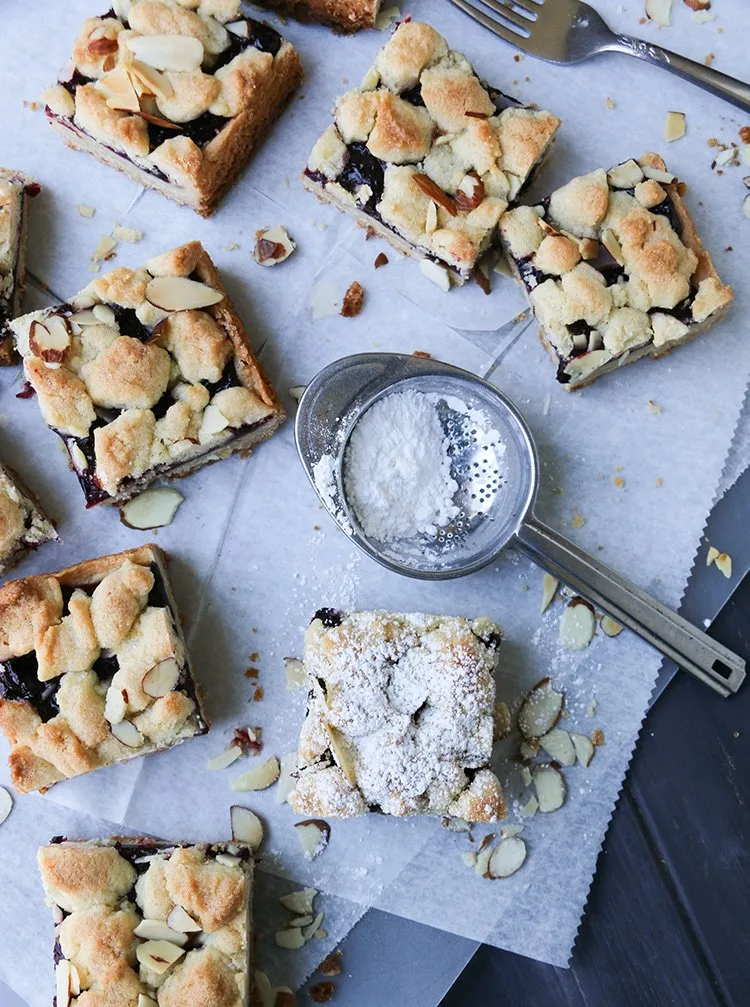
Go ahead and drop small spoonfuls of the crumb topping mixture all over the cooled crust. Then, top with some slivered almonds just to hit that whole almond cherry flavor combo home.

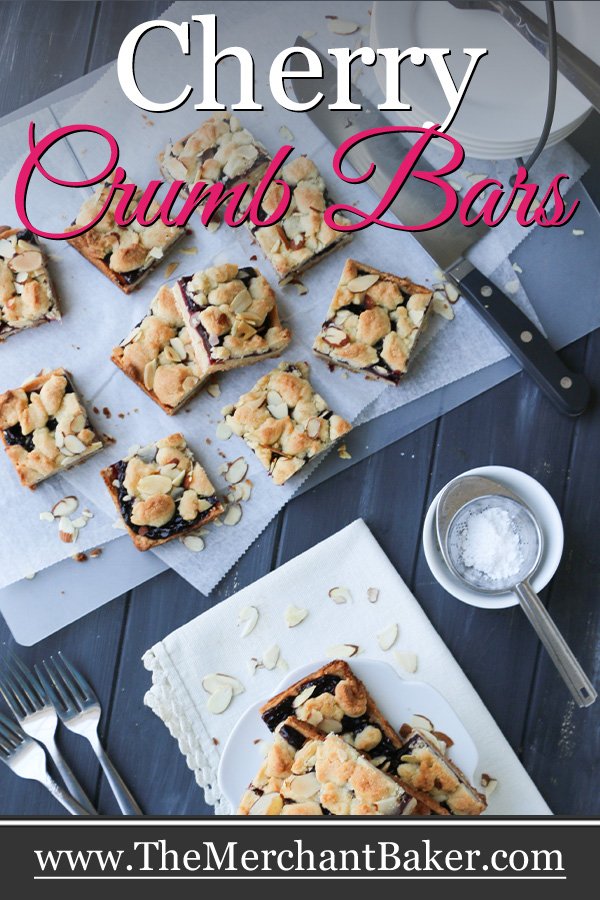
Topping the topping
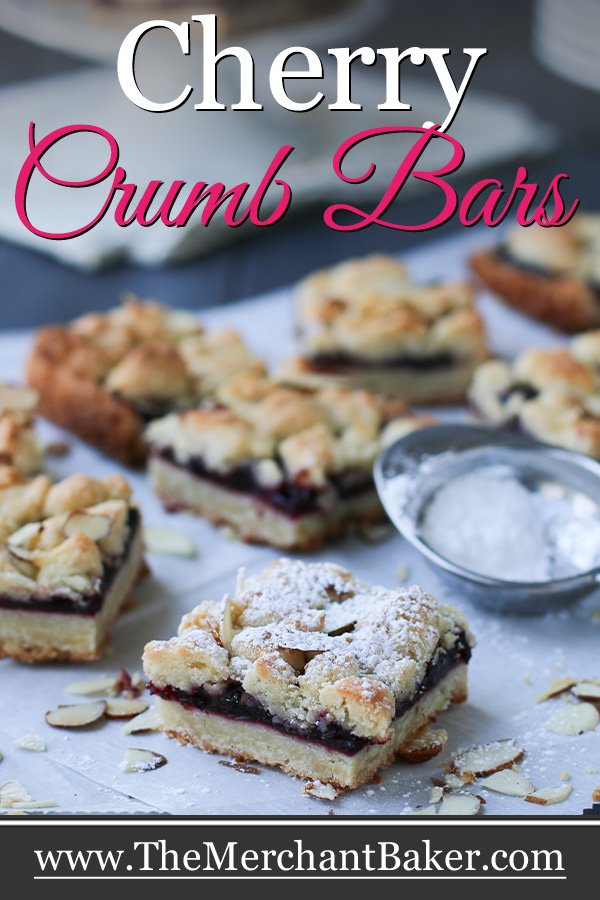
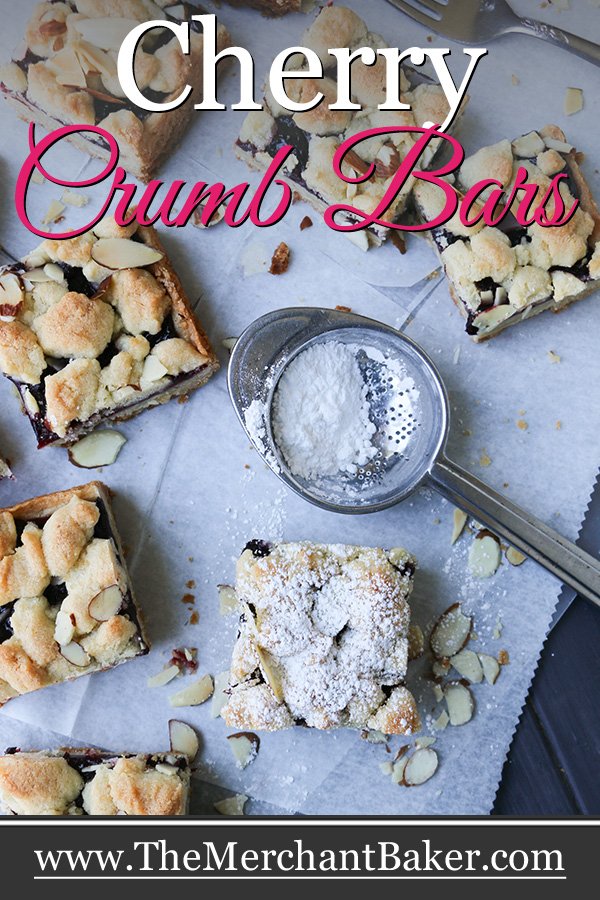
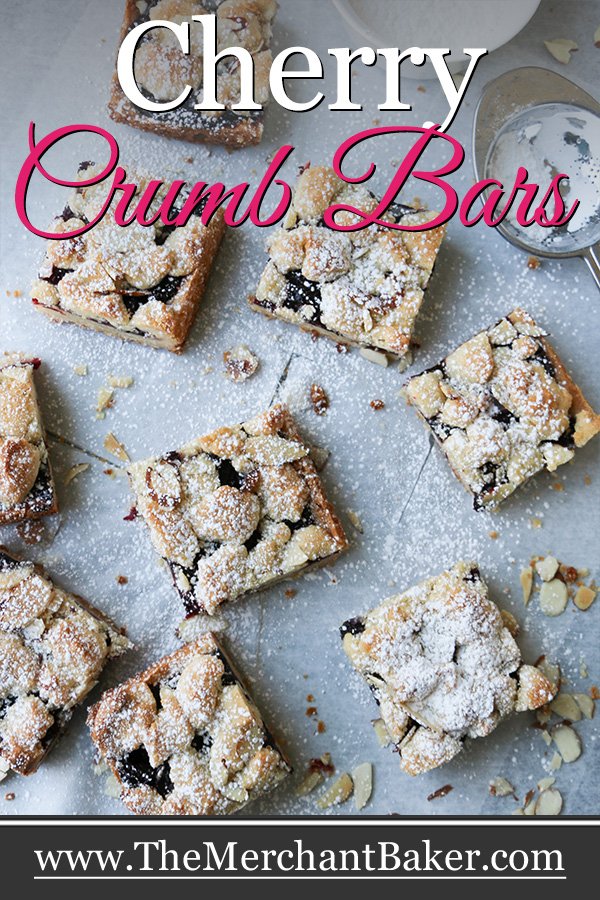
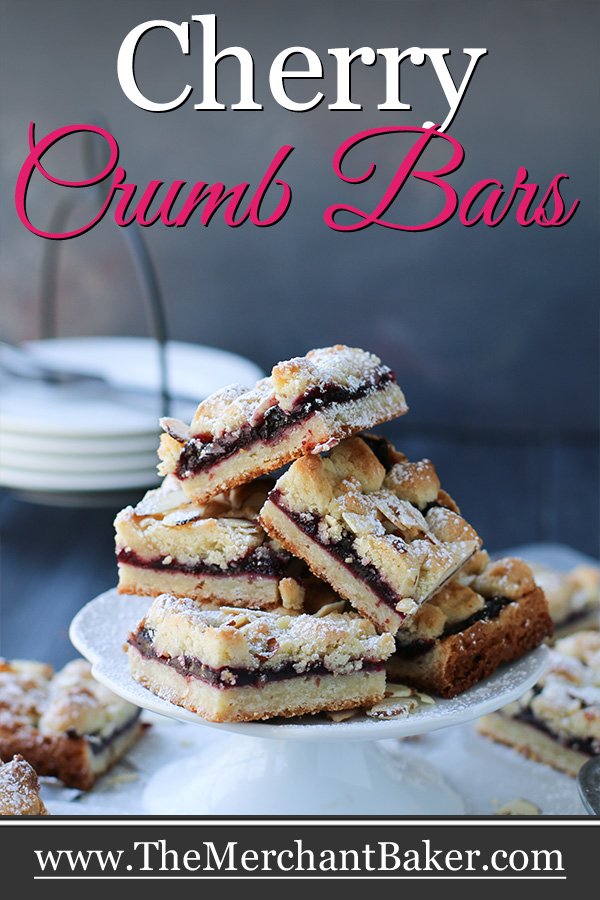
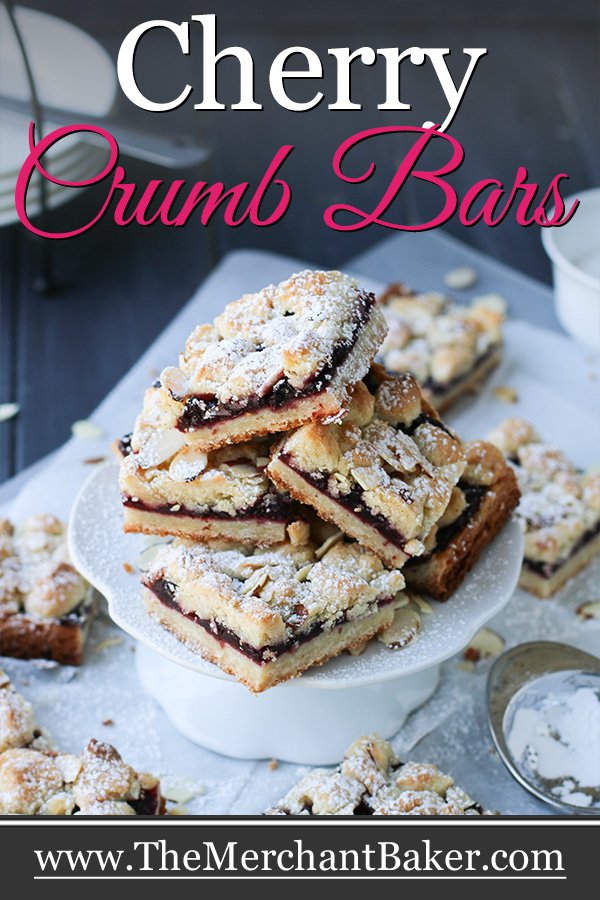
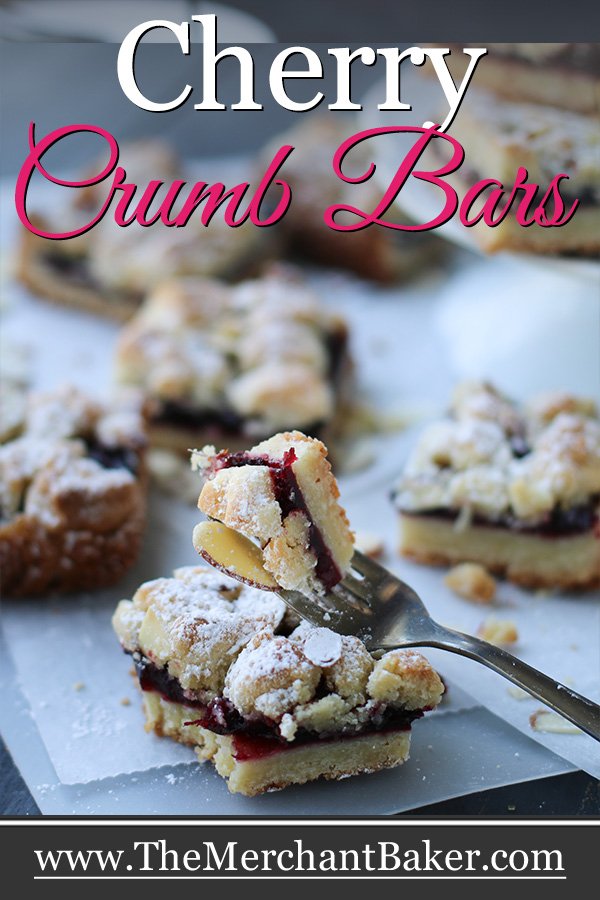
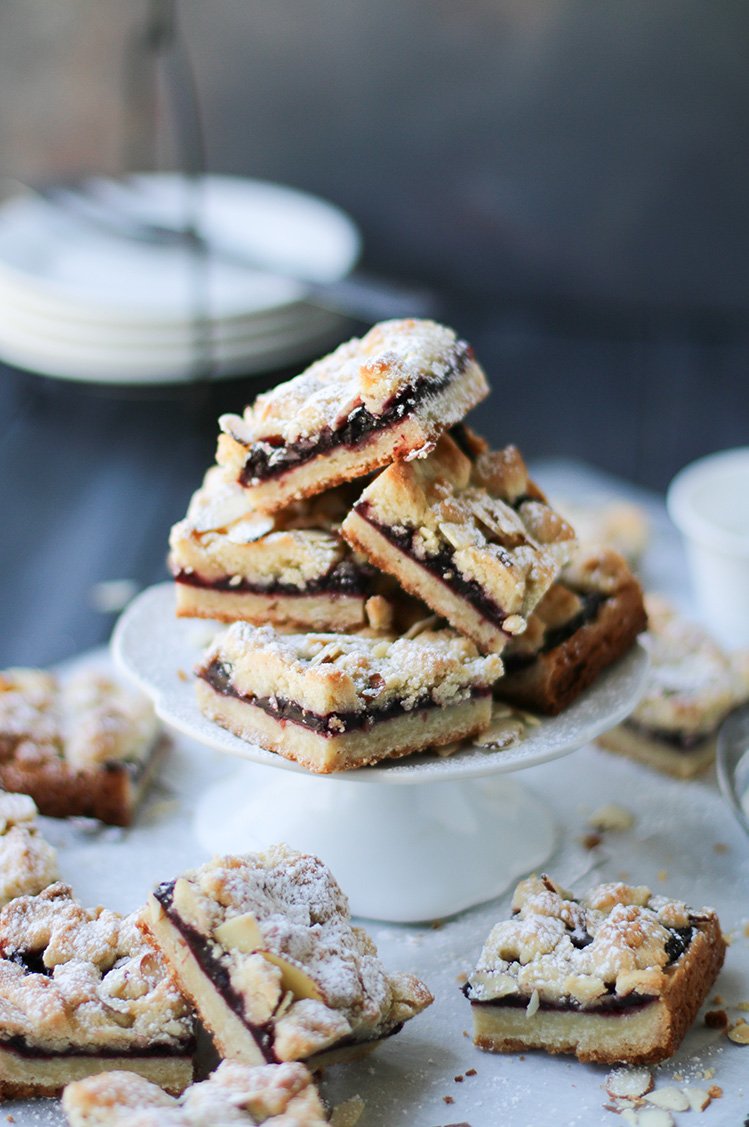
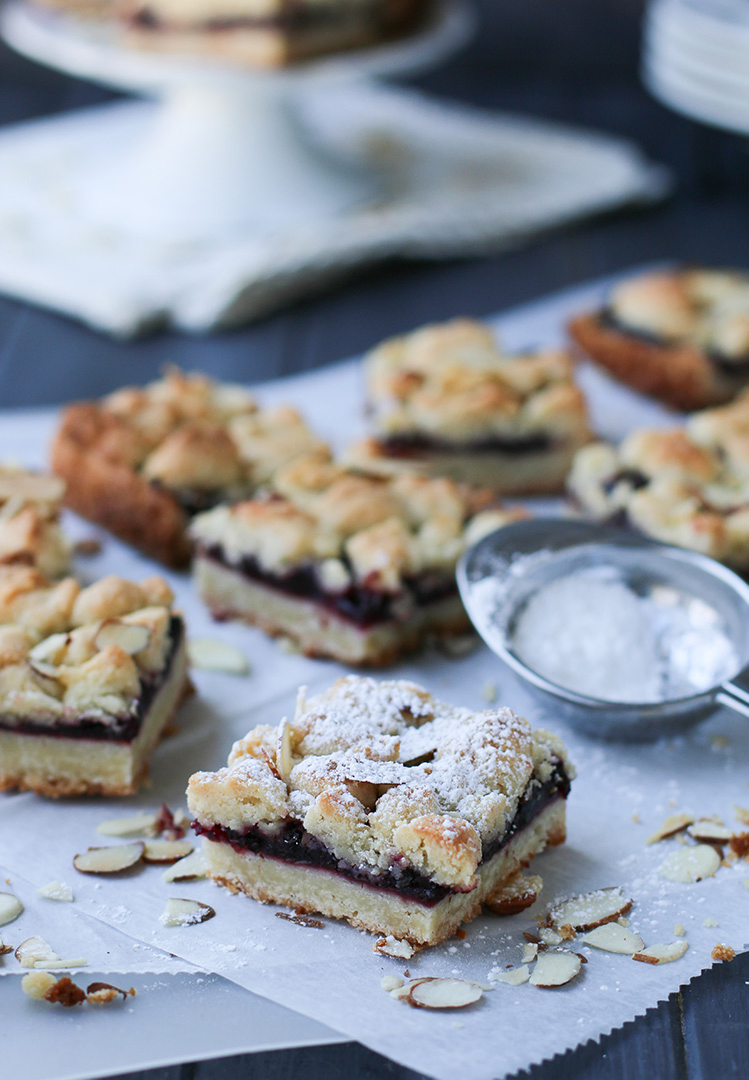
After baking and cooling, cut into bars. Now, you can serve them as is… or, give them a dusting of confectioner’s sugar.
I am a sucker for crumb topping dusted with confectioner’s sugar. I don’t think this bar needs the extra sweetness, but that dusting of white on that cobblestone top always makes me smile.
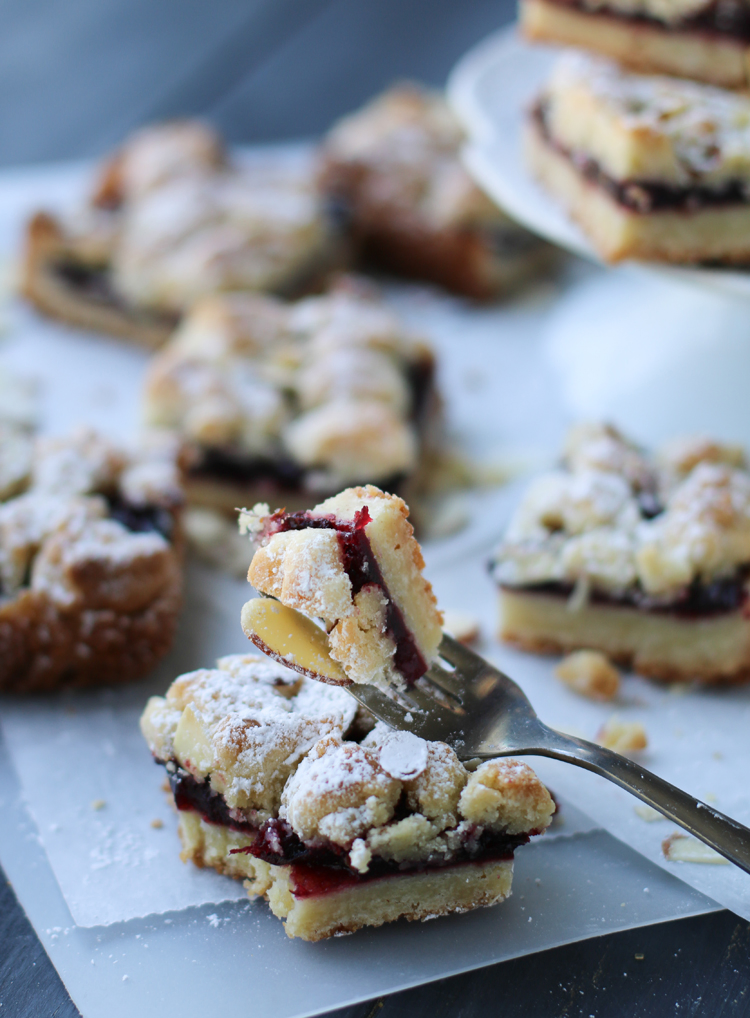
When you’re done, you’ll have lovely Cherry Crumb Bars, filled with delicious homemade cherry pie filling, a tender crust, and cobblestone “crumb” topping.
The hint of almond flavor may remind you of Christmas, but you’ll be quite happy to be enjoying this bar any month of the year.

That’s quite a relief, since, it kind of seems like May is the new February ;)


Cherry Crumb Bars
Cherry Crumb Bars are filled with an easy, stove top cherry pie filling. A tender cookie crust serves as the base of the bar. Then, almond flour is added to reserved dough from the crust and scattered like cobblestones over the pie filling. Once they’re baked and golden, cut them up into easy to eat bars. They’re like portable slices of cherry pie!
Ingredients
For the cherry filling:
- 2 cups halved sweet pitted cherries (frozen or fresh)
- 5 Tablespoons granulated sugar
- zest and juice from one small lemon
- pinch of salt
- 2 Tablespoons cornstarch
For the crust:
- 2 cups all purpose flour
- 1 Tablespoon cornstarch
- 1 cup (2 sticks) salted butter, room temperature
- 1 cup granulated sugar
- 1 large egg, room temperature
- 1 teaspoon vanilla extract
- 1 teaspoon almond extract
For the topping:
- 5 Tablespoons almond flour
- 2 Tablespoons sliced raw almonds
Instructions
Prepare baking pan:
- Line a 9" square pan with foil. Spray bottom and sides with cooking spray. Set aside.
- Preheat oven to 350 degrees F.
Make cherry filling:
- In a small saucepan, combine frozen (or fresh, pitted) cherries, sugar, lemon juice and zest and salt. Bring to a boil and allow to simmer for 1- 2 minutes. The cherries will give off a good amount of juice at this point.
- In a small bowl mix the cornstarch and a few spoonfuls of the hot cooked cherry juice straight from the pan. Use enough of the juice to fully dissolve the cornstarch. It should be a thin liquid. Pour this mixture back into the pan with the cherries and stir to incorporate. Bring the mixture back to a boil, then reduce to a simmer until thickened, stirring occasionally. Remove from heat. Pour into a heat safe bowl and set aside to cool.
Make the crust:
- In a medium bowl whisk the flour and cornstarch together. Set aside.
- In a large mixing bowl, use an electric mixer to beat the softened butter and sugar together until light and fluffy, about 2-3 minutes.
- Add the egg, vanilla and almond extracts to the butter mixture and continue beating until thoroughly combined.
- Gradually add the flour mixture to the butter mixture and mix until well combined. It will be moist enough to hold together.
- Remove 3/4 cup of this crumb mixture and mix with the almond flour until well combined. Set this mixture aside for later.
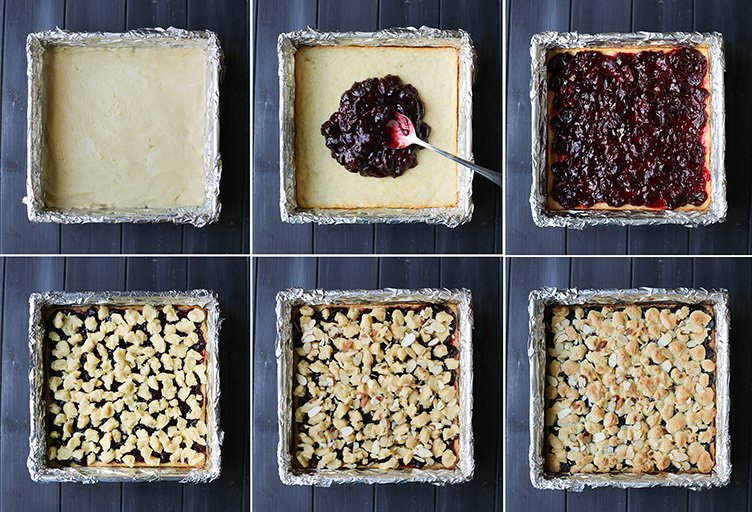
- Press remaining crumb mixture evenly into the bottom of the prepared pan. Bake for 15 minutes or until lightly browned. Allow to cool.
Fill and top:
- Top cooled crust with cooled cherry filling, spreading the filling evenly over the partially baked crust.
- Take the reserved crumb/almond flour mixture and drop small pieces of the mixture evenly over the top of the cherry filling. (See blog post for photos of this step)
- Sprinkle top with about 2 Tablespoons of sliced almonds.
Bake:
- Bake for 30-35 minutes until filling is bubbly and crumb topping is golden brown.
- Allow to cool completely. Use foil to lift bars out of pan for cutting. Sprinkle with confectioner's sugar, if desired.
Store:
- Store bars at room temperature for up to 2 days, then refrigerate any leftovers for 2 more days. For longer storage, wrap each bar individually with plastic wrap or waxed paper and place in a freezer bag, then freeze for up to 3 months..
Notes
*If you use unsalted butter, add 1/2 teaspoon salt to the dry ingredients for the crust.
*You could sprinkle raw sugar on top of the almonds before baking instead of topping with confectioner's sugar at the end after the bars have cooled.
* You can take a short cut and use canned pie filling. See the post for a link to a canned pie filling review.
*You can also substitute jam for the pie filling. There are lots of different flavors of jam, so it would be easy to switch this recipe up. I'd probably use about a cup or so of jam. (Do NOT use jelly. It will just melt away while baking.)
jake3_14
Sunday 5th of May 2024
Another home-run recipe from The Merchant Baker! The crowd I served it to raved about it like they'd hadn't had shortbread in two decades (maybe they hadn't, given that many of them avoid baked goods (except mine))!
Since I always bake for crowds, I made a double batch in a 10x14x2 metal lasagna pan and adjusted the baking times:
- crust: 30 min. - crust + filling + topping: 50 min.
Doubling everything left me with about half the dough reserved for the topping left over, and just about 2 oz. of the filling left over.
Using aluminum foil instead of parchment paper for lining the pan ensures that the crust browns and hardens enough to support the filling. This is a clever technique, something I've come to expect from this recipe design.
Ramona
Monday 6th of May 2024
Hey Jake! Thanks for your detailed comment and great feedback. I love a big batch dessert. I'm glad a double batch worked out well and was such a hit with your crowd!
Karen
Friday 15th of December 2023
Ramona...just a quick question. If I want to make the bars in a 9x13 pan. Would I just make the recipe and then 1/2 it like I did with your delicious pumpkin squares. Thanks Karen. P.S. I will be making those pumpkin squares again for Xmas.
Thanks again.
Ramona
Thursday 28th of December 2023
Hi Karen, so sorry for the delayed reply, but yes, doing 1 1/2 batches would work fine here as well. I hope all worked out well!
picosinge
Thursday 3rd of June 2021
This is such a versatile and absolutely delicious recipe! Made it according to the recipe with cherries, tried it with peaches, and sliced apples with a bit of leftover blackberry jam (you know, the almost empty jar at the back of the fridge). Most recently a friend who has fig trees and the unusual dilemma of having too many frozen figs from last season asked for "help". I cooked the figs with some cardamom and finely chopped ginger (and sugar and cornstarch, just like you did with cherries), added some finely chopped fresh rosemary into the dough, and substituted almonds with pine nuts. It was out of this world.
Thank you SO much for sharing this recipe!
Ramona
Monday 7th of June 2021
You are so welcome! I'm loving hearing about all of your variations. And the fig version? Wow! Sounds incredible! Thank you for sharing :)
FG
Saturday 13th of June 2020
Thank you for sharing this recipe! I had some cherry pie filling left over from baking a pie. Did not want to turn on the large oven and thought will give this a try since the 8x8 pan fits into my Breville Mini oven. After preparing the bottom crust and the topping, I got busy and stuck everything in the freezer for a couple weeks. Finally got around to making it, defrosted in fridge overnight, baked according to direction, and came out absolutely delicious! Perhaps my pan is smaller, and I have some topping leftover (enough to top a 6" mini single-crust peach pie; the almond flavor perfectly compliments peaches). The only adjustments made are: 1. reduced the sugar in the crust to 3/4 cups (just a personal preference) and 2. increased the final baking time to 45 minutes (simply because I was using the toaster oven).
Sorry for being so long-winded. I have been playing with recipe for the last month or so that would adapt to being made in the toaster oven to avoid heating up the house. This is a wonderful and super forgiving recipe. Thank you!
Ramona
Saturday 13th of June 2020
FG, thanks for sharing your experience with the recipe. I can write 1000 words in a snap when I'm talking about food, so no worries on being long winded. That's what we do here, lol! I love hearing about making it your own and learning from what you've done. I think recipes are a great jumping off point and I'm glad you were able to make it work out just the way you wanted to. I'm all for reducing sugar, so I'm glad to hear that worked out well. It's great to know that freezing and baking later worked like charm. And peaches? Yum! Perfect for peaches :)