


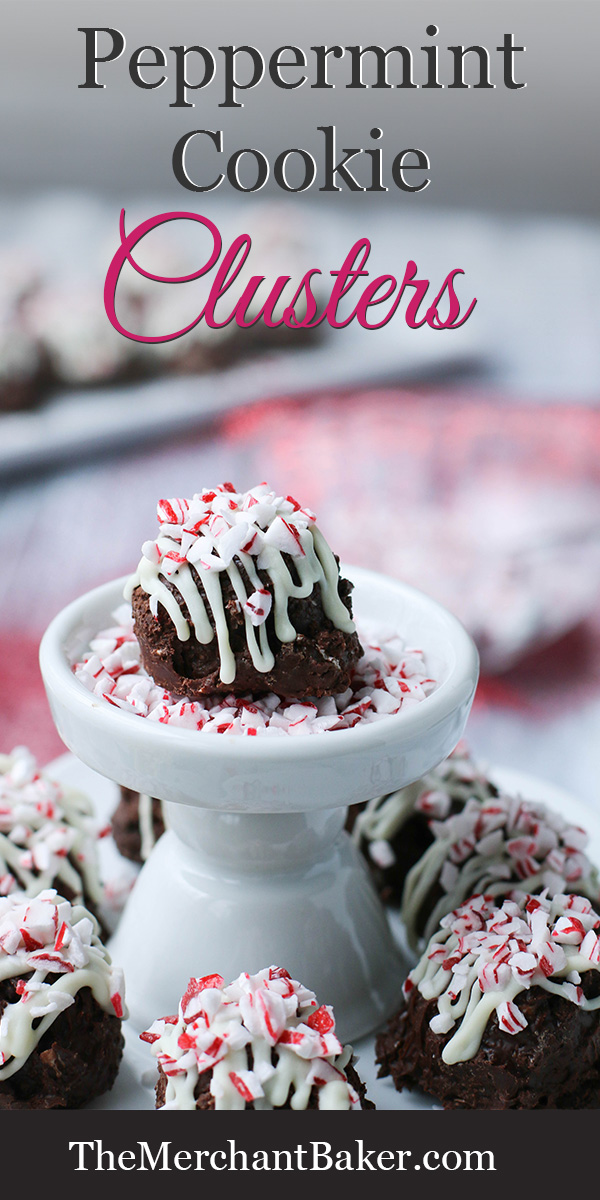


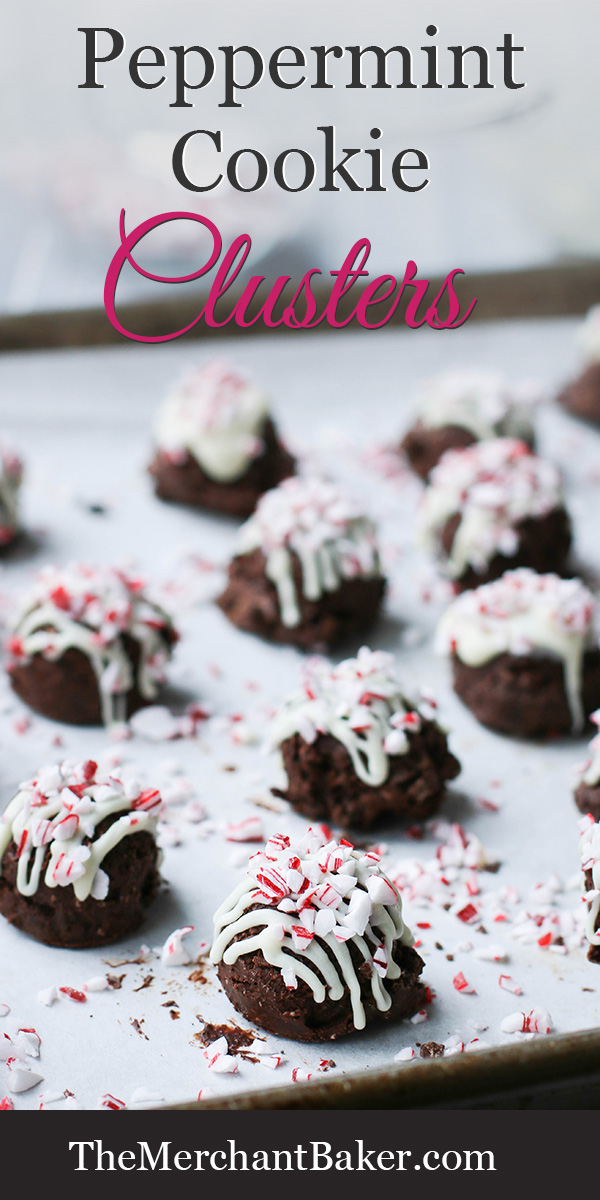


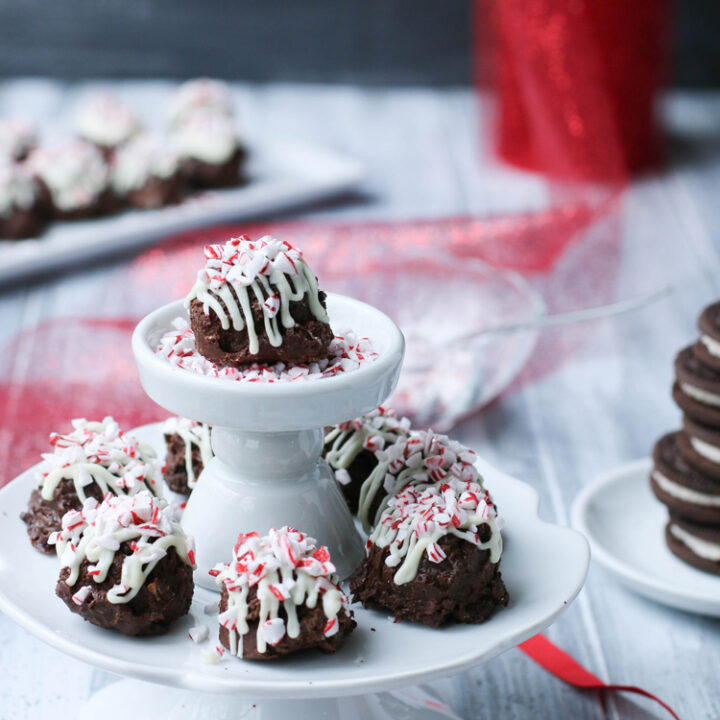
Peppermint Cookie Clusters are a delicious, easy to make chocolate candy that’s a combination of peppermint, cookies and cream, and a chocolate candy cluster. It’s like a chocolate covered sandwich cookie, but crushed and clustered instead of dipped. Perfect for gifting or your holiday trays!
I couldn’t let the holiday season go by without an easy to make candy to add to your festive holiday trays or to give as gifts. I love peppermint and just about everything minty during the holidays. (See list at the end of this post for some other faves :)
I haven’t actually started my official holiday baking yet, but I love having a last minute easy recipe to add once I’m done.
It happens every time I wind down on holiday baking. I always think, I’ll just make one more thing. I like it best when, after all the baking, it’s something easy, but something new to add to my trays.


And this recipe fits the bill perfectly. There’s no baking involved and no long list of ingredients.
This is an easy recipe that only has 5 ingredients!
The following paragraphs may contain affiliate links {aff.link} We are a participant in the Amazon Services LLC Associates Program, an affiliate advertising program designed to provide a means for us to earn fees by linking to Amazon.com and affiliated sites.


Ingredient List
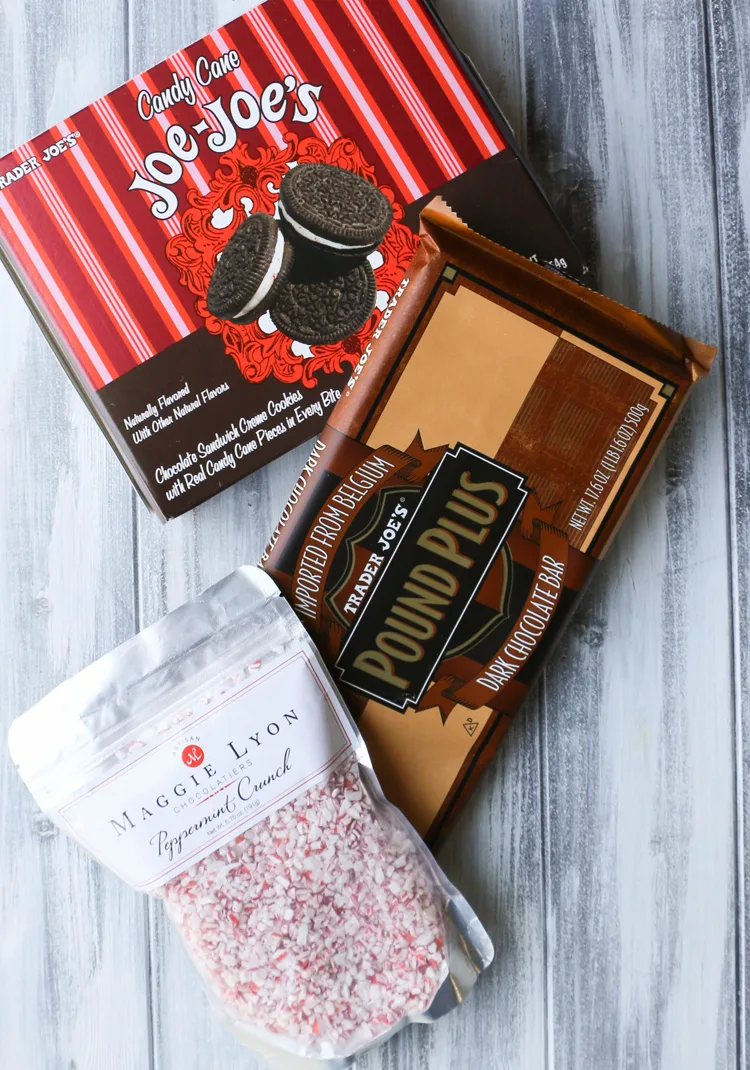
- Peppermint sandwich cookies– I used Trader Joe’s Candy Candy Joe Joe’s.
- Good quality chocolate for melting-I used Trader Joe’s Pound Plus Dark Chocolate Bar. {aff. link}
- Good quality white chocolate-I use either Ghiradelli White Premium Baking Chips or a bar of Lindt Classic Recipe White Chocolate. {aff. link}
- Coconut oil-You can also use shortening or a liquid oil. You only need a tiny bit, so try to use something you already have on hand.
- Crushed peppermint candies-I bought a bag of crushed peppermint candy at Home Good’s, but you can also find crushed peppermint in the baking aisle, on Amazon, {aff. link} or you can crush up your own.


How to Crush Peppermint Sandwich Cookies
When I need cookie pieces, I often just rough chop them with a chef’s knife.
But for this recipe, I wanted a mixture of pieces and crumbs with the peppermint filling flavor easily accessible to the melted chocolate mixture.
So, I gently smashed them with the flat bottom of a drinking glass.
You could use a measuring cup, a rolling pin, or even the back of a large serving spoon or spatula.
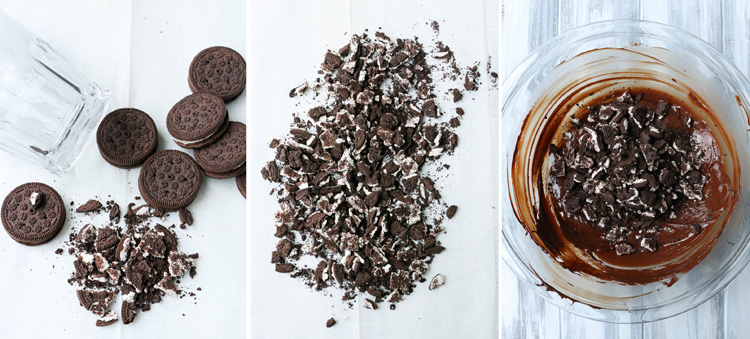
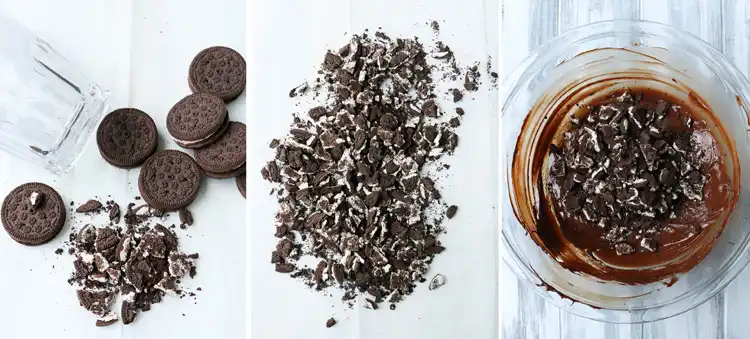
The key is to just press hard enough to break into pieces. You don’t want the cookie completely pulverized.
Once smashed, I just gently separated the cookie into pieces. Easy peasy. Or, easy piece-y! :)

What’s the best kind of chocolate to use for making candy?
Ok. We’re not going to go super crazy with all of the science behind making chocolate candy and tempering in this post. Actually, we will talk a little about tempering, but we’re going to take the easy route. More on that later.
But, let’s at least start with decent chocolate. For, this recipe, I used Trader Joe’s Pound Plus Dark Chocolate Bar.
Is it the best chocolate candy ever, ever, EVER? No, but I still love it. Why? Because it’s an affordable choice with great flavor and my go to choice for almost any recipe where I’m melting chocolate.
It’s dark, but not super dark, so it’s not too bitter for my recipes. If I want it even sweeter, then I’ll mix it with Trader Joe’s Pound Plus Milk Chocolate Bar. {aff. link}
(It’s much less expensive to just buy the chocolate at Trader Joe’s instead of ordering it on Amazon, but at least you can see what the bar looks like so you know what to look for in the store.)
Another good choice is Ghiradelli Bittersweet Chocolate Baking Bar. That’s just slightly darker than Trader Joe’s.
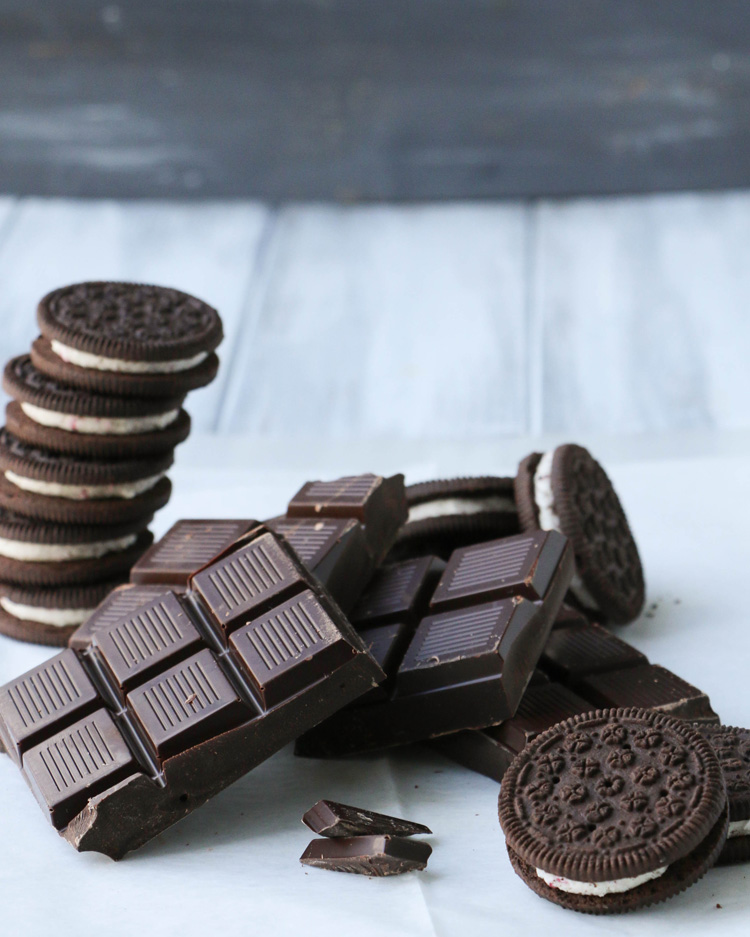
I chose to use dark chocolate because dark chocolate and peppermint go hand in hand. But, feel free to use milk chocolate or a mix of milk and dark chocolate.
I think the important thing to remember is that you want to love the flavor of the chocolate you’re melting. If you would eat the chocolate bar by itself and enjoy it, you’re good to go.
The other critical point is that these chocolate choices are tempered chocolate.
What is tempered chocolate?
Tempered chocolate is chocolate that has been heated and cooled at controlled temperatures. This stabilizes the chocolate and gives it that shiny finish and snap once it cools.
Are chocolate chips good for candy making?
Chocolate chips are not tempered chocolate. However, you can use them in a pinch, but there are simply more risks with blooming. That means you might end up with white streaks or dots when your chocolate sets.
One way bloom happens is if your chocolate has been melted improperly. The cocoa butter separates from the chocolate when melting and then rises to the surface and settles there. It’s still edible, but not pretty.
If you’re dead set on it, you can always mask the issue with the toppings.
How to Temper Chocolate in the Microwave
Instead of going through a whole heating and cooling process, we’re going to take a bit of a short cut. We can do that because we aren’t melting massive amounts of chocolate.
First we’re going to start with tempered chocolate. The chocolate bar suggestions I gave above are all tempered.
Now, the goal is to KEEP it tempered. To do that, we need to have patience and an instant read thermometer.
I use a Thermapen (not sponsored). It’s a good quality, accurate, instant read thermometer and I use it regularly for both baking and cooking.
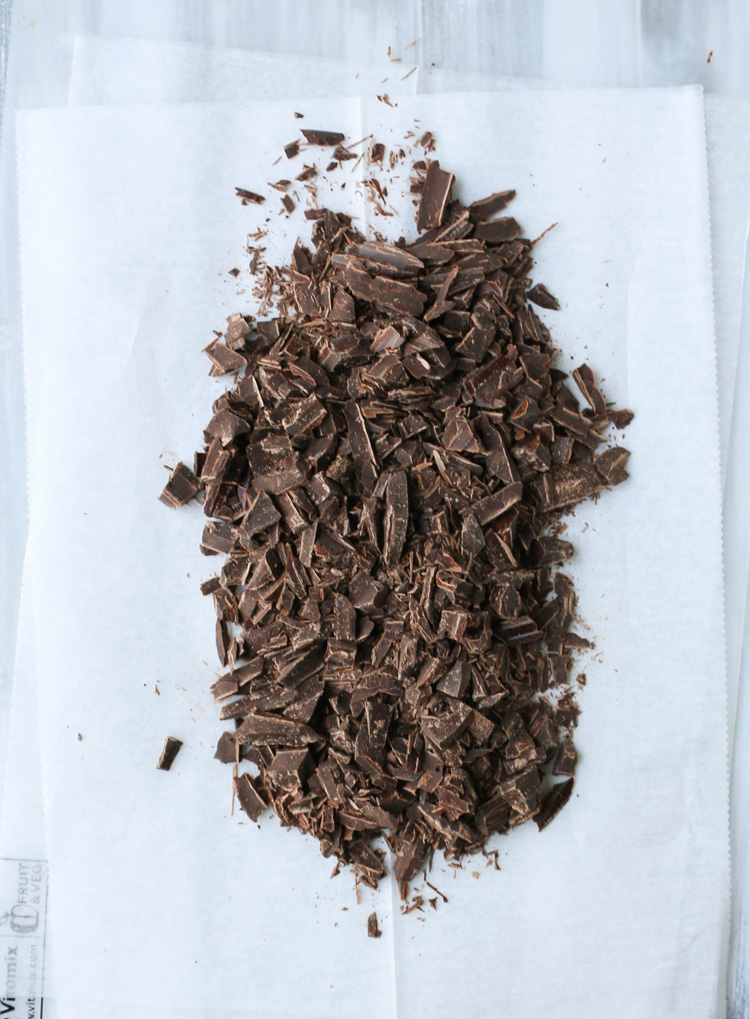
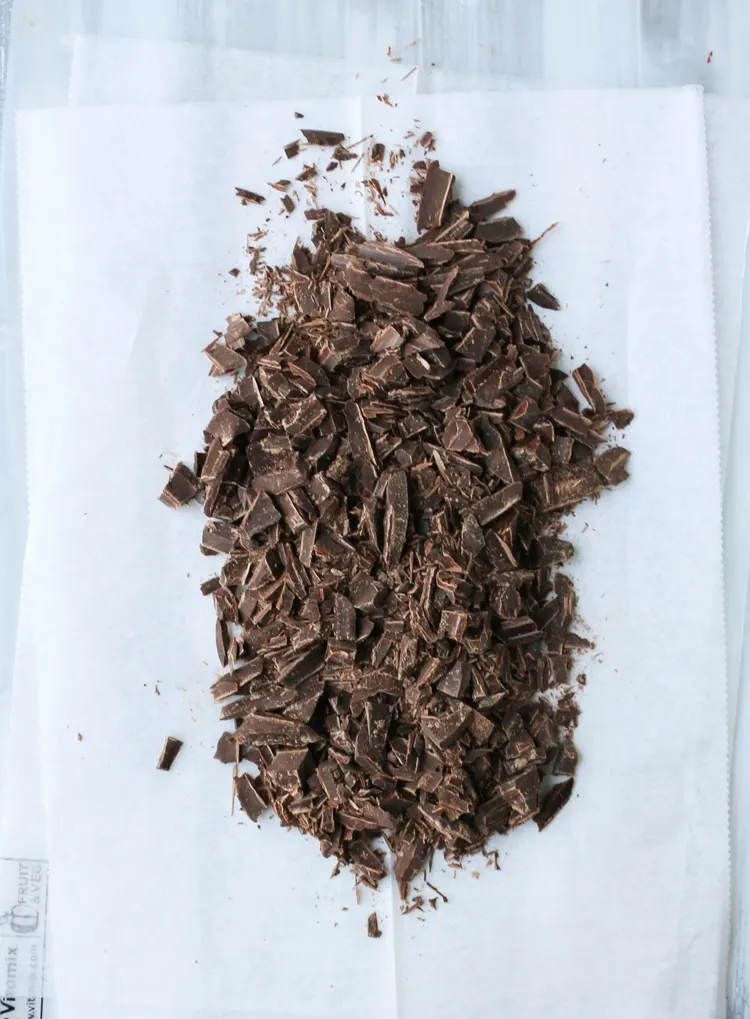
Side note: This process goes faster if you really chop your chocolate into smaller pieces. Have I mentioned how much I hate chopping chocolate? My pieces could have been smaller.
Heat. Stir. Take Temperature. Repeat.
Start by placing all of the chopped chocolate into a microwave safe bowl. I use a medium glass Pyrex bowl {aff. link} for this. Heat for 30 seconds. Stop. Stir.
Don’t try to skip steps and heat for longer without stopping and stirring. This process is all about controlling that temperature and you would be surprised how fast that temperature can rise.
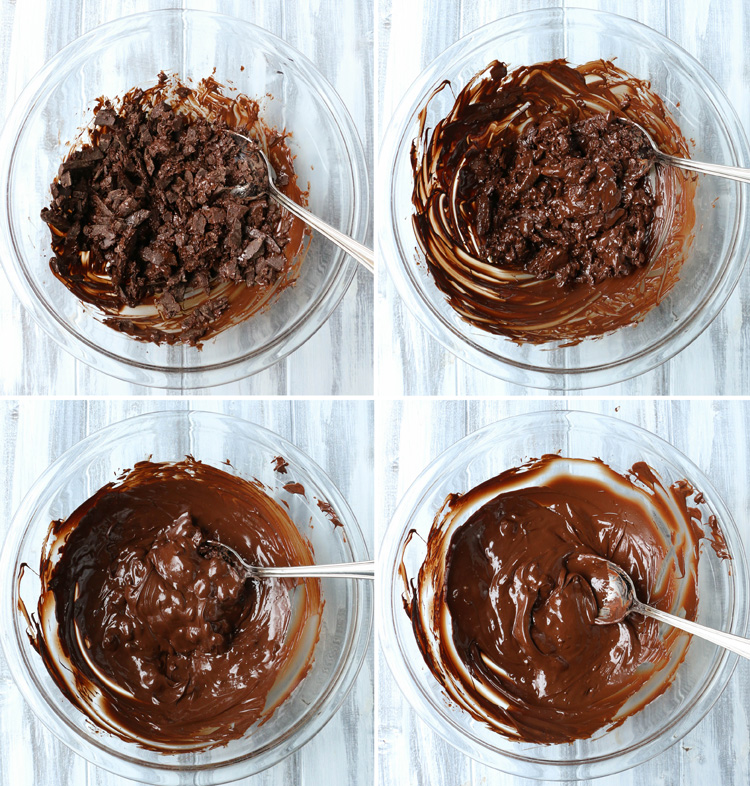
After that first 30 second stage, repeat the process every 15 seconds, taking the bowl out to stir, check the temperature and return to the oven.
(My photo only shows 4 photos of the melting stages. There were more than that. Just heat, stir and check temperature until you’re done. It won’t take long, but it’s a little tedious.)
Heating in short spurts helps to keep the chocolate from overheating.
Stirring helps to distribute the heat evenly throughout the mixture and also keeps it cooler.
The glass bowl helps to retain some heat while you’re melting.
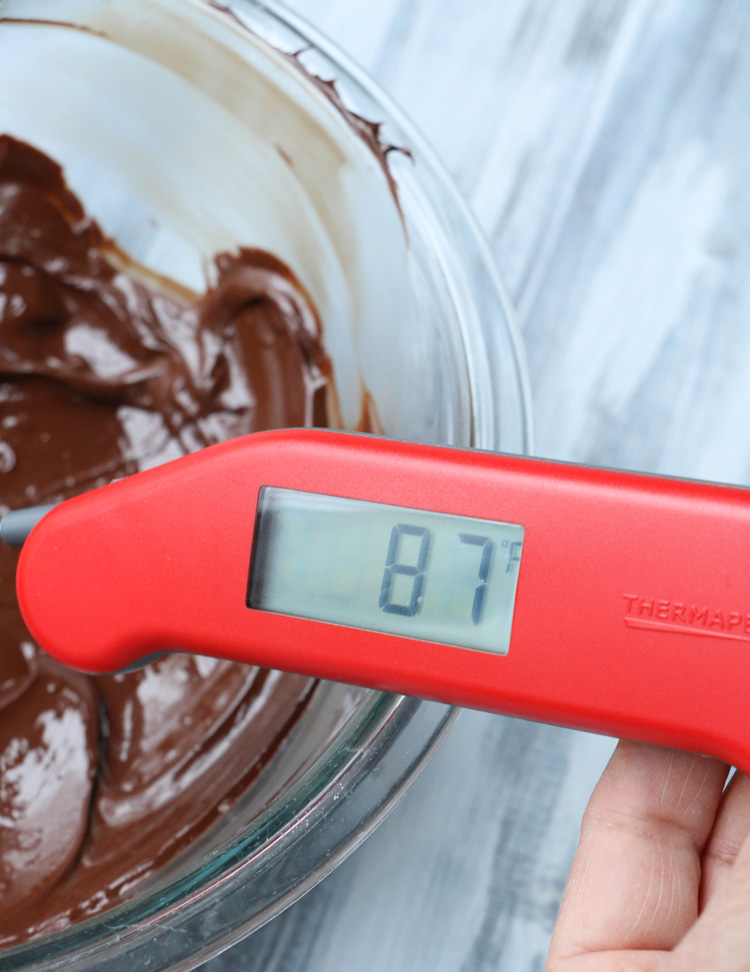
You can stop heating when you still have un-melted bits in the mixture. Keep stirring and let the residual heat from the mixture and the bowl melt the final pieces.
The goal is to melt the chocolate without going over 88-90 degrees F. If you use milk chocolate, don’t go over 82-84 degrees.
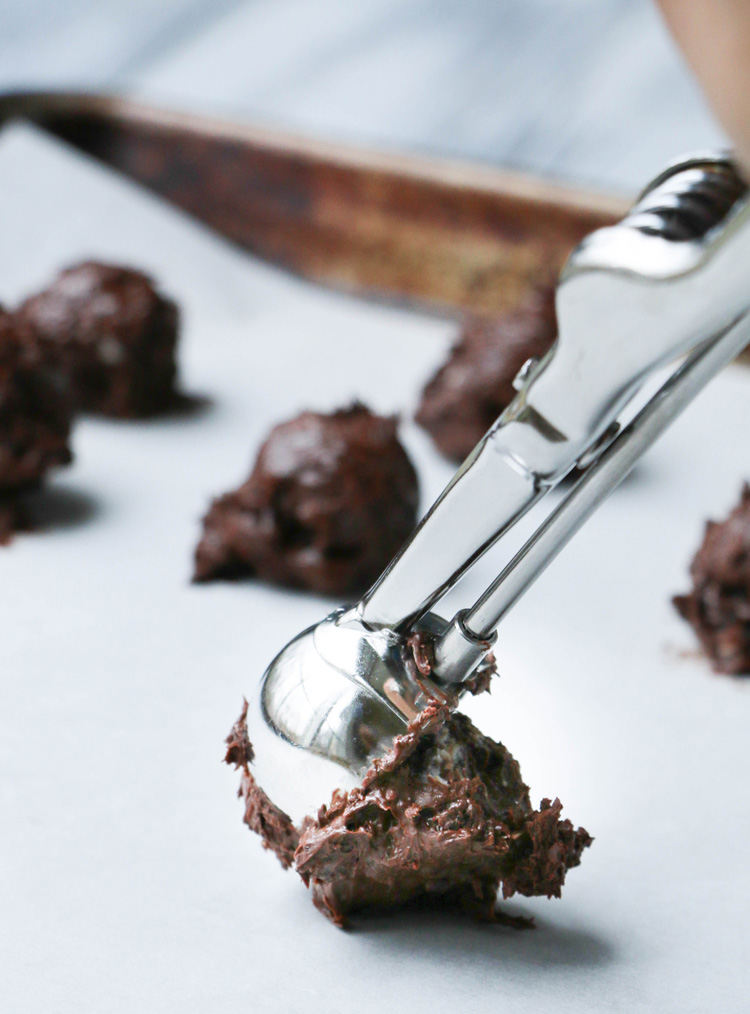
Making the Peppermint Cookie Clusters
Once the chocolate has been properly melted, just stir in the cookie pieces.
Now the world is your oyster! You can make them whatever size or shape you desire!

You can go free form and drop them onto a sheet with a spoon. Or, flatten and make little patties or drop them in larger mounds to look more like a traditional chocolate cluster.
I wanted to make small bites, like little candies you’d find in a box of chocolates, so I used a small 2 teaspoon sized scoop like this one {aff. link}
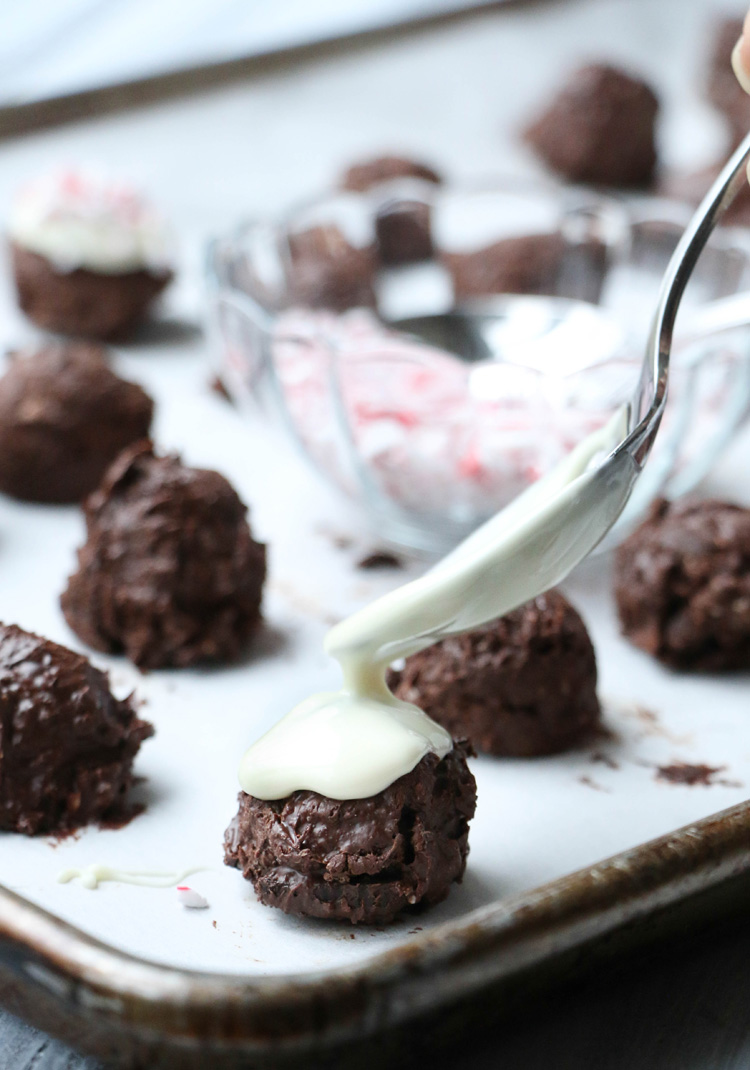
Topping the Peppermint Cookie Clusters
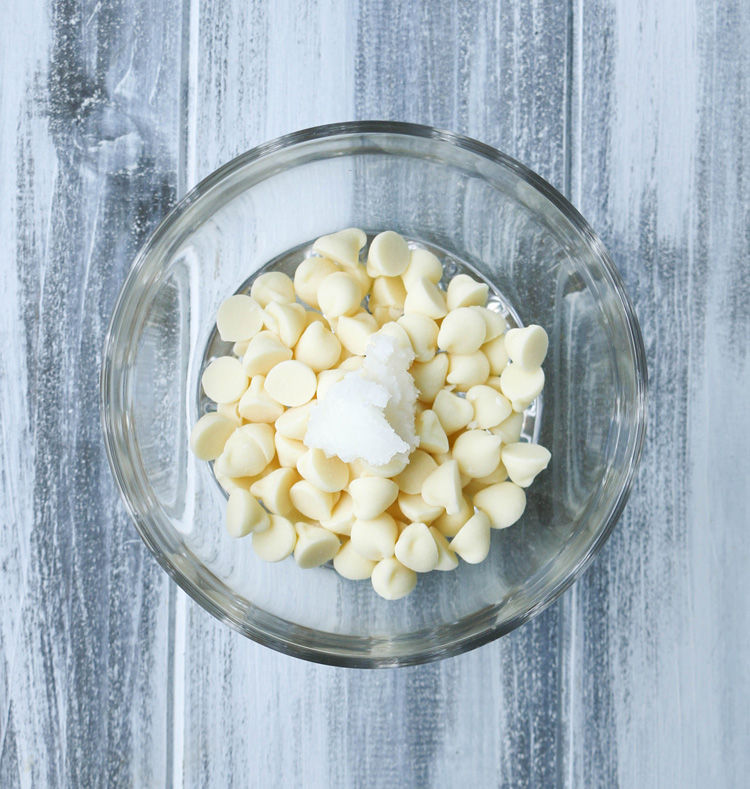
I thought the dark chocolate could use a bit of extra sweetness and creaminess so I melted some white chocolate chips with a bit of coconut oil.
No need to worry about tempering for this step. You can still melt it in the microwave and do in 15 second increments, stirring after each interval, but that’s it. No temperature taking needed.
Then, either spoon the melted white chocolate over the top and give it a snow topped mountain look.
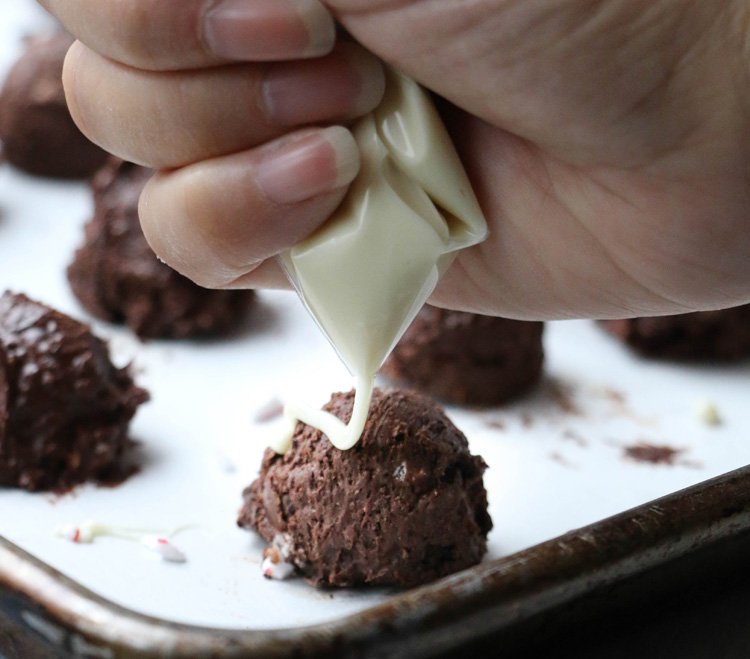
Or, put it in a zip top bag, cut a small piece from the corner and drizzle it over the top.
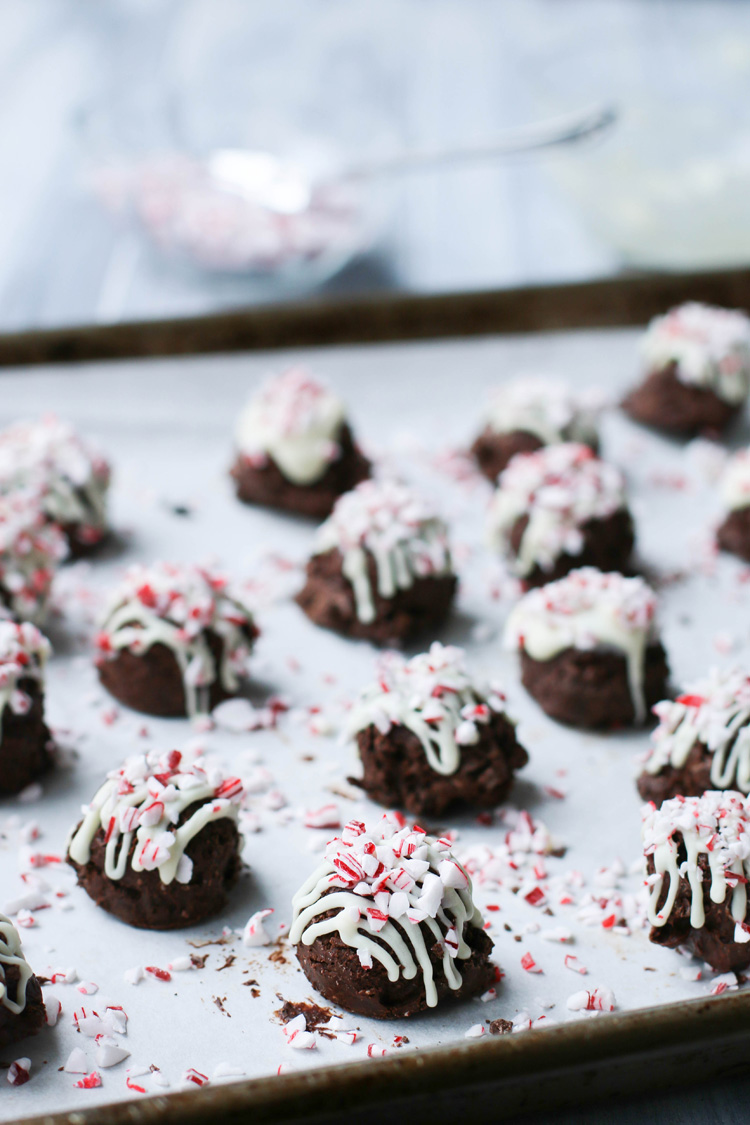
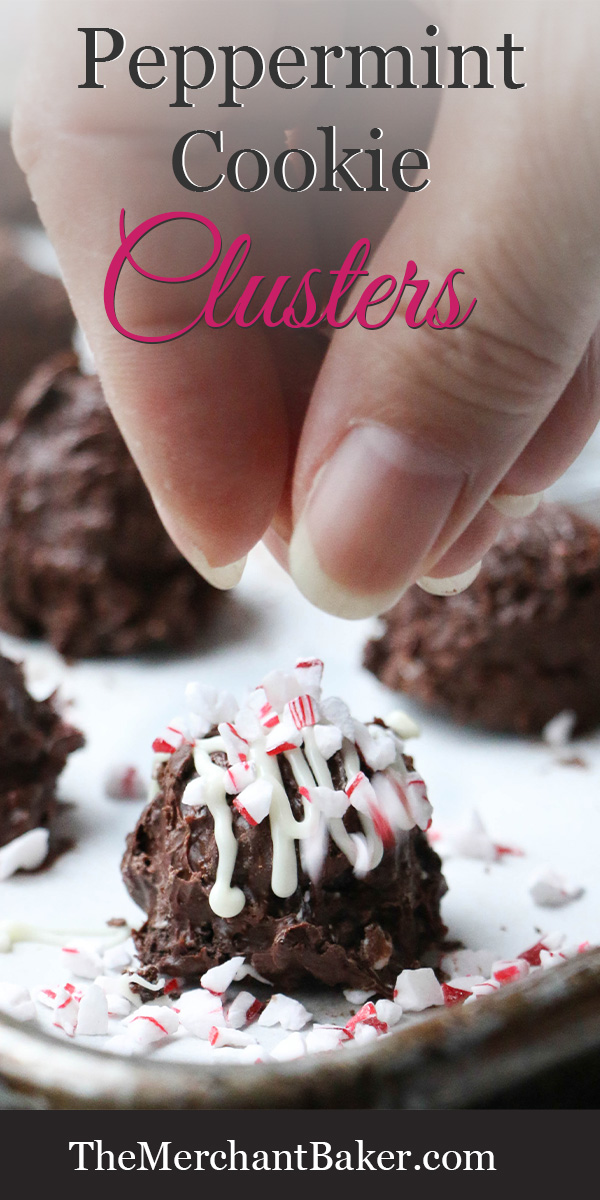
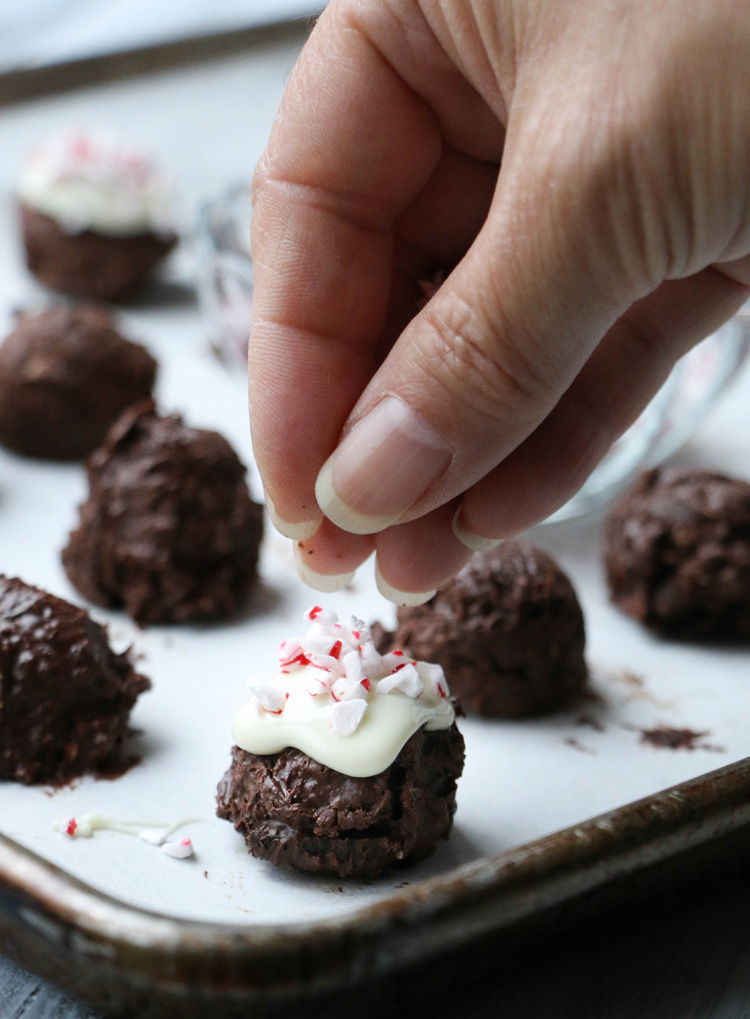
Sprinkle the peppermint chips on top while the chocolate is still melty. Be quick. It can set up fast!
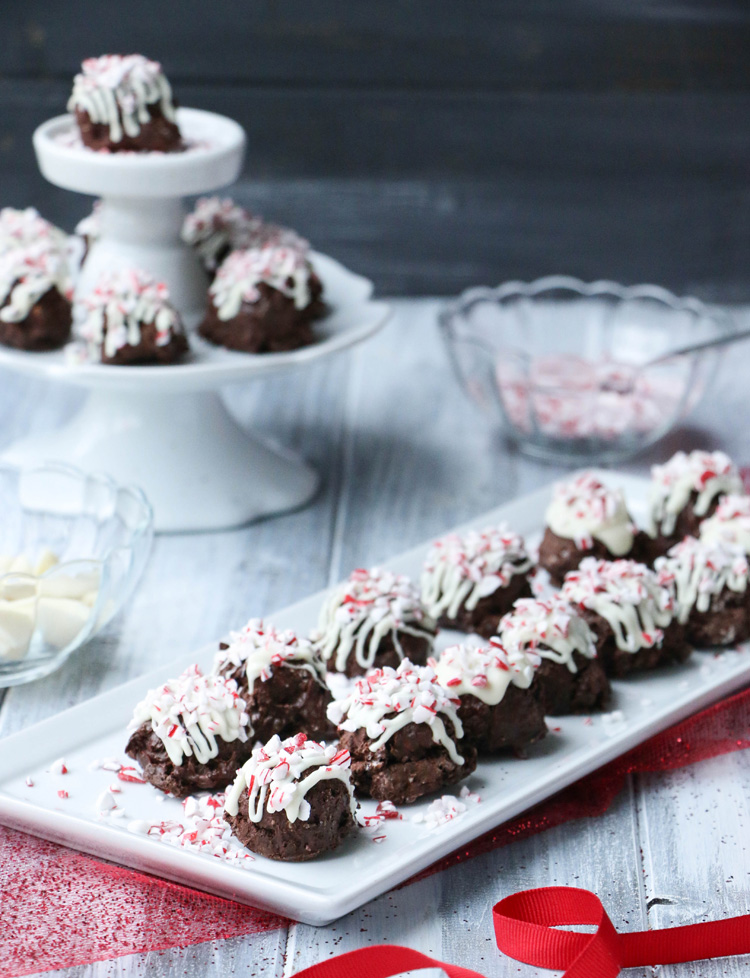
Once the clusters have cooled and set, you’ll have lovely little Peppermint Cookie Clusters that have a nice firm bite to them and no blooming due to your patience while melting the chocolate.

Now, go forth and enjoy the fruits of your labor!
Check out these other peppermint/minty recipes!
- Andes Mint Chocolate Chip Cookies
- Peppermint Chocolate Cookie Bark
- Peppermint Brownie Bark
- Peppermint Candy Cane Donuts
- Minty Cocoa Snowballs
- Minty Cocoa Fudge Sandwich Cookies
- Mint Chocolate Pudding Parfaits
- Chewy Peppermint Cookies and Cream Cookies
Peppermint Cookie Clusters
Peppermint Cookie Clusters are a delicious, easy to make chocolate candy that's a combination of peppermint, cookies and cream, and a chocolate candy cluster.
Ingredients
For the candy:
- 12 peppermint sandwich cookies
- 10 ounces good quality dark chocolate, chopped, I used Trader Joe's Pound Plus Dark Chocolate
For the topping:
- 1/2 cup white chocolate chips, I used Ghiradelli
- 1/2 teaspoon coconut oil or liquid oil like canola
- crushed peppermint candy
Instructions
- Line a cookie sheet with parchment paper or a silicone mat. Set aside.
- Using a flat bottom glass or measuring cup, gently smash each sandwich cookie just enough to break it up. Separate smashed cookies into pieces. Set aside.
- Place chopped dark chocolate into a microwave safe bowl. Heat for 30 seconds in the microwave. Stir. Repeat every 15 seconds, stirring after each interval. Use an instant read thermometer to check the temperature of the chocolate throughout the process. You should ensure the temperature does not ever exceed 88-90 degrees F. Mine did not exceed 87-88 degrees F. You can stop before the chocolate is completely melted and just stir until the residual heat melts the remaining pieces. This process should keep the chocolate tempered. See blog post for additional details on tempering.
- Add crushed cookies to the melted chocolate and stir to fully combine until the cookie pieces are fully coated with the chocolate.
- Using a small scoop (mine was about the size of 2 teaspoons) to portion out each piece of candy onto the prepared sheet. You can also just eye it and drop by spoonfuls onto the sheet.
- I liked the mounded shape from the scoop, but you can flatten them or shape them as desired. As they cool, you can use your finger to smooth any jagged edges, if desired.
- Melt white chocolate chips and coconut oil in the microwave in 15 second intervals, stirring after each interval until smooth. No need to take any temperature here.
- Drizzle or spoon melted white chocolate over each piece of candy, immediately sprinkling with crushed peppermint candies before chocolate sets.
- Once chocolate has fully set, store in an airtight container at room temperature.
Notes
*This recipe uses a tempering process that basically keeps already tempered chocolate from being heated above a certain temperature. This will keep the chocolate from blooming and getting those white dots and streaks while it sets. In a pinch, you could use chocolate chips, but you risk blooming since that chocolate has not been tempered. See blog post for more details. Or, you could use chocolate candy coating which you don't have to temper, but the flavor will not be as good.
*If you prefer a sweeter candy, use milk chocolate or a combination of milk and dark chocolate. It's best to begin with good quality chocolate that's already been tempered.
*I'm not a huge fan of chopping chocolate, so while I've included photos of my chopped chocolate, ideally, the chocolate should be chopped into smaller pieces for easier melting.
*I used Trader Joe's Candy Cane Joe Joe's, but there other brands like Oreo out there. I've even seen generic grocery store brands offer them.
*See blog post for more helpful tips.