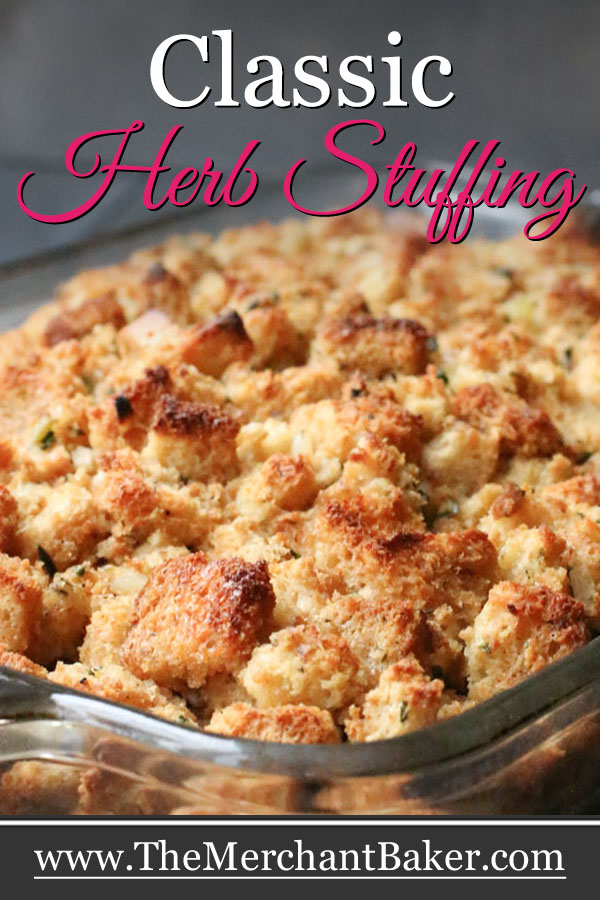


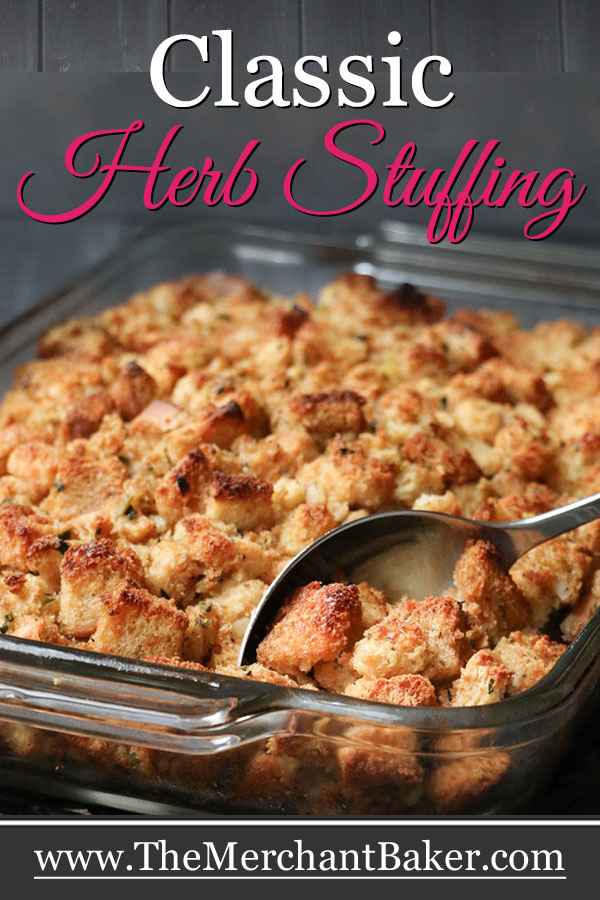


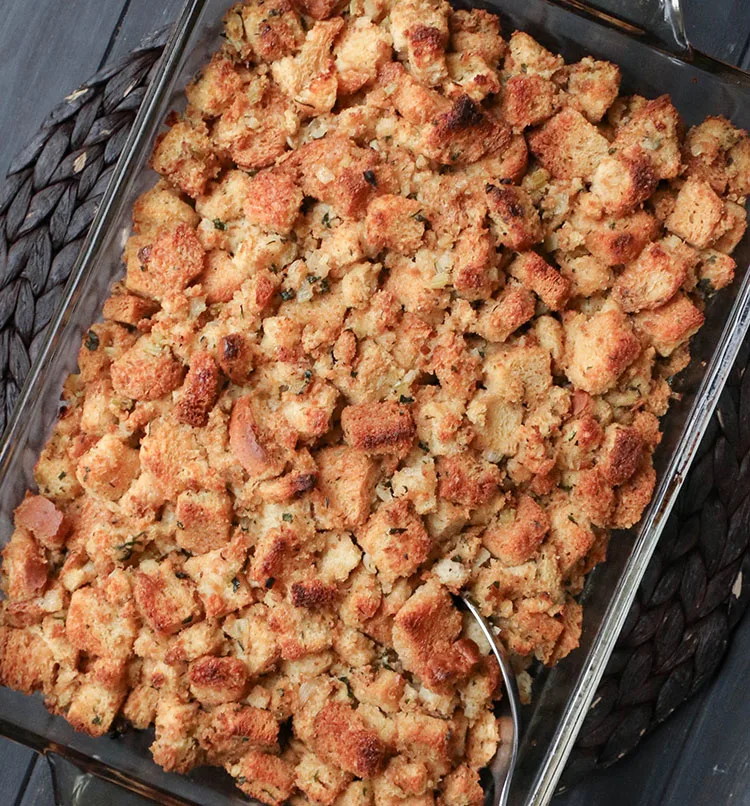
Classic Herb Stuffing has the traditional flavors of the holidays (especially Thanksgiving!) that everyone loves. This recipe starts with fresh bread and includes both fresh and dried herbs like parsley, sage, marjoram and thyme. Baking the stuffing (or dressing) in a separate dish maintains the moisture while allowing the top to get golden and toasty.
I grew up on two kinds of stuffing, depending upon who was cooking for Thanksgiving. Generally we had a classic stuffing, which I love.
My mother used to also make a sausage, chestnut and oyster stuffing. Growing up, I was totally game for the sausage and chestnuts and not just a little suspicious of the addition of oysters. As a kid, oysters and stuffing were simply not my match made in heaven.
I’ll add that she made a bang up crowned roast of pork with the most delicious apple stuffing. I’m all about fruit in my stuffing, being a big fan of sweet and savory combinations.
That’s one reason I really love Sausage, Fig and Cranberry Stuffing. So good! I made that for quite a few Thanksgivings. The title says it all, savory sausage, sweet figs and tart cranberries. A splash of Calvados (apple brandy) adds even more flavor. Love it!
It’s also why I love Pineapple Stuffing, both the original sweet version and my more savory version. Pineapple stuffing is a definite crowd pleaser.

But sometimes, you need a good, solid classic stuffing. I know plenty of people that don’t like anything extra in their stuffing. No fruit, no nuts, no meats. If you serve them stuffing with extra stuff? They’ll likely pass.
Which means, I’ve also made two kinds of stuffing on some Thanksgivings, so there’s something for everyone.
And, I’ve got no problem with that. I love classic stuffing; I think I love almost any stuffing, though the jury might still be out on the whole oyster deal ;)
I’ve even developed Low Carb Stuffing Chaffles. There’s no bread in that recipe but it’s got the flavor of today’s recipe and works so well with some turkey and gravy. It’s a one serving deal, so you can whip them up whenever you’re in the mood for a little Thanksgiving flavor.
Now….if I’m going to put all of my eggs in the classic stuffing basket, then I will go the extra mile with making my own bread cubes and adding my own seasonings.
So let’s start with the bread. I like making my own dried bread cubes because I can choose my bread and also cut it into the size of cube I want.

What kind of bread works well for stuffing?
The best kind of bread to use for a classic stuffing is a nice, hearty white sandwich bread like Arnold’s Country White Bread or Pepperidge Farm Farmhouse Hearty White Bread. I used Trader Joe’s Canadian White Bread in this recipe because I prefer the ingredient list on that bread to the others.
What does “hearty” white bread mean?
A “hearty” white bread is heavier and denser than average white sandwich bread. Many typical white sandwich breads are quite fluffy and filled with air. You know, they’re the kind of breads that can’t hold up to an aggressive swipe of peanut butter or butter that is on the chillier side.
They would fall apart when stirred together with all of the wet ingredients.
You want a bread with integrity. One that can stand up to the job.


How much bread will I need?
For this recipe, you’ll need about 2 pounds of bread. Hearty white bread generally comes in 24 ounce loaves. So you’ll have to pick up 2 loaves, but only use about one and a third. Leftover bread is one ingredient that is a non-issue in our house.
Leftover white bread? Even better. It’s a treat around here since we normally only buy whole grain bread. I had to ban my son from the loaves while I was making this recipe. He was already making plans for it :)
I found that 24 ounces of fresh bread equates to about 15 ounces once it’s been dried. So each dried slice was just a bit under 1 ounce. Therefore, I needed about 21-22 slices.
How to dry out bread cubes for stuffing
First we have to cut the bread into cubes. I cut mine into 1″ squares because I like a heartier bite of stuffing. Also, it’s easier to cut a larger square from fresh bread than it is to cut smaller 1/2″ squares. But it’s your choice here, big or small.
One inch invariably gives you a flatter “non-cube” with sliced bread, where 1/2″ will give you more of a cube shape.
If you’re using unsliced bread, then you have all kinds of control over the size of the cubes. It doesn’t have to be perfect. I’ve made other stuffings where I’ve torn pieces of artisan bread for more rustic pieces.
You want to be somewhat uniform though, because tiny pieces will toast faster than large pieces and you want a generally uniform toast.
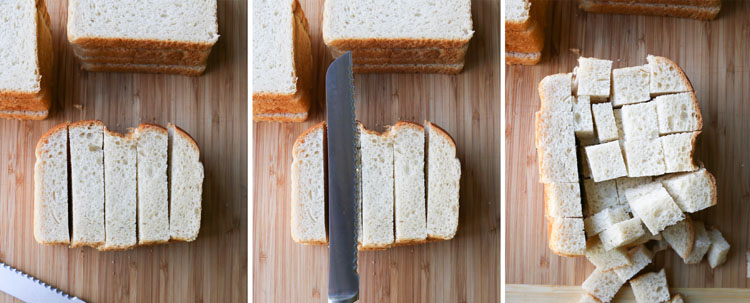
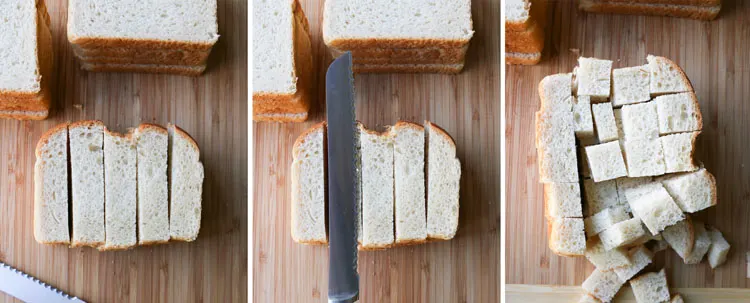
For my Trader Joe’s loaf, I made piles of 5 slices and cut four strips one way and and five strips the other way. You can see that the width of my strips was pretty close to the width of my bread knife.
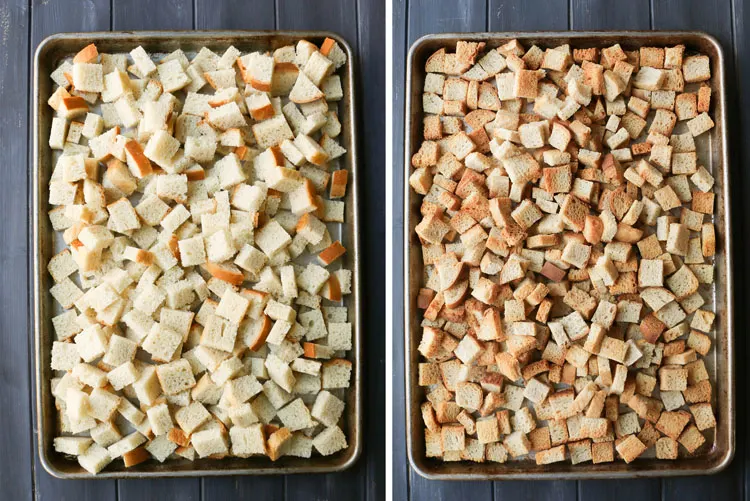
After that, just spread the bread cubes on a couple of sheet pans. Bake them at 325 stirring halfway in between. If your oven runs hot, go with 300 degrees instead. You want them completely dried out and you don’t want to over toast them in the process.
Mine got a little toastier than normal because I forgot to set the time after the halfway mark of stirring. Thankfully, it didn’t affect the recipe in any negative way. They were perfectly toasty.

Can I make the bread cubes in advance?
Yes. You can make them days in advance if you wish. Just make sure they’re completely cool before storing them in an airtight container. Otherwise, that residual heat will serve to soften those toasty cubes.
Can I use other kinds of bread?
Absolutely! It all depends on the flavor you’re looking for and what end result you seek. This is meant to be classic and thus, the white bread.
But, I adore a stuffing made with artisan breads. I might cut them into big fat cubes or tear them (as mentioned above) into rugged chunks.
Just remember, if you use a heartier bread, or a bread with a crusty exterior, or a bread that is significantly heavier than white, you may have to adjust the liquid ingredients so that you don’t end up with dry stuffing. If you don’t feel comfortable making those kinds of adjustments, I’d stick to white bread.
Preparing the wet ingredients
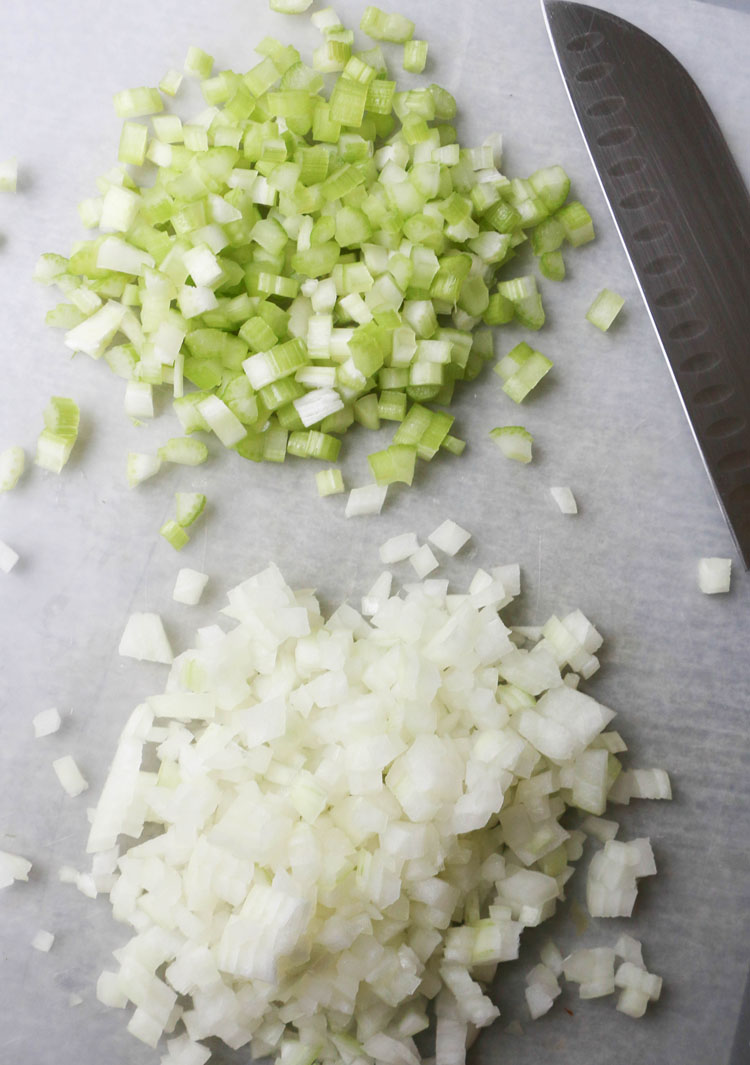
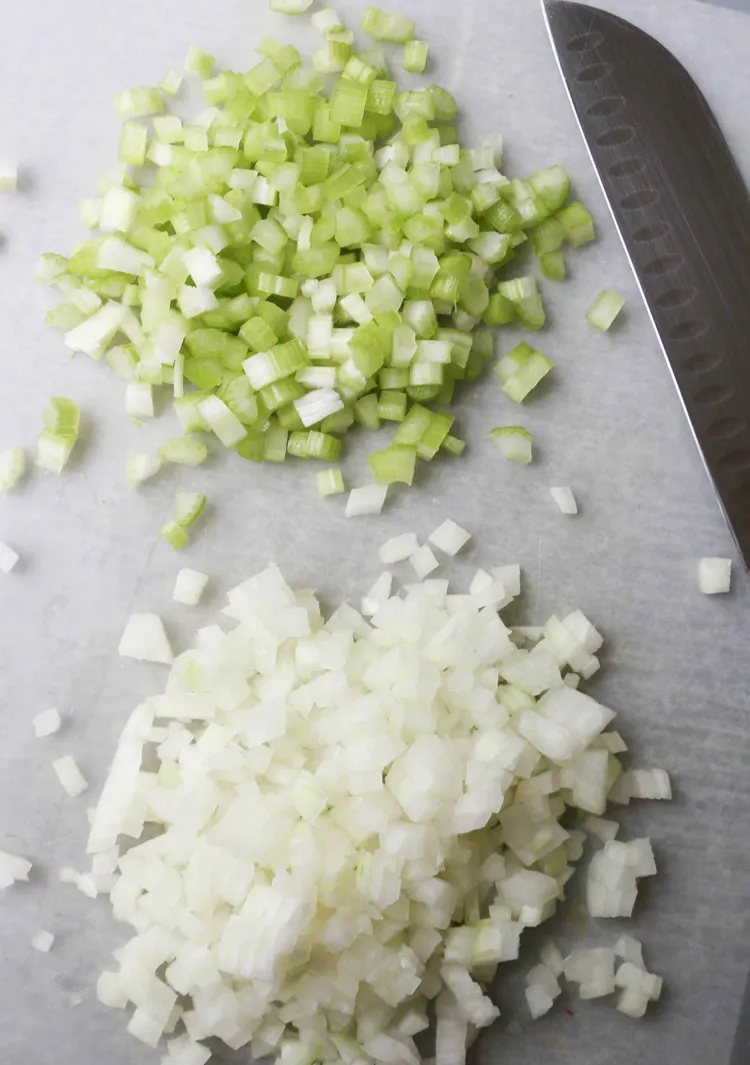
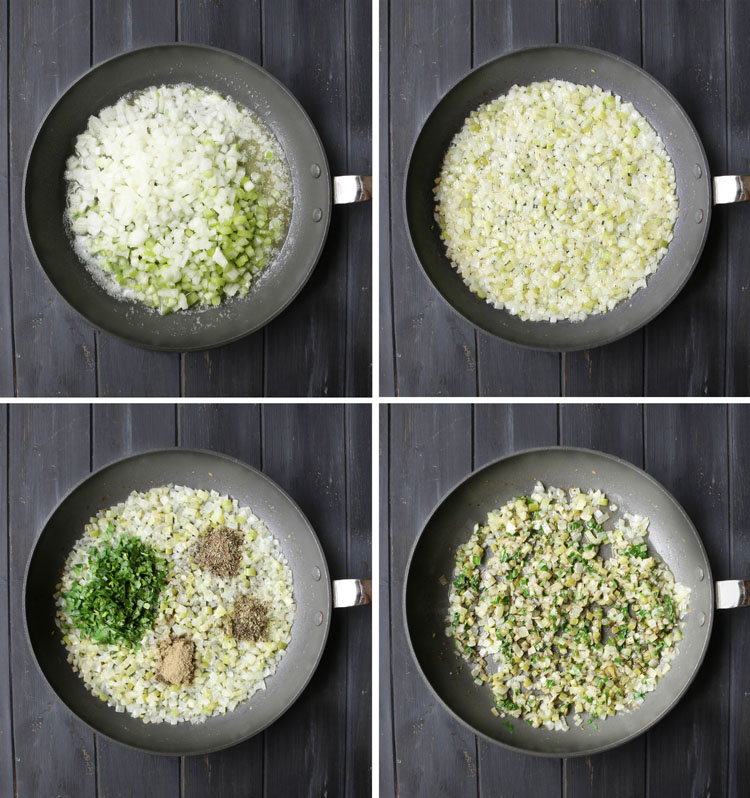
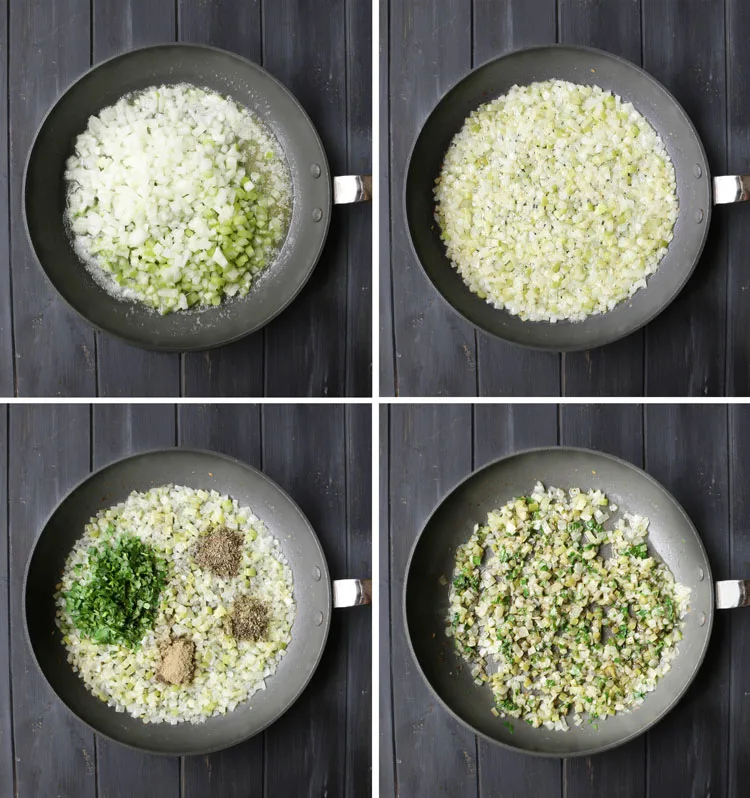
This part starts with chopping up onion and celery. Once I start sauteing those in butter, that’s when my kitchen begins to smell like Thanksgiving. That’s also when my family stops by to ask. “What smells so gooooood???”
Saute the veggies for a good 8-10 minutes until softened. Then, add all of the herbs and seasonings, cook briefly, until they are fragrant.

Tip: Use a very large mixing bowl!
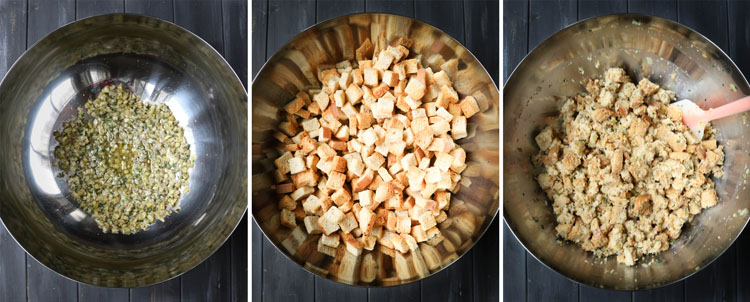
Transfer all that buttery goodness into a very large mixing bowl. And when I say large, I mean LARGE. You’ve got a ton of bread cubes coming your way and you want plenty of room to stir.
If you don’t have a large mixing bowl, you could use a large serving bowl or even a big roasting pan to get the whole thing mixed together. Trust me, trying to negotiate stirring in a bowl that’s too small just isn’t worth the frustration.
(Ask my sister in law, who responds to my offers of help by giving me the job of dressing and tossing the spinach salad….in a bowl that’s filled to the brim with salad. I’m always like…okay…challenge accepted! It’s kind of a running joke with us…)
In any case, this isn’t salad. It’s stuffing, and with stuffing, it will be difficult to insure all of the wet ingredients are evenly distributed if you don’t give yourself a bit of room to maneuver the mixture.
The bowl I use to mix large quantities is 14″ across. It’s huge. I bought it at IKEA. And it comes in super handy for times just like this :)
I spread the hot celery/onion mixture along the bottom and sides and it cools off pretty quickly against the cool stainless steel. It’s not mandatory for the mixture to be cool. The eggs are going on top of the bread, so no worries about cooking them in the hot mixture.
Then, all of the bread cubes go into the bowl. I’ll pour the beaten eggs all over the top and give the mixture a stir to begin to distribute the cooked vegetables and eggs.
Next up is the main liquid ingredient. I like to add the broth in stages, while I’m stirring. I’ll pour about a cup or so in and stir, bringing the drier cubes from the bottom to the top, and then just repeat until I’ve used all of the broth and gotten good moisture distribution.
You don’t want to go too crazy with stirring or you’ll start breaking up the cubes of bread as they start taking on moisture from the broth. But you do want the cubes evenly coated. Let the mixture sit for about 10 minutes. This will allow the bread to continue to absorb the liquid ingredients.

Tip: Add additional broth for a wetter stuffing
The recipe calls for 3 1/2 cups of chicken broth. This makes for a nice, moist stuffing. I have used up to 4 cups with this recipe with success. If you are a lover of moist stuffing, go for the additional half cup.
I actually decided to use the full 4 cups this time. One of the benefits of that is if you like a crispy top to your stuffing, the extra moisture helps keep the rest of the mixture from drying out, especially if you leave it in the oven for a bit longer to get those delicious crunchy edges.
It’s also good if you’re planning to reheat in the oven multiple times for left overs. Again, it helps it from drying out.
I actually had some leftovers that I spread out and reheated in my toaster oven on 350….and I forgot they were in there! The whole tray turned deep golden brown!
Ugh! I thought I ruined it! (Yes, that was the second time on this particular recipe that I got busy with other things…it’s been a crazy week!)
Guess what? The top was deliciously crispy and the bottom did NOT dry out. I had at least one member in my family say that they liked it even better.
On the other hand, if you’re a lover of tons of gravy on your stuffing? Stick with the recipe amount. Gravy craves stuffing with a bit less moisture so it has room to seep into the mixture.
It’s only half a cup. Err on whatever side suits you. I love it both ways.
Tip: Control the salt in your recipe
This recipe calls for unsalted butter and low sodium chicken broth. There’s salt in the recipe and that’s where you can adjust for flavor.
If you end up using salted butter or full sodium chicken broth, you’ll just need to reduce or possibly even eliminate the salt in the recipe, based on your personal taste. I think the more you can control how much salt is in the recipe, the better. So I suggest following the recipe and adding salt to taste.
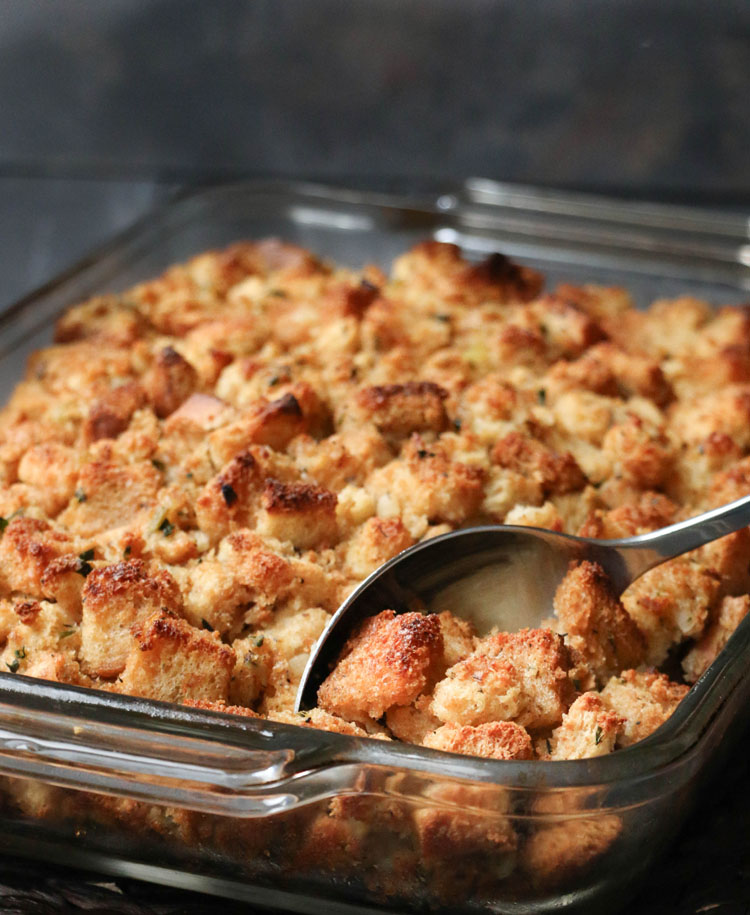
Once you’ve gotten everything mixed up and it’s had some time to sit, into a buttered pan it goes.
And yes, you’ll be surprised how that giant bowl of stuffing suddenly fits so nicely into a 13×9″ pan. And you don’t have to pack it in. I may press a bit here and there just to insure nothing’s going to fall overboard, but I do not try to create a solid mass of stuffing.
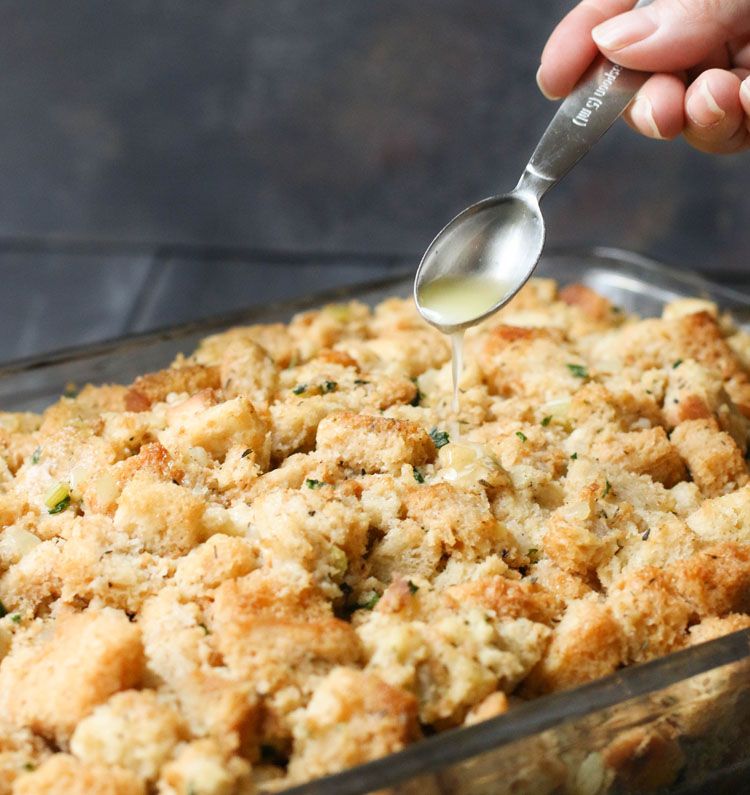

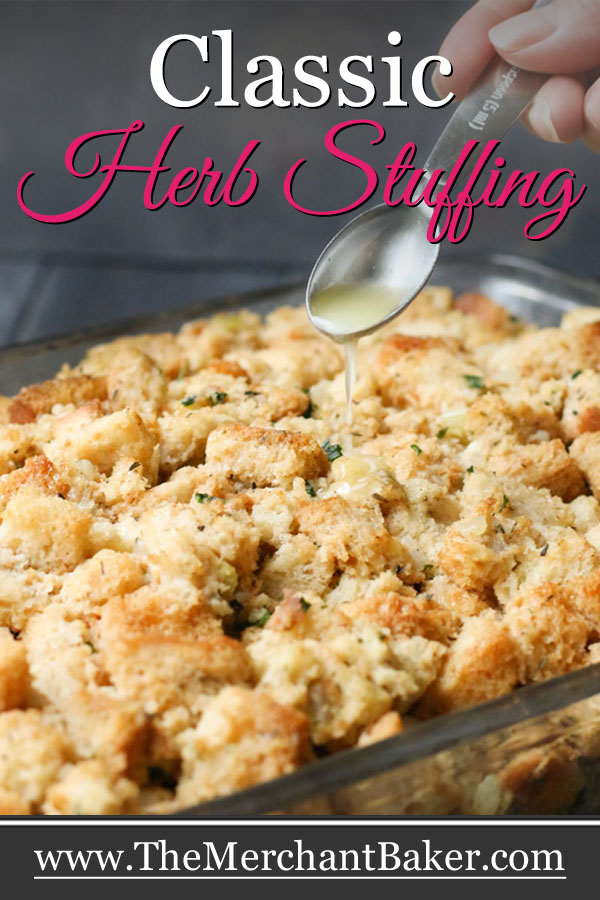
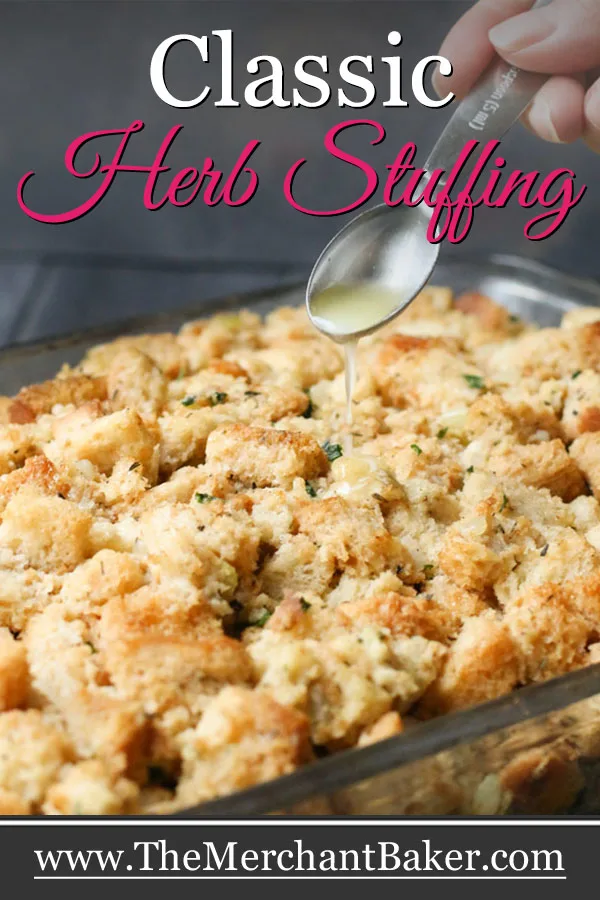
Tip: Drizzle butter on top
Once the mixture is in the dish, drizzle a bit of melted butter over the top. This will add flavor, of course, but we’re just going after a nice toasty top. The butter will help get some extra golden toasti-ness going.
Can I make the Classic Herb Stuffing the day before?
The USDA does not recommend refrigerating unbaked stuffing. See this link for guidelines.
If you still want to get ahead of the game, here’s another option….
Toast your bread in advance. Store that. Make the butter, celery, herb mixture and store that in small container in the refrigerator.
The next day, reheat your butter mixture just until the butter is melted and proceed. You’ll still get a good head start on the recipe.
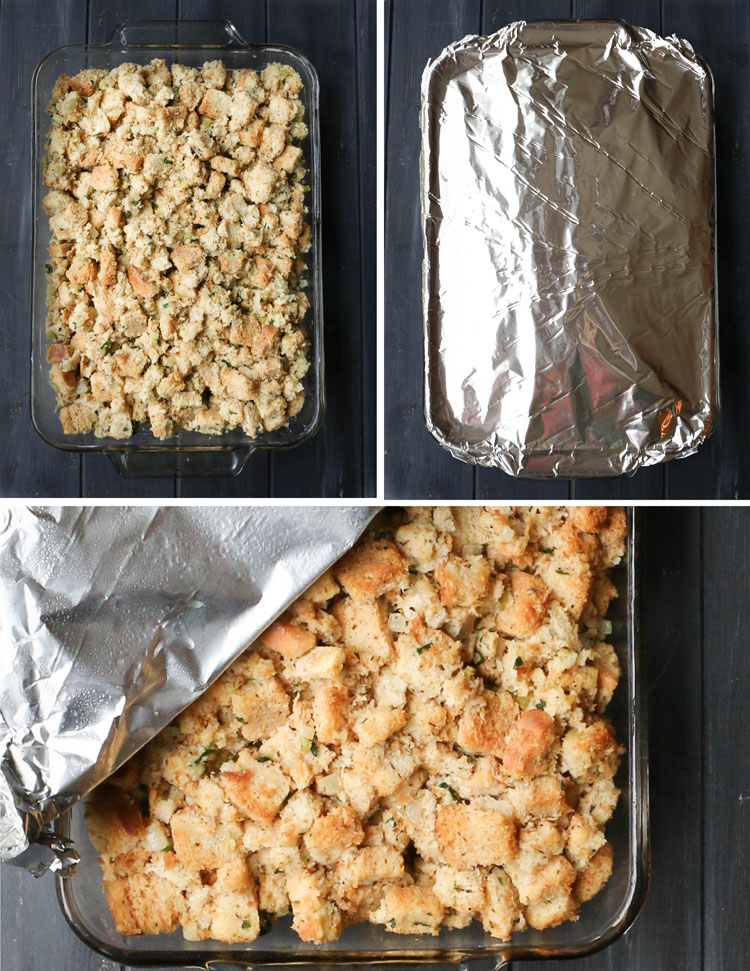

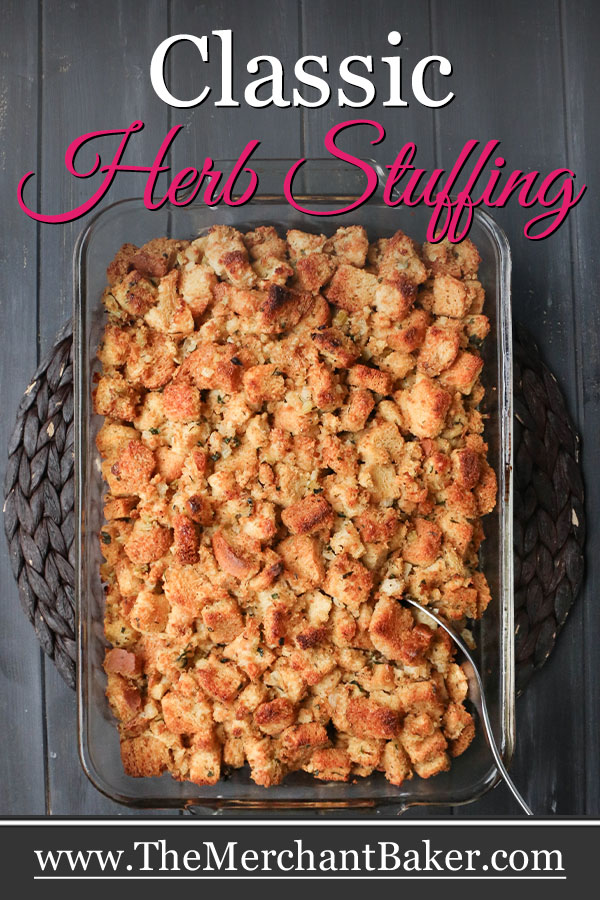
First bake covered, then bake uncovered
The first part of the baking process is meant bring the whole mixture up to temperature without letting it dry out. Keeping it covered during this first step keeps the heat and moisture trapped inside under the foil while it bakes.
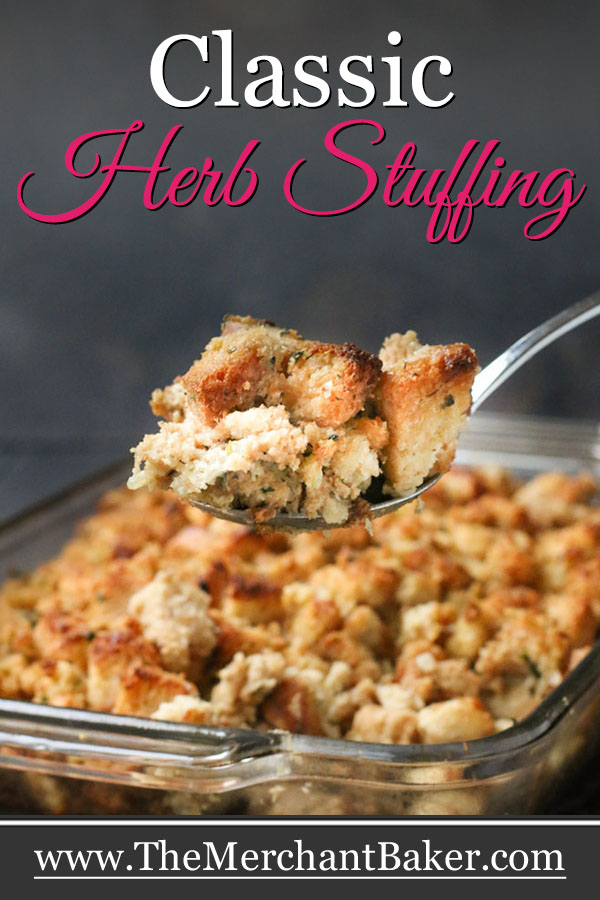
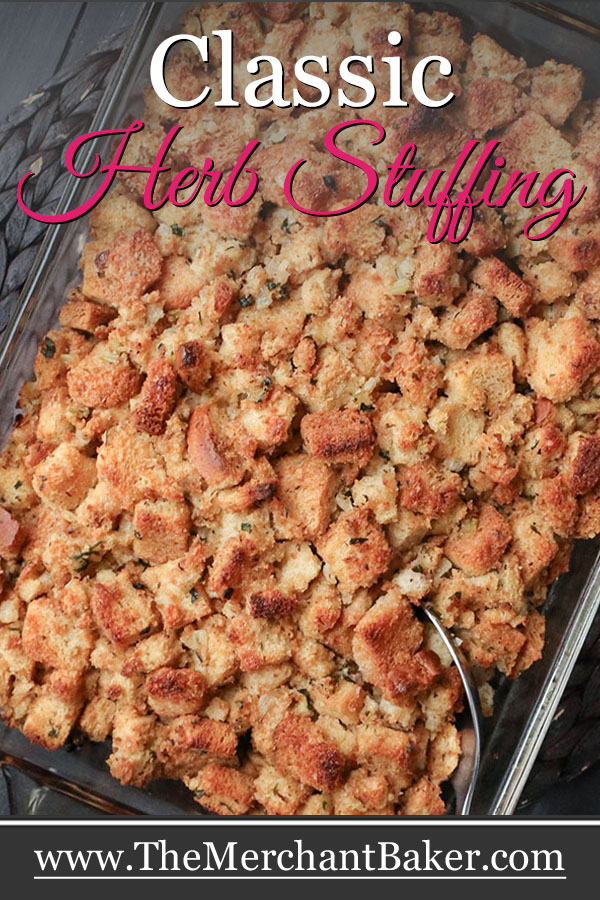
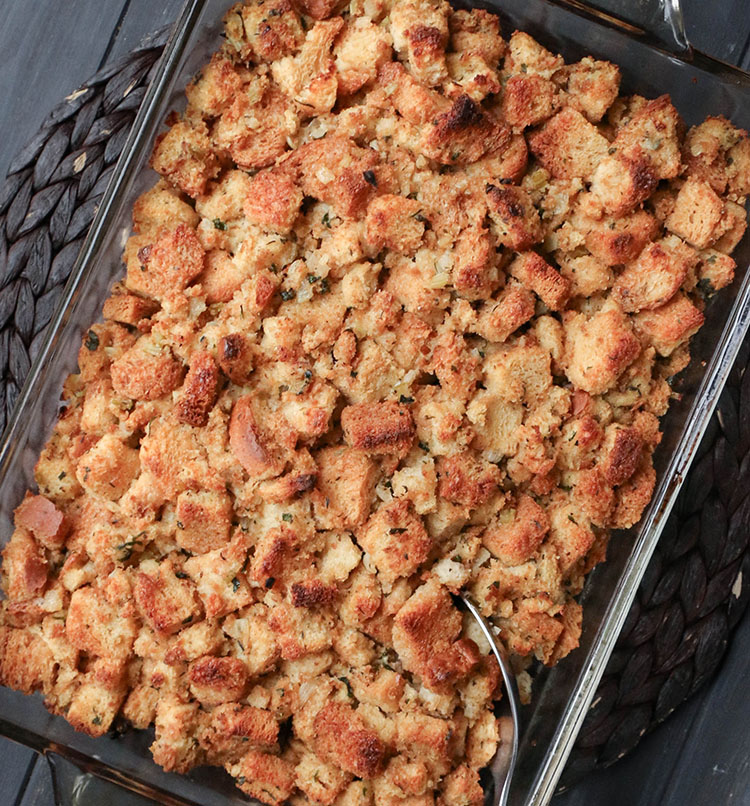
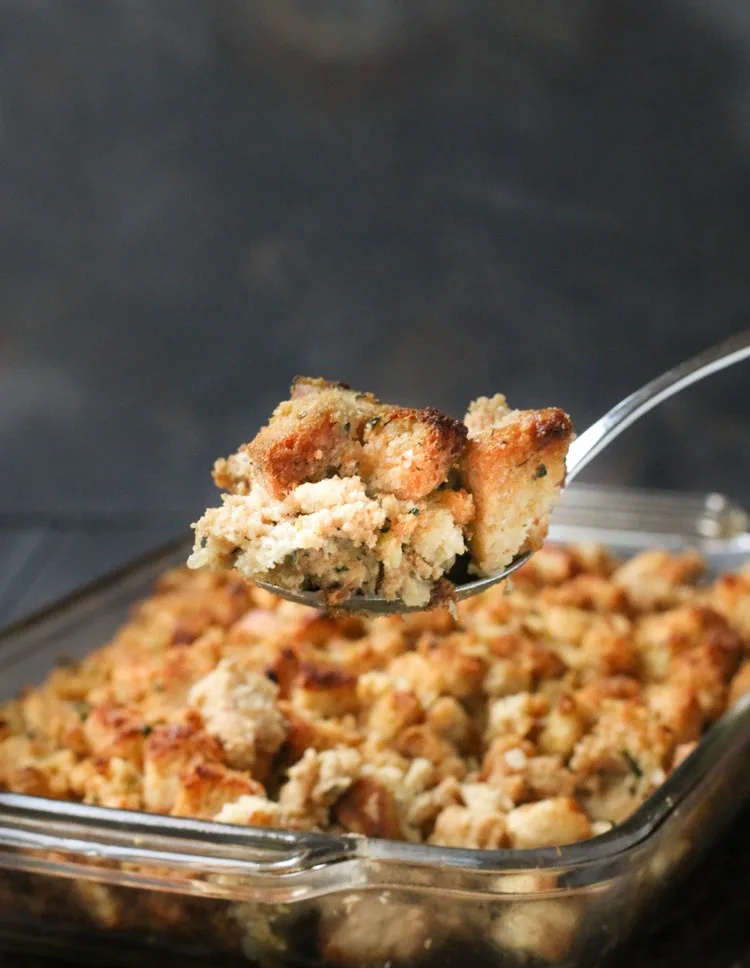
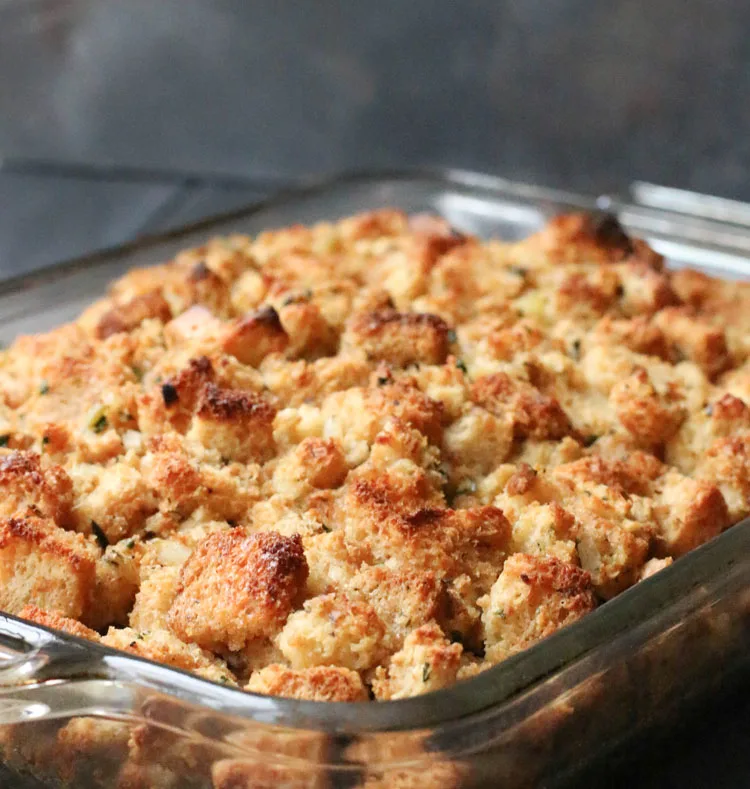
The second part of the baking process is to finish baking and to brown the top. One thing I love about this stuffing is letting the top get toasty. Moist flavorful stuffing with texture is what I’m going for here :)

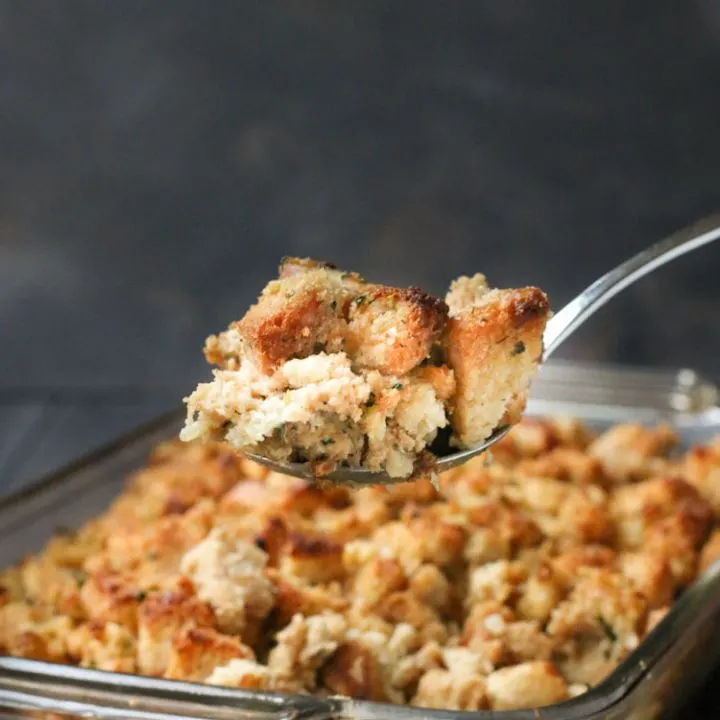
And that’s it! Flavorful Classic Herb Stuffing made completely from scratch. And, you can get started the day before!
One last tip…for smaller gatherings, I used to cut the recipe in half. Until, that is, I found a whole new way to use those leftovers. After that, I always had to make a full batch so that I had extra leftovers to make this Leftover Stuffing Breakfast Skillet! Soooo good!

Classic Herb Stuffing
Classic Herb Stuffing has the traditional flavors of the holidays that everyone loves. This recipe starts with fresh bread and includes both fresh and dried herbs like parsley, sage, marjoram and thyme. Baking the stuffing (or dressing) in a separate dish maintains the moisture while allowing the top to get golden and toasty.
Ingredients
For the bread cubes:
- 2 pounds hearty white sandwich bread
For the seasoned butter mixture:
- 6 Tablespoons unsalted butter, plus additional for buttering baking pan
- 1 1/4 cups finely chopped onion
- 3/4 cup finely chopped celery
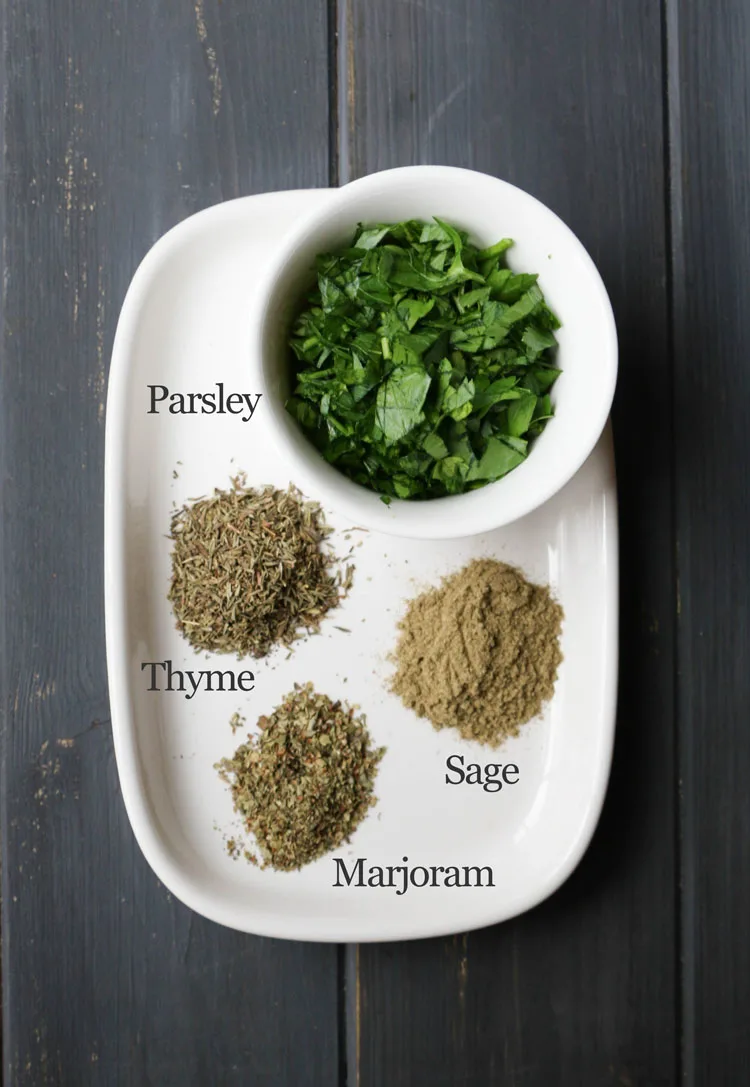
- 1/4 cup minced fresh parsley leaves (I use flat Italian parsley)
- 1 teaspoon dried sage
- 1 teaspoon dried thyme
- 1/2 teaspoon dried marjoram
- 1 teaspoon kosher salt (or to taste, see notes)
- 1 teaspoon ground pepper (or to taste, see notes)
- 2 eggs, beaten lightly
- 3 1/2 cups low sodium chicken stock
For the topping:
- 3 Tablespoons unsalted butter, melted
Instructions
Prepare the bread cubes:
- Preheat oven to 325 degrees.
- Cut sliced bread into 1/2"-1" squares. Spread cubes evenly in two ungreased sheet pans. Bake for 25 minutes. Remove from oven,
stir bread cubes and return for another 20-25 minutes until lightly golden and fully dried out. - Remove from oven and set aside to cool.
- Preheat oven to 350 degrees F. Butter a 13 x 9" baking dish. Set aside.
- Melt butter in a large skillet over medium high heat. Add celery and onions and saute for 8-10 minutes or until softened.
- Add the parsley, dried herbs, salt and pepper and cook just until fragrant, about 30 seconds or so.
- Scrape mixture into the bottom of a very large mixing bowl spreading along bottom and sides.
- Add toasted bread cubes to bowl. Top with beaten eggs. Stir gently to combine mixture.
- Add broth, about 1 cup at a time, stirring gently after each addition bringing dry cubes from the bottom to the top. Repeat with remaining broth.
- Allow to sit for 10 minutes, then transfer mixture to prepared baking dish.
- Drizzle the 3 Tablespoons of melted butter over the top. Bake for 25 minutes. Remove foil and bake for an additional 25-30 minutes until golden brown. Allow to sit for 10 minutes before serving.
Prepare the stuffing:
Notes
*You can make the toasted bread cubes a few days in advance. Allow them to fully cool, then store in an airtight container.
*If your oven runs hot, you might want to reduce the temperature to 300.
*You're going to need 21 ounces of dried bread cubes for
this recipe. If you don't have a scale, each slice of fresh hearty white bread should yield about one ounce of dried bread cubes. So, you'll need about 21-22 slices of bread, depending on the loaf. I used Trader Joe's Canadian White Bread. You can also estimate. You'll use 1 whole 24 ounce loaf and then 1/3 of the second loaf.
*If you'd prefer not to make your own bread cubes, you can buy them instead. You'll need 21 ounces of plain, unseasoned dried bread cubes. They must be plain because you'll be adding all the seasoning.
* See post for make ahead options.
*For an even moister stuffing, you can add up to and additional 1/2 cup of broth. I usually add a little extra if I've cut my bread cubes in larger chunks. For 1/2" cubes, 3 1/2 cups should work just fine. You can use any left over broth to drizzle over leftover stuffing if you're reheating in the oven. It will help keep it from drying out.
*Be careful with salt amounts. This recipe uses unsalted butter and low sodium chicken broth. If you use salted butter and full sodium chicken broth, you may want to reduce or even eliminate the amount of additional salt added, based on your individual taste. If you use table salt instead of kosher salt, I'd reduce the amount to 3/4 teaspoon.
*Be sure to use a very large bowl for mixing. Mine was 14" across and gave me plenty of room to stir the mixture. If you don't have a very large mixing bowl, use a very large serving dish or even a roasting pan to mix up the stuffing.
*To prevent any sticking, you can spray the foil lightly with cooking spray before covering stuffing for baking.
Recipe adapted from Cook's Illustrated Traditional Bread Stuffing.
Beth
Saturday 11th of January 2025
Why do you say 2 pounds of white bread in the list of ingredients and then say 21 ounces in the notes? 2 lbs is 32 ounces.
Ramona
Monday 13th of January 2025
Hi Beth, The weight difference is between fresh bread and dried bread. Not everyone has a scale, so I've tried to give multiple ways to figure out the amount. Bread comes in many shapes and sizes. The recipe notes and the section of the post that talks about bread both describe that distinction. You'll see that I weighed my specific brand of bread before and after. The loaves were 24 ounces each, so I needed 2 full loaves since you can't buy partial loaves. That 32 ounces of fresh bread dried to about the 21 ounces I needed. It doesn't have to be exact, but that amount of dried bread is good for the amount of liquid in the recipe. I hope that helps!
Chris
Tuesday 14th of December 2021
My grandmother is turning over in her grave because this stuffing is bumping out hers as my favorite!
Ramona
Wednesday 15th of December 2021
hey Chris, I'd say I won't tell if you won't, but I guess the word's out now! lol!
Empress
Saturday 12th of December 2020
I used the springform pan that I had which is the kind that has a clamp on the side and the bottom goes in. When I put it in water it leaked. What now?? I had to put it in without being in water.
Ramona
Saturday 12th of December 2020
I'm confused by your question, Empress. This recipe is for stuffing and doesn't require a spring form pan nor to be baked in water. It simply is put into a 13 x 9 baking pan and baked. Are you making stuffing, or another recipe?
rebecca
Thursday 26th of November 2020
loaves are all different weights. I'm finding this recipe difficult to use because i don't know how much bread to use. can you clarify, please?
Ramona
Thursday 26th of November 2020
Hi Rebecca, there's further clarity in the recipe notes. "You're going to need 21 ounces of dried bread cubes for this recipe. If you don't have a scale, each slice of fresh hearty white bread should yield about one ounce of dried bread cubes. So, you'll need about 21-22 slices of bread, depending on the loaf. I used Trader Joe's Canadian White Bread. You can also estimate. You'll use 1 whole 24 ounce loaf and then 1/3 of the second loaf." Most of the hearty white bread loaves are 24 ounces. So you can estimate from there. I also gave a per slice estimate. Let me know how I can help further.
Penny Thomas
Friday 20th of November 2020
This looks delicious! Looking forward to giving it a try!
Ramona
Friday 20th of November 2020
Hope you like it Penny!