


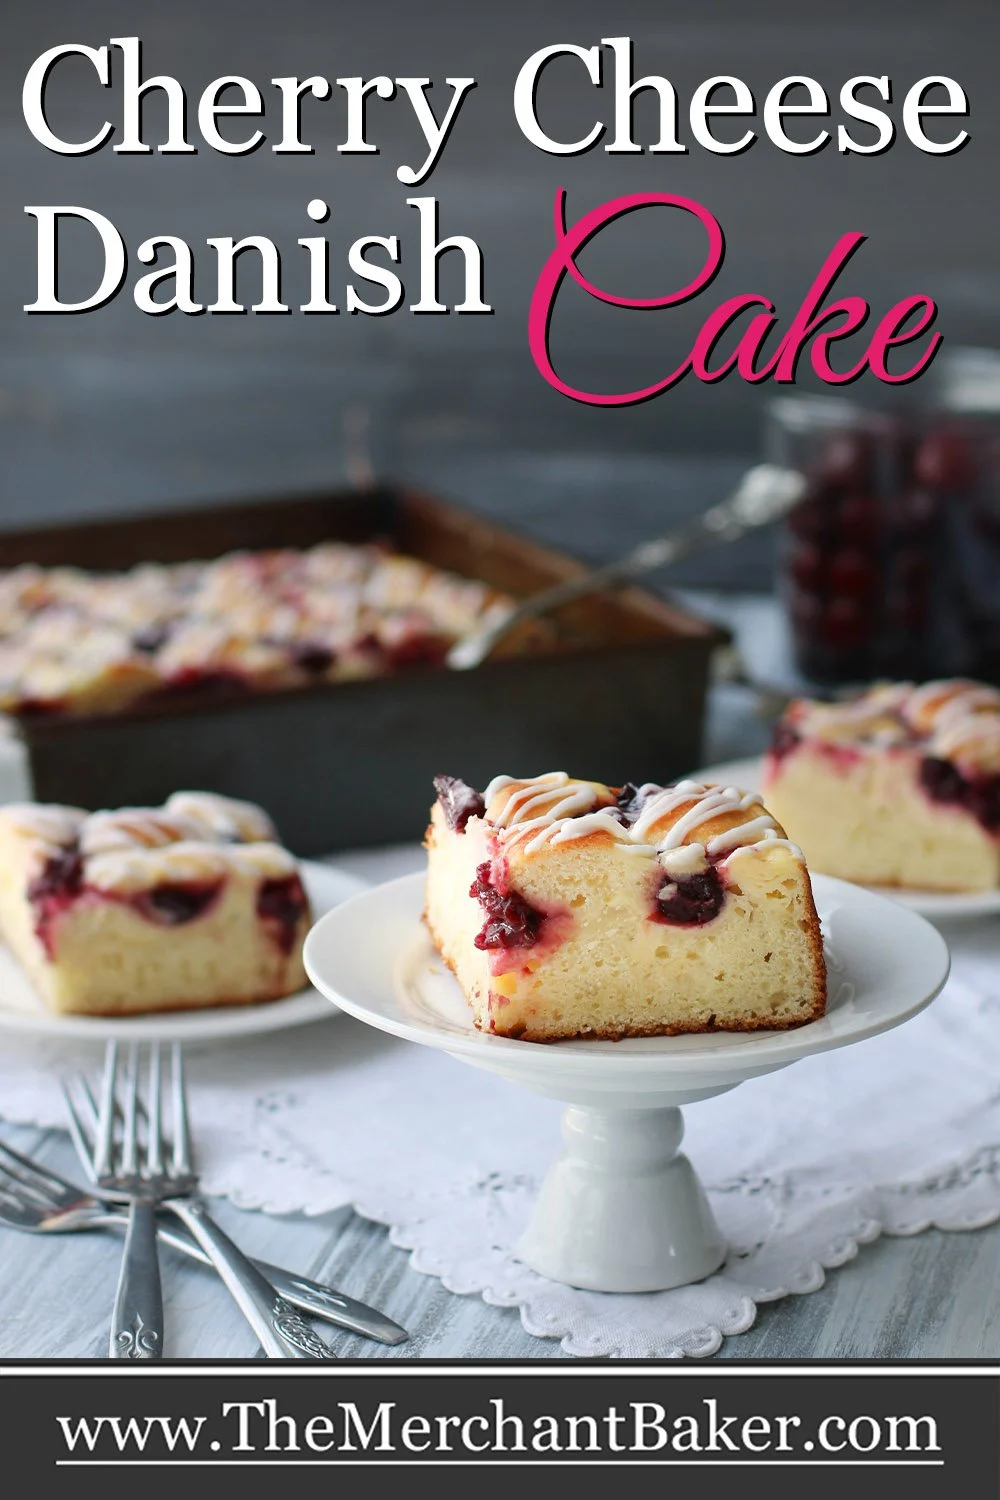

This Cherry Cheese Danish Cake was inspired by delicious cherry cheese Danish pastries. Instead of a flaky pastry, this cake boasts a delicious layer of almond scented cake and a creamy layer of cheesecake. Lightly sweetened cherries and spoonfuls of reserved cake batter create a cobblestone like surface that is then drizzled with a simple icing.
I love a cherry inspired treat in February. Between Washington’s birthday and Valentine’s Day, I think cherries are quite fitting.
In the past, I’ve made Cherry Crumb Bars, Chocolate Chip Cherry Cheesecake, Sugar Cookie Cherry Cobbler and a unique Chocolate Cherry Soda Bread.
Oh, and if you’ve got fresh cherries on hand…I absolutely love this Fresh Sweet Cherry Sauce. It’s great on pancakes, ice cream, cake…

This year, I had cherry cheese Danish pastries on the brain. I guess because it’s been ages since I’ve had one. I decided to make something that tasted like that creamy, fruity pastry without actually making pastry dough.
Is this a breakfast cake or dessert cake?
Let’s talk about this cake. It’s a little different than your average coffee cake (breakfast cake.)
First, I didn’t want this to be a super sweet cake. I kept the sugar to a lower level wherever I used it. I really wanted the subtle flavors to shine through instead of being covered up by a mountain of sugar.
I think that makes it perfect for a breakfast cake. But honestly, we’ve been eating it as dessert. One, because I wasn’t done shooting it until well after breakfast.
Two, because I had already made Baked Apple Oatmeal for a couple days ofbreakfast and it just would have been carb city for all of us if we ate both.
So, it’s been served for dessert instead of breakfast, something that I believe all breakfast cakes can do.


Of course, for those of you who have a serious sweet tooth, I do give tips in the recipe notes for adding more sugar to the recipe.
As far as flavor, while I adore almond extract, I didn’t go too strongly here. I added just enough to complement the cherries. Desserts and cookies that have more pronounced almond flavor always remind me of Christmas. If I were making this during the holidays, I might punch up that flavor a little further.
But suffice to say, I’m quite happy with both the level of sweetness and almond flavor in this cake. And, I received no votes from my taste testers to add more sweetness or almond flavor.


Can I bake with frozen cherries?
Yes, yes and yes! I LOVE using frozen cherries for baking. I buy frozen organic cherries in a large 3lb bag from BJ’s warehouse store.
I love that they are whole, organic cherries, pitted and ready to go! And really, they’re just beautiful cherries!
In this recipe, I actually cook them first, but most frozen fruit can be added directly to many cake and muffin batters as long as you add them when they’re frozen.

How to Make Cherry Cheese Danish Cake
Cook the Cherries
We start by cooking the cherries so that they have a chance to cool while you work on other parts of the recipe.
I cook the cherries before I add them to the recipe because:
- Plain frozen cherries might give off too much liquid for a cheesecake batter. I didn’t want that since they would be baking right on top of the cheesecake layer.
- Cooking the cherries would allow them to be juicy, like they would be in pie filling, but without quite as much “sauce.” I wanted the cherries to be individual in the cake, not part of a whole pie filling layer, if you know what I mean.
- I wanted to add just a little extra sweetness to the cherries.
Basically, I made pie filling cherries, if that’s even a thing. The good news is…it’s easy to do.


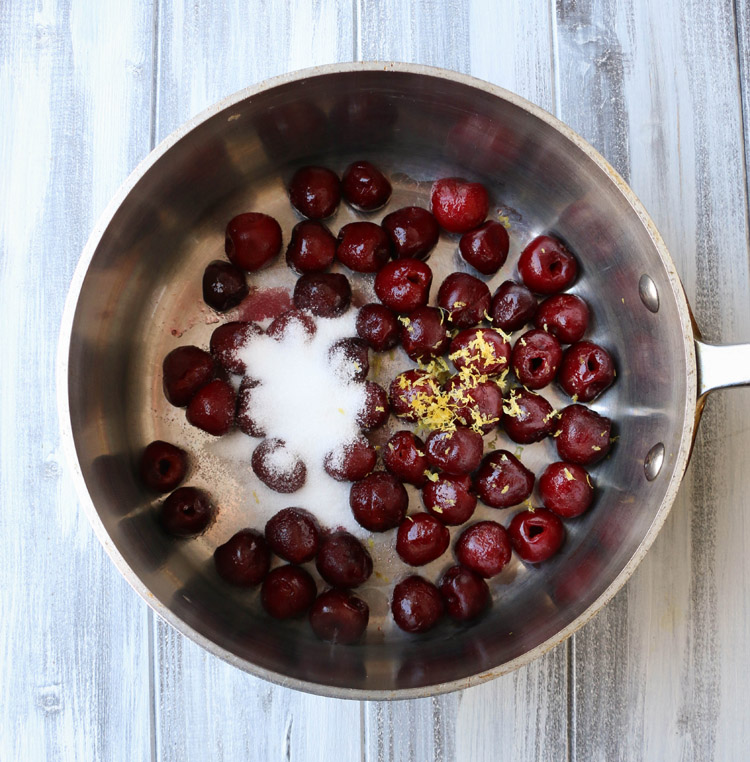
I started by cooking the whole, frozen cherries with some sugar and lemon zest. I didn’t add any water. Remember, the goal is not to create alot of sauce.
As the cherries cook, they give off their own liquid. Take a few spoonfuls of that liquid and mix it in a small bowl with some cornstarch to form a slurry.
Add the slurry back to the pan and continue to cook and stir until the mixture is thickened and some of the liquid has evaporated.


The mixture should be thick enough so that when you scrape the bottom of the pan, the sauce won’t flow right back over it. When you reach this stage, you’re done.
Take care not to over cook the cherries. You don’t want to make jam. We want to maintain the integrity of the individual cherries.


Make the Cake Batter
The cake batter comes together pretty quickly. You know the drill. Cream butter and sugar, add eggs and flavorings, add yogurt, then gradually add dry ingredients.
I omitted any alternating of dry and wet ingredients to simplify the recipe. Since this recipe has a few components, I figured that they should each be as simple as possible.
The batter will be thick. Reserve half a cup for the topping and spread the rest in the pan.
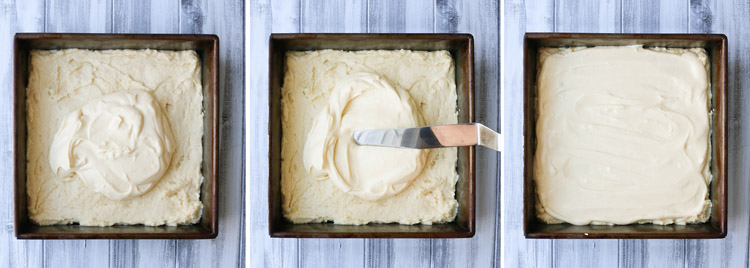

Make the Cheesecake
You can do this right in the same bowl in which you mixed the cake batter. No need to wash the bowl first.
See? Keeping it simple. No one needs an extra bowl to wash, and the cheesecake layer will not suffer from being mixed in the same bowl.
It’s a simple cheesecake batter. It will mix up in a flash.
Spread the cheesecake batter evenly over the cake batter.


Adding the Final Layers
At this point, the cherries should be fully cooled. Using two spoons, scoop each cherry up individually and drop them evenly over the cheesecake batter.
If the dropping of individual cherries is too tedious to you, just tip the plate you cooled them on and slide them off quickly. Just do your best to cover all the areas of the cake. You don’t want anyone to get a slice without cherries in it.
Then, drop the reserved cake batter in small spoonfuls right over the cherries.


Time to bake!
The following paragraphs contain affiliate links. We are a participant in the Amazon Services LLC Associates Program, an affiliate advertising program designed to provide a means for us to earn fees by linking to Amazon.com and affiliated sites.


How to Check if Your Oven Temperature is Accurate
I’m not going to lie. This cake is a little more difficult to read its doneness than your typical cake.
My oven bakes at an accurate temperature of 350 degrees F. If your oven runs hot or cold, your results may vary.
If you want the best results from a recipe, I would strongly suggest investing in an oven thermometer {aff. link}. They’re inexpensive and you’ll easily be able to check if your oven is running at the proper temperature.
If your oven is running hot, say it’s 375 degrees on the thermometer when your oven says it’s 350, then you can lower your oven temperature to 325 or until your thermometer registers 350.
Then, you can make the proper adjustment for future recipes.


How can I tell when the cake is done?
The toothpick test doesn’t work so well with this cake because you’re likely to hit soft cheesecake or cherries, so it will rarely come out clean or with a few crumbs as we might normally expect.
So, here are some visual cues:
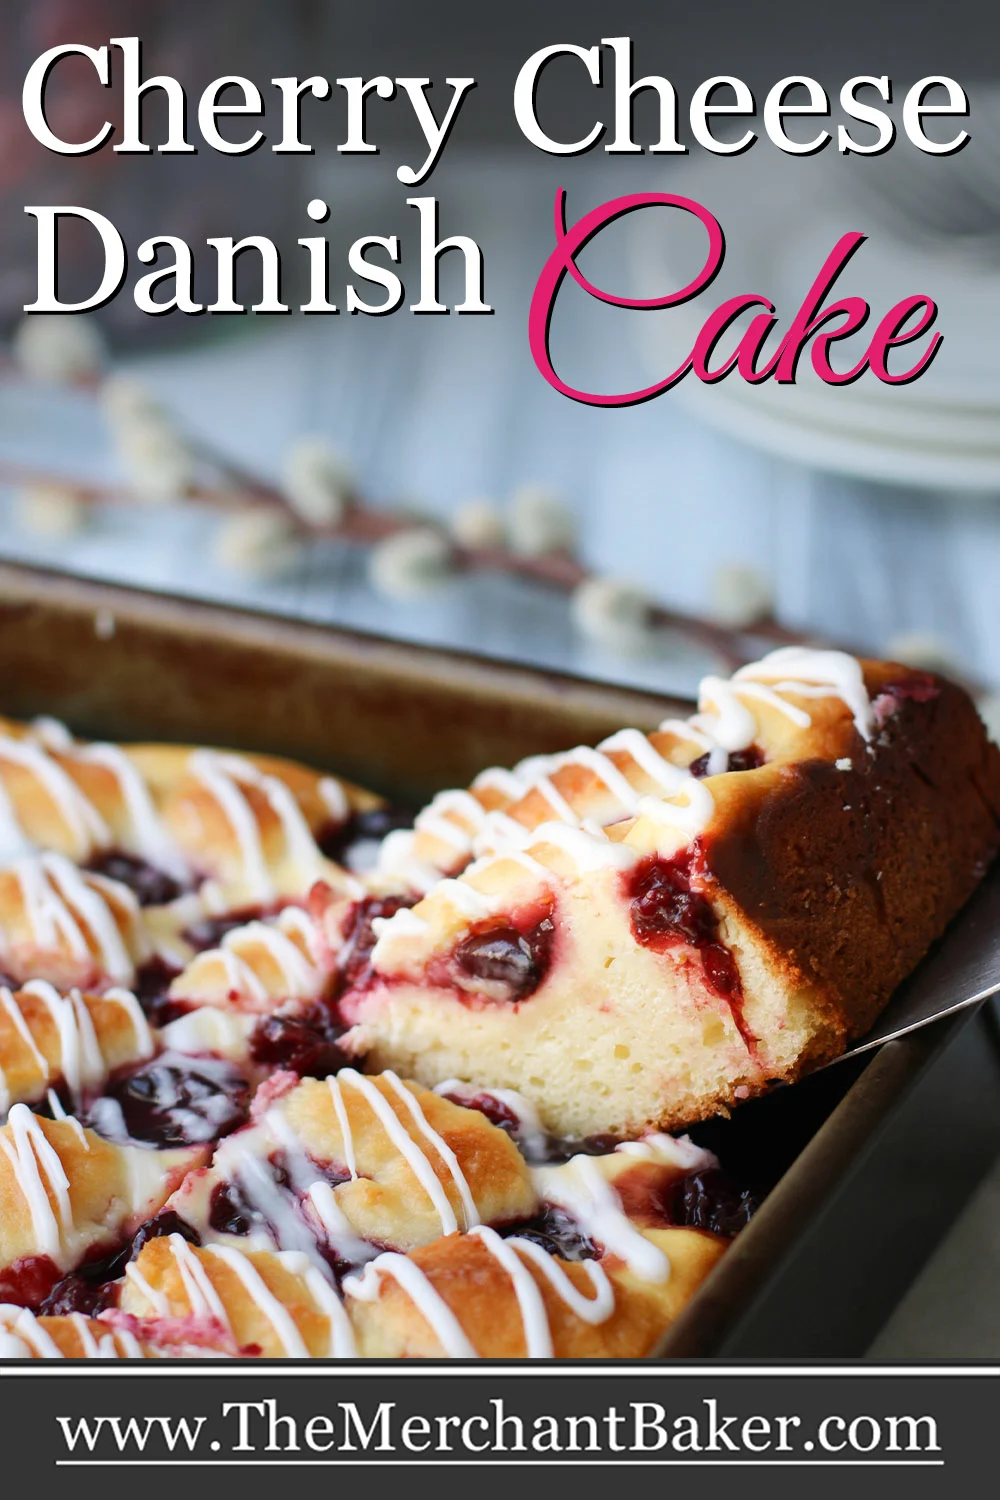
- The top of the cake is golden brown.
- The edges of the cake are pulling away from the pan and are also a deep golden brown.
- Your oven is truly baking at 350 and you’re within a window of 37-42 minutes. (Baking times can vary if you use a different sized pan that I did.)
What did I do? I double checked it with an instant read thermometer. <(This is not an affiliate link, it’s just a link to an updated version of the pen I own.)
Now this particular thermometer is not inexpensive, but definitely worth the investment. I use it all the time to check the temperature of cooked meats. I love it because it’s fast and accurate.
There are much less expensive brands on Amazon, but I can only vouch for the quality of the one I own.
While I use it most often to check meat temperatures, I also use it when if I’m unsure if a cake is finished baking. This was one of those days. I really did not want to over or under bake it.
The internal temperature of a cheesecake should be about 150 degrees. For cakes, it should be about 200-210 degrees, depending on the cake.
Because I had both in this recipe, I deferred to the cake temperature and considered it done at 200 degrees.
That temperature was achieved in 40 minutes of baking on the middle rack of my 350 degree oven.
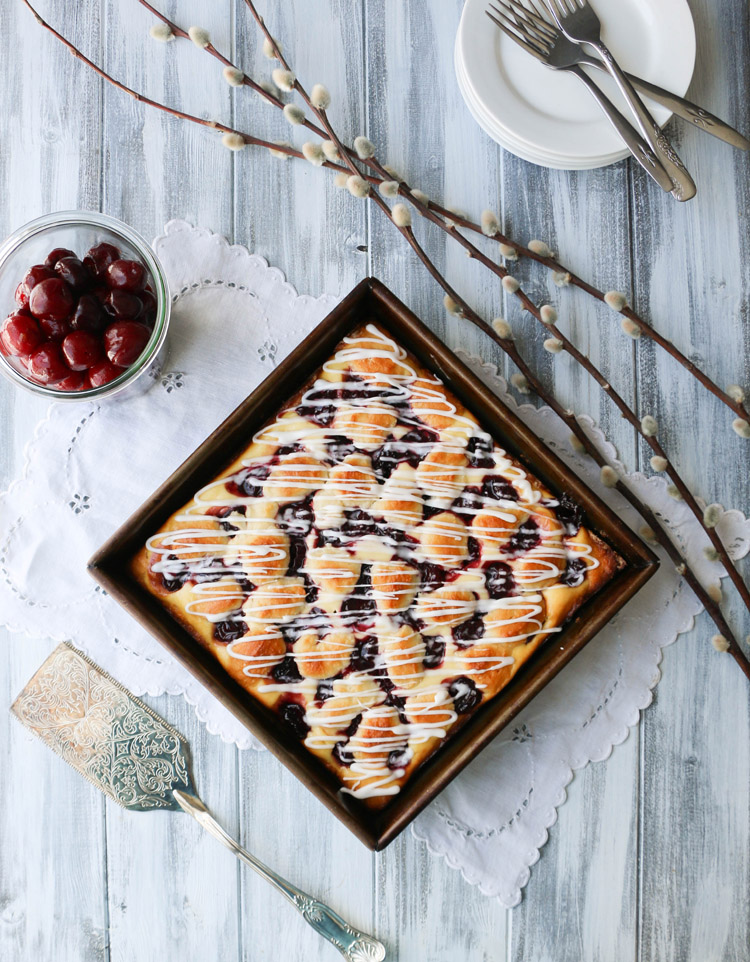

Topping the Cake
To hit home the whole idea of a cherry Danish, there had to be a drizzle of icing on top.
So, once the cake is cool, just mix up a small bowl of a simple confectioner’s sugar icing. (This is the other place I decided to add a hit of almond and vanilla flavors.)
You can drizzle it from a spoon all over the top of the cake. I like to put the icing in a zip top bag, cut a bit of the corner off and then pipe/drizzle from there. It’s not necessary, but it does give you a bit more control, should you want it.


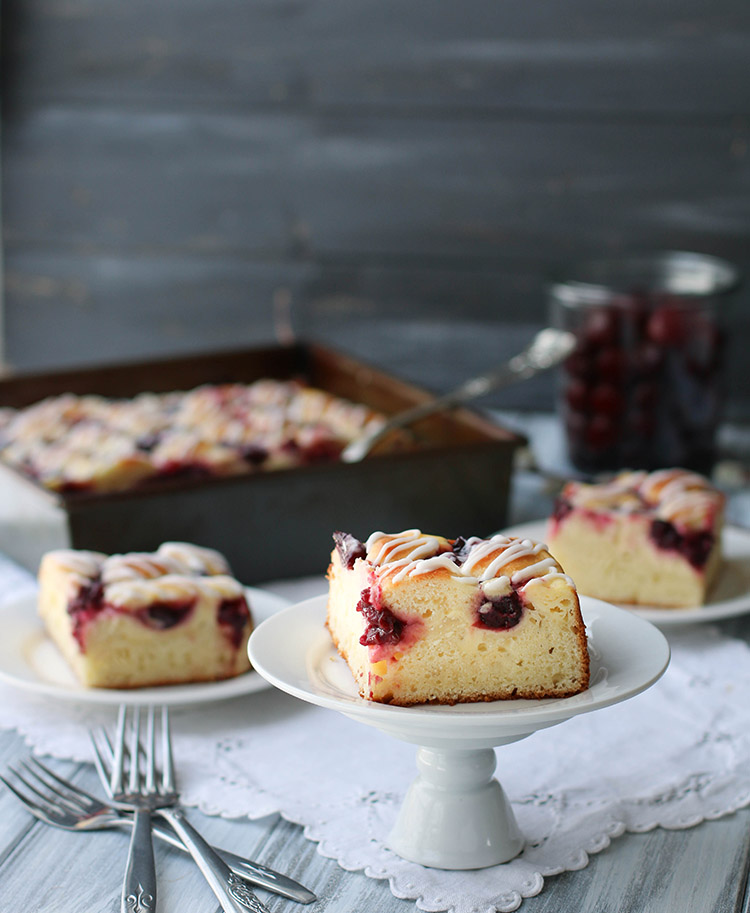
What’s the best temperature to serve Cherry Cheese Danish Cake?
Room temperature is lovely for the bottom cake layer. It’s also the best temperature to serve cheesecake.
The problem is that you have to refrigerate it for storage. And, actually, cheesecakes benefit from a long chill time as well. So, of course, that leaves you with cold cake.
You know how cakes get dense when cold? Well, this is already a rich, dense cake. When cold, the whole cake begins to feel like cheesecake, even though the base layer is cake.
And for some, there’s nothing wrong with that. My husband loves a cold cake. And we all love cheesecake, don’t we? So there’s no crime in eating a chilly slice straight from the fridge. Instant gratification.

For the room temperature fans, the only issue is this…trying to get your cold cake back to room temp every time you’re taking a piece out of the refrigerator seems a bit tedious to me.
So, my favorite way to eat this cake? I love it just ever so slightly warmed in the microwave. Basically, I’m just quickly bringing it back to room temp with just a few extra degrees of warmth.
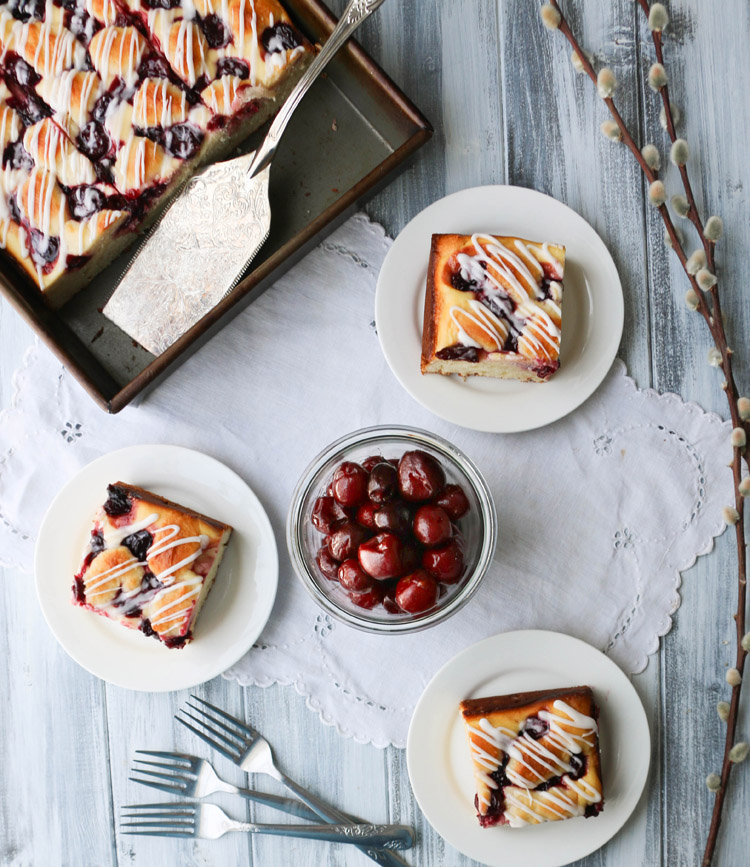
My pieces were 1/2 the size of the pieces in the photograph and 10-15 seconds in the microwave was perfect.
When you warm it up, the cake layer softens up and becomes more of an independent layer from the cheesecake layer. You get more of a sense of the cakes’s texture and crumb.
I also believe that warming it up just a bit helps your palette access the flavors better. You simply taste more of the flavors in a richer way when the cake is not cold.
It’s still a sturdy cake. It’s kind of like eating a delicious custard cake except that it tastes like a cherry cheese Danish :)
How should I store this cake?
Store this cake in the refrigerator for 3-4 days. I will admit I thought it tasted better 2 days after I baked it .
I store it right in the baking pan tightly covered with foil or covered in an airtight container. You don’t want the cheesecake to dry out and you don’t want it to absorb any random odors from other foods in your refrigerator, should there be any.
Can I freeze this cake?
Yes. You can freeze this cake for longer storage. I always prefer to freeze individual pieces. I wrap each piece in plastic wrap or waxed paper and then place them in a zip top freezer bag.
You could also freeze the whole cake, if desired. For this, I would wrap well with plastic wrap and then with foil unless you had an extra large freezer bag to store it in. I would also wait to drizzle the icing until after the whole cake was thawed.
In the whole cake case, I would thaw overnight in the refrigerator.


Cherry Cheese Danish Cake. It’s like getting to eat cheesecake, cake and a Danish pastry all at the same time…and for breakfast, no less! Sounds like a sweet way to celebrate just about any day in February to me :)

Cherry Cheese Danish Cake
This Cherry Cheese Danish Cake was inspired by delicious cherry cheese Danish pastries. Instead of a flaky pastry, this cake boasts a delicious layer of almond scented cake and a creamy layer of cheesecake. Lightly sweetened cherries and spoonfuls of reserved cake batter create a cobblestone like surface that is then drizzled with a simple icing.
Ingredients
For the cherries:
- 2 cups frozen or fresh whole cherries
- 2 Tablespoons sugar
- 1/4 teaspoon lemon zest
- 1 teaspoon cornstarch
For the cake:
- 2 cups all purpose flour
- 2 teaspoons baking powder
- 1/2 teaspoon salt
- 1/2 cup (1 stick) unsalted butter (cool room temperature)
- 1 cup granulated sugar
- 2 large eggs (room temperature)
- 1 teaspoon almond extract
- 1/2 teaspoon vanilla extract
- 1 cup Greek yogurt (I used Fage 2%)
For the cheesecake:
- 8 ounces block cream cheese, room temperature (I used full fat)
- 1/4 cup sugar
- 2 Tablespoons all purpose flour
- pinch of salt
- 1 egg, room temperature
- 1/2 teaspoon vanilla
For the icing:
- 1/2 cup confectioner's sugar
- small pinch of salt
- 1/8 teaspoon almond extract
- 1/8 teaspoon vanilla extract
- 2 teaspoons water or milk
Instructions
Prep Ingredients:
- Before beginning, make sure all eggs, butter, cream cheese and yogurt are room temperature. Spray a 9" square pan or 9" round springform pan with non-stick spray. Set aside. Preheat oven to 350 degrees F.
Make the cherry filling:
- Cook frozen cherries, sugar and lemon zest in a small sauce pan over medium heat, stirring occasionally, until the cherries have released their juices.
- Take a few spoonfuls of the juice out of the pan and mix them in a small bowl with the the teaspoon of cornstarch until fully dissolved.
- Add the cherry juice mixture back into the pan with the cherries and continue to cook until mixture has thickened and some additional juice has evaporated. You should be able to clear the bottom of the pan with a spoon (see photo in post) Remove from heat and spread cherries out on a plate to cool. Set aside.
Make the cake:
- In a medium bowl, whisk flour, baking powder and salt. Set aside.
- In a large mixing bowl, beat butter and sugar with an electric mixer until light and fluffy, about 3 minutes.
- Add eggs, one at a time, along with almond and vanilla, mixing until combined.
- Add yogurt and continue mixing to fully incorporate.
- Gradually add flour mixture until fully combined, scraping beater, sides and bottom of the bowl as needed. Batter will be thick. Reserve about 1/2 cup of the batter and set aside.
- Spread remaining batter evenly in prepared baking pan. Set aside. No need to wash the mixing bowl yet. We'll be using it again in the next step. (Don't worry if there's a little residual batter on the beaters or bowl.)
Make cheesecake:
- In the same mixing bowl used for the cake batter, beat the softened cream cheese, sugar, flour and salt until creamy. Add the egg and vanilla and beat until fully combined.
- Spread cheesecake mixture evenly over cake batter in pan.
Add final layers and bake:
- Spoon cherries and the little bit of sauce they're in evenly over cheesecake layer. (I used 2 spoons to drop each cherry individually over the top.)
- Drop teaspoon or so sized spoonfuls of the reserved half cup of cake batter evenly over the cherry layer.
- Bake on the middle rack for about 40 minutes until top is golden brown, cake appears set and the edges are a deep golden brown and beginning to pull away from the sides of the pan.
- This cake can be served cold, room temperature or warmed up for just a few second in the microwave (my favorite way.)
Make the icing:
- Once cake is cool, make the icing. In a small bowl whisk the confectioner's sugar, almond and vanilla extracts and the water or milk until smooth. Add additional liquid or sugar to get a thick drizzling consistency. Drizzle evenly over cake. Cut and serve.
Storing the cake:
- Cake can be stored in refrigerator for 3-4 days. For longer storage, wrap pieces individually in plastic wrap or waxed paper and place in zip top freezer bag. Frozen wrapped pieces of cake can be thawed overnight in refrigerator or on countertop at room temperature for an hour or so.
Notes
*Butter should be softened, but not soft. You should be able to press your finger into it and leave an indentation.
*You can sub sour cream for the yogurt.
*It can be a difficult to tell when this cake is finished baking especially if your oven runs hot or cold or if you use a different sized pan. I give visual hints in the instructions. However, I did use an instant read thermometer to put my mind at ease. I baked until the internal temperature was about 200 degrees. Allow to cool completely Don't be too afraid of dark edges as they will look like the edge of a cheesecake.
*This is a delightfully lightly sweetened cake. If you would like a sweeter cake, you could double the sugar for the cherries and cheesecake. I would probably leave the sugar as is in the cake batter. I really would try it as is before you made those changes and if you feel you want more sweetness after you tried a piece, you could always double the amount of icing to get that sugar hit you're looking for.
*This cake is also just lightly flavored with almond. I didn't want to overpower the cheesecake or cherries. However, it certainly could take more flavor if you want the almond to become more predominant. You can either double the extract in the cake, and/or add it to the cheesecake and the cherries.
*I came really close, but decided not to add another layer to this cake. That being said, you could top the cake with sliced almonds before baking or sprinkle the almonds on top of the icing after baking. It would add a lovely texture and accentuate the almond flavor.
Sandra
Monday 22nd of January 2024
Turned out well. Think for breakfast cake, would put in jellyroll pan instead of square pan Used canned pie filling and discarded half of the thickened part.
Ramona
Wednesday 24th of January 2024
Hi Sandra, I'm glad to hear that it turned out well. If you decide to experiment with a jellyroll pan, let me know how it works out. You'll probably need to reduce the baking time in a larger pan, so keep an eye on it.
Amanda
Sunday 14th of August 2022
Could you use canned cherry pie filling?
Ramona
Monday 15th of August 2022
Hi Amanda, you could definitely use canned filling, but I would try to pick one that actually has a fair amount of cherries in it. It seems some are heavy on the thick syrup part and low on fruit. Mine is high on cherries, low on "goo". And I would probably leave some of the canned syrup behind and pick out the cherries. You'll see I didn't cover the whole batter with a layer of pie filling, just scattered the cherries around the top. I'm not sure if a whole can of cherry pie filling would add too much moisture to the cake. It might would great or it might make the cake too wet, so I would mindful of not overdoing it. You can see in my photos why mine looked like. Let me know how it works out for you.
Don
Thursday 3rd of February 2022
I would use Raspberry or Pineapple instead of Cherry don't like Cherrys
Ramona
Thursday 3rd of February 2022
Hi Don, I think other fruits are a lovely idea!