


Hey! Somebody baked me a birthday cake!

Ummm, probably because I asked for it…and not in the, “Hey, do you want to bake me a birthday cake?” way. It was more of an assumption made with a broad grin. “Sooooo….what kind of birthday cake are you going to make for me?” I originally presented this question to my family in a joking manner, because, let’s be real. People rarely offer to bake cakes for people who bake a lot. We normally bake our own birthday cakes, if there’s any baking to be done. I know this to be true especially with the rise of food blogs and the now public records of those who blog about what cake they baked for their own birthday.
Truth is, I actually haven’t had a whole birthday cake in a long time, which is funny because it’s really the only thing I ever want for my birthday. Why? Because birthday wishes are special and they can only happen when you blow out a candle on top of a cake…or something sweet standing in for a cake. I usually plan to be out of town drinking up the last of summer’s glory. My family takes me out for a special dinner in whatever cool place we’re staying for the week and then we go out for a special dessert so we can light a candle and I can make my wish. School schedules have started messing up my plans so the tradition of being away that day has probably come to an end :(
So, knowing I would be at home this year, I thought about what kind of cake I would make and decided I wanted something different, so I picked Pineapple Upside Down Cheesecake Cake. Then, when my family said they would make the cake, I thought I should change it to something simpler. Instead, they wanted to rise to the challenge. Basically, they needed to make two cakes and they could split up the work over two days.
First, the cheesecake. I have a cheesecake recipe that everyone loves but I was worried it wouldn’t be dense enough to stand up as a base for another cake. I searched for a New York style cheesecake and came up with the recipe for Junior’s Cheesecake, which, regardless of how “famous” it might be, I had never tried.
The pineapple upside down cake was simply a tried and true recipe I’d been making for years from Cooking Light. I figured a slightly lighter cake might help balance out the richness of the cheesecake. I originally planned two layers of cake with the cheesecake in between, but for this, I thought it would be overkill. I handed the recipes over to my husband and kids and that was that.

Until my husband asked if we had everything we needed to make the recipes. I told him we had about 90%, but I’d make him a list of the other things he needed to get. He decided he wanted to make the list (but accidentally forgot it on the counter when he went to the store.) Once we (I mean, they :) had all of the ingredients I was banished from the kitchen while they dove headfirst into making the cheesecake. I heard the kids crushing up the graham crackers and then the mixer whipping up the filling. I only checked in once after the graham crust was baked. I gently commented that the springform pan bottom was not actually fully clipped into the pan when they baked the crust and that it needed to be fixed so that the filling wouldn’t ooze out. Thankfully, that was easily remedied without destroying the crust and I made my way back out of the kitchen.

The next morning I smelled buttery caramel cooking and checked in once more to see what was going on. My husband was enthusiastically making caramel sauce for the next cake. It was beautiful in the pan, but I asked him how long it had been boiling and it had been more than five minutes (yikes!) We cooled a little bit of it to find out he had hard candy instead of sauce. I didn’t realize he was going to start so early or I could have explained that he only needed to melt the butter and sugar together to combine them, not to cook them to a caramel stage. He started over and within a few minutes, was back on track.
I happened to be on the phone with a friend that morning and she kept scolding me to get out of the kitchen and just let them do it by themselves. So, I did. After the caramel candy incident, I stayed out. And then my husband left the house to pick up something fun for breakfast. I was still on the phone with my friend when I wondered if the cake was in the oven yet. It was. Then I wondered if my husband realized he left the house with a cake in the oven….Five minutes later he called and said,”I forgot about the cake in the oven. Could you check on it for me?” #dontstayoutofthekitchen
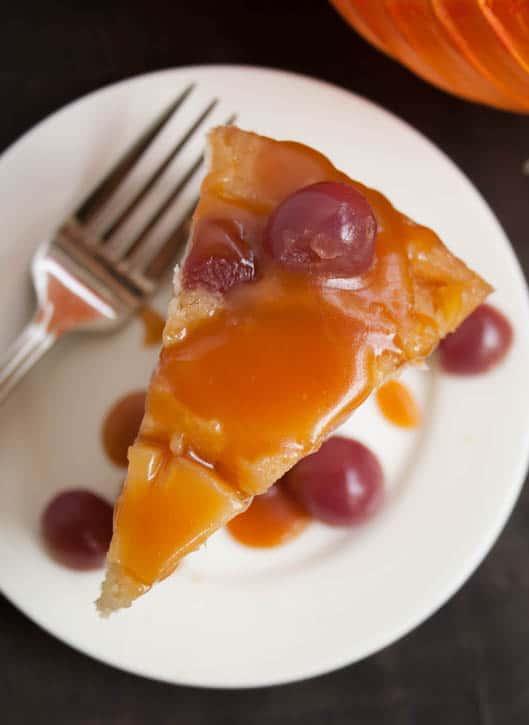

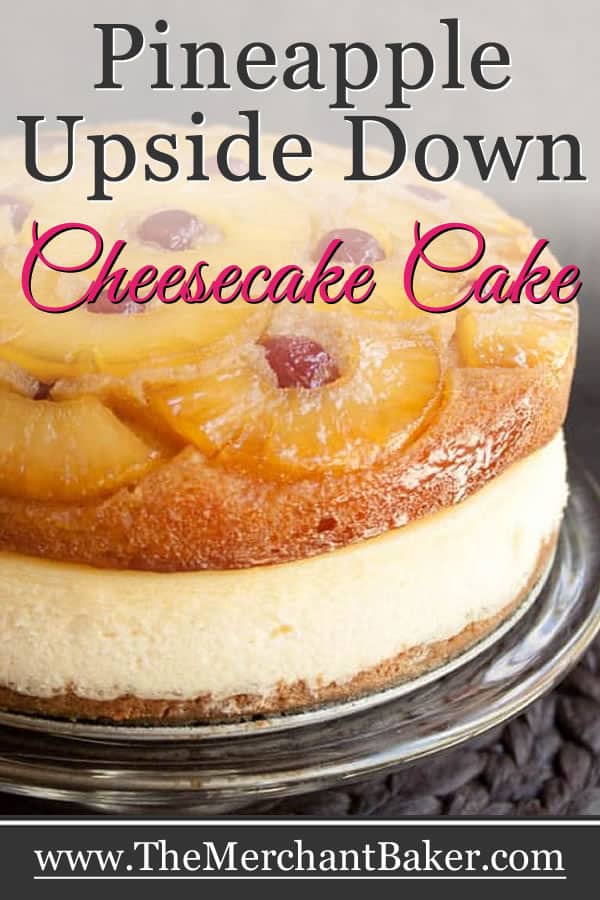
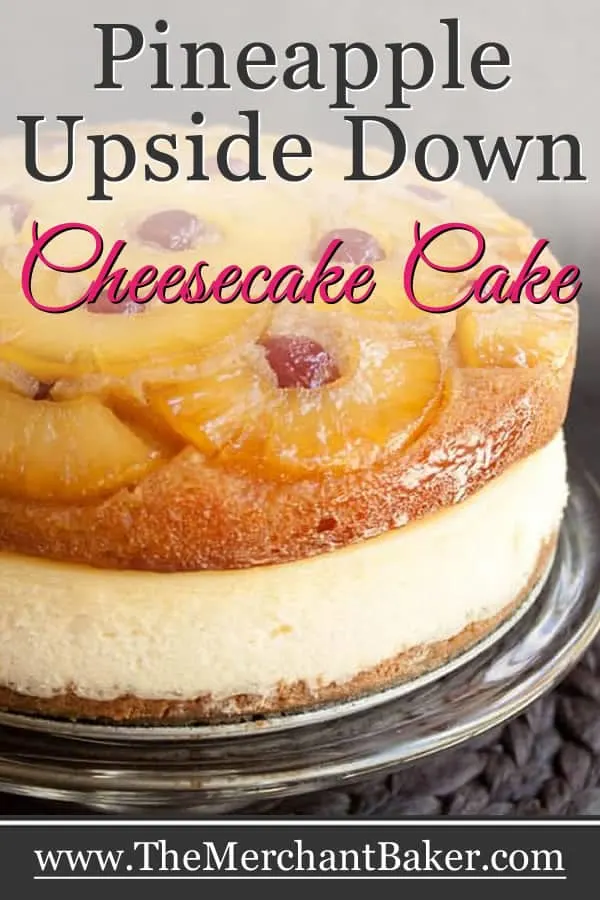
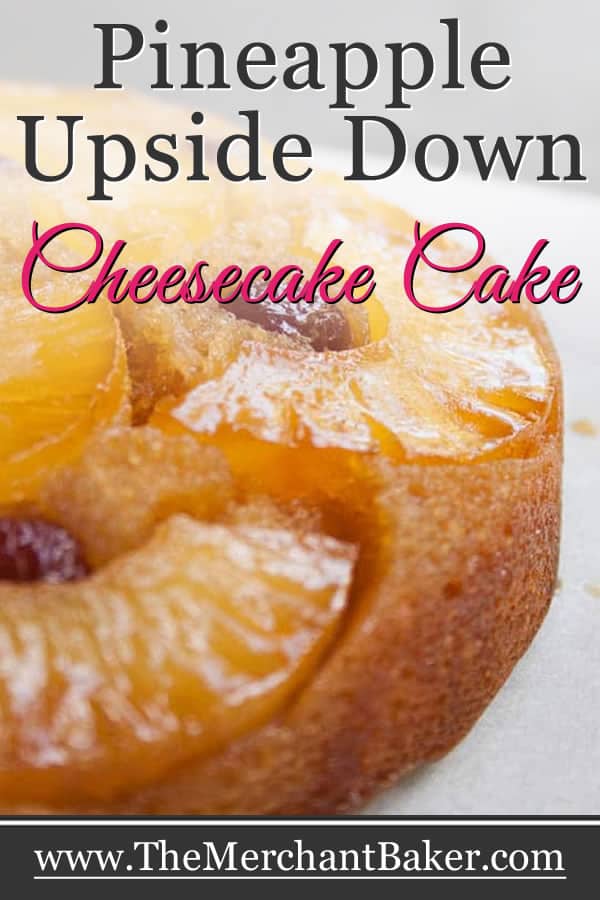
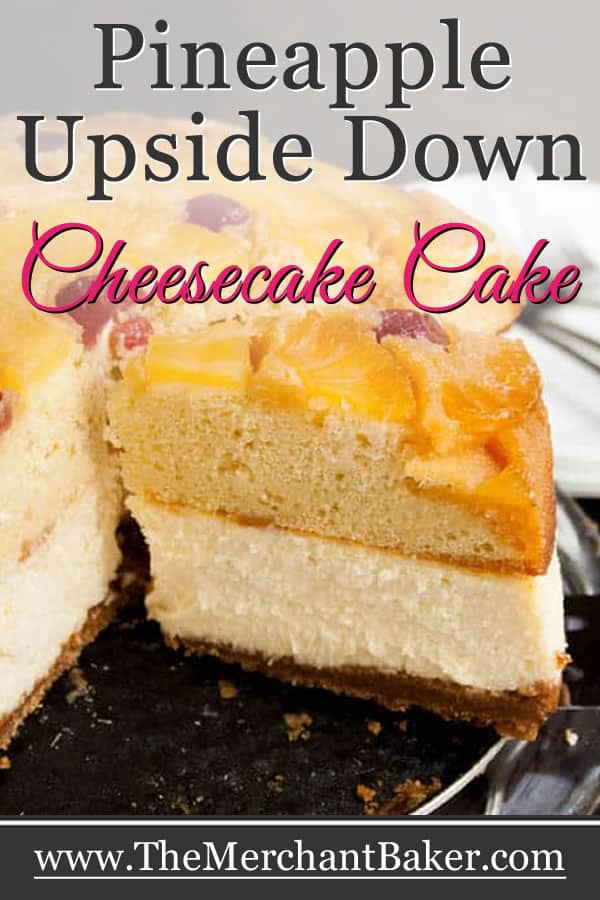
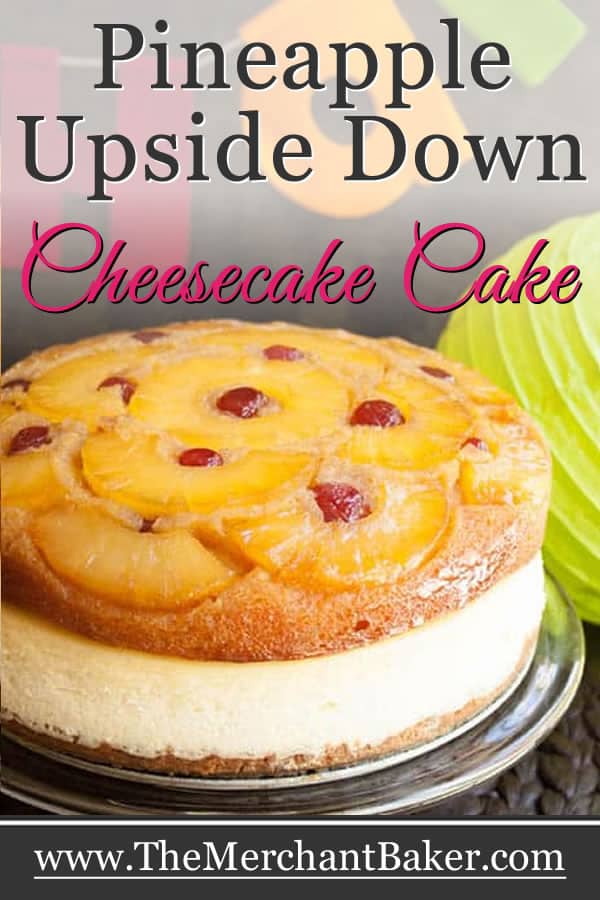
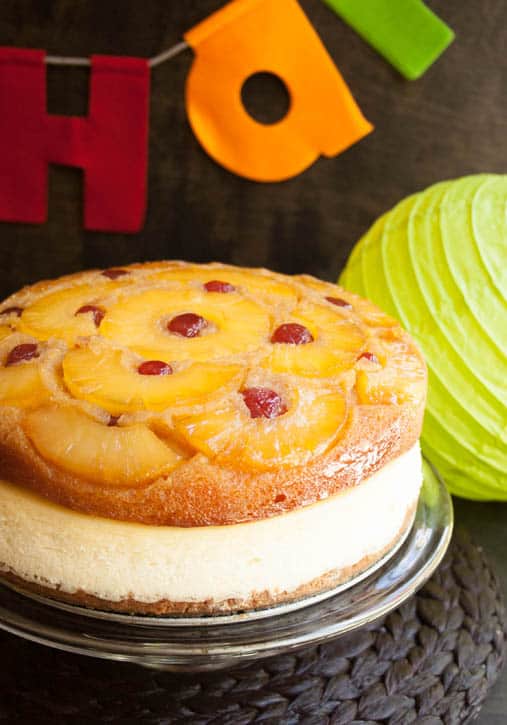
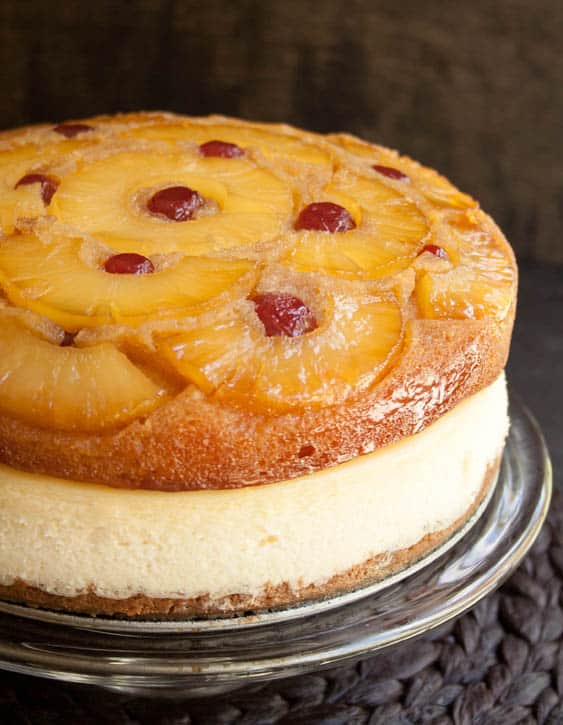
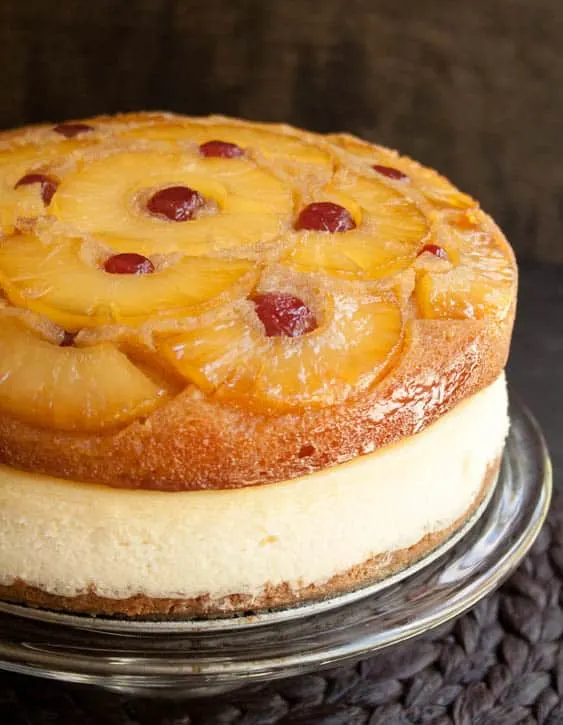
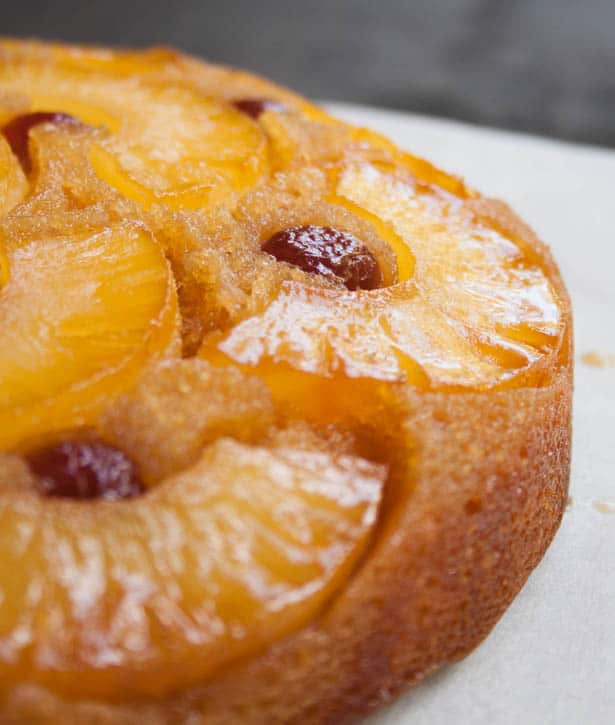
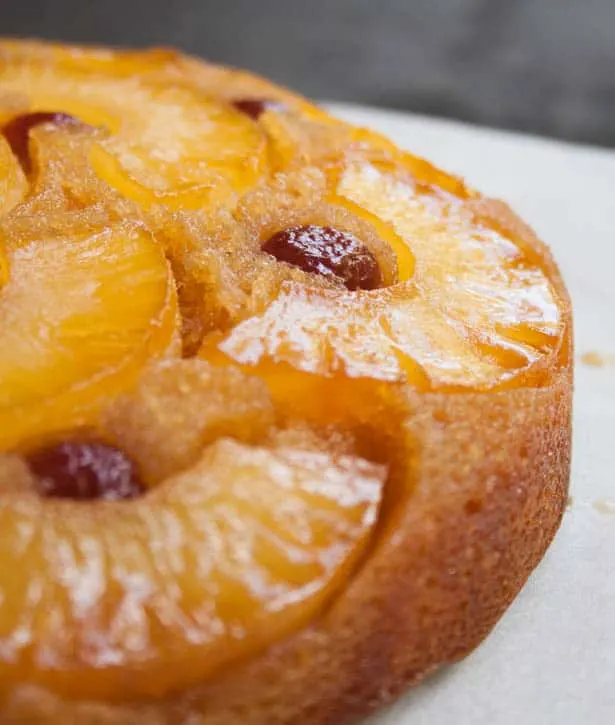
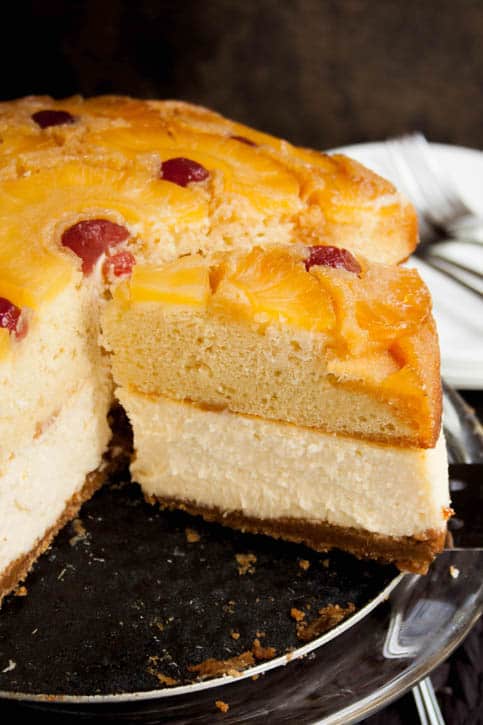
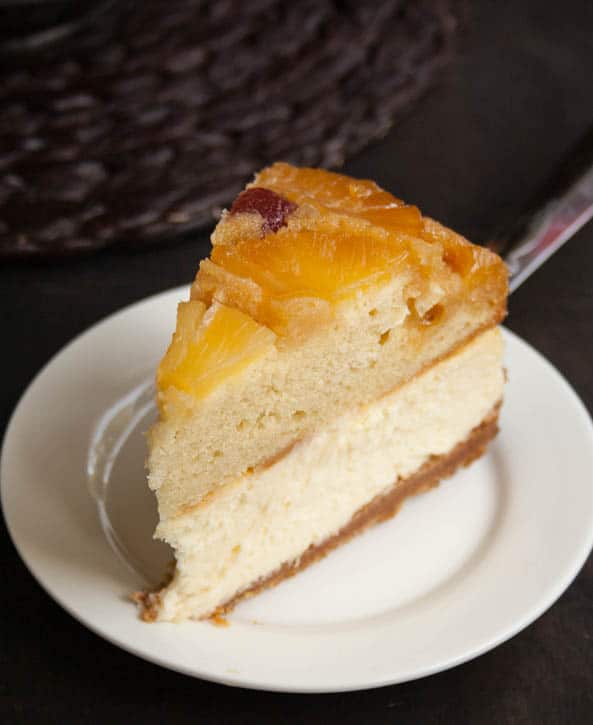
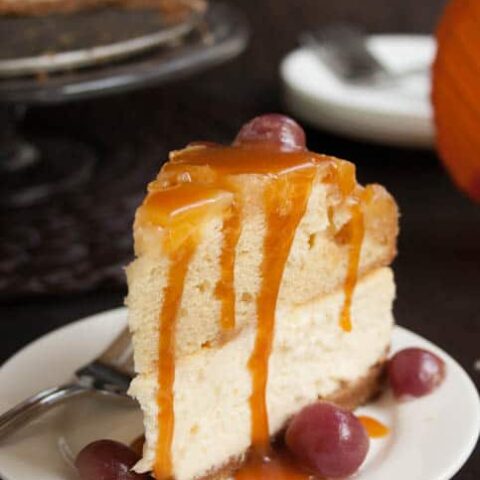
I tell you all this not because I want to point out any mishaps, or even highlight my control freak issues (#toknowmeistoloveme) but to emphasize that I only checked on them three times over two days and look what my family made?…. Pineapple Upside Down Cheesecake Cake!!! For me!!! It was gorgeous!
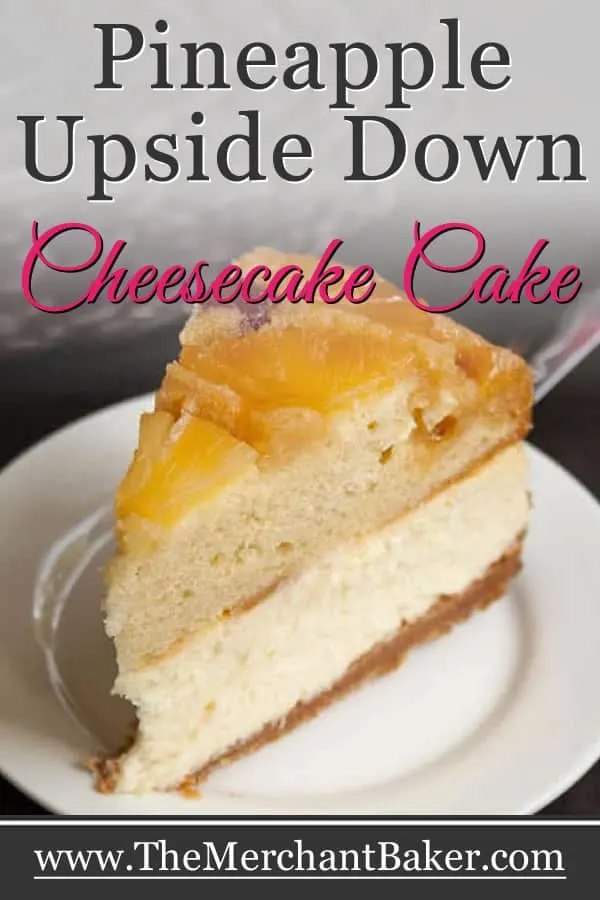
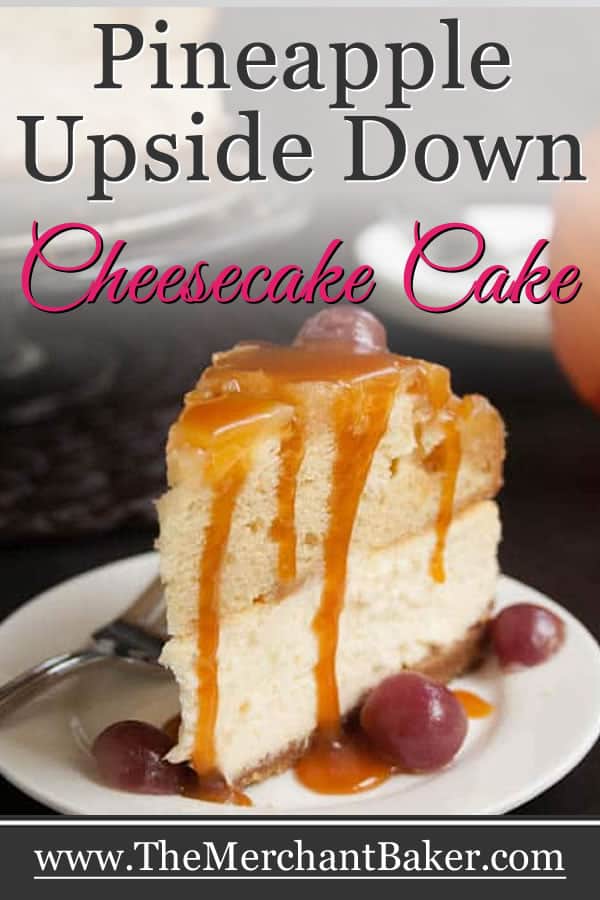
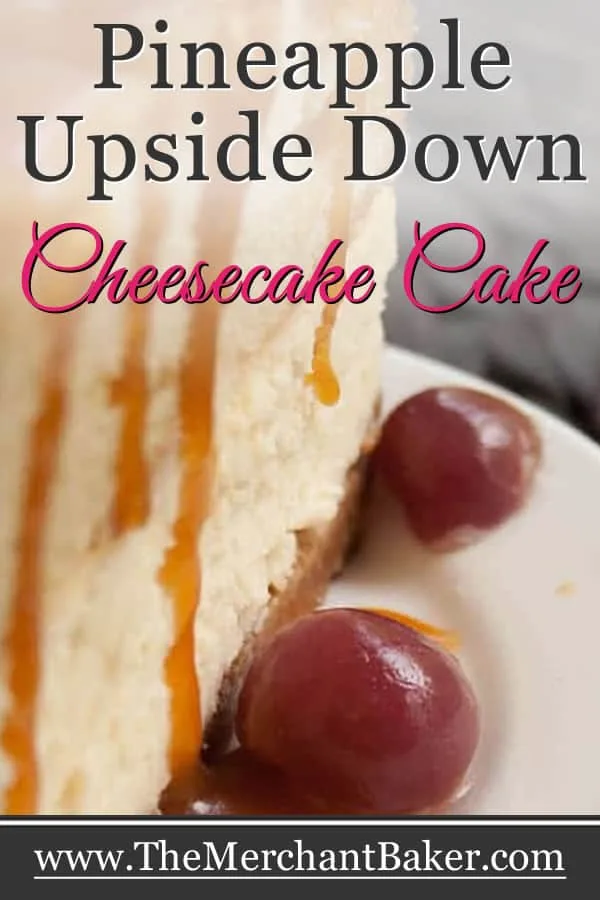
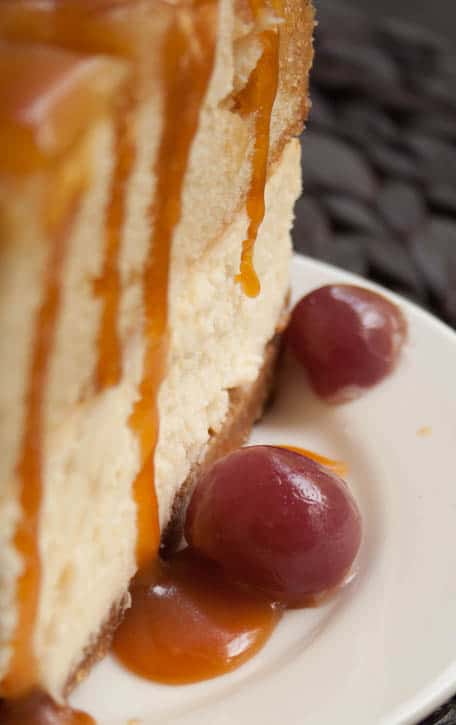
Sweet, buttery, caramelly and fruity pineapple upside down cake atop a creamy cheesecake. It was delicious! The cheesecake was not as dense as I had expected, but it was a great texture for the cake. We had some leftover salted caramel sauce that we drizzled on top and it was ridiculously perfect! (Yes, this was on top of the already caramelized fruity top. See that’s why the cake is “light”, so we have room to make it “un-light” without getting too crazy ;)

My family was so proud of their accomplishment. When I told my daughter I was going to shoot it for the blog, she said, “But Mom, you didn’t make it.” I told her it was okay. “The post would be about the fact that all of you made it…for me.” She was satisfied with that and skipped out of the kitchen.
My husband said both cakes were really easy to make. He had no idea that cheesecake was so easy and the pineapple upside down cake is pretty much a one bowl cake. You know, any cake would have been deeply appreciated. They could have bought a box mix and a can of frosting and I would have been honored and delighted. But now that I’ve had such an amazing cake from my oh so awesome family? Well….

I think I know exactly what to wish for next year… :)

Pineapple Upside Down Cheesecake Cake
Don't let a multiple recipe cake intimidate you. Both are easy recipes. Just make the cheesecake the day before and let it refrigerate overnight. Start early enough because there's a long baking and cooling time before you can forget about it in the refrigerator. The next day, whip up the super easy pineapple cake and you're good to go!
Ingredients
For the crust:
- 1 1/2 cups graham cracker crumbs
- 1 Tablespoon sugar
- 6 Tablespoons melted butter, either salted or unsalted works fine here
For the cheesecake:
- Four 8 ounce packages cream cheese, we use Philadelphia Cream Cheese, room temperature
- 1 2/3 cup sugar
- 1/4 cup cornstarch
- 1 Tablespoon vanilla
- 2 extra large eggs
- 3/4 cup heavy cream
For the cake:
- 1 20 ounce can pineapple slices in juice, drained
- 1/2 cup brown sugar
- 4 Tablespoons salted butter
- maraschino cherries, 7 or so depending upon your design
- 5 Tablespoons salted butter
- 2/3 cup sugar
- 2 large or extra large eggs
- 1/2 cup buttermilk
- 1 teaspoon baking powder
- 1 teaspoon vanilla extract
- 1/4 teaspoon salt
- 1/4 teaspoon baking soda
- 1 1/4 cups all purpose flour
- Extra cherries and warmed caramel sauce for serving, see notes for recipe links
Instructions
- The day before you want to serve the cake, make the cheesecake.
- Preheat oven to 350 degrees F. Prepare a 9" springform pan by wrapping the bottom and sides with heavy aluminum foil. This is to insure that nothing in your pan leaks out and that water won't get into your pan when the cheesecake bakes.
- Combine graham cracker crumbs, sugar and melted butter. Pour into a 9" springform pan and using your hands or the bottom of a glass, press the crumbs on the bottom and up the sides about a half inch or so. (My husband/kids only pressed on the bottom, so that's what you see in the photos. Either way is fine.)
- Bake crust for 8 minutes and set aside to cool.
- Make the filling. In a large bowl, with an electric mixer (use paddle attachment for stand mixers), beat one package of the cream cheese, 1/3 cup of the sugar and the cornstarch together on low until creamy, about 3 minutes. Scrape down the sides of the bowl as necessary.
- Blend in the remaining cream cheese, one package at a time, beating well after each addition.
- Increase the mixer speed to medium and beat in the remaining 1 1/3 cups sugar, then the vanilla.
- Blend in the eggs, one at a time, beating well after each.
- Beat in the cream just until completely blended. The mixture should look light, creamy and billowy. Be careful not to over mix at this step.
- Place the pan in a large shallow baking dish (we used a roasting pan) and pour in hot water until it comes up about halfway, (about 1 inch), up the side of the baking pan. Be careful not to splash any water into your cheesecake while you're pouring.
- Carefully transfer pan to oven. Bake until light golden brown and the center barely jiggles, about 1 hour and 15 minutes.
- Remove the cheesecake from the water bath and allow to cool on a rack for 2 hours. Cover top of pan loosely with plastic wrap and chill overnight in the refrigerator.
- The day of serving, make the cake.
- Preheat oven to 350 degrees F. Spray a 9" cake pan with cooking spray.
- Melt the 1/2 cup brown sugar and 4 Tablespoons of butter in a small sauce pan until sugar dissolves and mixture has fully combined. Do not cook or bring to a boil. You just need the sugar and butter to melt and combine. Remove from heat and pour into the prepared cake pan, tilting it back and forth to cover the entire bottom evenly.
- Decide how you want to arrange your pineapples and cherries. We used 7 pineapple rings (some cut in half) and 13 cherry halves for our design. You don't have to cut your cherries, you may leave them whole, if you wish. Once you figure out how many pieces of fruit you need for your design, pat them all dry with paper towels, then arrange them in the pan on top of the caramel sauce layer. If your cherries are cut in half, place them into the pan, cut side up so that the uncut side will be on top when you flip your cake over.
- Make the cake batter. Melt the 5 Tablespoons of butter in a large microwave safe bowl. Cover and microwave on high for 1 minute or until butter is melted. Add sugar, stirring with a whisk. Add eggs and whisk to combine.
- Whisk in buttermilk and next four ingredients (buttermilk through baking soda.)
- Add flour and stir just until blended (do not over stir.) Carefully pour the batter into the pan on top of the fruit layer.
- Bake at 350 degrees F. for about 30 minutes or until a toothpick comes out clean.
- Cool for 1 minute in pan. Place a baking sheet with no rim (or flip it so that you have a flat surface) upside down on top of the cake pan and invert the cake onto the plate. Cool completely.
- To assemble, remove chilled cheesecake from refrigerator and remove the sides of the springform pan. Leave the cake on the bottom of the springform pan for serving. Place the cake on serving plate, then using a large spatula, lift and slide the cooled pineapple cake off the pan and onto the top of the cheesecake. (You need the no rim sheet/plate so that you can easily slide the cake off of it. I used a cake lifter, but the pan should work fine)
- Slice and serve with warm caramel sauce and extra cherries, if desired.
Notes
*For the pineapple upside down cake, you could use 1/3 to 1/2 cup of prepared caramel sauce instead of melting the brown sugar and butter together. The original light recipe calls for 1/3 cup of fat free caramel topping drizzled in the bottom of the pan. The homemade version makes the fruit sink in a bit more, but I don't mind that at all and the flavor is so much better.
*You can warm up a prepared caramel sauce for serving or make 10 Minute Buttermilk Caramel Sauce or Salted Caramel Sauce. But definitely drizzle the caramel sauce on each slice. It brings the cakes together, is ridiculously delicious and makes for a pretty presentation.
*We use Tillen Farms cherries. I'm giving you a link, but we buy them from Whole Foods.
*Store cake in refrigerator. Cheesecake adapted from Epicurious
Cake adapted from Cooking Light, August 2001 Issue
The Merchant Baker Copyright © 2015
Charlotte
Thursday 6th of November 2025
This is what I have been looking for 💃💃 I was looking and found this weird recipe that called for the upside down cake on bottom of springform pan THEN a graham cracker crust over the cake followed by the cheesecake mixture, then bake it..the picture showed the finished product with the graham cracker crust on bottom as usual..how did that happen when the gc.crust was in the middle of the cake when assembling? And how could it bake with the two cakes baking at the same time, I totally didn't understand. Anyway, today your recipe showed up, what GREAT timing. Thank you 🙏
Ramona
Friday 7th of November 2025
Hi Charlotte! I'm happy to hear this recipe found its way to you :) I hope you love it as much as I do! It's a perfect combination!
Mrs Jones
Wednesday 27th of November 2024
Hello! Do you have to do the water bath for this to turn out right? I have never done this process when making cheesecakes, but I have heard of it before.
Ramona
Thursday 28th of November 2024
Hi Mrs. Jones, I haven't made this particular recipe without the water bath, so I can't comment on how it will turn out. Water baths help to gently and evenly bake the cheesecake which affects the texture of the end result. That doesn't mean you wouldn't be ok with the texture if you didn't do it. If you have a tried and true cheesecake that you make without a water bath, you could definitely use that instead. I just happen to like the texture and flavor of this cheesecake recipe with this cake.
Yvonne Caudill
Wednesday 20th of November 2024
How long can this pineapple upside down cheesecake last in the fridge fully assembled?
Ramona
Thursday 21st of November 2024
Hi Yvonne, I think it would be fine up to 3 days. The cheesecake can go longer, more like 5-7 days. It's best to make the cheesecake the day before, so you could potentially make the cheesecake 2 days before you make the cake portion. Once you make the cake portion, then I wouldn't store it more than 3 days.
Abby
Saturday 7th of September 2024
Would it be ok if I made it today but started now around 7am. It won’t need to be ready until around 5-6 tonight
Ramona
Sunday 8th of September 2024
Hi Abby, sorry this isn't going to get to you in time. You could make it in one day, but the cheesecake really benefits from a long chill. I fear you wouldn't get many hours of chilling time by the time you prepared,baked, cooled and chilled it. That being said, it would still taste good, but it might not have firmed up as well as if it had a longer time to chill.
Ashley
Friday 12th of July 2024
I whipped this up tonight for a birthday tomorrow and the layers are cooling in the fridge now. I cannot WAIT to stack these babies and present this absolute showstopper with the buttermilk caramel. The recipe was broken down perfectly and easy to follow, I'm so excited to taste!
Ramona
Sunday 14th of July 2024
Ashley, thanks for the lovely comment. I'm so excited for you to taste it! I could definitely go for a slice right now. Hope everyone loves it!