
I know. The name is ridiculous.


When I came up with the idea of mashing up a peanut butter cup with a peanut cluster, we were out running some weekend errands. I was trying to think of a name for the candy and my husband offered up this one, Peanut Butter Cluster Cups. I broke out in a fit of hysterical laughter and said, “No! I couldn’t!”
Clearly his ear did not hear what mine did because he looked at me quizzically and then answered with a challenge, “Why not?! It describes exactly what it is!” With kids in the back seat, (thankfully engaged with their own conversation,) I simply said, “Don’t try to say it five times fast, without, er, screwing it up.” I proceeded to convey the meaning with only my eyes, and then finally a, “Seriously? You don’t get it?”

And then he did, and began to laugh as well. By this time, the kids took notice and wanted to know what was so funny. I simply said, “Nothing. We’re just talking about some candy.”

And that is how this candy came to be. I do like peanut butter cups, but if I had a choice, I would most often pick a peanut cluster simply because it beats out a peanut butter cup in texture and has more of a salty sweet edge than a simple cup generally offers.
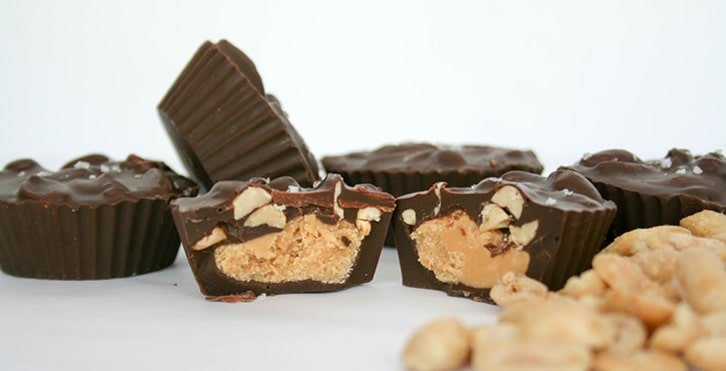
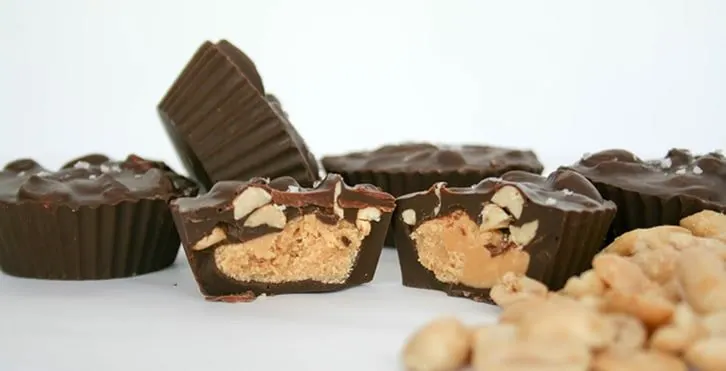
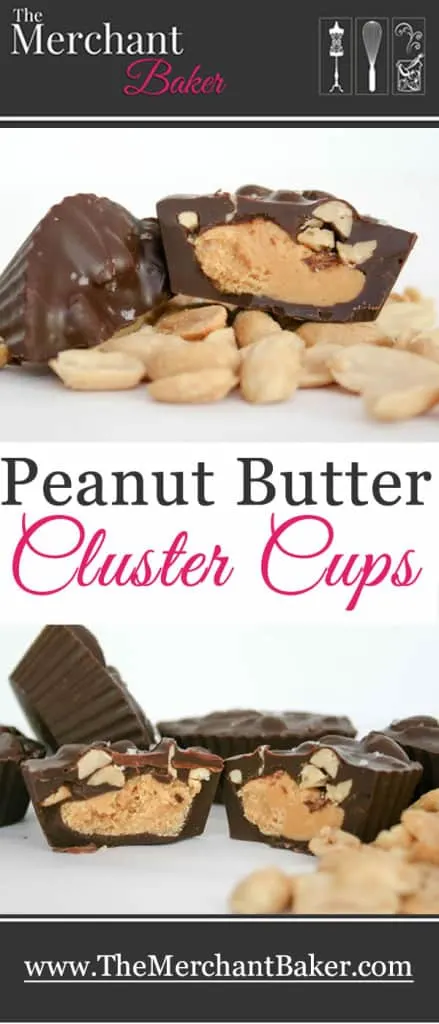
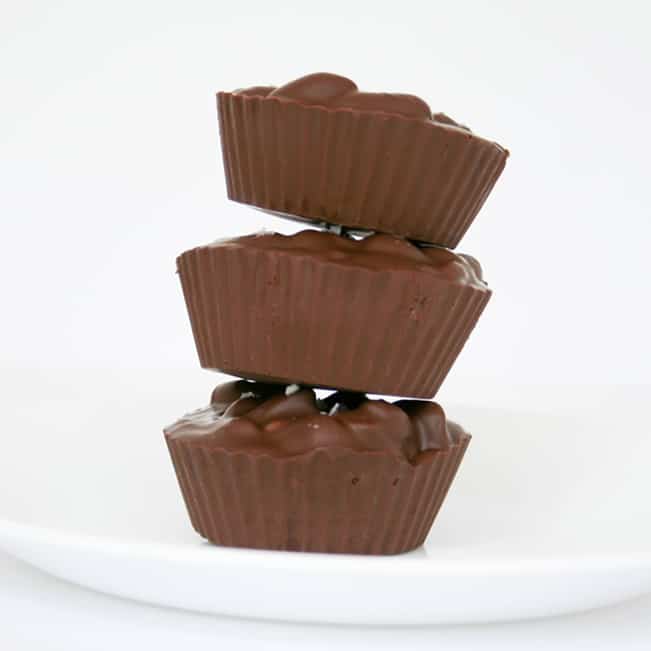
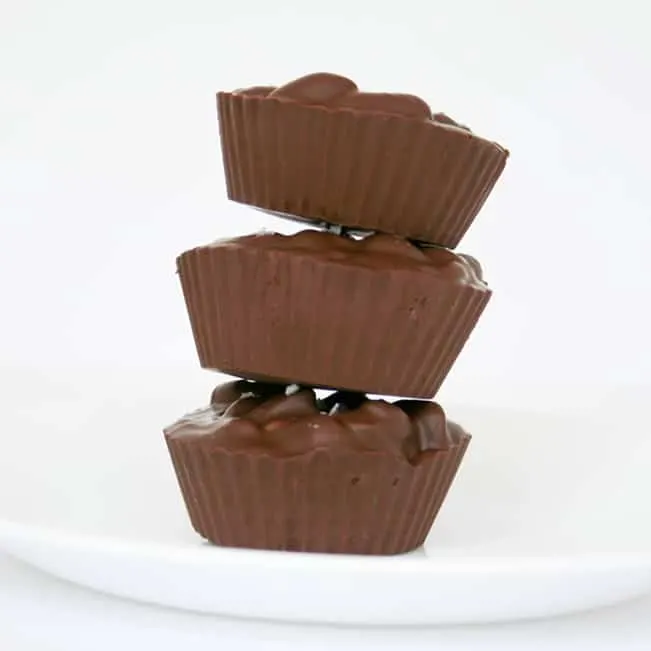
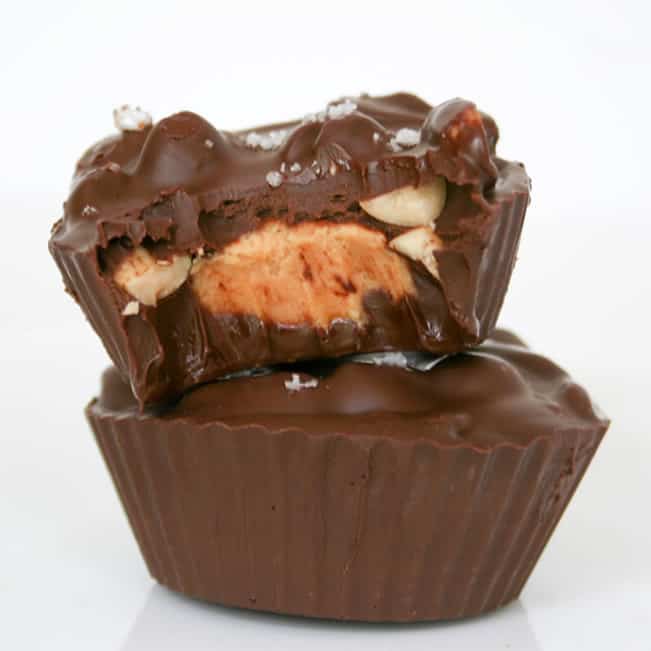
So this is the best of both worlds. Make a traditional peanut butter cup by melting some good chocolate, spooning it into your cup of choice and dropping in peanut butter filling. Then, instead of just sealing it with more chocolate, top it with peanuts and chocolate and add a sprinkle of fleur de sel, just to seal the deal on the sweet salty combo. For me, the perfect balance of chocolate, creamy peanut butter filling and crunchy, salty peanuts. Peanut Butter Cluster Cups. There. I said it. The name’s official.
Rather fitting, don’t you think? ;)
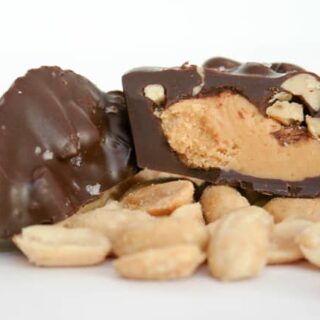

Peanut Butter Cluster Cups
Ingredients
- 12 ounces good quality chopped chocolate or chocolate chips, milk, semisweet or dark
- 2 teaspoons shortening, I use non-hydrogenated
- 1/2 cup peanut butter
- 2 Tablespoons unsalted butter
- 1/8 teaspoon salt
- 1/2 cup powdered sugar
- 1/2 cup whole salted roasted peanuts
- fleur de sel, to taste
Instructions
- Line a regular size muffin pan with 12 paper liners or use silicone cups placed on a tray.
- Melt chocolate and shortening in a microwave safe bowl stirring at 15-30 second intervals until chocolate is melted and creamy.
- In another microwave safe bowl, heat the peanut butter, butter and salt until the butter is melted. Stir.
- Add the powdered sugar to the peanut butter mixture and stir until combined. Put in the refrigerator to set up a bit while you begin to fill your cups.
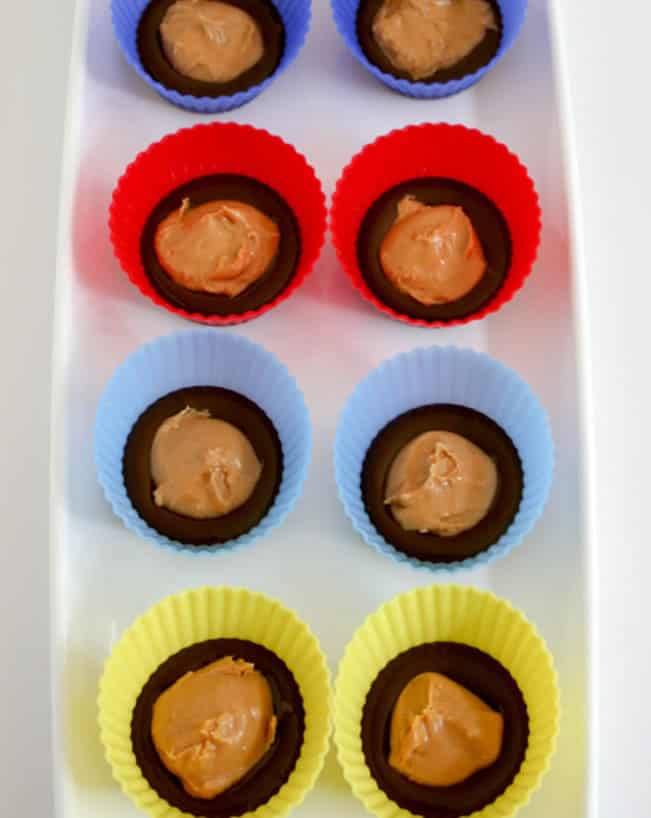
- Place about a tablespoon of melted chocolate into each cup. Reserve the balance for the topping.
- Remove the peanut butter filling from the refrigerator and place a generous heaping teaspoon or more of the mixture on top of the chocolate. You should have no left over filling.
- Gently tap the top of the peanut butter mixture with the tip of a spoon to get it to settle into the chocolate and flatten any mounds.
- Mix a generous half cup of peanuts (or more depending on the amount of chocolate you have left) into the remaining chocolate mixture until all peanuts are well coated.
- Place about a tablespoon of the chocolate peanut mixture on top of the peanut butter mixture. Once you have completely filled all of your cups, tap the pan or the cups on the counter to get all of the chocolate to settle evenly into the cup, making sure you’ve completely covered the peanut butter filling.
- Sprinkle a small pinch of fleur de sel on top of each cup and refrigerate for at least 15 minutes or until set.
Notes
*I used a natural peanut butter that did not need to be stirred.
*I don't use the kind that needs stirring, but I would suspect that it would be fine for this recipe.
*Store tightly covered in the refrigerator for up to a week.
Recipe from The Merchant Baker, Copyright © 2014
Jennifer C
Tuesday 7th of October 2014
These look delish!!!!!