

Breaking news! I tried rhubarb and I liked it!

How is it that I’ve gone my entire life without tasting rhubarb? I’ve always wanted to…I guess the opportunity simply never presented itself. It’s not like you see rhubarb on many menus. No one in my circle of friends ever made anything with it (at least not that they shared with me) and I had never taken the initiative to buy it. But here it is in these yummy Strawberry Rhubarb Hand Pies!
I remember when I was 9, I found tons of what I thought was rhubarb growing wild near where we lived. I had always heard about rhubarb pie, but had never tasted it. And here, so close to my house was this giant bounty of rhubarb! I was so excited that my friends and I were completely distracted from the Taj Mahal palace we were building in the woods on an old wooden pallet we had found.

Well, we never made pie. I can’t even remember what happened with our discovery. Did I try to find out more about it in our massive set of Encylopedia Brittanica? I don’t know if I took a stalk back to my house and my mother determined it was not rhubarb or if the whole topic of rhubarb simply peaked and declined while my friends on I got back to more royal adventures building our “palace.” I think my mother simply warned us not to eat it. Having researched it now, I believe it wasn’t rhubarb, but something called, “Burdock.”
After all these years, why a post about rhubarb today? It’s all thanks to the CSA I joined this summer. I talked about it in my last post along with what I call “CSA stress.” Every week, we pick up a large box of vegetable goodies. We’re on week three and I am constantly thinking about how to use all of the fresh produce before it spoils.
Rhubarb was delivered in our very first box and the challenge was on! What would I make? Other friends in the CSA group started sharing recipes and before I knew it, I had more ideas than I had rhubarb for and I wanted to try every single one of them! I knew the first thing I would have to make is Strawberry Rhubarb Hand Pies. I had heard about rhubarb pie for far too long to pass up the opportunity to see what it would taste like.


Instead of making a whole pie, I chose to make hand pies. I had originally planned on making just strawberry hand pies, but when the rhubarb came along, I knew I would combine them. I decided to use that combination because I knew it was a classic and it also helped me hedge my bets that if for some reason we didn’t like rhubarb, the strawberries would temper it and increase its appeal.
I needn’t have worried. The rhubarb was a hit with my family! I personally loved it. For those of you who have never had it, it has a lovely tart flavor, sort of like a tart green apple. Cooked with no sugar, it’s a puckery affair. But, combined with strawberries and the right amount of sweetness, it is wonderful. It sort of does the same thing for a fruit pie that lemon or lime would do. It brightens the flavor. (I actually added to that brightness with some lemon and orange.)

I wasn’t sure how much sugar I would need to sweeten the rhubarb. I can usually estimate with fresh fruit pies, but with rhubarb being so tart, I was afraid I might over compensate with sugar. So, I made these pies with a different approach…I cooked the filling first! That might be a cheater’s approach, but it worked perfectly for me.
I wanted to able to taste the filling for the perfect level of sweetness…and then there was the thickening agent. I wasn’t sure how much I would need. Cooking on the stove top eliminates the mystery because you can cook out the excess liquid and get your desired thickness. Never being one to just try one new thing at a time, I also decided to try a different thickener, tapioca. I generally use flour or cornstarch, but just looking at those red stalks made me think that might not work as well. I had it in my pantry and thought, why not? I’d always wanted to try it and this seemed as good a time as any.
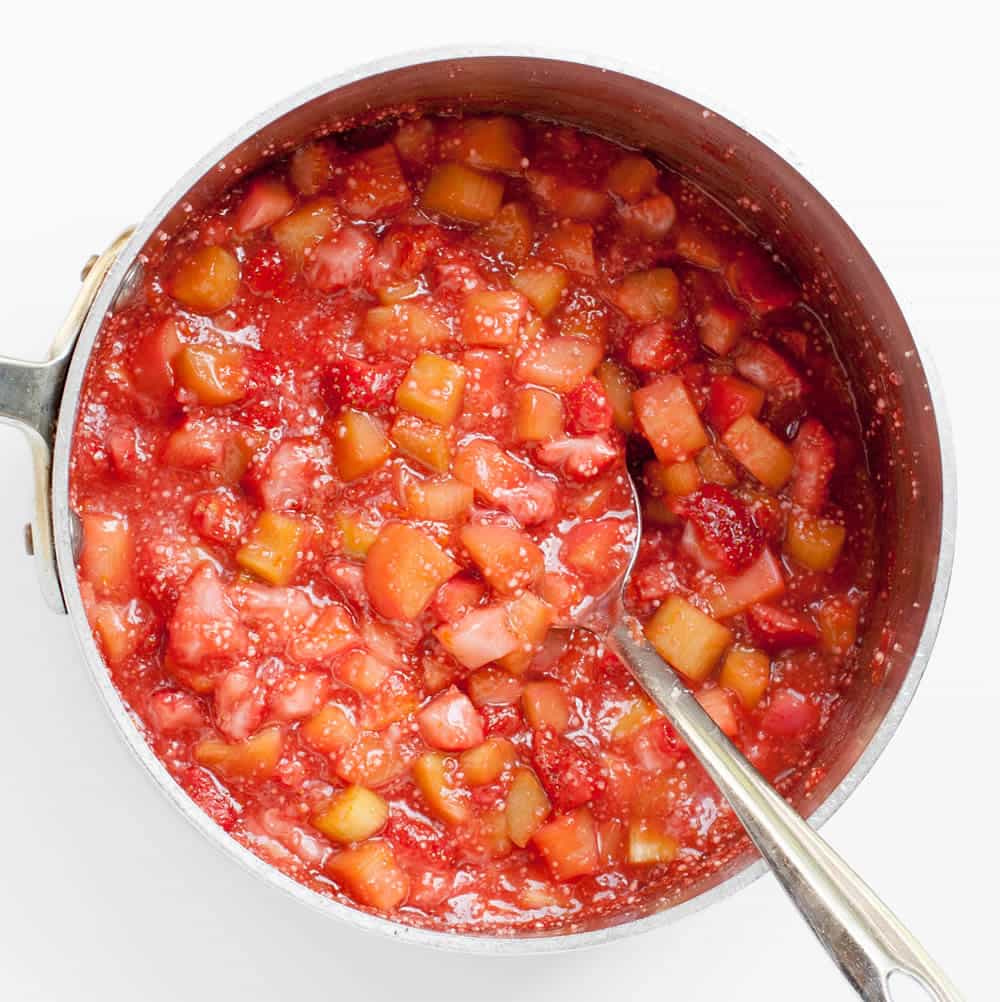

So I put all of my filling ingredients into a pot and simmered them on the stove until I got a nice thick pie filling consistency. I needn’t have worried. It thickened up beautifully and, honestly, I could have skipped the tapioca, but no harm, no foul. I set it aside to cool.
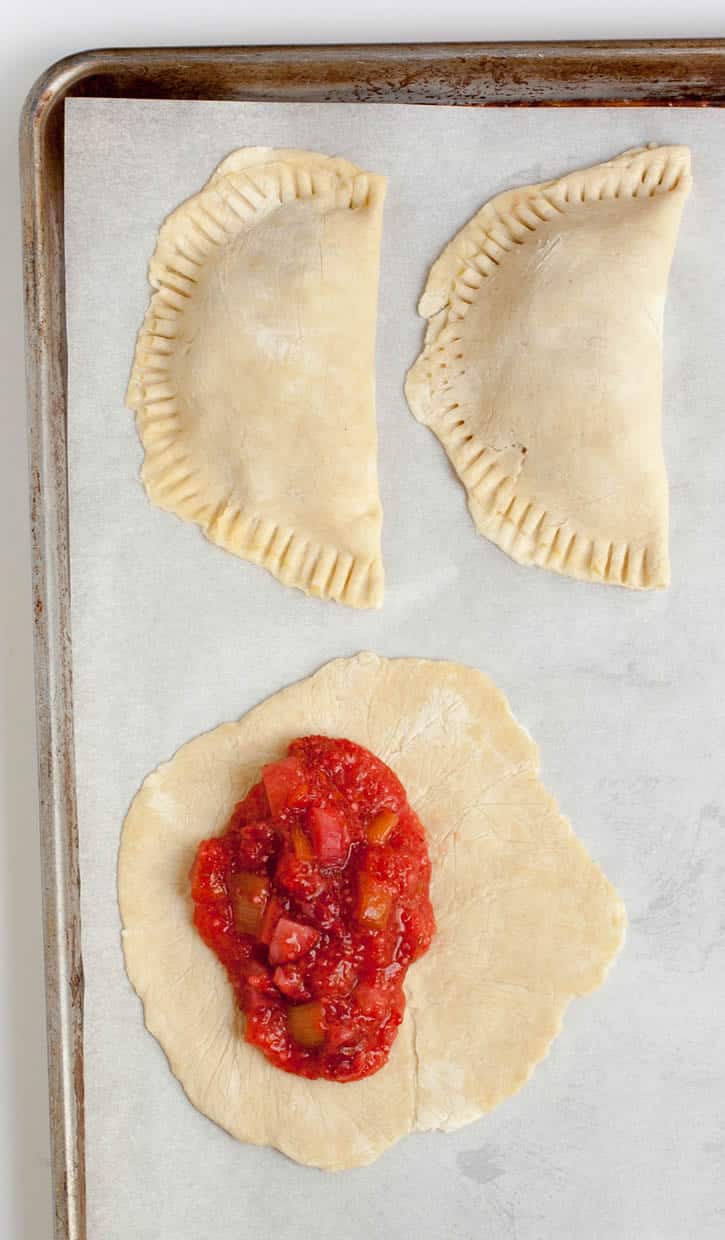

Then I spooned it onto my little imperfect circles of pie dough, folded the top over to create half circles and sealed them by pressing the edges together with a fork.

Don’t let the pie dough intimidate you or prevent you from making this recipe. This is the same easy all butter pie dough I used in my Blueberry Galette and Caramel Apple Crostadas. This recipe has changed my pie dough making life! The process I use makes the dough easy to roll, practically mess free and it makes a delicious, flaky, buttery crust!
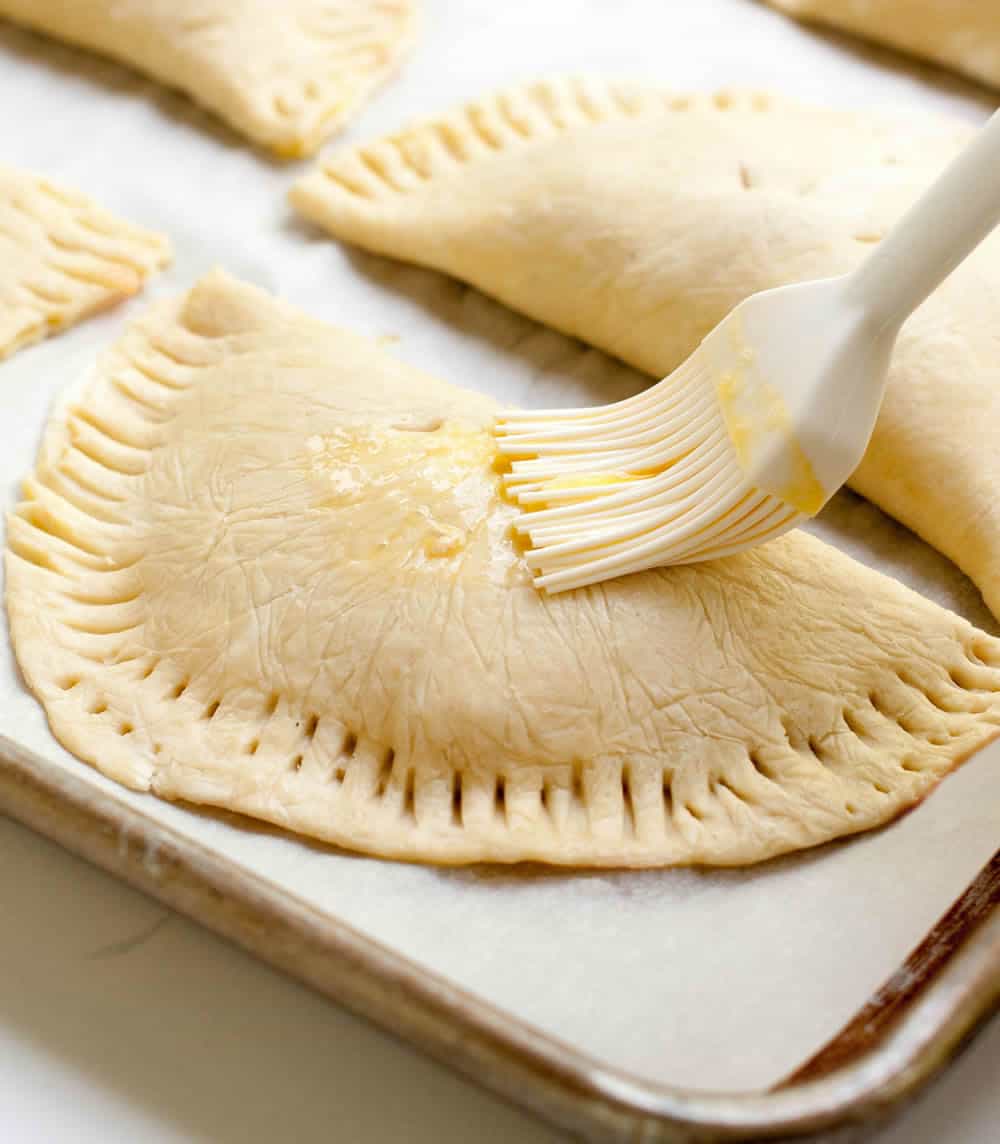

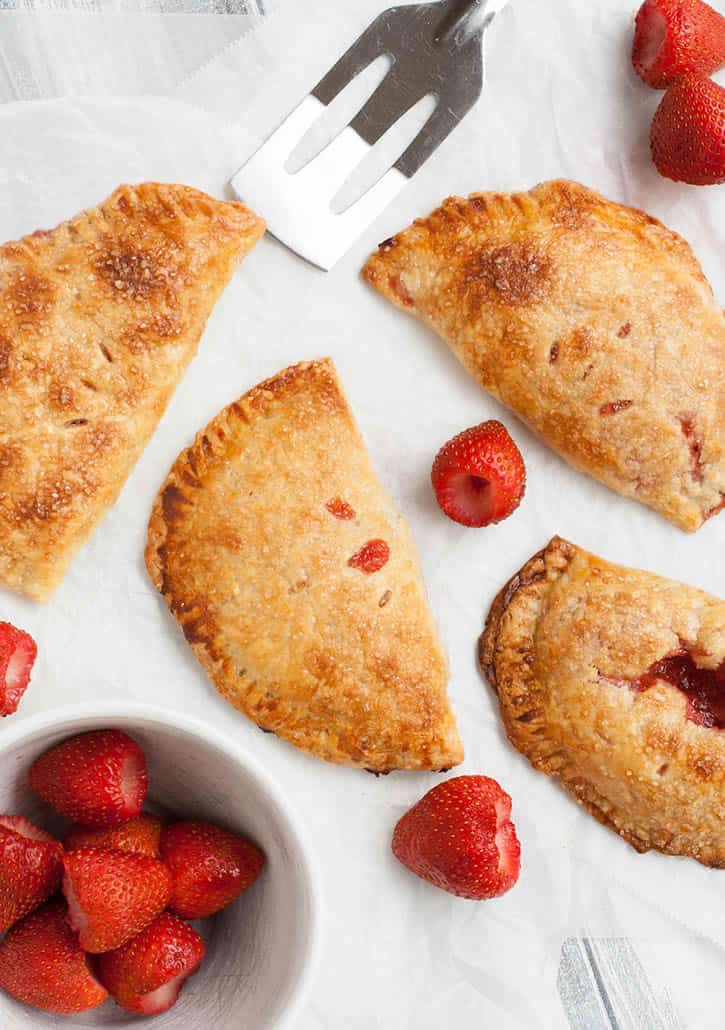
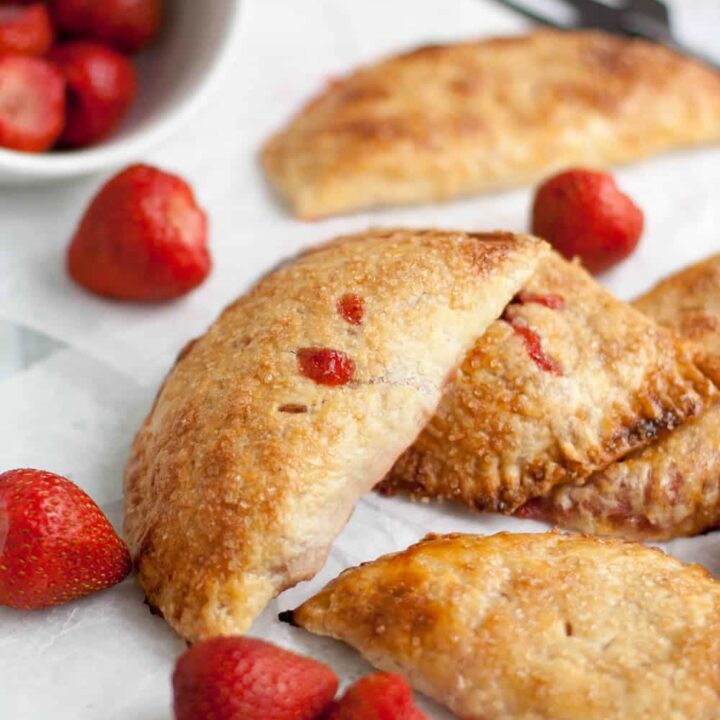
Okay, enough about the crust. For now, anyway. I brushed the tops of each pie with an egg wash, sprinkled generously with raw sugar and baked them.
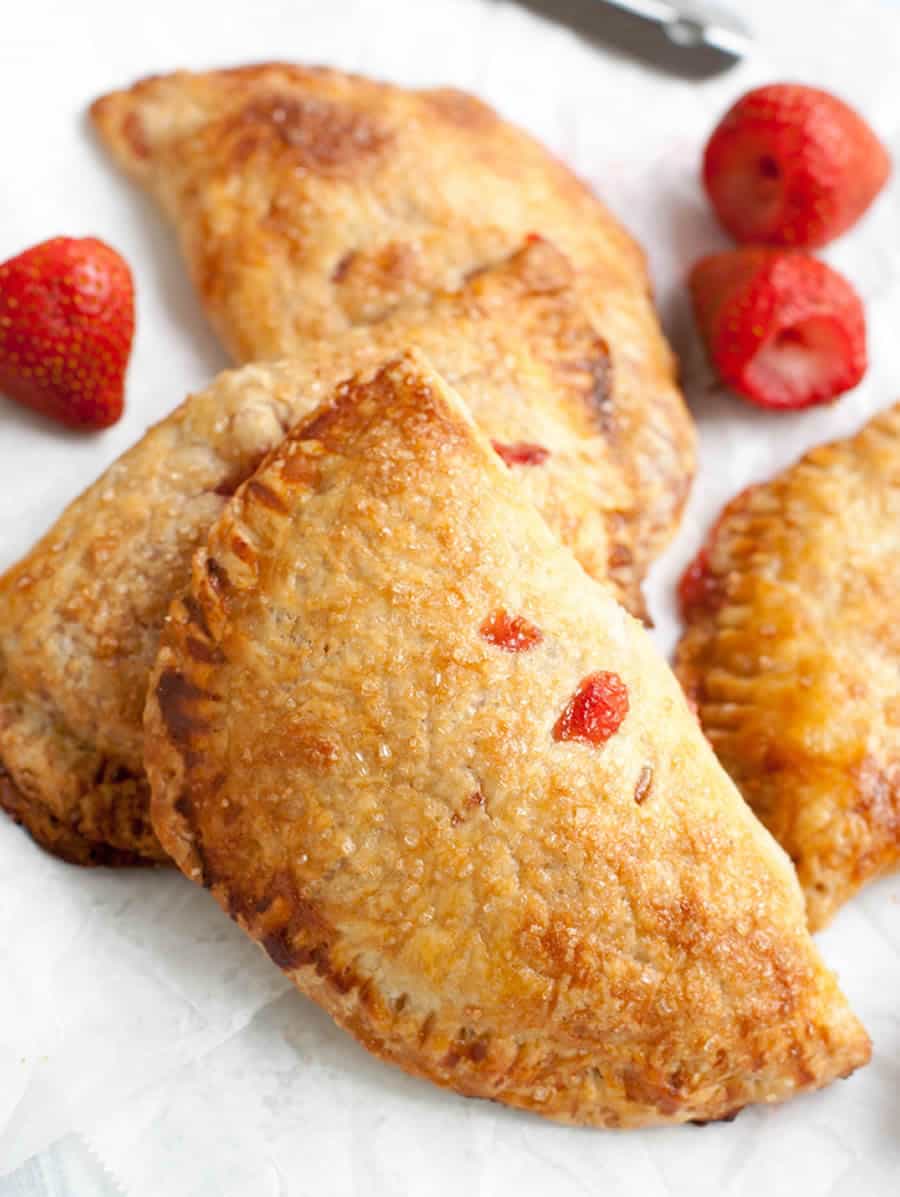
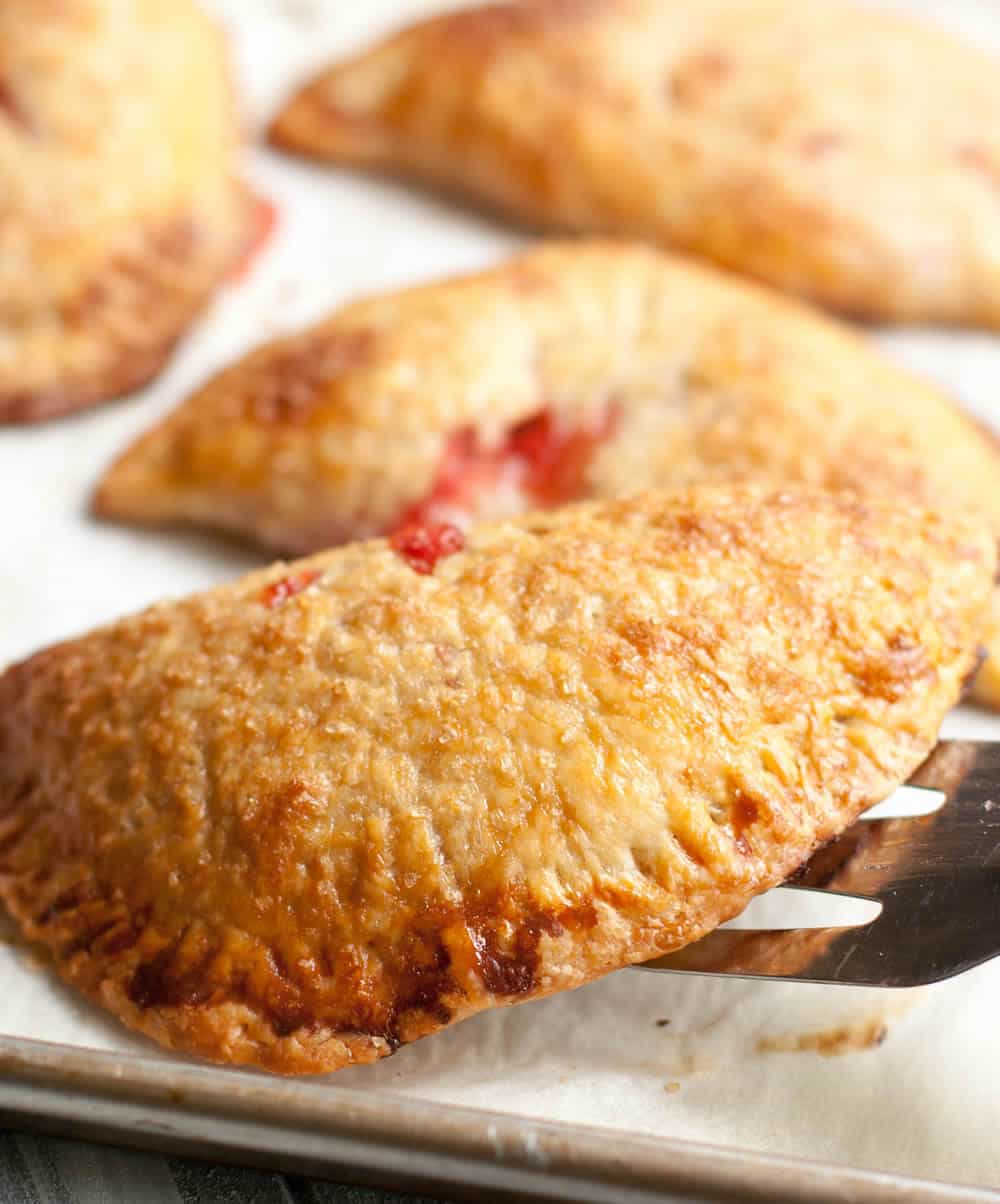
Out came gorgeous, golden brown Strawberry Rhubarb Hand Pies. They are like homemade rhubarb pop tarts, but infinitely more delicious. Full disclosure…a couple of my pies lost some filling during baking. Chalk it up to my effort to pack as much filling into each pie as possible. (Sometimes more is not better.) But no worries, I just scraped it up with a spatula and served it with the crust from which it escaped. Trust me, no one said, “No,” to any of the pies, whole or rebuilt. Next time, I’ll be a little less heavy handed with the filling and all will be well.
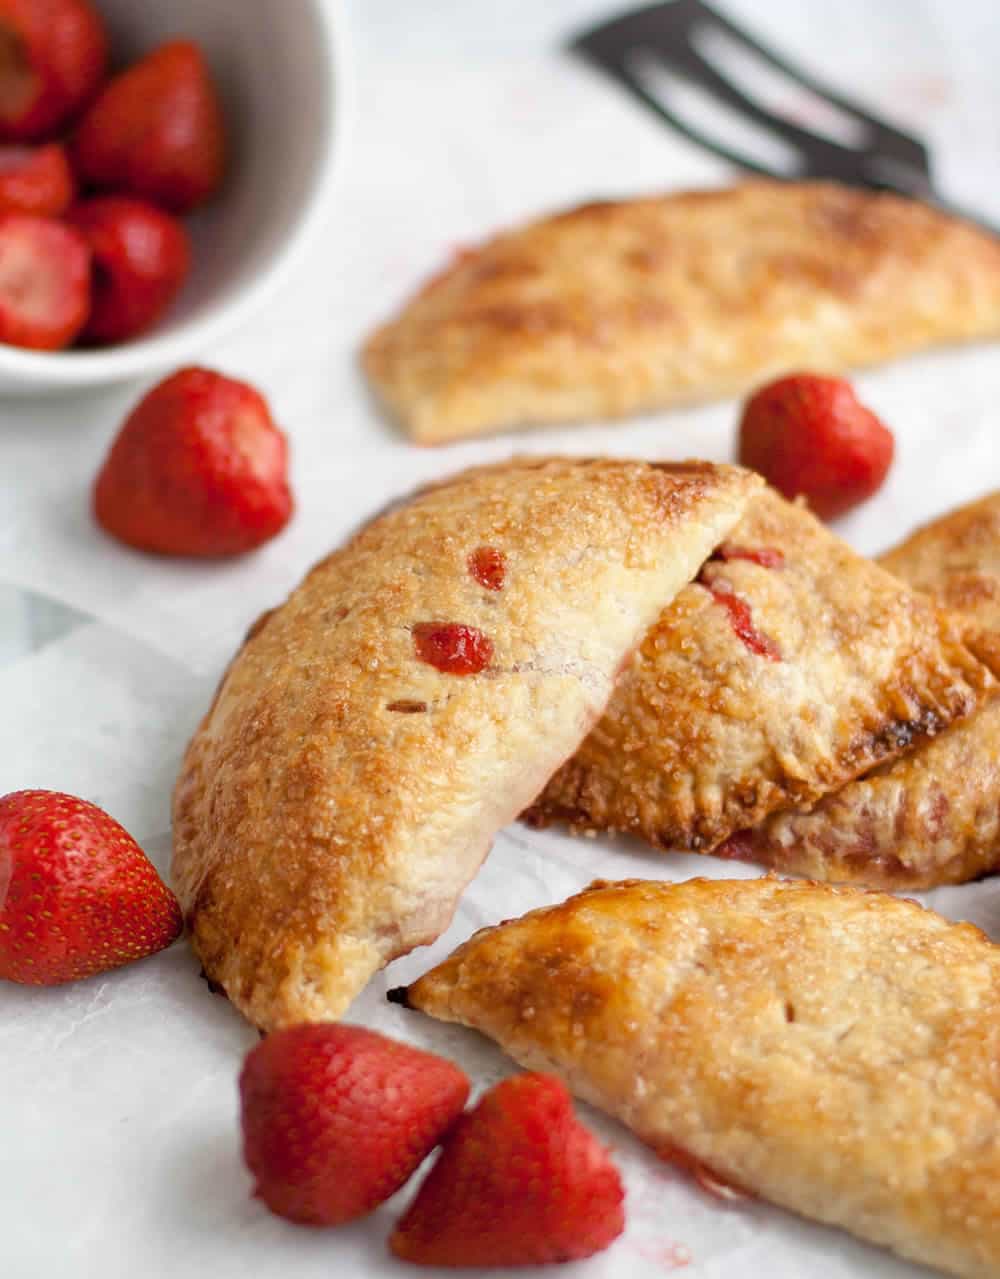


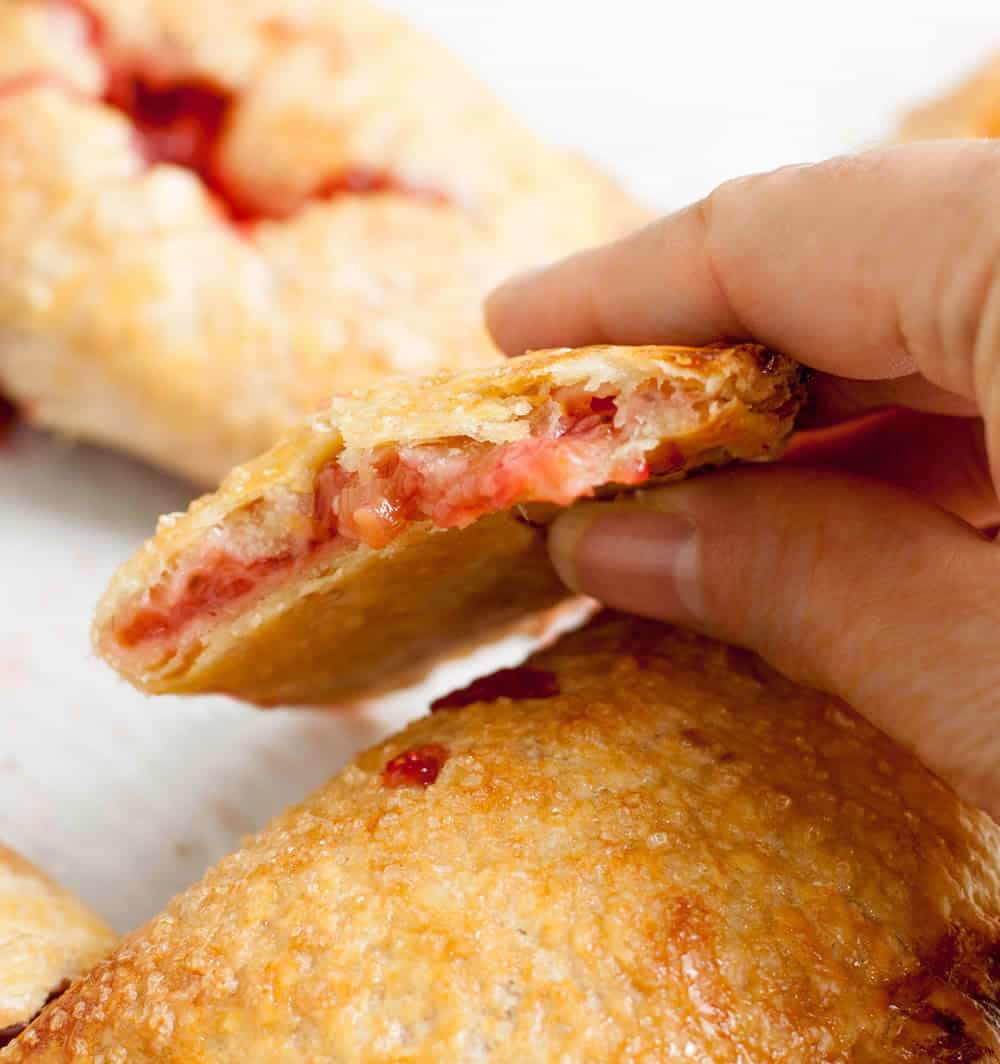
When I bit into the pie my expectations were exceeded. I loved the tart sweet balance I had confirmed with my cooking process. These weren’t super syrupy sugary pies. Sometimes the flavor of the fruit is masked by an overly sweet filling. Not so with these pies. They were plenty sweet but had such a lovely tart flavor. I’m a lemon lover so these were right up my alley. And the sweet tart filling balanced perfectly with the flaky but tender buttery crust topped with crunchy raw sugar crystals.
When I was 9, the Taj Mahal project in the woods trumped the bounty of “rhubarb” we suspected was growing nearby and the thoughts that we could make a thousand pies with it. Today, I could say that these Strawberry Rhubarb Hand Pies trump that adventurous time of make believe. I won’t. Nope, a million years later as I sit down with my own insanely imaginative children, we don’t have to choose. We can dream big fantastical adventures…

and make delicious little hand pies too!

Strawberry Rhubarb Hand Pies
Ingredients
For the crust:
- 1 1/2 cups all purpose flour
- 1 Tablespoon sugar
- 1/2 teaspoon salt
- 8 Tablespoons 1 stick unsalted butter, cold and cut into small pieces
- 5-8 Tablespoons ice water, more if needed (see notes)
For the filling:
- 1 Tablespoon salted butter
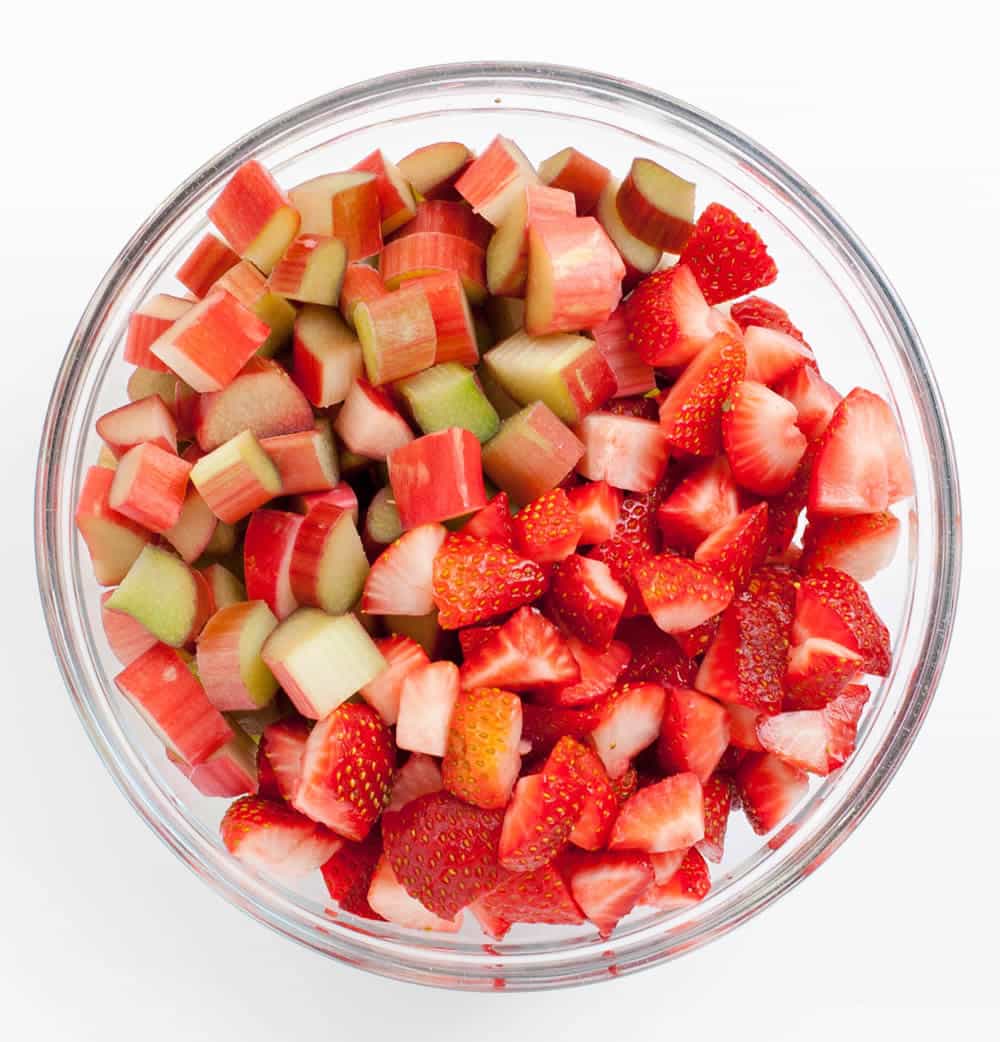
- 2 cups chopped fresh rhubarb, about 1/2" slices
- 2 cups chopped strawberries
- 1/4 cup white sugar
- 1/4 cup brown sugar
- 2 Tablespoons minute tapioca, optional, see notes
- 1/2 teaspoon lemon zest
- 1/2 teaspoon orange zest
- 2 Tablespoons orange juice
- 1 egg, lightly beaten (to brush tops)
- raw sugar for sprinkling tops
Instructions
- Make the crust.
- Whisk together flour, sugar and salt. Add butter pieces and cut into the flour mixture using a pastry cutter or two knives until butter is in various sizes no larger than peas.
- Fill a cup with iced water and using a measuring spoon, drizzle a tablespoon of water over the flour mixture. Toss with a fork to distribute the moisture. Repeat this process adding a tablespoon of water at a time and tossing the mixture until your mixture looks shaggy and there's no dry piles of flour at the bottom of the bowl; it shouldn't look wet. (See Galette Post for photos) You should be able to grab a handful of the mixture and squeeze it in your hands and have it hold together. For me, this can take anywhere between 5-8 Tablespoons of water. It varies each time I make it.
- Bring the mixture together in a ball. Divide into 8 portions and cover with plastic wrap to keep it from drying out while you roll each portion.
- Tear off two sheets of plastic wrap about 10" long. (You just need it to big enough to give yourself room to roll out the dough.) Take one portion of the dough, shape it into a ball and place it in the center of one of the sheets of plastic and cover it with the other, sandwiching the dough between the two sheets. Lightly press on the ball to flatten it into a disk.
- Using a rolling pin, roll the dough into about a 5"-6" circle. Roll from the center out, easing up on the pressure as you near the edges so that you don't roll them too thin. Your rolling pin should not roll past the edge of the dough and back onto your counter. That would squeeze your dough into paper thinness. Think of the circle of dough like a clock and roll out to the 12 then pick it up and go back to center to roll down to the 6. Use the plastic wrap to pick up and rotate your dough to help you roll out to the different points on the circle. Always roll from the center out and resist the temptation to roll your pin back and forth. Lift the plastic wrap as necessary to release any places where it's stuck together and preventing the dough from rolling out. For this recipe, you don't have to worry that your dough is a perfect circle, but you do want it to be generally symmetrical so that you'll be able to fold it over and have the edges meet.
- When you've achieved your circle, keep it sandwiched in the plastic wrap and place on a tray or flat surface in the refrigerator. Grab more plastic wrap and roll out the remaining portions of dough. Refrigerate for about an hour or two or you can store in the refrigerator overnight until you're ready to use them.
- Line two large baking sheets with parchment.
- Make the filling. Combine all of the filling ingredients in a small saucepan, stirring to thoroughly combine. Simmer over medium heat for 5-10 minutes until the mixture has thickened. Taste and add sugar, if desired. Allow to cool completely before using. Hot filling on cold dough is a bad idea. I put mine in a separate bowl and set that bowl in ice to speed up the process.
- Remove one piece of dough from the refrigerator, then peel off the plastic wrap and place the circle of dough onto your parchment lined baking sheet. (Place it wherever it's going to bake because it will be harder to move once you've filled it.)
- Spoon about 3-4 Tablespoons of the filling mixture on one side of the dough circle making sure you leave a 1" border on the edge. The photo I show with the filling was probably too much. You want to leave yourself enough room to fold the dough over and seal without having filling squirt out the sides while you're doing so.
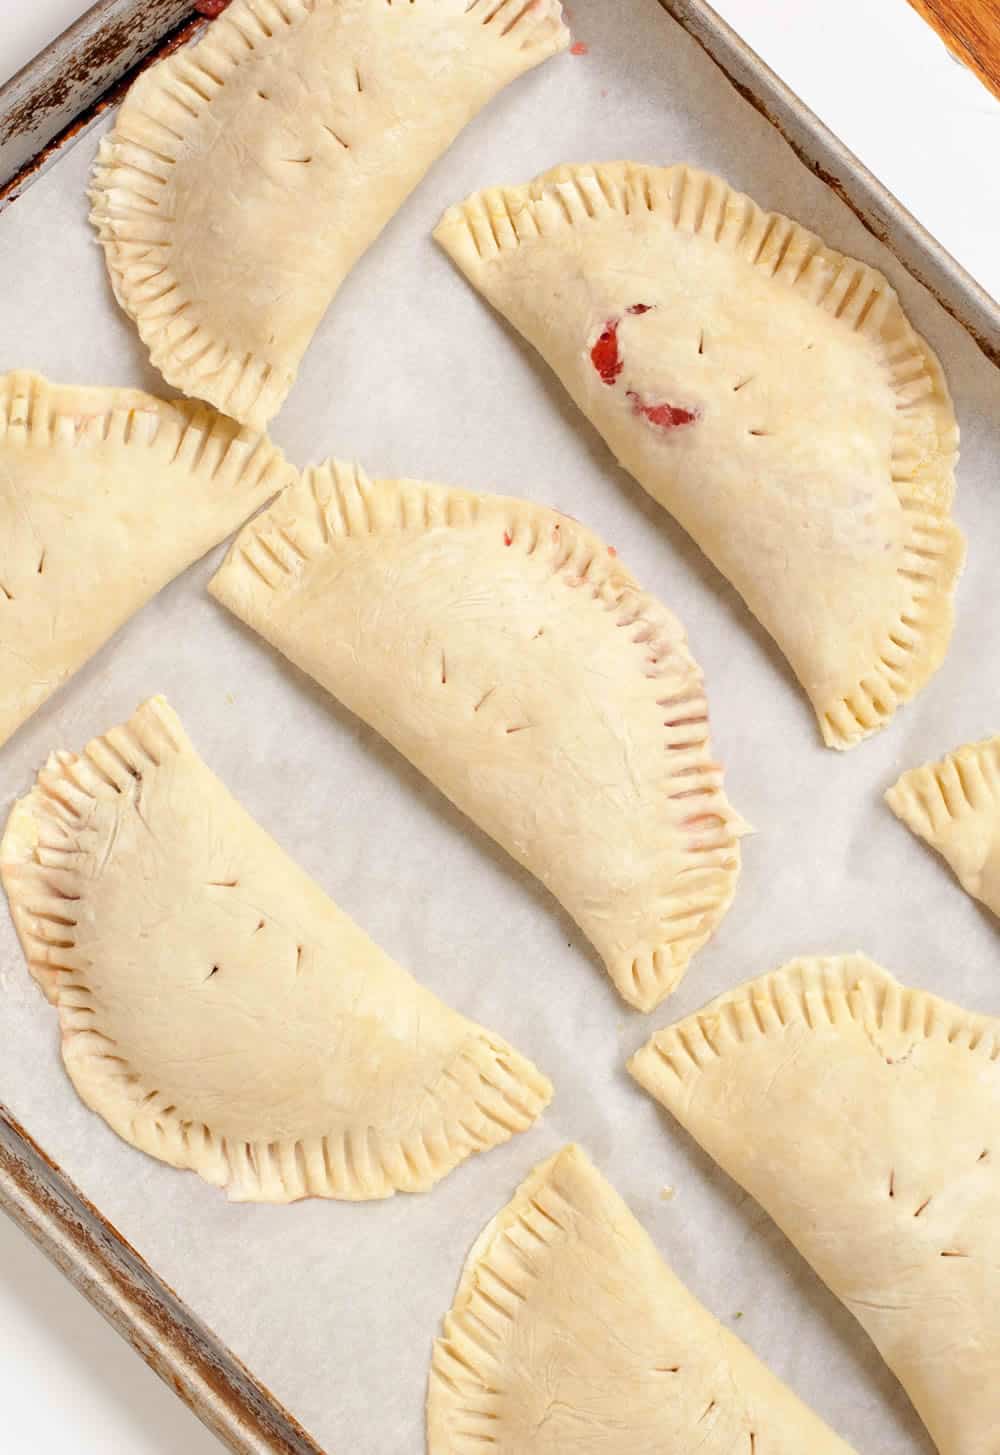
- Fold the dough up and over the filling, lining up the edges so you are left with a half circle. Do not stretch the dough as you do this. Just fold it over, press on the edges, then use a fork to seal them by pressing the tines of the fork onto the dough.
- Finish filling the rest of your pies, removing just one piece of dough from the refrigerator at a time, so that the waiting pieces stay cold.
- At this point, I like to pop the trays back into the refrigerator one more time, to insure the butter in my dough is nice, cold and firm before baking. about 30 minutes. You could also use the freezer to do this in less time. (Wait to preheat your oven until after you've put the filled pies into the refrigerator.)
- When you're ready to bake, preheat your oven to 375 degrees F.
- Just before baking, brush the surface of the dough lightly with the beaten egg, then sprinkle the dough and top of the filling with a coarse, raw sugar. Use a sharp knife to cut a few small vents in the top of the crust.
- Bake for about 30 minutes or until crust is completely golden and filling is bubbly. Serve warm or at room temperature, but best served the same day.
Notes
*The crust on these handpies is rolled thin. If you like a thicker crust, make four hand pies instead of eight and roll to desired thickness.
*Becasuse of the thin crust, these little hand pies are best served the same day they are baked, when the crust has a nice crispness to it. Leftovers the next day will still be delicious, but the crust will be softer. Store lightly covered at room temperature
*If you'd rather make one large pie, tear off larger pieces of plastic wrap and roll your dough into one large 12-13" circle, or to about an 1/8" thick. Refrigerate per directions then fill as you would the smaller pies, fold the top over and seal edges with a fork and continue with directions. With the larger piece of dough, you may need to let it sit for a couple of minutes at room temperature to soften up just a little before its pliable enough to fold over. Bake at 350 degrees F for 50-60 minutes or until crust is completely golden and filling is bubbly.
*I almost always make the dough the day before. It doesn't take long and it's nice to be able to take some dough out of the refrigerator the next day and just fill and bake it.
*You can also freeze the dough after rolling if you're not going to use it the next day. Freeze flat or roll it up loosely into a tube like shape while it's still sandwiched in the plastic wrap, place it in a freezer bag and freeze. When you're ready to use it, let it thaw in the refrigerator, then fill and bake as usual.
*Because I precooked the filling, I could have eliminated the tapioca and just cooked the filling to desired consistency. I didn't think of that before I made them. Pre-cooking helps the liquid evaporate so you don't have watery filling when you bake them. I didn't mind the additional tapioca, though, it did keep the filling thick as the little pearls soaked up any additional juices.
*The chill time in the refrigerator is important! It relaxes the gluten and helps keep your dough from shrinking while it bakes.
*If you end up having leftover filling, it's great on pancakes or oatmeal.
The Merchant Baker Copyright © 2016
Thalia @ butter and brioche
Thursday 26th of May 2016
love a good hand-pie. especially when they are filled with something as delicious as this! strawberry and rhubarb is such a perfect combination for the season.
Ramona
Thursday 26th of May 2016
Strawberry and rhubarb are perfect together. I guess that's why it's such a classic combo...one that I've missed out on all these years! Happy to finally be on board!
Cathleen @ A Taste Of Madness
Thursday 26th of May 2016
Okay, I seriously need to try rhubarb sometime!! I have only tried making hand pies once (I made plain Strawberry) and I am wondering why I don't do it more often!
Ramona
Thursday 26th of May 2016
The rhubarb is so good! Adds such a nice sweet tart flavor! This is the first time I've made hand pies, I usually slack and go with a galette because it's sooooo easy! But everyone loved having their very own pie :)
Janice
Wednesday 25th of May 2016
Breaking news! You can eat that burdock! My Italian husband's family always went looking to pick fresh burdock. The stalks need to be cleaned well & peeled removing the "prickery" layer. It is then microwaved a bit before using in frittatas/omelettes---especially for the meatless feast of St. Joseph on March 19th. You found a real treasure back then. :)
Ramona
Wednesday 25th of May 2016
If only my nine year old self would have known that then.... :) Who knew our "palace" was "rich" with an edible crop?
AZ@...And a Dash of Cinnamon
Wednesday 25th of May 2016
Yay! welcome to the rhubarb club. I love it and glad you finally got to try it. (P.S. It is also really easy to grow)
Ramona
Wednesday 25th of May 2016
Good to know that it's so easy to grow. We have a garden so I just might add it to our list of things to plant for next year!