


Millionaire Magic Bars. They say third time’s a charm…

As I write this, I have my third test batch of these Millionaire Magic Bars in the oven. I’m pretty confident (she said hopefully) that this batch is going to be THE batch. Of course, I was confident that the first two batches were THE batch also. I even shot them. Two whole photo shoots, wasted :( But, I’ve got a good feeling about this batch of Millionaire Magic Bars. This batch is going to be the magic batch! I’m so confident, I’m going to do a third photo shoot before I even taste it. But I’m getting ahead of myself. Let’s start at the beginning. What is a Millionaire Magic Bar and why did I create it?


Well, for years, I’ve saved every recipe for millionaire’s shortbread, hoping that one of them would be the perfect recipe. Millionaire’s shortbread traditionally has a shortbread base, a nice thick layer of soft caramel and a chocolate topping. It’s sort of like a Twix candy bar, but not in candy bar form and with better ratios of crust to caramel. Needless to say, like so many recipes I research, I have not tackled even one of those shortbread recipes. Not that I haven’t wanted to, but I wasn’t confident that any of the recipes were “the one.” And, I have no less than a million other recipes that I’d like to conquer, so it’s simply a matter of just not getting around to it.

Magic bars have been around forever and traditionally begin with a graham cracker crust, which is then layered with chocolate and butterscotch chips, nuts and coconut and then completely covered with sweetened condensed milk. Now those…those I have made many, many times. They are definitely one of my favorite bar cookies. I leave out the butterscotch chips, though. I loved them as a kid, but, ugh, I just can’t stand them as an adult. Too sweet and without a really true butterscotch flavor.

So, I started thinking…can I get the flavor of millionaire’s shortbread with the easy prep of a magic bar? I decided to skip even looking at any of the recipes I’d saved and start fresh. I knew I wanted a shortbread base, but I didn’t want it to be too crumbly. I combined elements from my Vanilla Chai Sugar Cookie Bars (without all the spice) and traditional shortbread. That came out good, but the texture was a little too crumbly and dry for me, even though the recipe I based them on was not crumbly at all. Back to the drawing board.

Then, instead of changing just one variable, as one should when testing, I changed many. I changed the amount of flour, and the amount of sugar, and then I melted the butter. In other words, I basically started over with an entirely new recipe. Now I had a thinner, chewier crust that was delicious, but I thought I lost some balance in sweetness and texture between the crust and the topping when I went that route. Everything was chewy now and it all melded together.

Both batches were delish. Everyone loved them, although some preferred the first and some preferred the second. I knew I needed something in between. That’s the batch that’s baking now. The “in between” batch. But regardless of whether this particular batch is successful, the recipe below will be the final “it” batch. The photos in the post will be the “it” batch. The batch that has the slightly chewy shortbread crust. The one that has the right crust to topping ratio. Thankfully, I don’t need to worry about the topping; that was perfect on the first try.
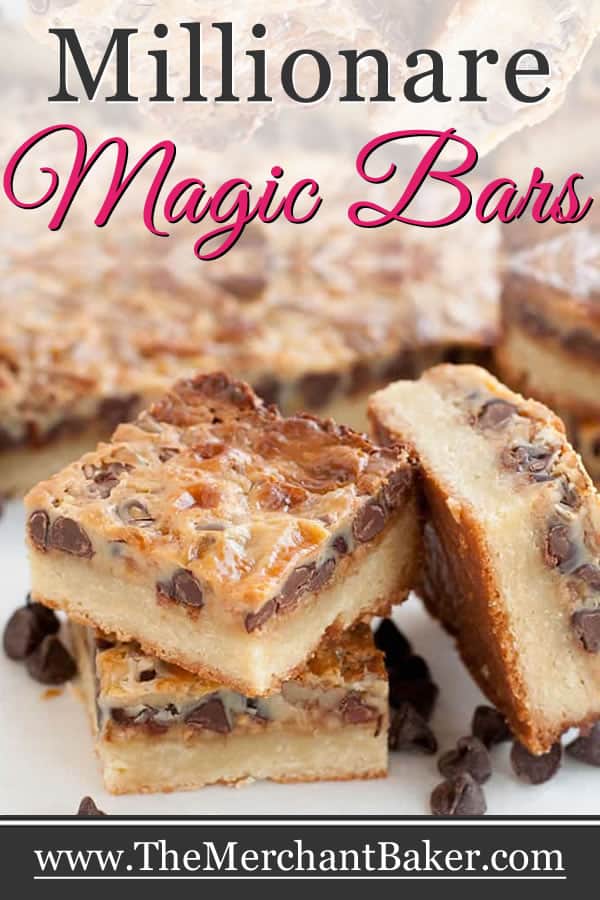
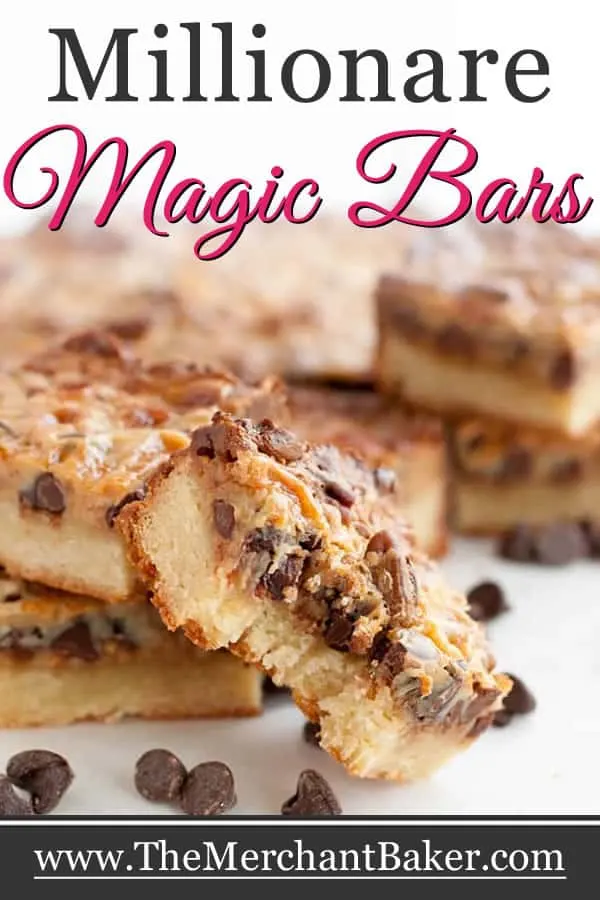
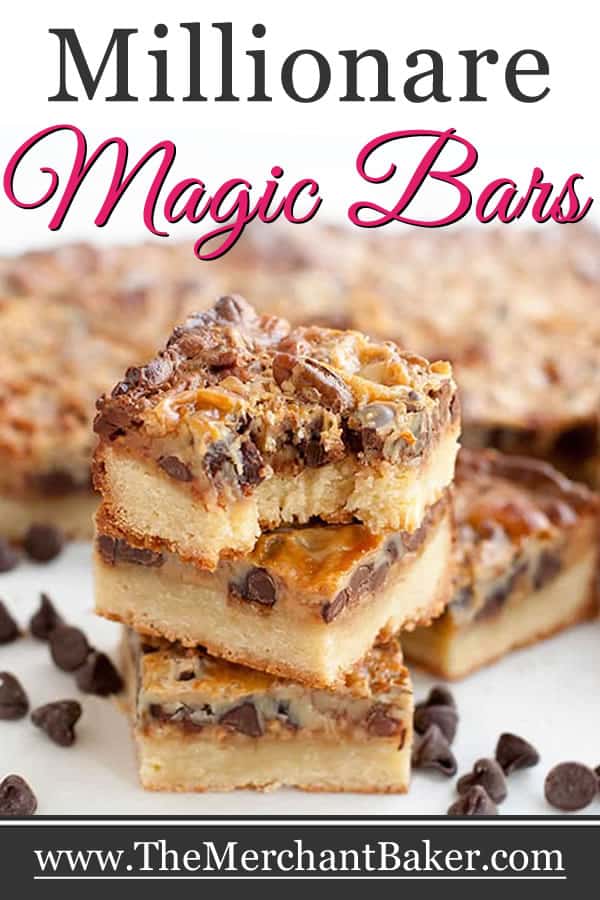
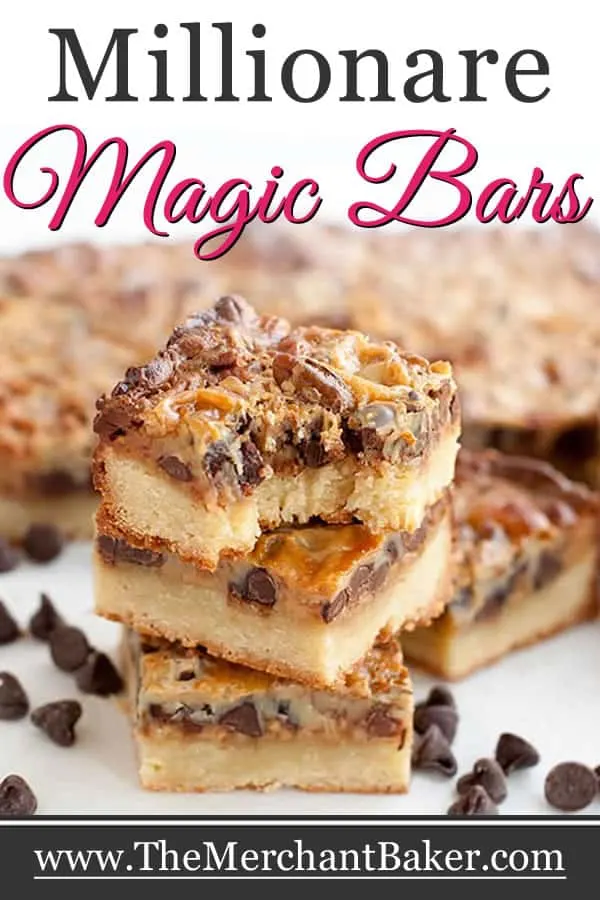
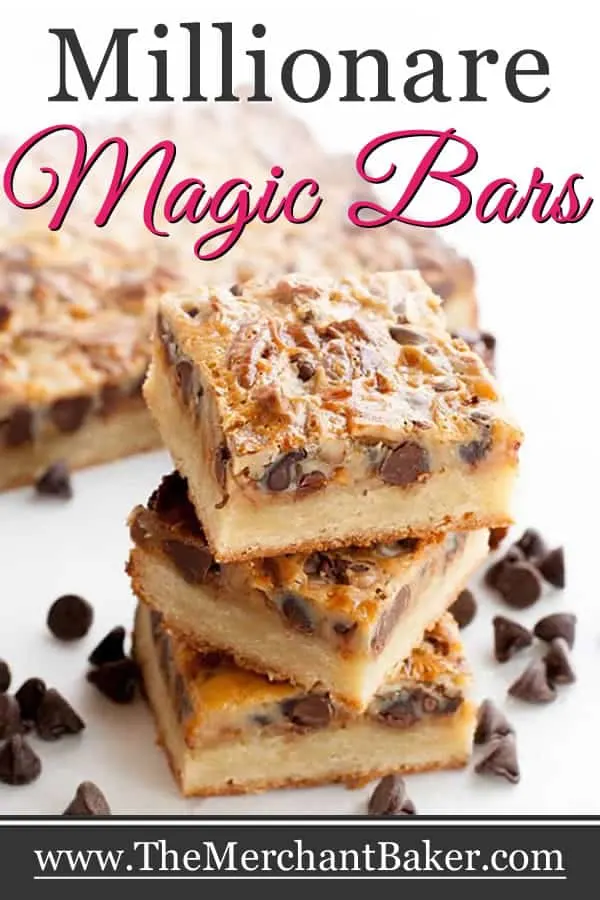
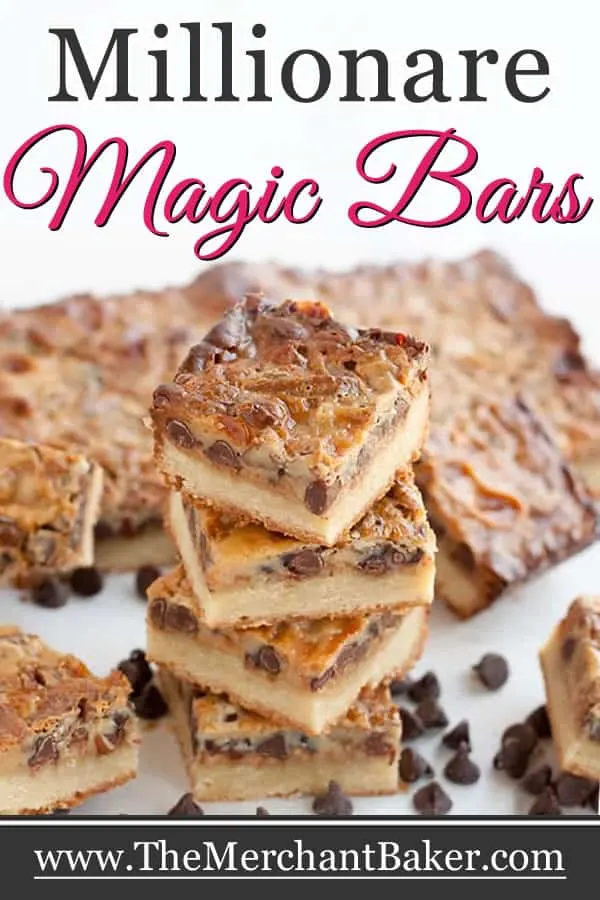
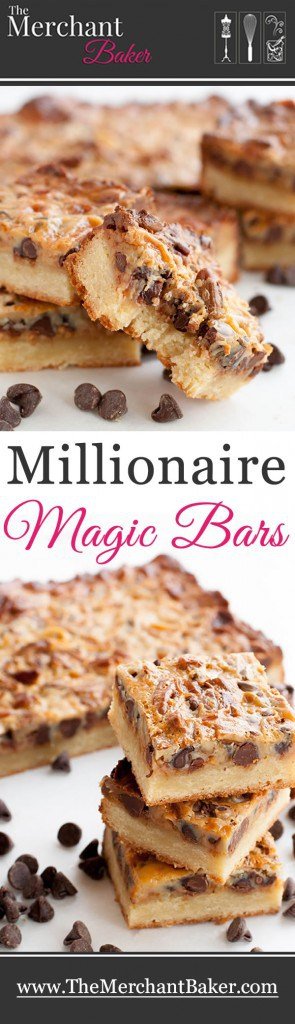
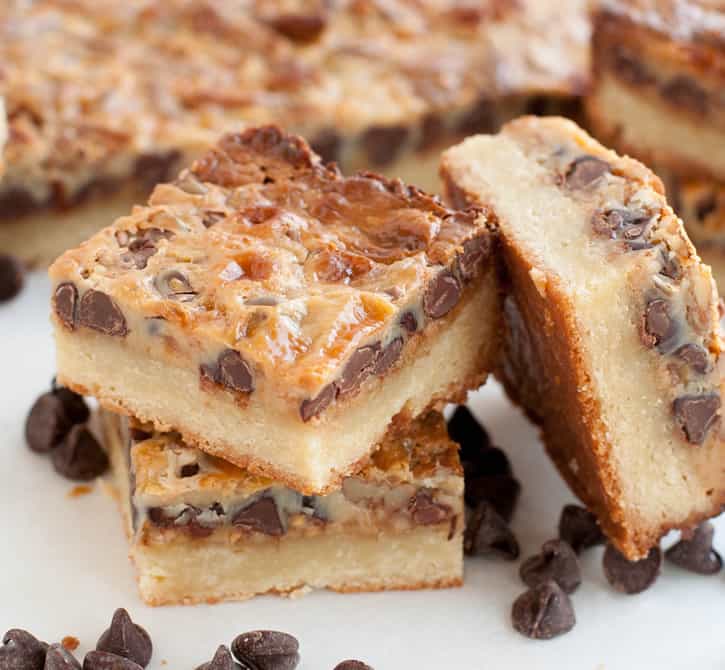
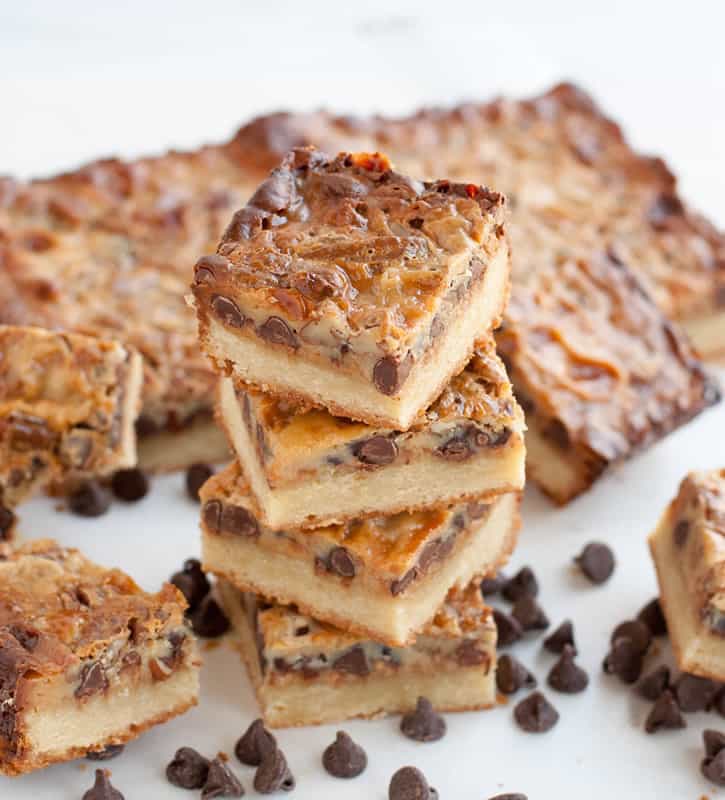
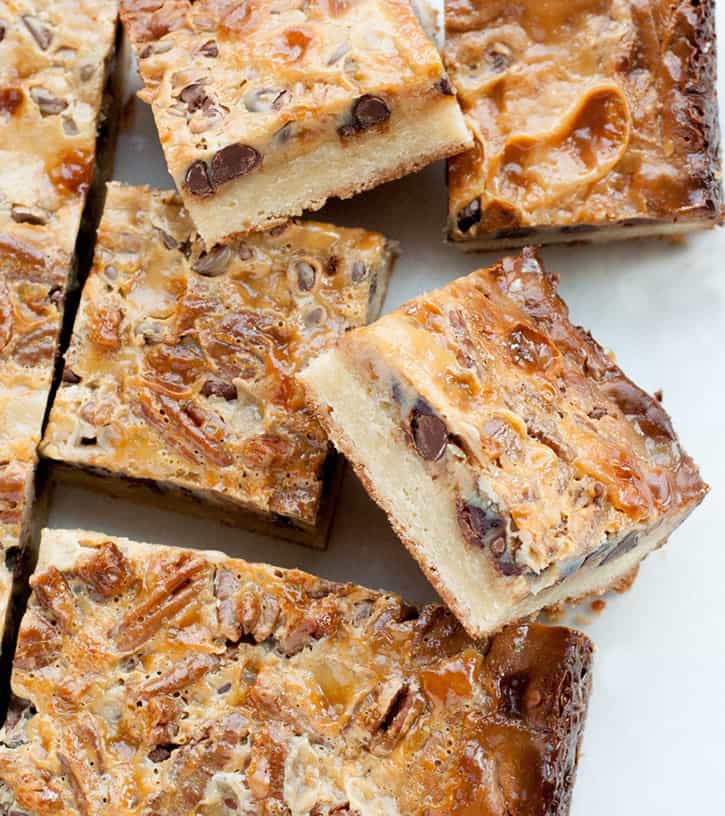
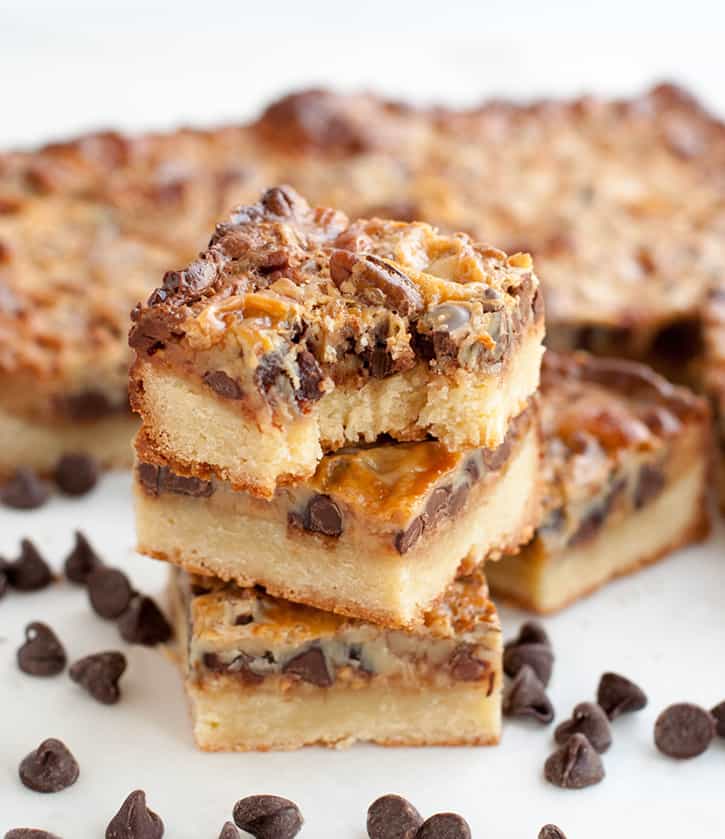
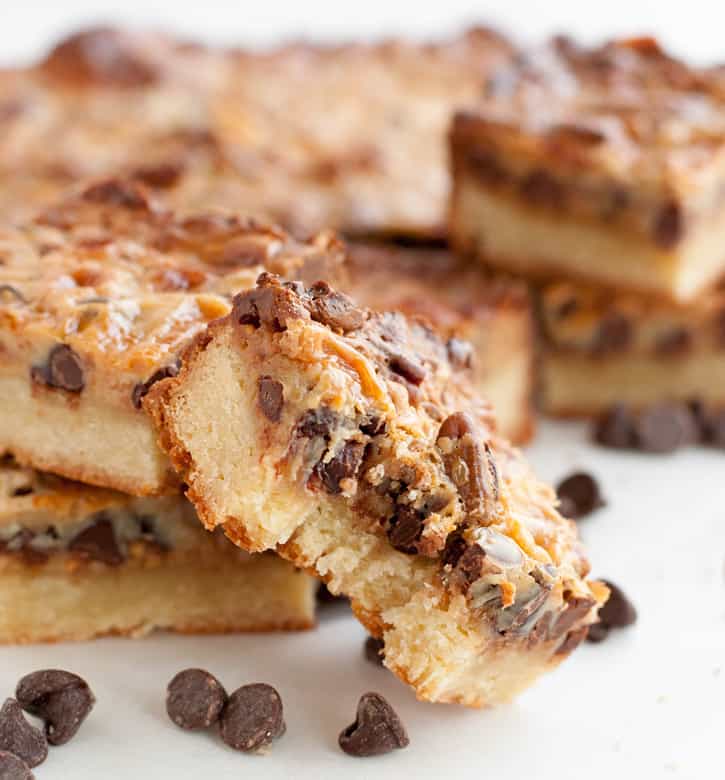
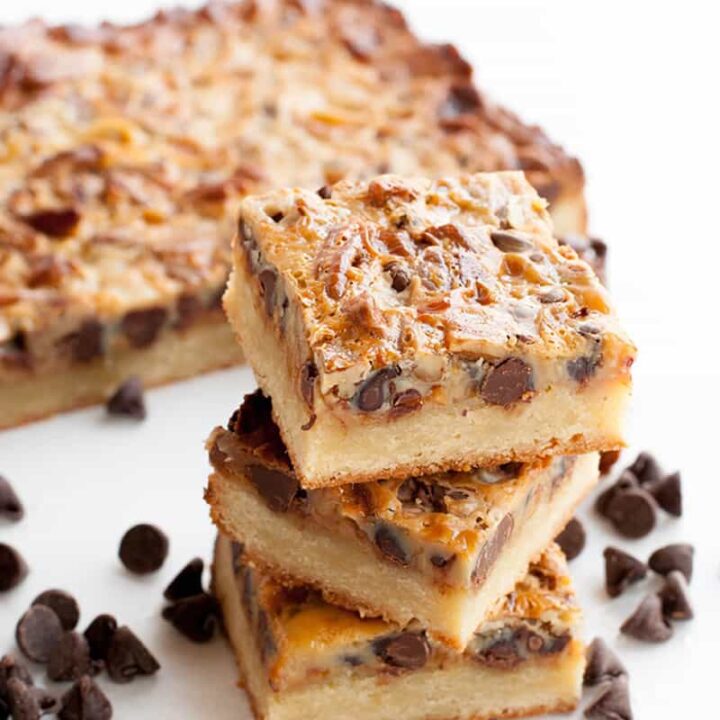
Let’s forget about the ratio of ingredients for a minute, the process remains the same. First we partially bake the crust just until it sets. Then we start layering the toppings. I started with toffee chips because I wanted to make sure that I punctuated that wonderful caramel flavor. After that, I sprinkled on a layer of semi-sweet chocolate chips. Then, because I am a turtle loving fool, I added some pecans. I wasn’t going to originally, since millionaire’s shortbread has no nuts, but hey, magic bars do and honestly, everyone was fighting over getting the ones with the nuts, so clearly, it was a winning move. You’ll see I didn’t layer the pecans over the entire surface. We’ve got some braces going on over here, so I wanted to make sure we had some choices. Alright, so caramel isn’t good for braces either, but maybe I can warm up a square to make the caramel really soft so that my daughter doesn’t accuse me of “torturing” her by making things she can’t eat.
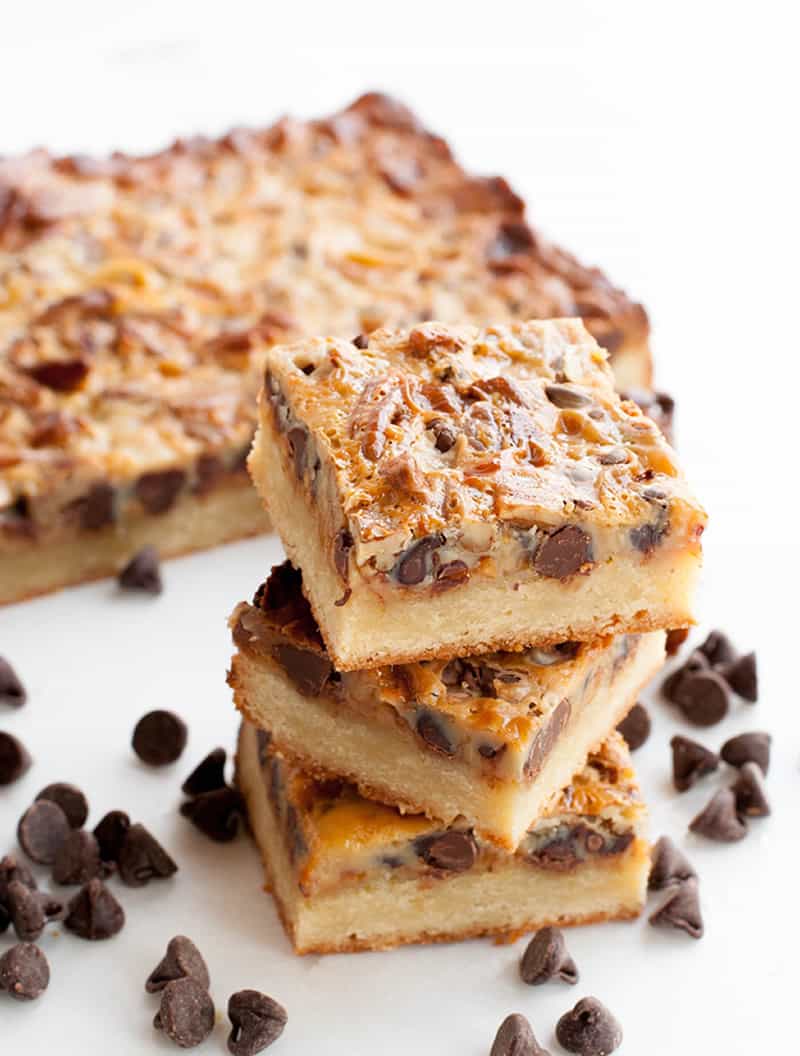

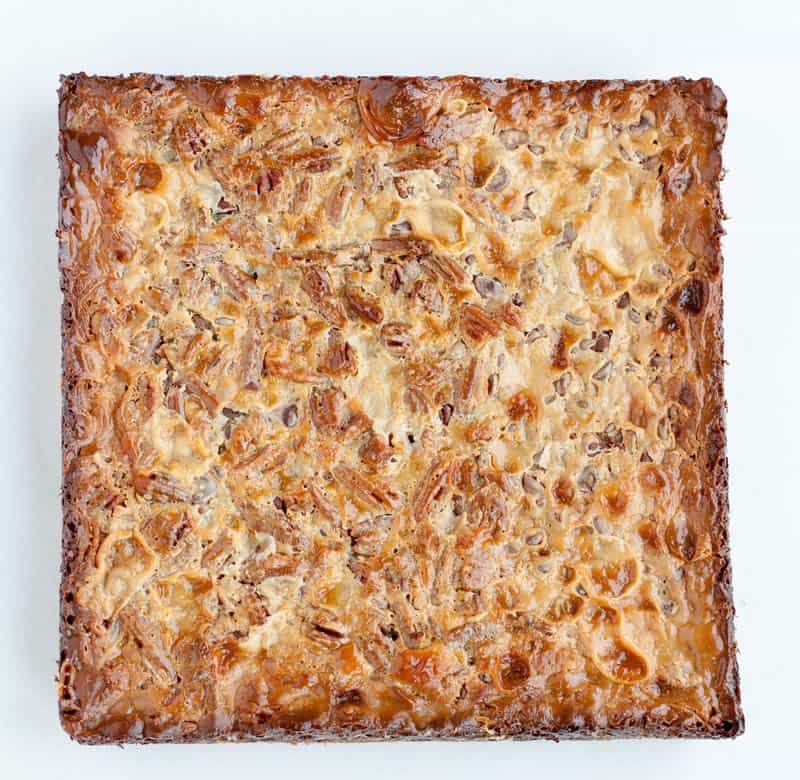
In traditional millionaire’s shortbread, you make a soft caramel by cooking sweetened condensed milk with a few other ingredients on the stove top. That caramel layer is then spread over a fully baked crust and cooled before melted chocolate is spread on top. Instead of making a separate caramel layer, I thought I would let all that caramelization happen in the oven. I just poured the sweetened condensed milk over the partially baked crust and toppings and baked it until it was a deep toasty caramel color. Letting it bake long enough is critical to getting a good caramel flavor. The dark brown parts have the best flavor. Those deep brown edges? Not burned. Gold. Chewy caramel gold. (Looking at the photos now, I might push the baking time a little longer to get the center even browner.)
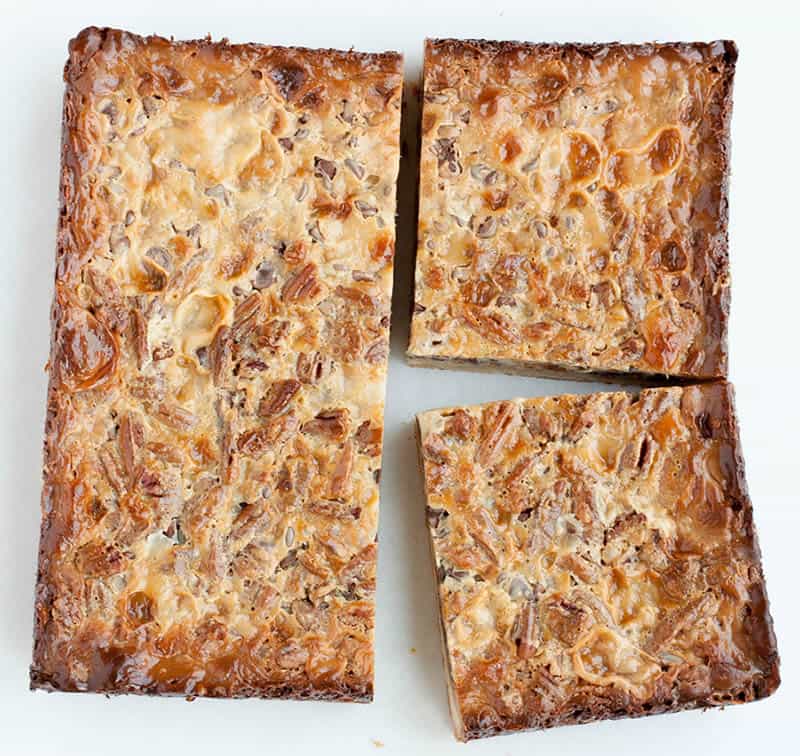
Let it cool completely so that it firms up enough for some nice clean cuts. Or, you could forgo the clean cuts and cut some ooey, gooey, warm bars. I went for clean cuts, but was terribly tempted to cut them warm.

There’s nothing traditional about these Millionaire Magic Bars. The shortbread isn’t a classic shortbread, the caramel wasn’t made on the stove top first, and there is no separate layer of chocolate crowning the top. However… these amazingly delicious bars do have all the wonderful flavors of millionaire’s shortbread, with the wonderful easy prep of a magic bar. Oh, and the nuts…that’s magic bar territory too…optional, but preferred. I think all of that adds up to quite the magical combo.
Millionaire Magic Bars. Third time’s a charm? I had hoped so, but, in this particular case, the magic batch was the fourth. Four batches. Four photo shoots. And finally, one amazing recipe.

There’s something to be said for perseverance.

Millionaire Magic Bars
Ingredients
- 2 cups all purpose flour
- 1 Tablespoon corn starch
- 1 cup salted butter, 2 sticks, room temperature
- 1 cup sugar
- 1 large egg, room temperature
- 1 teaspoon vanilla
- 1/2 cup toffee bits, I used Heath
- 3/4 cup semi-sweet chocolate chips
- 3/4 cup chopped pecans, optional
- 1 14 ounce can sweetened condensed milk
Instructions
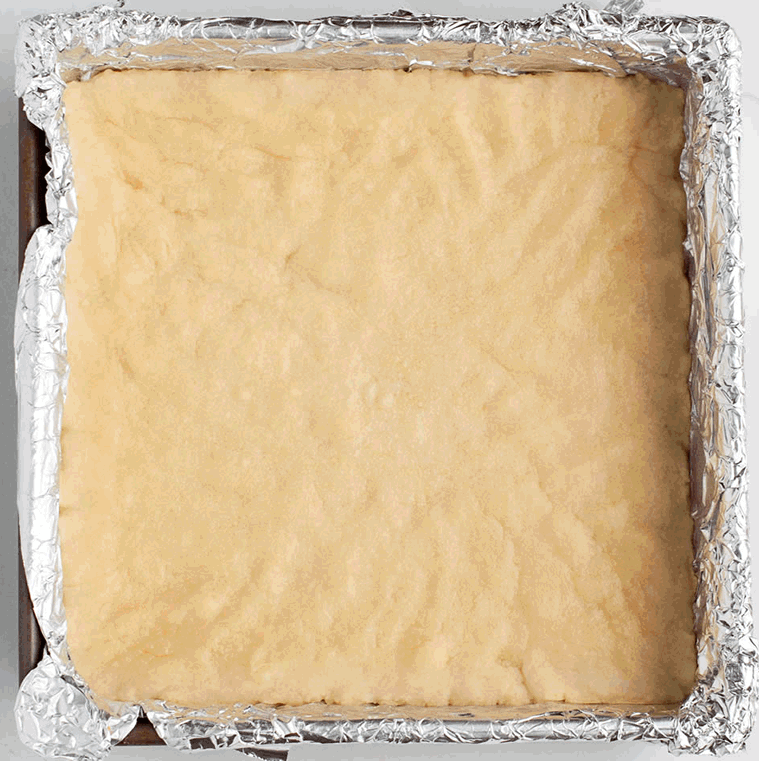
- Preheat oven to 350 degrees F. Line a 9" square pan with foil and spray with cooking spray.
- In a medium bowl, whisk together flour and cornstarch. Set aside.
- In a large bowl, beat butter and sugar together until light and fluffy, about 2-3 minutes.
- Add the egg and vanilla and beat until combined.
- On low speed, gradually add the flour mixture and mix until combined.
- Scoop the dough into prepared pan, and using a layer of plastic wrap, press the dough evenly into the pan. (The plastic wrap will keep the dough from sticking to your hands. Lift and move the plastic wrap around as necessary to get the dough evenly pressed into the pan.)
- Bake for 10 minutes.
- Remove from oven and allow to cool for about 5 minutes.
- Layer the toffee chips, then chocolate chips evenly over the crust. Top with pecans, if using.
- Drizzle the sweetened condensed milk evenly over the entire surface.
- Bake for 30-40 minutes or until top is bubbly and deep golden brown over the entire surface. You want to insure the milk has had time to really caramelize, but you don't want to over bake your shortbread.
- Allow to cool completely in pan for cleanest cuts.
- Remove from pan using foil liner. Peel off foil and cut into squares.
Notes
*You can adjust your topping amounts to your preference. If you want almost solid chocolate on top, use a full cup. If you'd like a little breather between your chips, go with 3/4 cup. Same for the nuts. Add more or less.
*If you use unsalted butter, add 1/2 teaspoon salt to the flour mixture.
*To speed up the cooling process, once the pan is just barely warm, you can put it in the refrigerator, uncovered, to help it set up. (I never put anything hot into the refrigerator.)
*This is a rich bar. I cut it into 16 squares for the photos, but you could easily cut it into 25 squares (5 x 5) or even 32 rectangles (4 x 8) and it will still be a satisfying portion.
*I baked this batch about 35 minutes, but it didn't caramelize as much as my other tests did at 30 minutes. I think I will try pushing it to 40 minutes next time and see if the shortbread can handle the extra time.
The Merchant Baker Copyright © 2016
Rebecca
Thursday 5th of December 2019
Can I use a 9"/2qt round casserole dish in place of the 9×9 square? I'm dying to try these & have EVERYTHING except the pan. 🥺 Keeping my🤞 until I get a reply. Thank you
Ramona
Thursday 5th of December 2019
Hi Rebecca, I think you could, but it will possibly bake up a bit differently. So, first, if it's a glass casserole dish, you'll need to reduce the temperature by 25 degrees. So, you would bake it at 325 instead of 350. I would still line the dish with foil for easy removal after it cools. Also, the volume of a 9" square pan is greater than a 9" round, so the layers may be thicker in your casserole dish. This means it might take longer to bake. I wouldn't worry too much about the first bake where you're getting the crust to set, but you might want to push the second baking time longer. Remember you're looking for a nice golden brown. If I had all the ingredients, didn't have the proper pan but really wanted to try this, I would definitely try my casserole dish. Just know there's some adjustments necessary and keep your eye on how it looks as it bakes. The bottom line is all the stuff you're putting in the pan tastes good together. As long as you cook it thoroughly, even if it doesn't turn out exactly like mine, it should still taste yummy. Let me know how it works out! I have my fingers crossed for you, too!
Fall Millionaire Magic Bars - Barbara Bakes
Monday 24th of October 2016
[…] sweet friend Carol fell in love with The Merchant Baker’s Millionaire Magic Bars and emailed me a slightly adapted version of the recipe. She said she took them to a party and […]
Cyndy
Friday 21st of October 2016
I'm with Carol on using convection mode and I trust her instincts completely. She's never steered me in the wrong direction and can always find great recipes. I can't wait to make these. Love the photos too, the bars look luscious.
Ramona
Friday 21st of October 2016
Thanks Cyndy! I agree that convection is a great choice for these bars. I hope you try them! If you're a fan of magic bars and millionaire bars, I think you'll love these!
Carol G
Thursday 13th of October 2016
Hi Ramona.
I had to stop by to let you know that I made these for our annual Football Sunday Soup Lunch last weekend and boy were they a hit! I had some caramel filled baking chips that I substituted for the semisweet chocolate chips-they really added a nice touch. I also took your advice and baked the bars a touch longer-almost 45 minutes in my oven on convect mode. The top was a rich golden brown which made for a nice caramel flavor and the shortbread crust wasn't dry or over-baked at all.
Oh my stars, they are DELICIOUS! They'll be one of my new go-to recipes when I have to take dessert some place. I cut them into 32 rectangle shaped pieces-just the right size for a richly tempting treat.
Thanks so much for sharing the recipe here!
Carol
Ramona
Thursday 13th of October 2016
Carol, I am so happy to get your feedback! I love the caramel filled chips sub and I'm excited to hear that the additional baking time worked out. I'll be using your success at 45 minutes as a gauge next time I make these and I think I'll bake them in my convection oven next time. I always try to give bake times from my electric oven since I know not everyone has a convection oven, but I think the convection oven will probably be the one to use when I bake these from now on. Generally, I use the convection for cookies and bars and the electric for anything that needs to rise like cakes, biscuits and scones. Anyway, I'm thrilled that they were a hit!