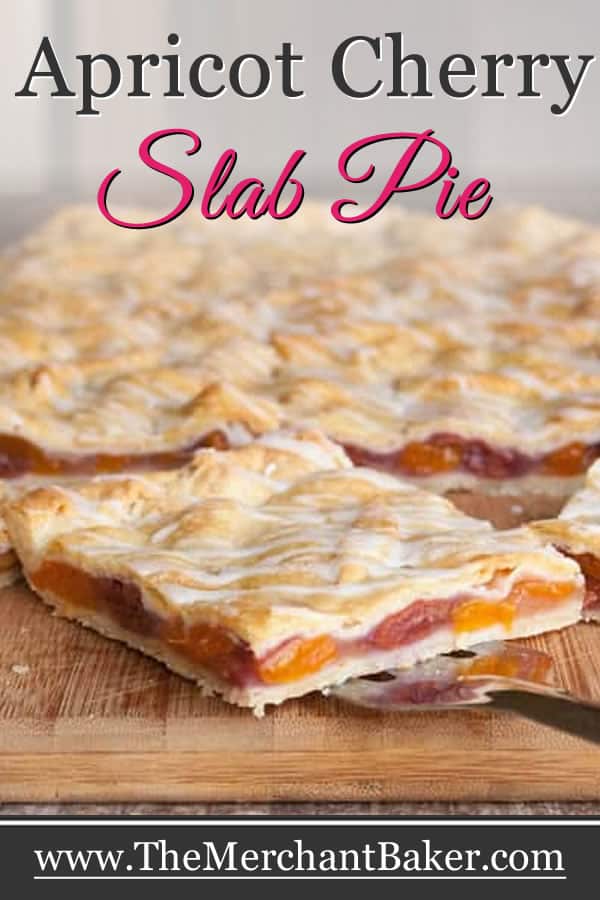


This is definitely pie for a crowd.

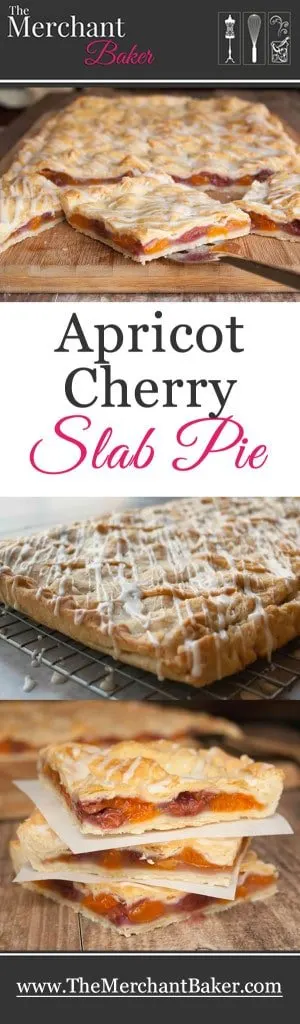
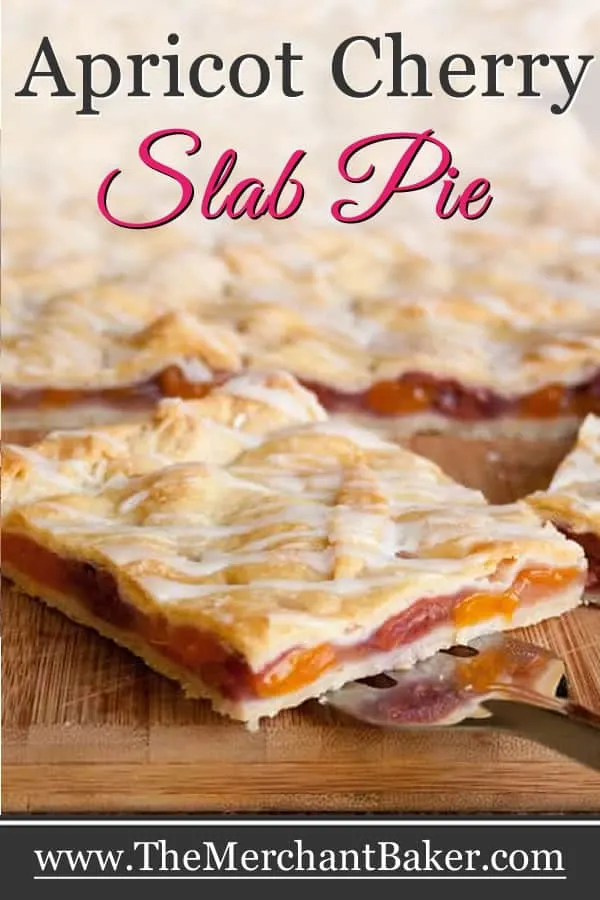
Apricot Cherry Slab Pie. I love the name. “Slab” and “Pie” just naturally belong together because if you love pie, there’s nothing better than a big honkin’ slab of it. Plenty to share. No need to worry about slicing up beautiful wedges from a pie pan that has all the fruit filling falling out as you serve each slice. Then you try to dole out equal amounts of fruit from the pile gathering in the middle of the pie pan which you spoon unceremoniously on top of the piece you just destroyed. Then there are those that try to cut half slices of fruit pie, (because hello, there’s a dessert buffet and you want to try more than one thing,) leaving yet another obliterated piece in the pan because you can’t really cut a half a slice…not well anyway.
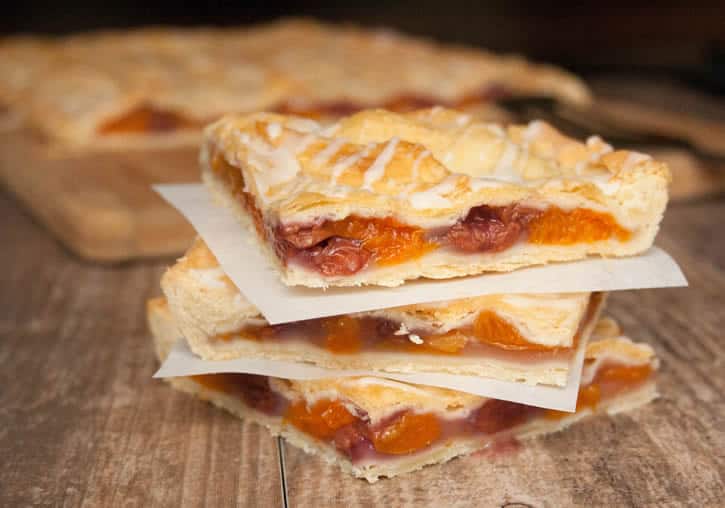

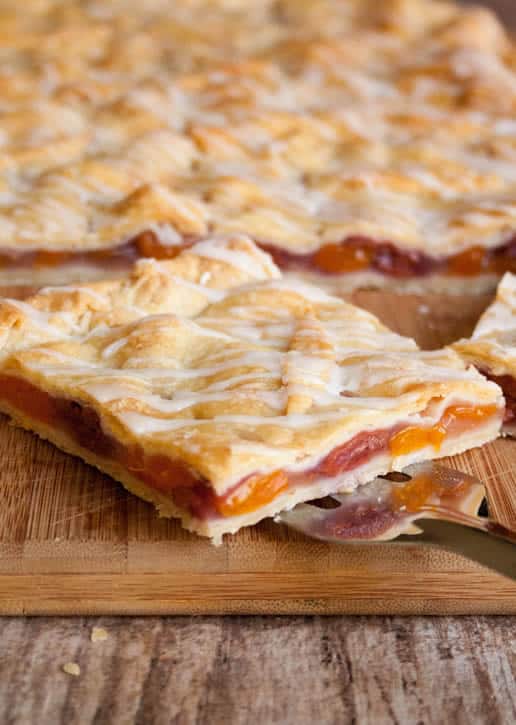
Ever since I started making slab pies, they have become my pie of choice, especially if I’m serving a lot of people. The beauty of slab pies lies in their sheer size, the stability of the filling within the crust and the most perfect proportion of pie crust to filling. I think that’s the most magical part. My husband says it’s like a giant pop tart…but 1000 times better. The crust is rolled thin, probably larger and thinner than you’ve ever rolled a pie crust, which, when baked, has the most wonderful buttery, flaky texture. I rarely eat a pastry pie crust that I love. So often they are dry, or soggy, or the edges taste like burnt butter…blech! I usually cut the crust off since there are calories in that crust and I figure, why waste them? But there is no crust cutting with this pie. I’ll even take an edge piece and fully enjoy the extra crust that the middle pieces lack.

When you taste really good pie crust, it’s as if it’s in a completely different category than other pie crusts. Now, I swear by and only make all butter pie crusts for a traditional round pie and I have tried making this crust with all butter. But to be honest, this particular crust works best for me with half butter half shortening. It was easier to roll out and the crust didn’t get overdone before the pie was actually ready. Then there’s the whole argument that using both kinds of fats renders a tender, flaky yet buttery crust, and that is quite true in this case. This recipe also works well with all shortening, but I prefer the taste with the butter added. Either way you’ll be a rock star. I’ve taken pictures of the steps today, to give you some visuals, so pull up a chair and let’s get started.
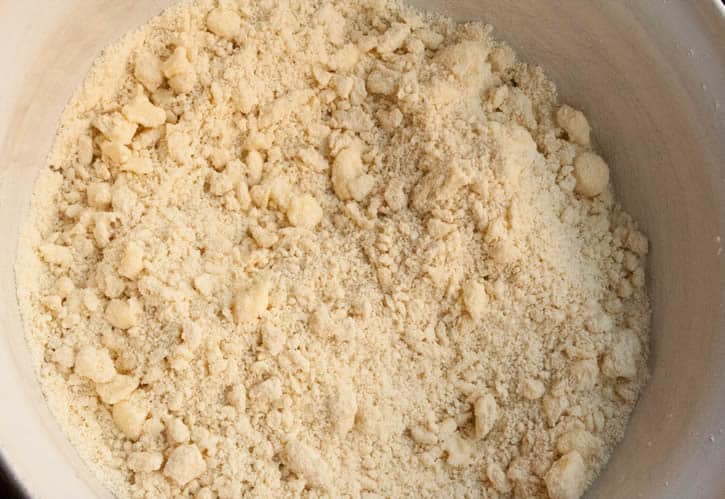

You’ll mix your dry ingredients, then cut in your shortening and butter. I always cut in the shortening first to get it well distributed, then I add the butter and cut it in until it has varied size pieces no larger than peas. (Well, some might be larger than peas, but that’s okay.) You’ll see in the picture that the base texture is crumbly from the shortening mixed in, but I have plenty of pieces of butter of various sizes floating throughout.
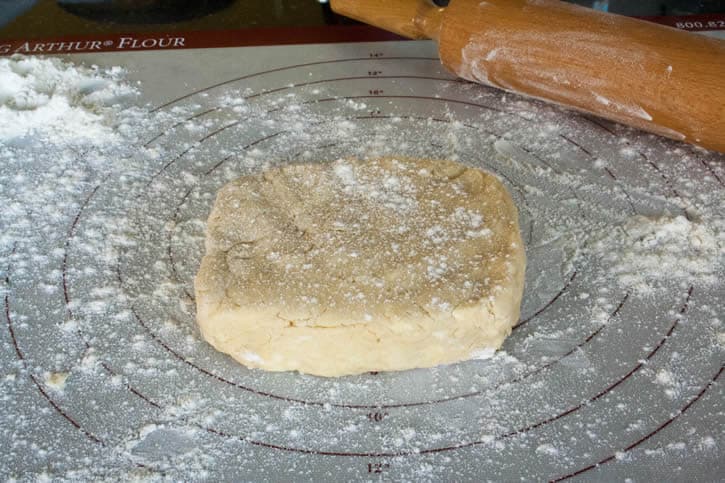

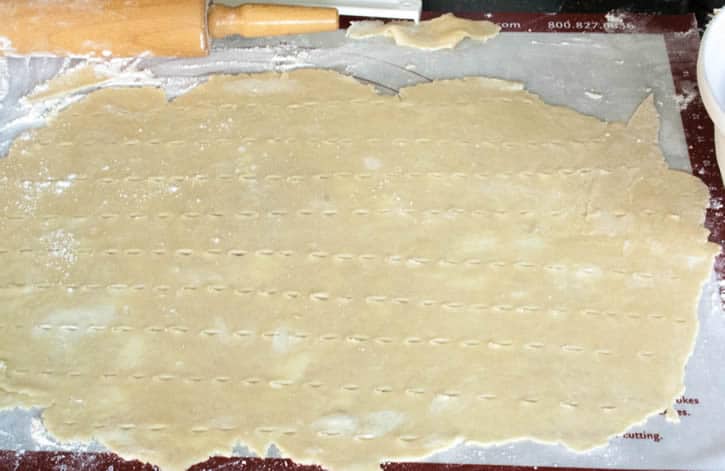
Next you’ll add your milk and egg yolk and toss/stir until the dough comes together. I take the dough out of the bowl and weigh it, splitting into 2/3 and 1/3. The 2/3 section will be for the bottom crust, and the 1/3 for the top. You can eye this measurement, but it is really important that you make sure you get a full 2/3 for the bottom; you’ll thank me when you’re trying to roll a few more inches out of it. I take the 2/3 bottom portion and form it into a chunky rectangle, so that it is already in the shape that I’m going to roll. Unlike other pastry doughs, this one does not need to go into the refrigerator to rest before rolling out. I used a silicone rolling mat because I like the built in measurements and the non-stick property of the silicone, but I’ve rolled this dough plenty of times on my counter and used a ruler. Make sure you flour your surface and are rolling from the center outward alternating your rolling from left to right and top to bottom. This will help you maintain the rectangular shape as you continue to roll it outward to it’s required dimensions. Notice those light patches in the dough below? That’s those chunks of butter getting ready to become flaky pastry…yum!
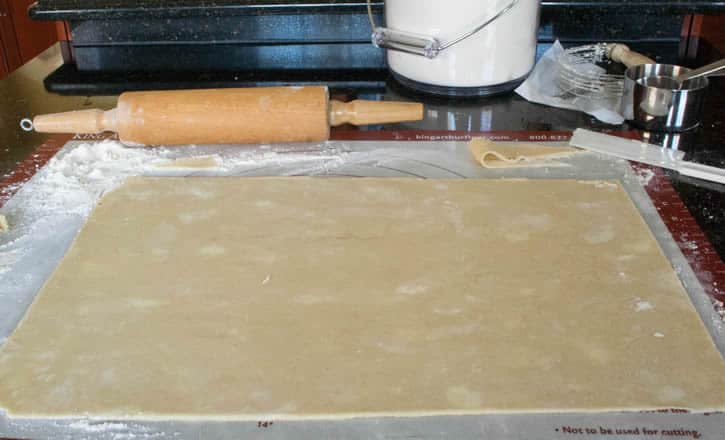

Once that’s done, cut it to the proportions listed in the recipe. (I used a plastic dull knife to “cut” so as not to damage the mat.) Roll the dough onto your rolling pin and transfer it to a foil lined 15″x10″ pan. You will now have some dough scraps left over from which you can cut various shapes. I chose leaves for this pie and just cut them free hand and scored them gently with a knife to make the leaf veins. Any shapes you cut will be fine. Or you can skip this step if you don’t want that additional decoration. Set your shapes aside and make your filling.
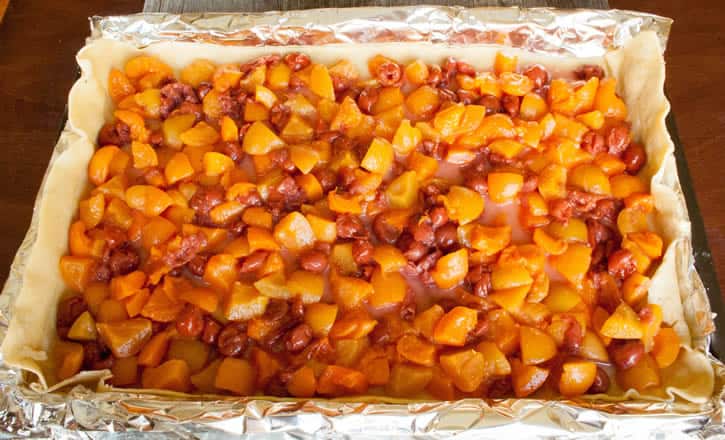

This pie uses canned fruit, not canned fruit pie filling, but canned fruit. I never use canned fruit for pie, but it’s very good here. You’ve got cherries that you simply need to drain and apricots that are drained and then quartered. I usually do this step before I start the recipe so that the fruit is draining while I’m rolling the dough. The fruit is then tossed with some sugar and cornstarch and is then spooned into the bottom crust. Time to roll the top crust.

This portion is also rolled to a large size, but not as large as the bottom crust. Make sure your surface is floured, then follow the same process as with the top crust, forming your 1/3 portion into a chunky rectangle, etc. When you’re done, you need to put some vent holes in it so that the steam can escape while the pie is baking. I’ve done this a number of ways, but for this pie, I decided to do rows of slashes for decorative as well as functional purposes. You may vent in any design you choose, just insure your small cuts make it through the dough.
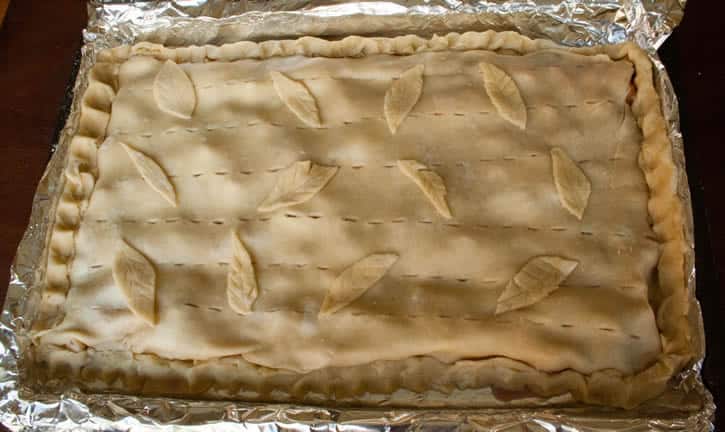

The top dough is now ready to roll onto your pin and be transferred to the pie pan. Roll the dough carefully over your filling. Then, bring the bottom crust up and over the edge of the top crust without stretching the dough, and crimp with a fork or use your desired fluting technique. It’s not going to be perfect. Mine never is, but it always turns out well in the end. Just do your best to seal the edges, always bringing the bottom up over the top to prevent the filling from spilling out. Sometimes I need to coax the filling a bit towards the center as I go around the pie, so that I have enough dough to meet bottom to top. Basically, make it do what you need it to. Be the boss of your crust. You’ll see in the upper right hand corner where I couldn’t quite get the ends to meet no matter how bossy, but I insured I had a good bottom crust edge to hold the filling in the crust. Sealing is more important than looks, so prioritize that.
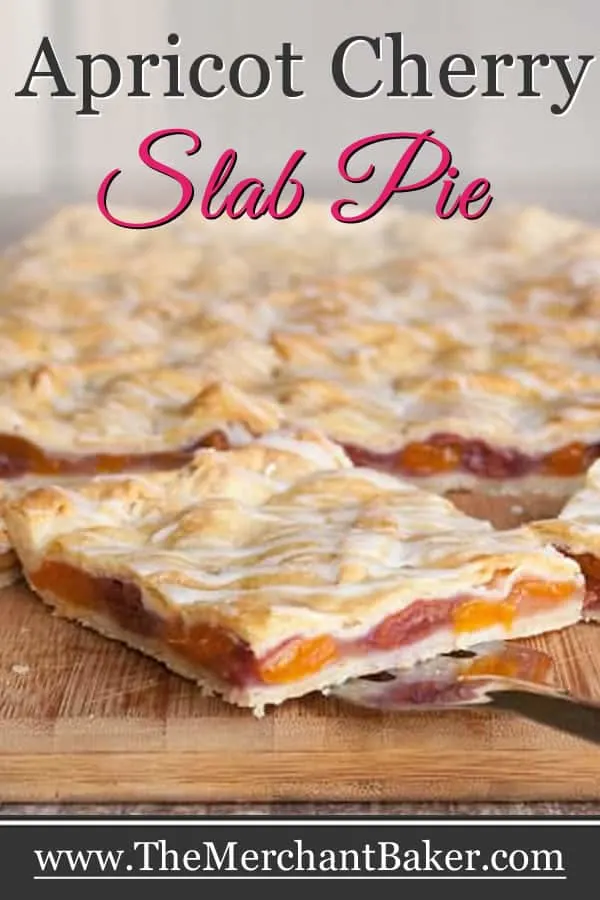
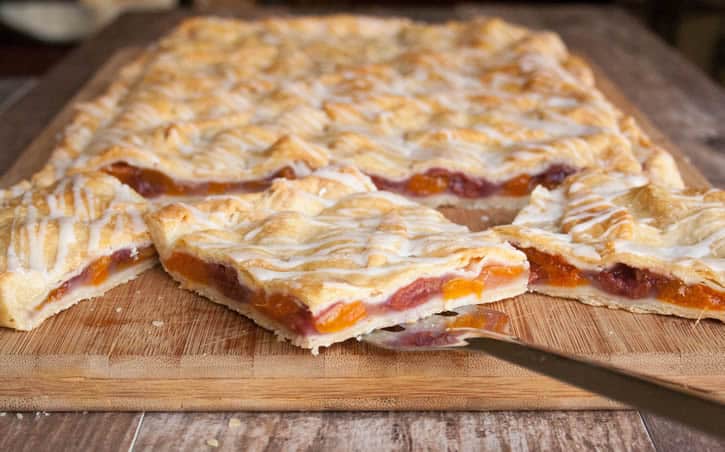
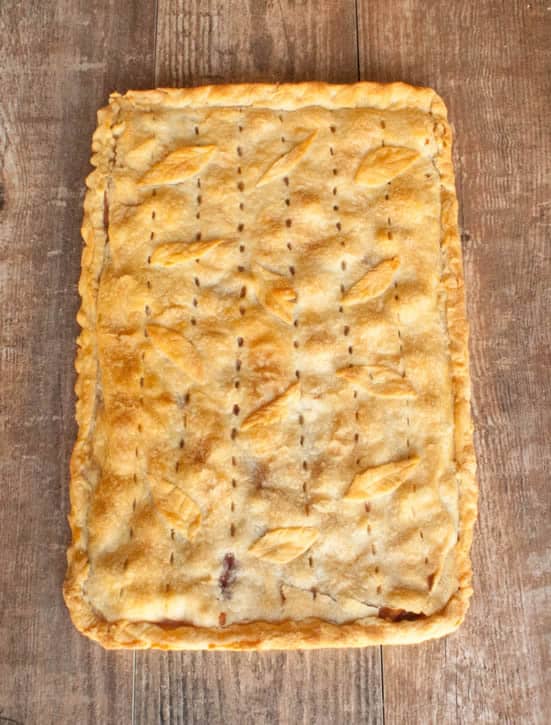
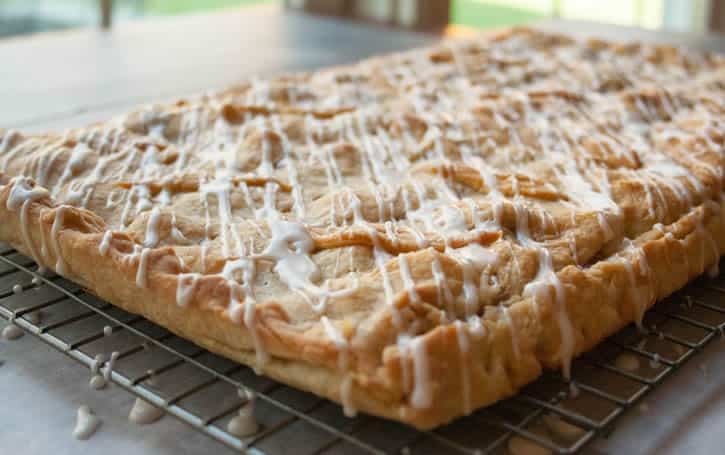
You’ve now got one large pie that’s ready for décor. Brush the bottoms of your various shapes with water (I actually used some of the drained fruit juice for this because it was nearby) and place them as desired on top of your crust. That’s it! It’s ready to bake. In about 45 minutes you’ll have a beautiful golden crust and the filling will be bubbly underneath. Be patient and let it cool a bit so that it can set up. I let mine cool completely before I drizzled on the glaze, but it’s also wonderful served warm.

Even though the pie is so pretty right now, the glaze really helps to bring it together. The cherries are a bit tart in the filling and the glaze adds a lovely sweetness to the pie. The extra added bonus of the glaze? If you’re not so keen on how your crimping or pie decorations turned out, the drizzled glaze covers a multitude of sins. See how pretty?
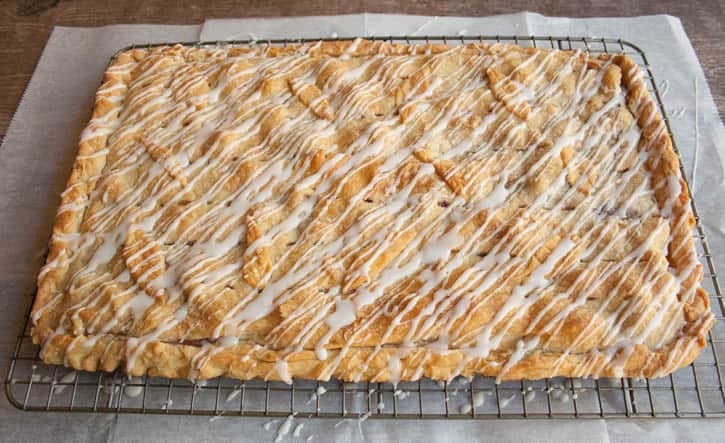

On the other hand, if your pie top is so beautiful you hate to distract from it with the drizzle pattern, you could always brush the glaze over the whole top so that all of your handiwork shines through. I decided to go with the drizzle and let my leaf shapes be a hint of textural interest throughout the top.

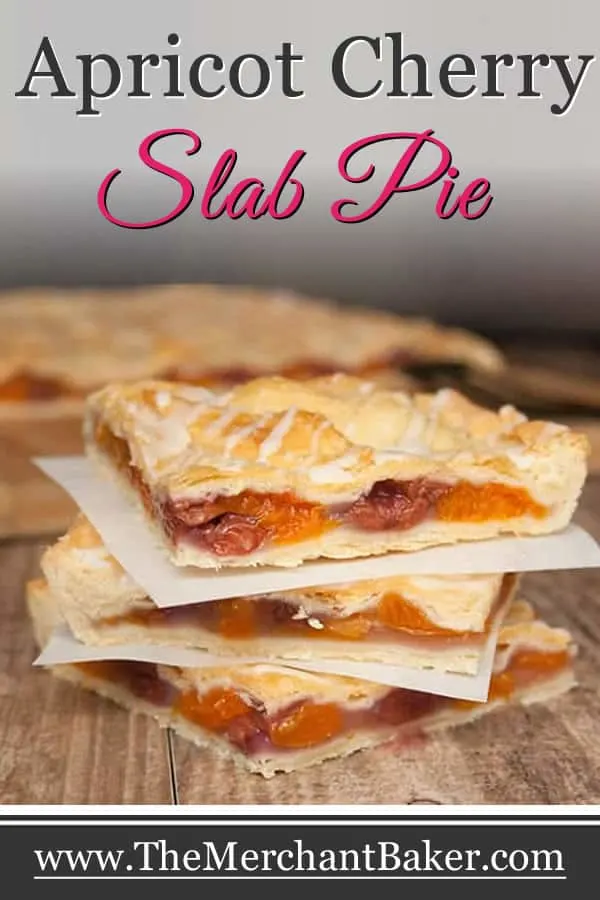
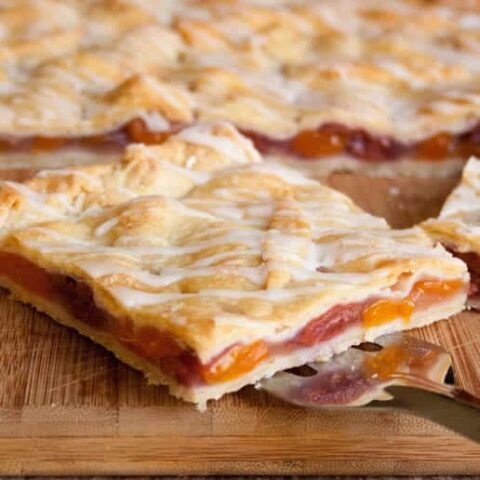
Let’s talk about slicing this pie. It cuts PERFECTLY into nice clean slices. This pie is great for a dessert buffet because you can slice little strips of pie and get a ton of servings out of it. Or, slice it into mini slabs for more generous portions. Oh! Here’s another benefit…if you decide to go a la mode…your ice cream will sit nicely atop a mini slab of pie… so much better than on a wedge of pie. (Sorry no pics of that, just thought of it now.)
(For the die hard friends that are still reading this 1700 word+ post, thank you. I’d share my slab pie with you anytime :)
Finally, this pie is delicious. You can see how flaky the pastry crust is and the filling is sooo good! I’ve never taken it to any event or celebration where people didn’t comment on how good it was or ask for the recipe. Actually, yesterday I mentioned that I made two Thanksgiving dishes for the blog…this was a third. I wasn’t counting desserts when I wrote that post. And let me say that no one in my family would mind eating this pie again tomorrow let alone next week. It’s the magical proportion of crust to filling, I think. It’s different than any traditional pie and well worth your time to make it.


So get out your rolling pin and make a slab of pie. Your friends will thank you.

Apricot Cherry Slab Pie
Ingredients
For the pie:
- 3 1/4 cups all purpose flour
- 1 teaspoon salt
- 1/2 cup unsalted butter, cold and cut into small pieces
- 1/2 cup shortening, I use non-hydrogenated
- 1 egg yolk
- whole milk
- 1/2 cup sugar
- 3 Tablespoons cornstarch
- 3 15- ounce cans apricot halves, drained and cut into quarters
- 1 14 1/2 ounce can pitted tart red cherries, drained
For the glaze:
- 2/3 cup powdered sugar
- 1/4 teaspoon vanilla
- water or milk
Instructions
- Line a 15 x 10 x 1 inch baking pan with 18" foil, extending the foil up and over the edges. Set aside.
- In a large bowl, whisk together flour and salt. Using a pastry blender, cut in the shortening until well combined into flour. This should only take about one minute of blending.
- Add the butter and continue to cut into the flour mixture until you have small varied size pieces no larger than peas.
- In a glass measuring cup, beat egg yolk with a fork. Add enough milk to make 3/4 cup total liquid. Mix well.
- Add egg mixture to flour mixture and toss and stir until well combined.
- Divide dough into three equal portions; combine two of the thirds into one, leaving you with one large portion and one small portion. I used a scale for this, but you can estimate it.
- Shape the large dough ball into a rectangle, then roll on a lightly floured surface into a 19x13 inch rectangle, rolling from the center outward. The dough will be thin. Make sure you are moving the dough and adding flour to the rolling surface as necessary to prevent sticking.
- Trim edges to make an 18x12 inch rectangle. Use the scraps to cut leaves or other desired decorations to use later.
- Wrap dough over rolling pin and transfer to the prepared pan. (Pastry will extend over ends of pan.)
- Preheat oven to 375 degrees F.
- Prepare the fruit filling. In a large bowl, combine sugar and cornstarch. Stir in the drained cherries and quartered apricots and gentle mix until sugar mixture coats all the fruit. Spoon fruit mixture onto dough rectangle in pan.
- Roll the remaining dough portion into a 16x11 inch rectangle. Cut several small holes or vents in the dough. You can create a design with your cuts, if you wish. Place dough rectangle on top of fruit filling.
- Bring bottom dough rectangle up and over edges of top rectangle; fold edges towards center of pan. Seal edges with tines of fork or crimp/flute as desired.
- Take cut out leaves or other designs, brush bottoms of the shapes with water, and arrange on top of pie as desired.
- Bake about 45 minutes or until top is golden. Cool in pan on a wire rack for at least 30 minutes. Use foil to lift pie from pan.
- Make glaze. In a small bowl, stir together powdered sugar and vanilla, adding just enough milk so that the glaze drips off the spoon, about 2-3 teaspoons.
- Drizzle glaze over pie. Serve pie warm or cool completely.
Notes
*To Bake Ahead: Bake and cool as directed. Cover and let stand at room temperature for up to 24 hours or chill in the refrigerator up to 3 days. Return to room temperature to serve.
Recipe from Better Homes and Gardens Christmas Baking, 2008
The Merchant Baker Copyright © 2014
It’s All About the Inside | Building Her Hope Chest
Tuesday 21st of July 2015
[…] I found an amazing recipe on Pinterest. I know, I know, who doesn’t? But I actually tried making this one. Most of my Pinterest posts just hang out on the computer screen looking pretty. Isn’t that what they’re for? Anyway… I have made many pies and have even been complemented on the taste but no one has ever said that my pie was pretty. It just doesn’t work that way for me. So I thought “how hard can this recipe be” and then I thought “I’m going to make this a learning tool for Kaleigh.” Not to mention the fact that she is much more talented than I am so I assumed that she would just get in there and make it beautiful. I guess in some cases having a good teacher can be helpful. Here is a picture of our amazingly delicious but incredibly ugly Apricot Cherry Slab Pie. […]
Emily
Wednesday 19th of November 2014
Have you ever done this recipe with other kinds of fruit? Do you think it would still work well with other kinds?
Ramona
Wednesday 19th of November 2014
I've made it with fresh thinly sliced apples (with sugar and spices as you would for a normal pie.) It was very good! Since this is basically just a big flat pie, you could use any fruit/fruit mixture you would use for your favorite pie. If you have a favorite, just use the filling part of the recipe and bake it in the slab crust. I will add that even though apricot cherry might not ring the number one favorite fruit pie bell....it is really, really good and worth a try! Either way, I think you'll love the slab version of any pie.
Shannon @ Bake.Frost.Repeat.
Tuesday 18th of November 2014
Oh my! This pie looks fabulous! I love slab pies but I've never made one. It would be perfect for those holiday potlucks at work.
Ramona
Tuesday 18th of November 2014
It is perfect for large gatherings...and it's quite sturdy for transporting. It always gets rave reviews!
ATasteOfMadness
Tuesday 18th of November 2014
This looks amazing! I have always wanted to try to make a slab pie, but I always thought it looked daunting. I think I should try one of my weekends..
Ramona
Tuesday 18th of November 2014
It's really no more difficult than a regular pie...and it's so good! You have to try it!