I love, love, love Valentine’s Day!

Unlike New Year’s Eve where I’ve always felt like the world requires you to have someone to kiss at midnight, for me, Valentine’s Day is about ALL the love. Love for parents, kids, friends and of course, if you have a special someone, well…I simply consider that a bonus.
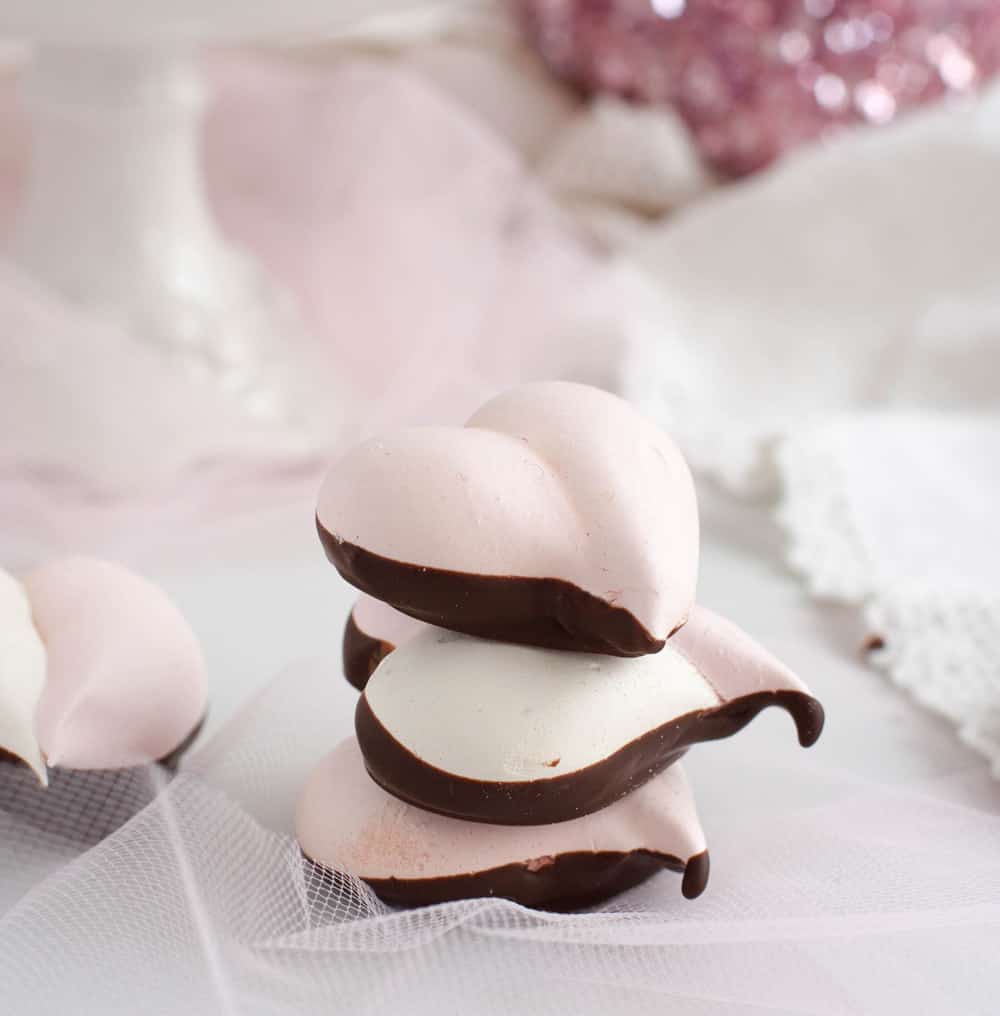
I love making Valentine’s treats and this year, I decided to whip up some pretty little Valentine Meringues. They’re somewhat of a guilt free pleasure (relative to the other decadent treats available this time of year.) It’s been awhile since I’d made meringues, but they’re pretty easy if you just follow the directions. These are French meringues, so we’re basically just going to whip up some egg whites with sugar.


You must start with a clean bowl. There should be no residual fat from any other baking endeavor. I like to swish my bowl with a little vinegar and water (dry thoroughly) just to make sure. Then there’s four ingredients: egg whites, confectioner’s sugar, cream of tartar and salt. That’s it!
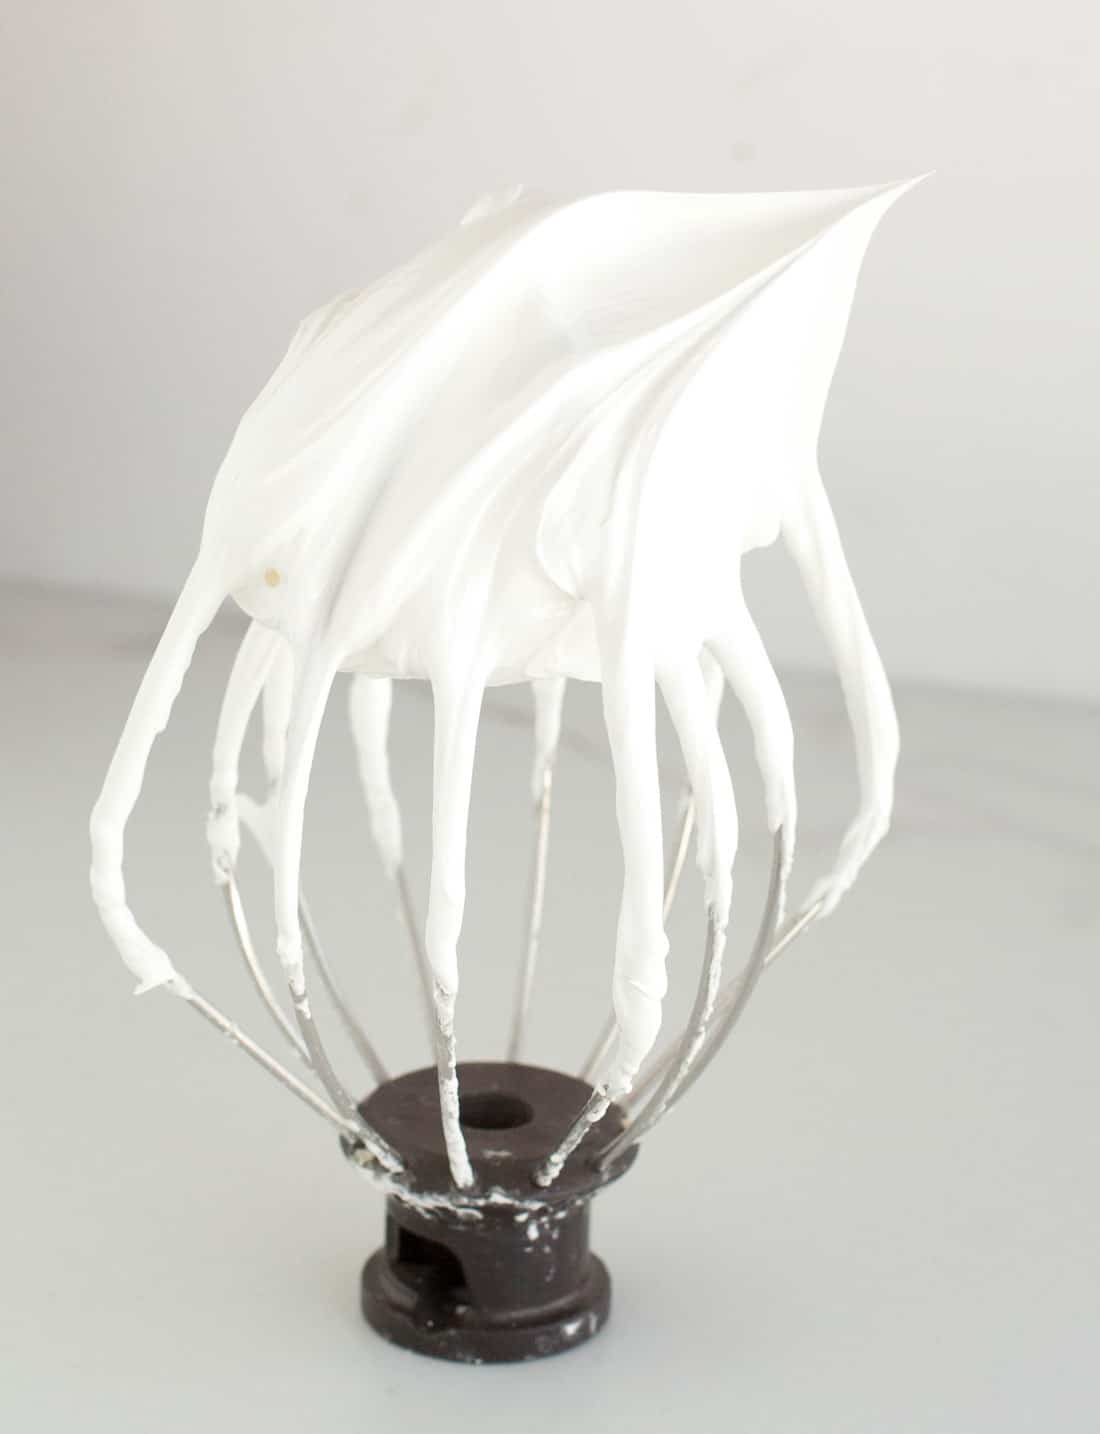
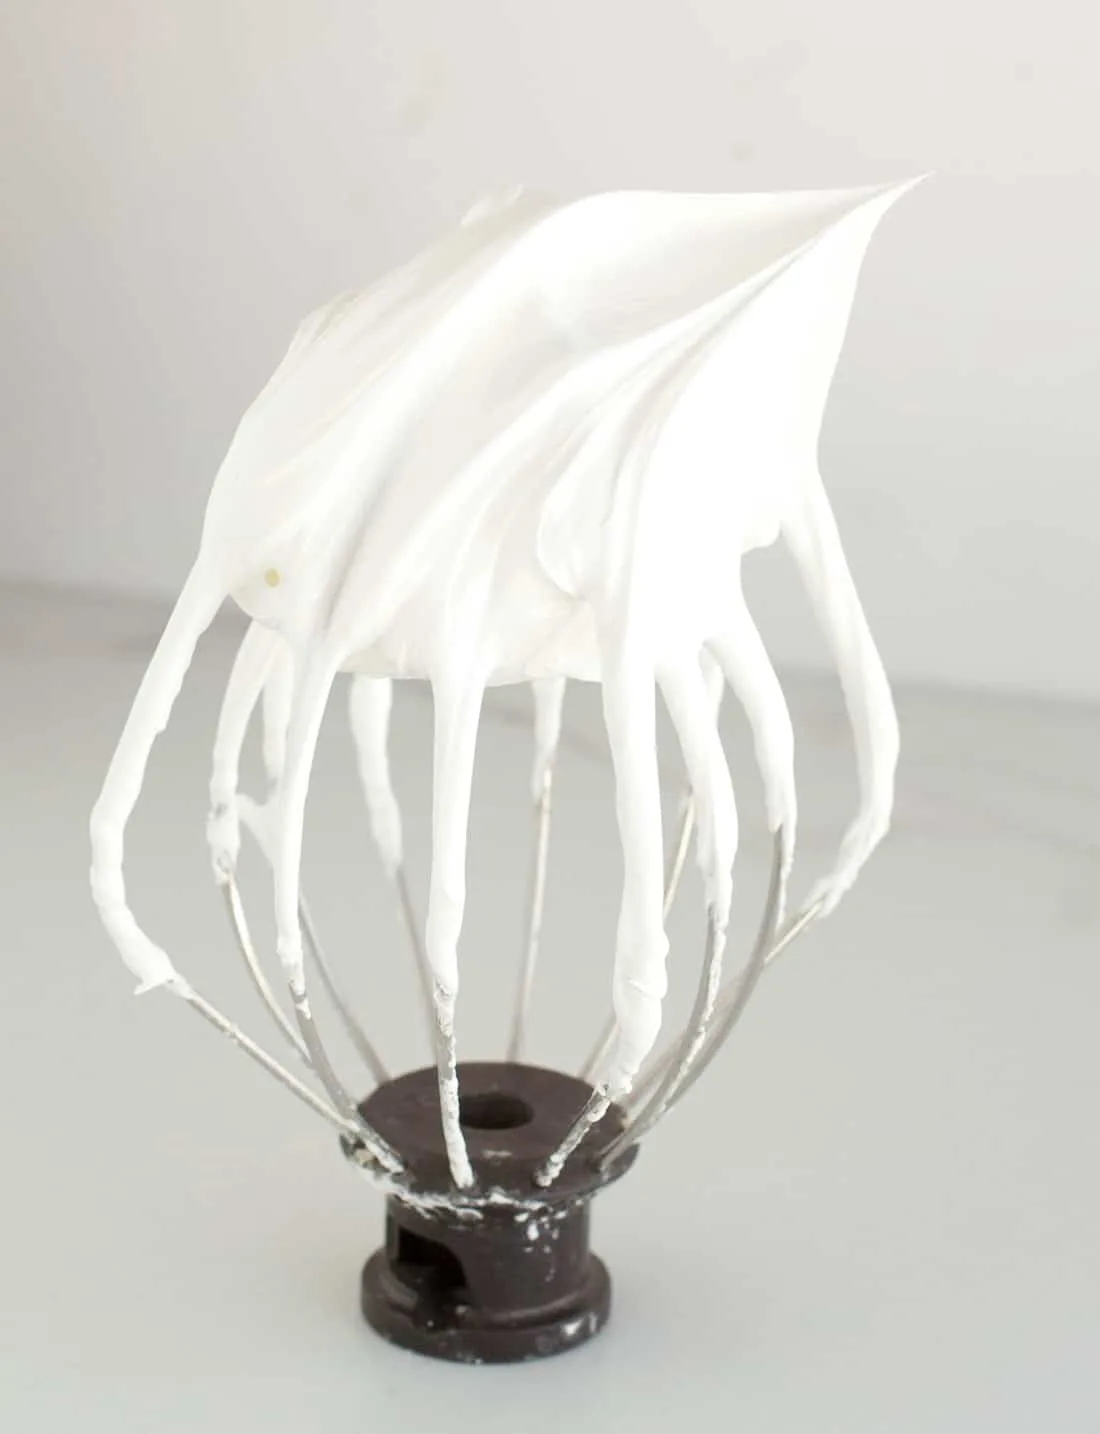
Now, it’s all about the whipping. Whip the egg whites until foamy…adding in the cream of tartar and salt. (The cream of tartar helps stabilize the egg foam.) Then gradually add the confectioner’s sugar and whip and whip until you get a beautiful glossy mixture with stiff peaks.
I lamented over what shape I would pipe the meringue into…hearts? roses? nests that I would later fill with some yummy filling? I was pretty close to deciding on the nest since I had my leftover yolks and you know extra yolks means mandatory lemon curd to me. Until, that is, I found out that my husband used those extra yolks. He rarely uses the left over of anything in the refrigerator and he knows I hate to waste food and am always looking to use up all the fruit/veg or whatever we have that needs to be used. He was quite proud of the fact that he noticed them and added them to our scrambled eggs that morning. (Yep..who knew our scrambled eggs were a splurge that day? Oh right, my husband did ;)
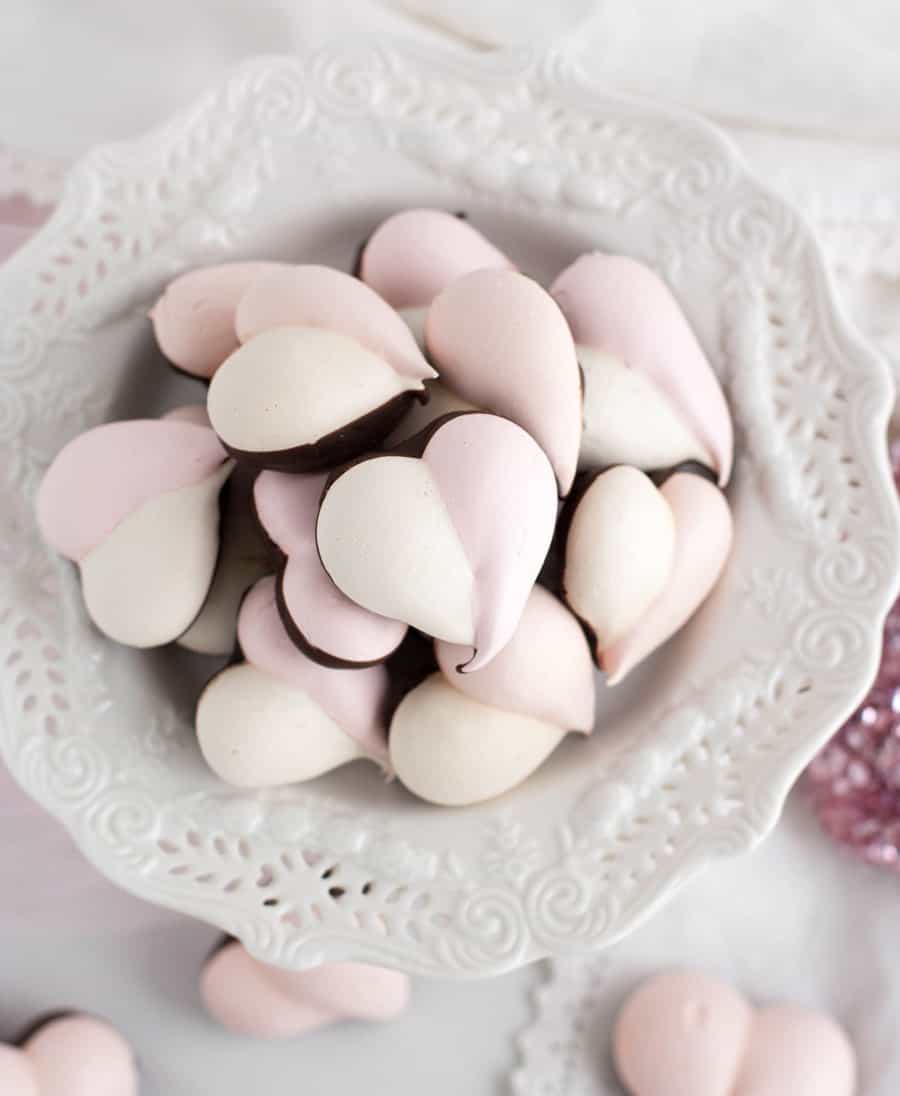
So…no nests. Hearts it is! But I wanted to make them a little more interesting so I took half of the meringue and added a couple drops of food coloring. I generally like to avoid food coloring, but I will use it now and then and I really wanted just a hint of pink to contrast with the white.

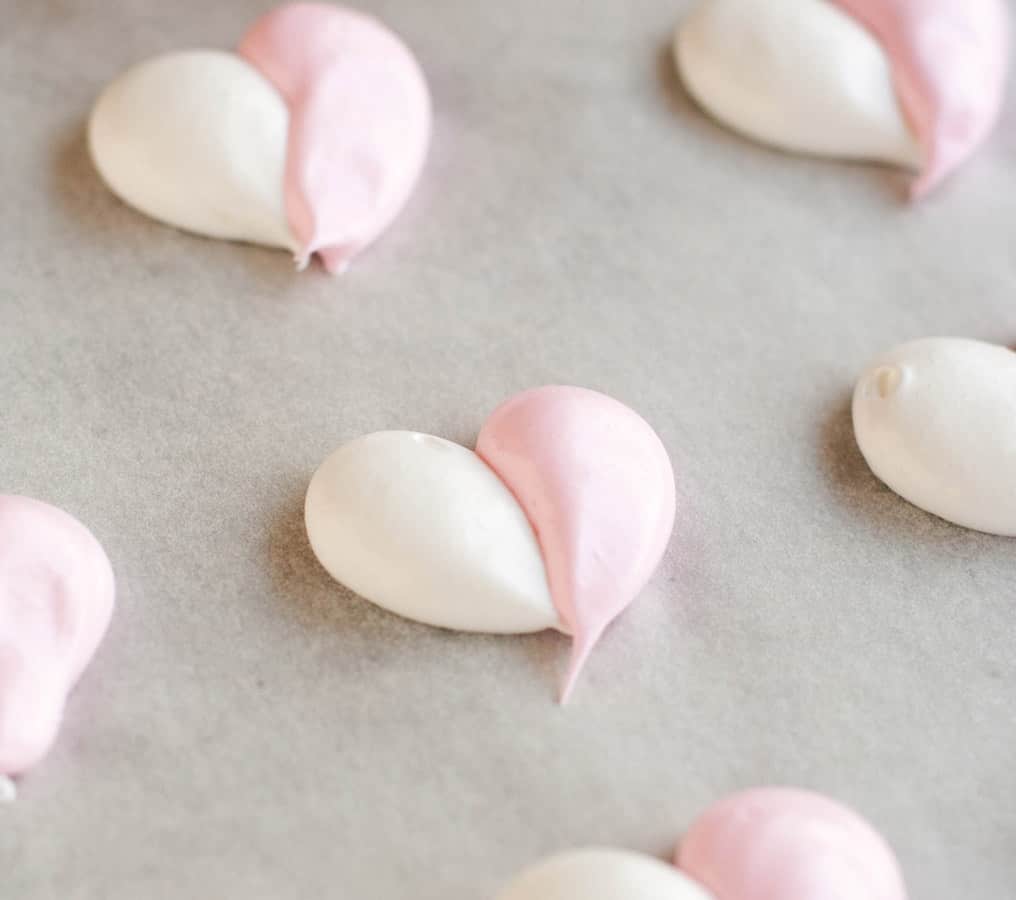
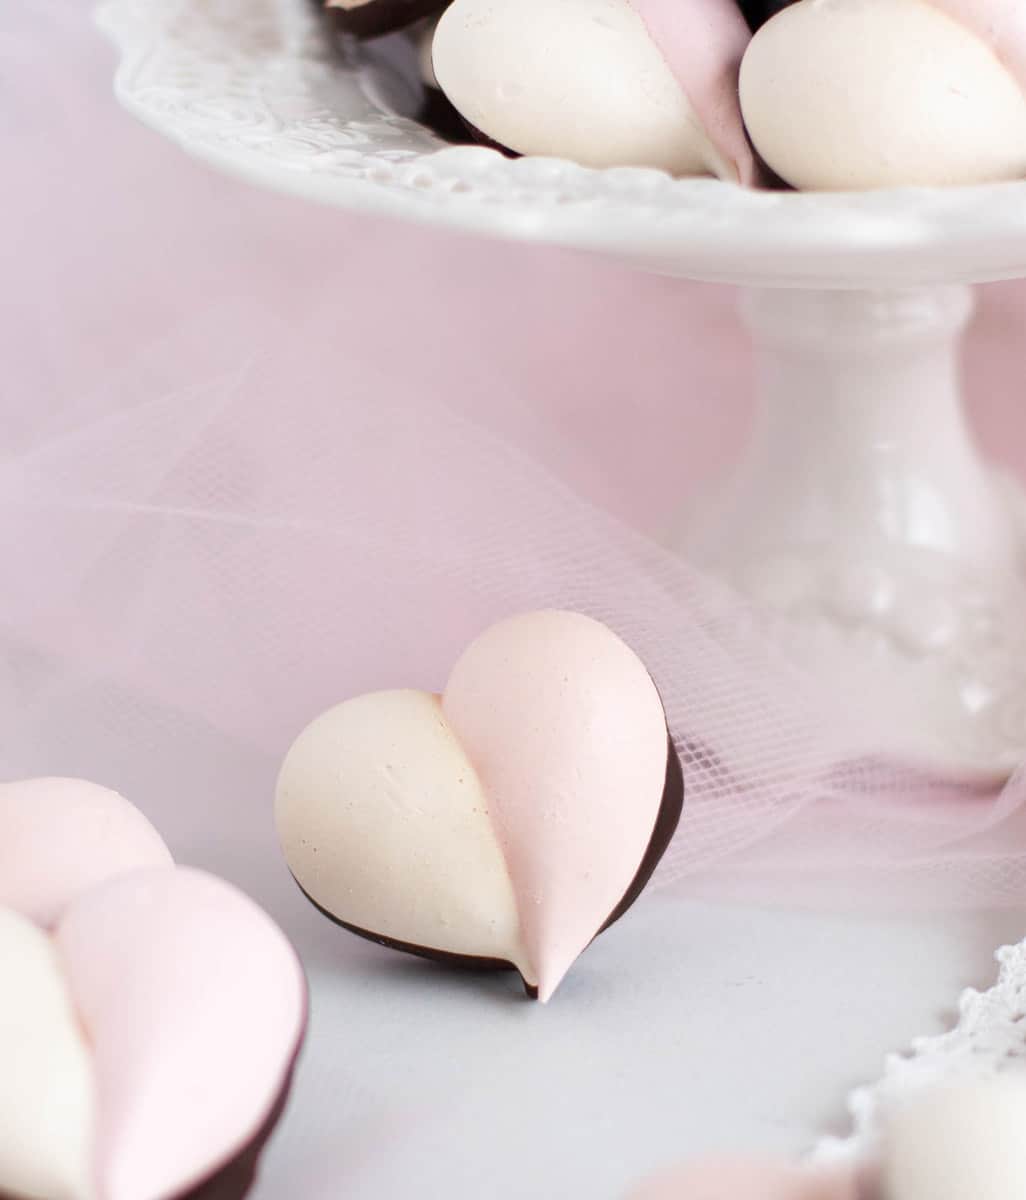
Okay…so I’ve never piped hearts before. I needed some practice. I started with a 1/2″ round piping tip and began piping my little teardrops. Basically you begin piping a circular mound for the top of the heart, then release the pressure while you pull down to a point. I did this with the white, then went back to finish the hearts with the pink. I used any leftover color to pipe single color hearts.
So, it does take a little practice, but you’ll be surprised how easily they “become” hearts when you pipe the other half. I found that some of the hearts that I thought would turn out badly because the first half was a little suspect came out quite nicely once I finished up with the second half.
I’m sure no two of my hearts ended up looking exactly the same. I like to think of them like snowflakes…no two alike…each one unique and special :) (Nevermind my daughter who stopped by to say that they looked like butts…or my husband who came over to agree with her.)

Then I gathered up every Valentine colored sprinkle I had in my pantry. Turns out, I have quite a few. I was thinking that I should have a separate container that just holds Valentine sprinkles. I should have taken a picture…of the sprinkles and my face when I saw them all lined up together.
I thought I would use sprinkles and sugar hearts and pearls and, and… all kinds of stuff! I tested the sprinkles out on my practice meringues, but none of it looked right on my pretty pretty hearts. It was all a little too bright and garish for these little lovelies. So I skipped the sprinkles and carried the whole load back to the pantry.
Into the oven for three hours. Yep. Three. You bake them at a low heat until the meringues are dry and crisp. I will confess that I may have over baked some of mine. You want them dry and crisp with no browning. They should release cleanly from the parchment lined baking sheet. Mine never released completely cleanly, as in leaving no evidence of ever being there. They released easily, but there was the ultra thinnest meringue print left on the sheet. I should have ignored it and taken them out, but I left them in for a bit longer and some of them began to brown. So, once you are approaching the 3 hour mark, check them for doneness. Or check at 2 and half hours, just to be sure.
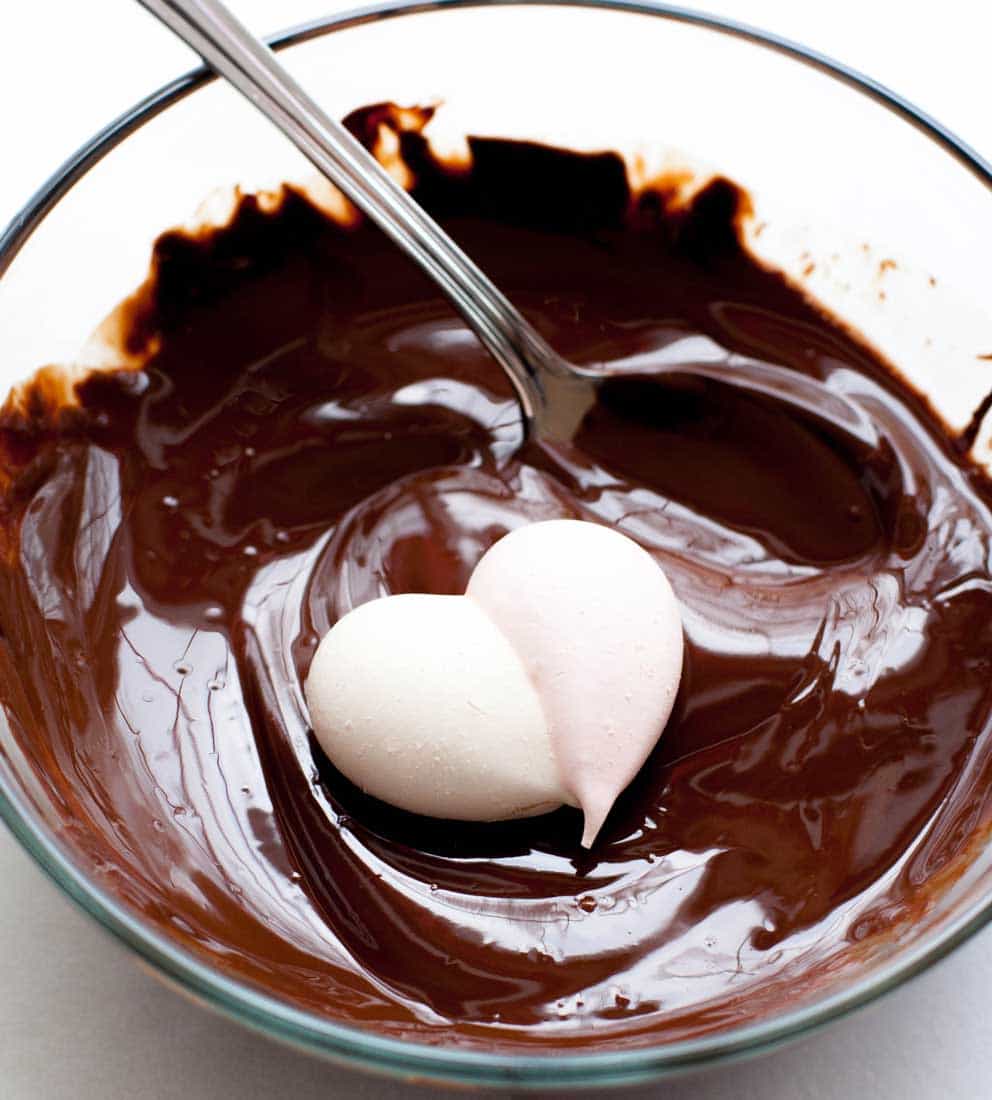

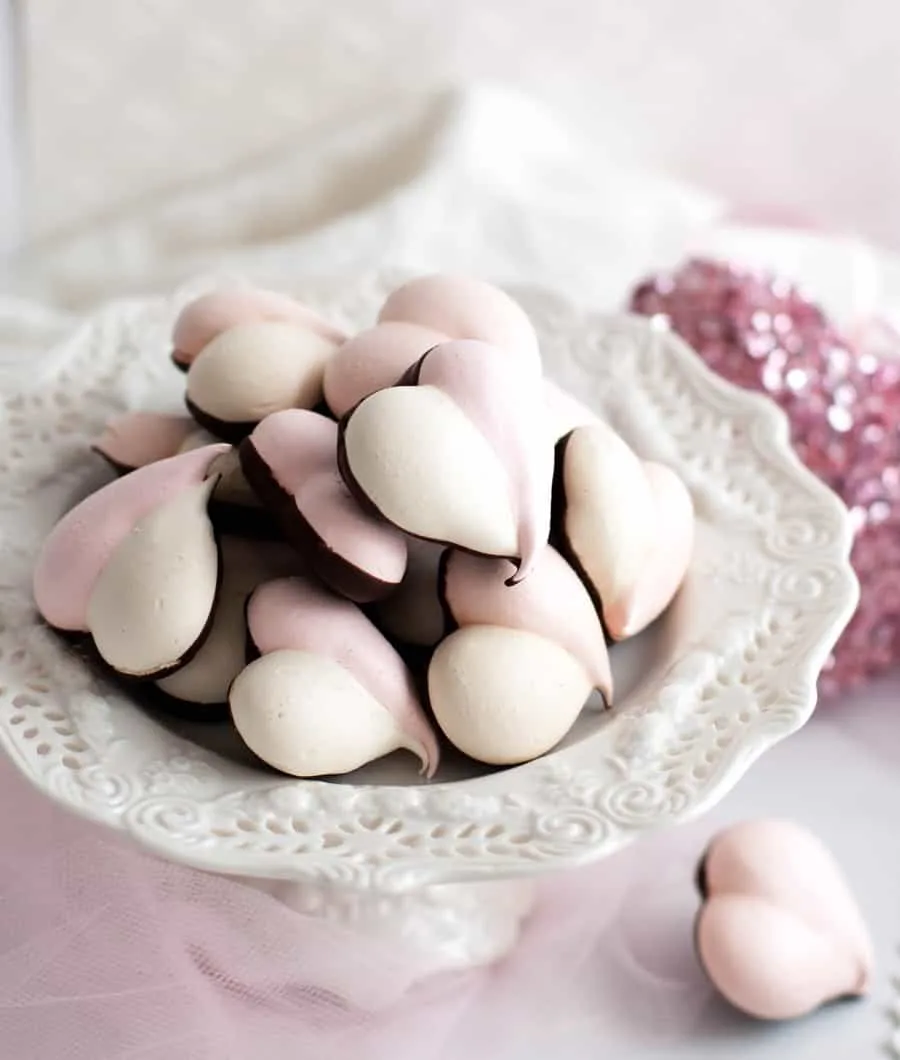
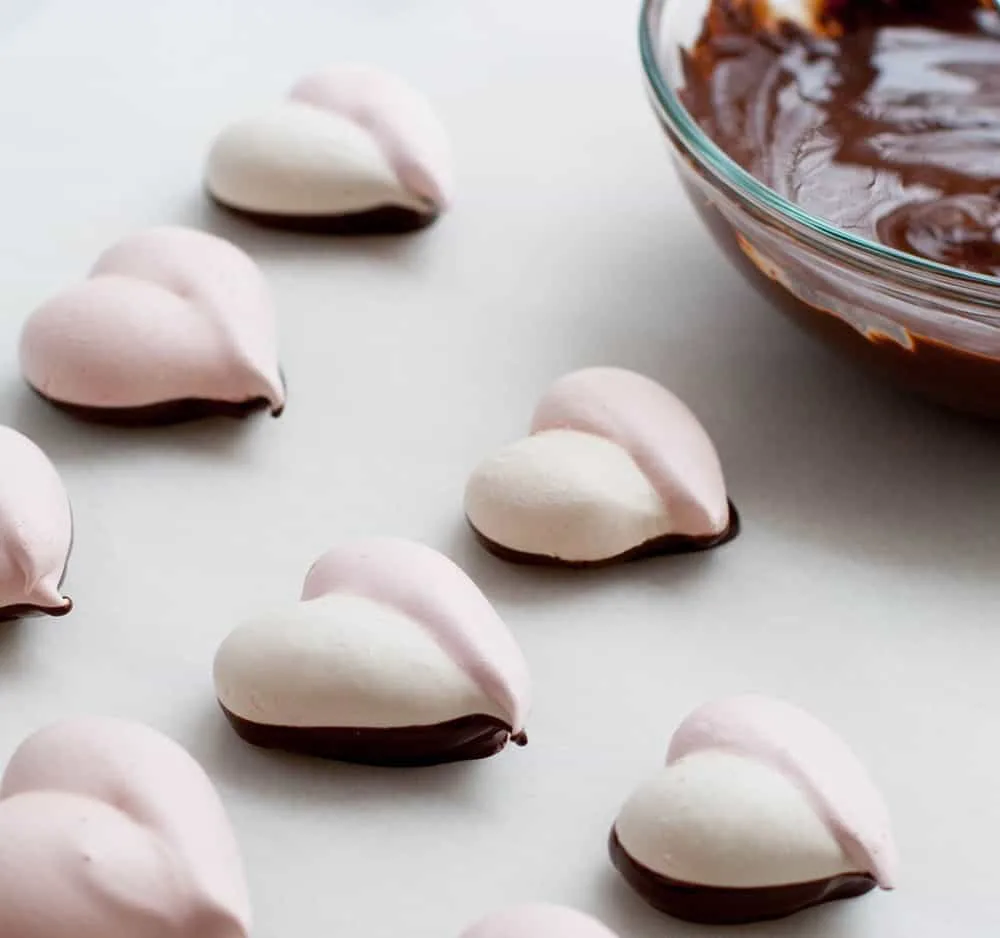
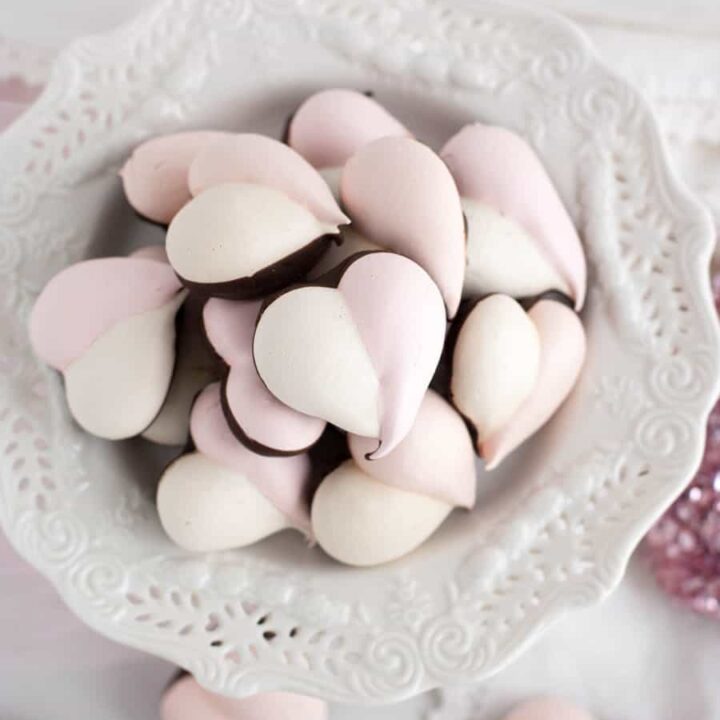
Once the meringues were out of the oven and cooling, I headed back to the pantry…I switched gears from sprinkles and grabbed the dark chocolate….then I chopped it up and melted it. Once the meringues were cool, I dipped just the bottom of each one into the pool of melted chocolate, then placed it on wax paper to set up.

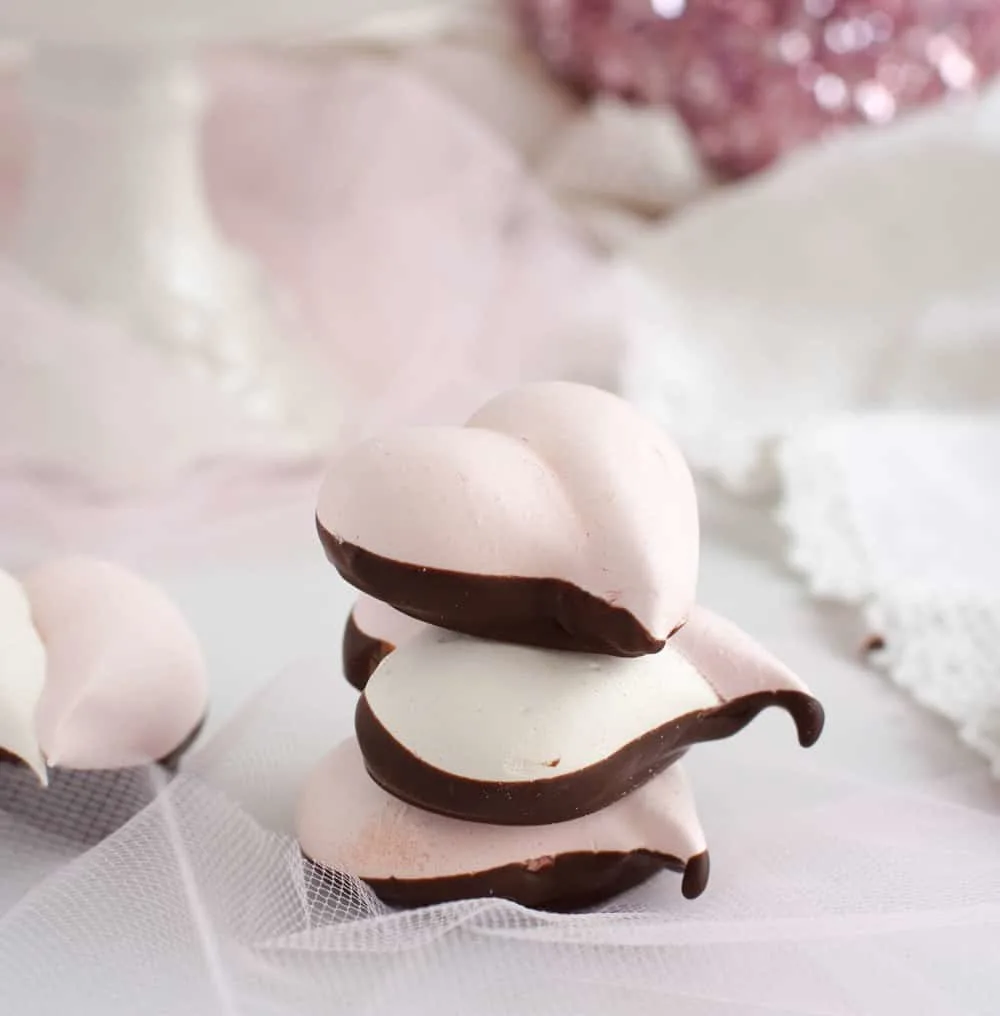
Meringues can be sweet and the dark chocolate was the perfect counterpoint to balance it. Crispy meringue and creamy dark chocolate, this was an infinitely better idea than sprinkles. Valentine Meringues. They’re a nice change from frosted cookies, cakes and candy…or maybe I should say a nice addition to cookies and cakes and candy. Any way you slice it, or pipe it, Valentine’s Day is a wonderful time to share a sweet treat with your favorite peeps. So go on now…

Here’s a little something to spice up your Valentine’s Day…a $1000 Amazon Gift Card GIVEAWAY!!! That’s right…say it with me…ONE…THOUSAND…DOLLARS! This giveaway is being hosted by Seduction Meals who has teamed up with a terrific group of food bloggers to give you a chance to win this amazing prize! There are many chances to enter below. Click on any of the arrows in the chart below to “visit, comment, follow or join” a blogger and you’ll be entered in the give away – it’s that easy! The giveaway only lasts for two weeks so get your entries in! Good luck!
Keep on sharing the love and check out the other bloggers who have joined together to bring you this amazing giveaway. You might just find some new favorites!
http://greenhealthycooking.com
http://www.nospoonnecessary.com
http://www.tastyeverafter.com/
Valentine Meringues
Ingredients
For the meringues:
- 4 large egg whites, at room temperature
- 1/2 teaspoon cream of tartar
- 1/4 teaspoon salt
- 2 1/4 cups confectioner's sugar
For the chocolate:
- 1 1/2 cups chopped dark chocolate, about 8 ounces
- 1 1/2 teaspoons shortening or coconut oil, I only use non-hydrogenated fats
Instructions
- Position oven racks in the upper and lower thirds of the oven. Preheat oven to 250 degrees F.
- Line two baking sheets with parchment.
- Beat the egg whites, cream of tartar and salt on low speed until foamy. Your bowl and beater/s should be clean, dry and free from any oil, butter or other fat.
- Increase the mixer speed to medium speed and continue beating until the mixture is opaque.Do not rush the whipping process by using the top speed on your mixer.
- Gradually add the confectioner's sugar. I added about heaping spoonful at a time, sprinkling it over the egg whites and continuing to beat at medium to medium high speed. Save high speed for the very end of your whipping time.
- Beat until stiff and shiny peaks form. The mixture will look glossy and marshmallowy. It will take about 5 minutes to reach this stage.
- Fit a 1/2" round piping tip into a piping bag or plastic freezer bag with the tip cut off.
- Pipe half of the merinque (onto the parchment lined baking sheet) into 1 1/2" teardrops to form the left side of a heart leaving room to pipe the other half of the heart. Create your teardrop by piping the top of the heart with a circular mound, then release the pressure on piping and pull down to a point. (See post for piping visual.) Leave some room between each heart. I could have piped mine closer than what you see in the photos.
- Continue piping until all of this first half of the mixture is used up. Wash and dry piping tip and fit into a clean bag.
- Add a couple drops of food coloring to the remaining meringue to achieve your desired shade of pink. You may need to re-whip this half of the mixture to achieve the stiff peak stage again.
- Use the pink tinted meringue to pipe the other half of the white hearts. If you have any pink left over, simply continue piping all pink hearts. You can use a wet finger to coax stray meringue tails or points into place.
- Bake for about 3 hours or until meringues are crisp and dry. Let cool completely on the baking sheets.
- Melt 3/4 of the chocolate and all of shortening in the microwave stirring every 30 seconds until warm enough to finish melting by stirring. Do not over cook or your chocolate will seize. Add the remaining 1/4 of chopped chocolate to the warm melted chocolate mixture and continue stirring until completely melted. (This is a shortcut method for tempering chocolate.) You can heat for an additional few seconds if your chocolate isn't fully melted.
- Dip the bottoms of cooled meringues in the melted chocolate and place on a wax paper lined tray to set up in a cool area. (Do not put them in the refrigerator to set up.)
- Once the meringues are dipped and the chocolate is set, peel them off the wax paper and store in an air tight container at room temperature.
Notes
*These directions are for crisp meringues without a chewy center. They are light and airy.
*To insure your bowl is free from any oils, swish around some vinegar and water on all sides and wipe clean. Fats will inhibit your whites from reaching their proper consistency.
*I only use fresh egg whites that I've separated myself. I don't use them from a carton.
*You may get some cracking. Most of my hearts were fine. Cracking can happen due to using older egg whites, being cooled too quickly, or beaten too quickly. I did not use the method where you leave the meringues in a turned off oven to cool. If you want to try that, turn off the oven when they are done, then use a wooden spoon to prop the oven door open a bit to release the heat. Leave in oven until cool. Otherwise, be careful to follow the directions for gradually whipping the egg whites.
*You may need more or less chocolate depending upon how heavily you dip each meringue.
*Meringues can be stored for up to a week in an airtight container, possibly longer. If you are planning to make them well in advance, I would wait to dip them until closer to serving as the chocolate does add some moisture and will reduce the time they can be stored and still stay crisp, although I have some that have been dipped and stored for a week that are still crispy.
The base meringue recipe adapted from Food Network Magazine, December 2015
The Merchant Baker Copyright © 2016
Nancy Metcalf-mantell
Monday 15th of February 2016
Well, I've only just found this prize and it's the day after V-Day. But, I can still try making them now. Just love chocolate. Never made meringe before either. The gift card would really come in handy.
Chris Martinez
Monday 15th of February 2016
Okay, I'd have to spread this evenly among my wife and kids! I know my wife would love an *extra* date night ;)
Bryan
Monday 15th of February 2016
Looks tasty
Dayna Colvin
Sunday 14th of February 2016
The dessert looks lovely, very rich, but lovely. I'll give it a try, but I will add my dairy free organic sweetener loving touch. :) I would buy a brand new MacbookPro to help me write my next page turner best seller, a I am a holistic organic writer. I would also by all the beautiful supplies I want to make beautiful semiprecious and glass beaded 925 sterling silver jewelry. Thank you for being a caring creative person.
gloria patterson
Sunday 14th of February 2016
my niece in expecting her first child and she needs everything! I have my eye on several different items from a halo to one of the rockers