
Hey! I made us some ice cream!

This is an exciting day because I only make ice cream approximately….well….let’s say….yeah, once a year :) Just enough to make me feel like owning an ice cream maker is actually worth the cabinet space. You remember Egg Nog Ice Cream with Hot Buttered Rum Sauce? That was the last time I made ice cream, which is crazy considering how easy it is to whip up a batch. So, today I’m sharing one of my favorites, Seaport Salty Swirl Ice Cream.
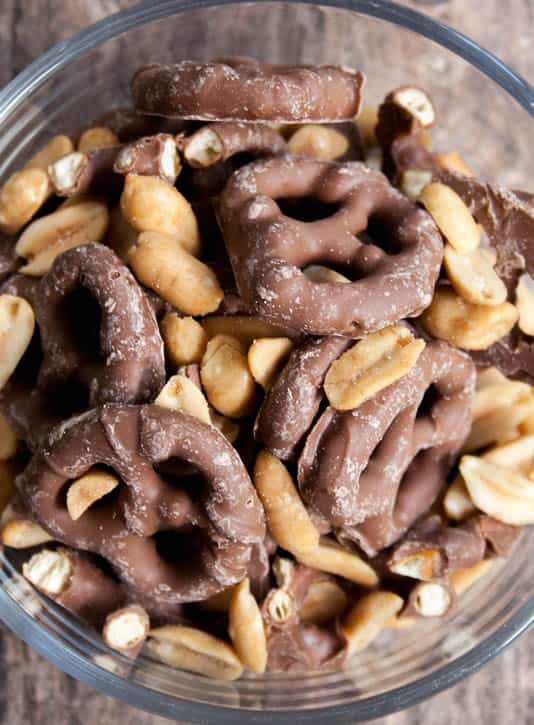
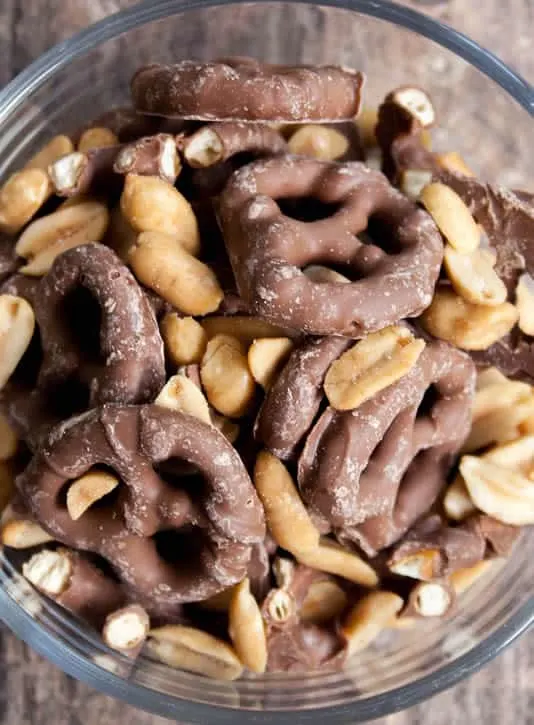
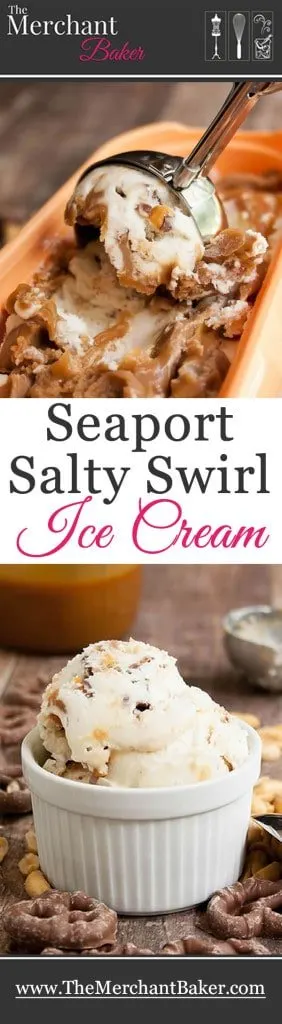
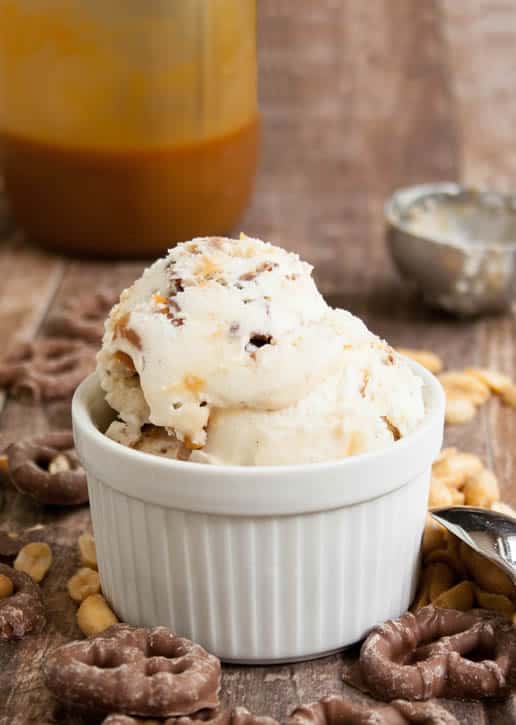
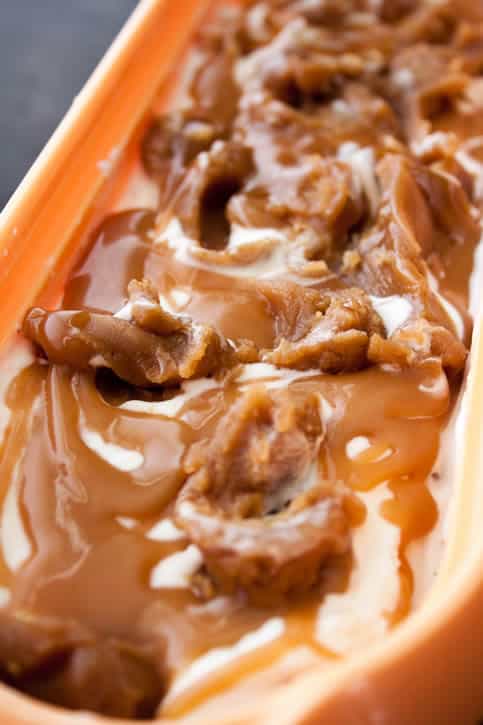
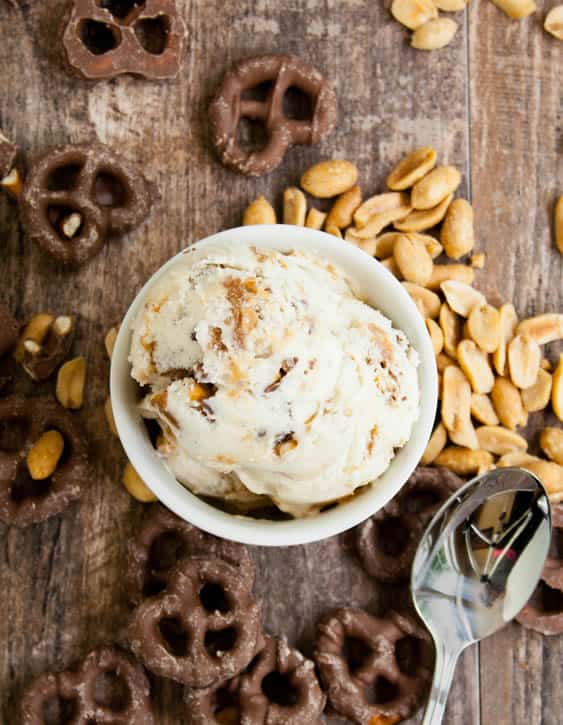
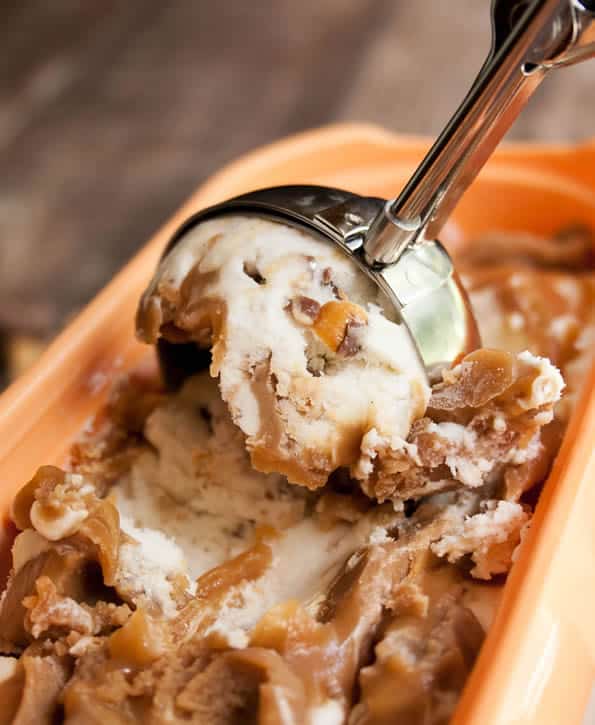
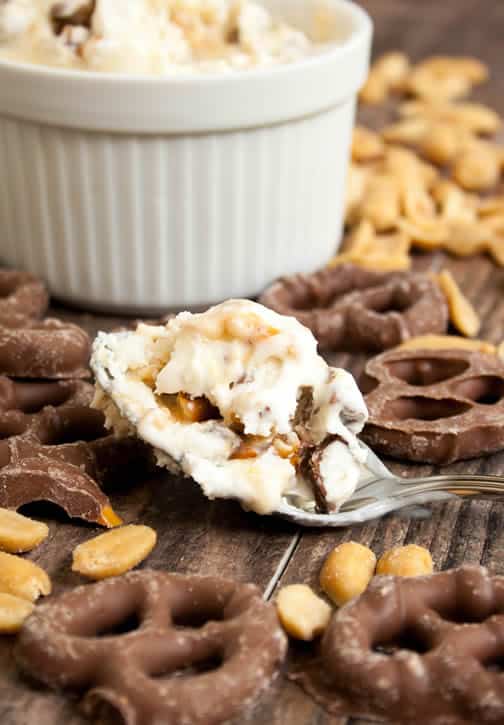
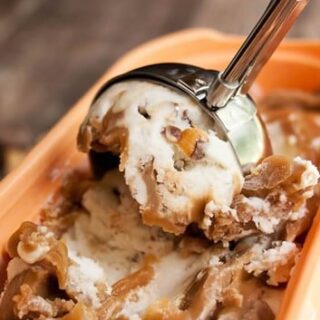
Ahhh yes….this flavor hails from Mystic Drawbridge Ice Cream in Mystic Connecticut. We stayed there a night or two, a few years ago, on our way to a vacation in Vermont. In every summer destination, we always look for the ultimate ice cream shop, the kind that has the best homemade ice cream in town. In Mystic, it’s Mystic Drawbridge Ice Cream. I ordered the Seaport Salty Swirl Ice Cream and immediately fell in love with it. So much so, that we went back one more time before we left so that I could order it again. It’s basically a creamy vanilla base chock full of chocolate covered pretzels and chopped peanuts with peanut butter sauce and salted caramel swirled all through it. Yum, yum and yum! It is the perfect flavor and texture combination.

I’ve been meaning to re-create this yummy flavor combo ever since then. I figured this summer was as good a time as any, so I googled it to confirm what all the delicious mix ins were so that I could make it exactly like the original. Turns out, a passionate ice cream blogger named Lindsay Clendaniel of Scoop Adventures wrote a book called, “Scoop Adventures The Best Ice Cream of the 50 States.” And guess which ice cream was featured from Connecticut, with the shop’s recipe to make it? Yes! Seaport Salty Swirl! Clearly, I wasn’t the only person who thought this was a winning flavor. And even though the recipe was one of the few you could read in the preview, I went ahead and bought the book because, of course, I wanted to check out the other 49 states. If my beloved Seaport Salty Swirl made her book, then I was anxious to find out what other treats she’d found to share.

The recipe has three parts: the ice cream base, the peanut butter sauce and the salted caramel sauce. Then you have the mix ins, but you don’t have to make them, you just have to chop them up.
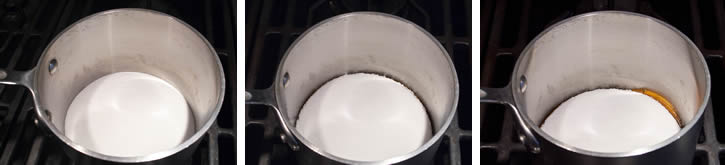
The vanilla base is easy as pie to make and when I make ice cream, it’s at this point, when I’ve basically just mixed up a few ingredients on the stove, that I realize that I need to make ice cream more often. But this ice cream has added extras, so we will have a few more steps. It’s going to be worth it, so stick with me. We need to make peanut butter sauce and caramel sauce.
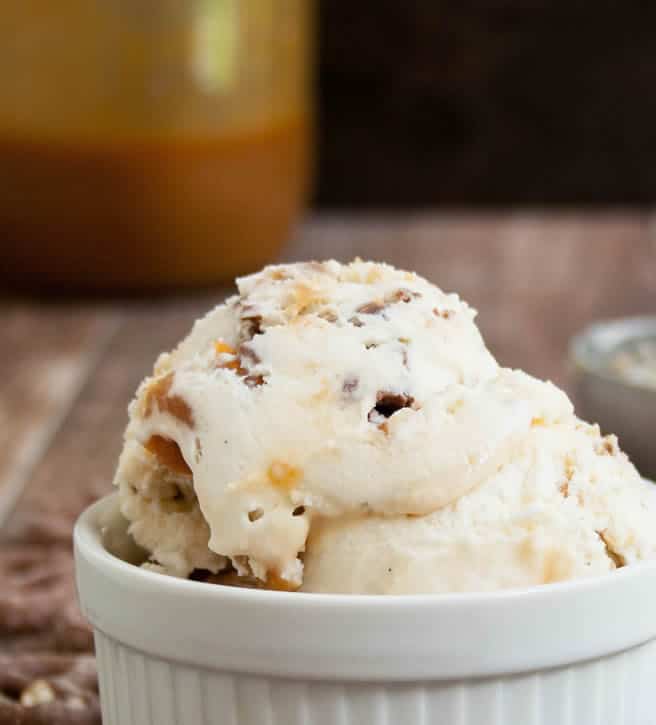
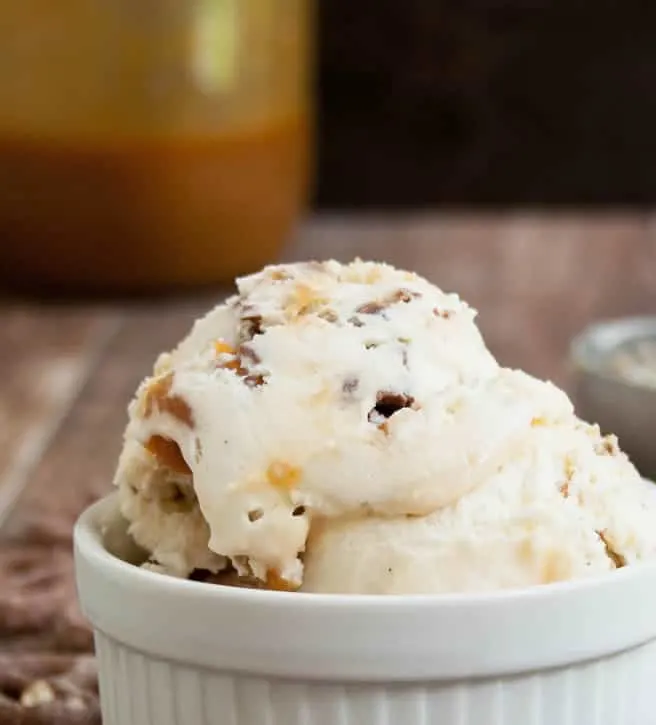
The peanut butter sauce is also easy and is simply another round of mixing up a few ingredients on the stove. I accidentally let mine cook too long while I was doing camera adjustments and so it was a little less saucy than it should have been. I thought about thinning it out with more cream/milk, but I decided I might like the thicker result, so I left it. (I don’t have any photos of the peanut butter sauce, but you’ll see the chunks layered at the top of the tub of ice cream.)
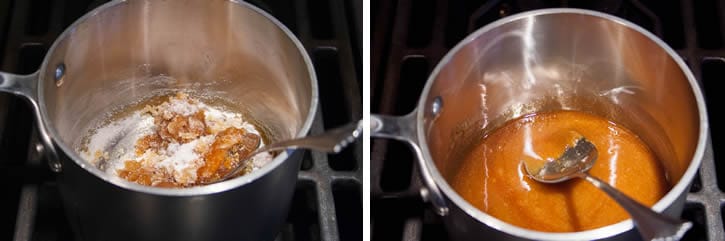
That brings us to the salted caramel sauce, because it wouldn’t be Seaport Salty Swirl Ice Cream without salted caramel sauce. Now this is not prepared like my easy 10 minute Buttermilk Caramel Sauce. While that sauce is so butterly delicious, it can get a little finicky with crystallization (which is quickly solved through reheating.) We can’t have that happen once it’s mixed into our ice cream. This recipe involves making caramel with the “dry method.” With the dry method, you caramelize the sugar by itself before you add any other ingredients. It’s not scary though. Just use a good heavy bottomed pan and have all of your ingredients ready to go. Oh, and don’t leave the pan. Stuff happens when you leave and lose track of time…so be vigilant.
You’ll start with heating your sugar over medium heat. When you start to see all of the sides melting, you can begin pulling the melted edges towards the dry center. My sugar melted rather quickly and you can see what it looked like as I mixed it up… like a lot of caramel colored sugar. But keep cooking it, stirring it frequently and it will become syrupy.
At that moment, you can pull it off of the heat and add your butter, then cream and salt. It’s important to have your butter at room temperature. I thought mine was, but it was still cool enough in the center that it made my caramel solidify and get chunky. It’s supposed to bring down the temperature of the caramel, but I think it was still cooler than it needed to be. Ugh! I had a pot of melted butter and cream with giant clumps of caramel.
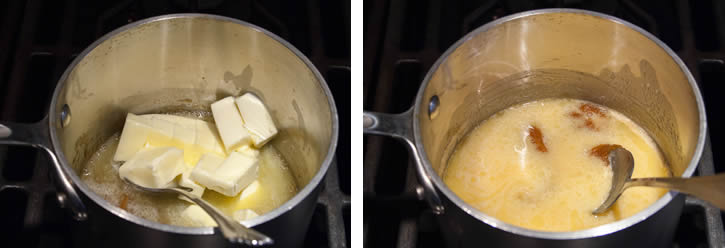
But, no worries. I returned it to the heat and continued stirring until everything melted and came back together as one combined sauce. (Phew!) I had a couple of small clumps of caramel bits in the bottom of the pan. This was easily remedied. I simply strained my caramel into a mason jar, and voila! Beautifully smooth salted caramel sauce. (Um, no pics here either. It’s in the mason jar in the background of some of the photos and, yes, layered with the peanut butter sauce in the tub of ice cream.)
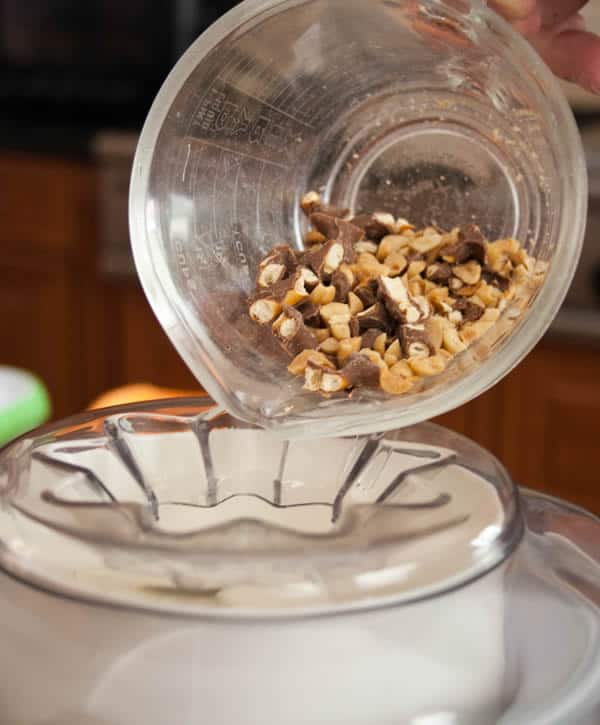
Once you have your sauces completed and cooled to room temperature, you can make your ice cream. Just pour the ice cream mixture into your machine, follow your manufacturer’s directions for churning and when you’re nearing the end, add your chopped up peanuts and chocolate covered pretzels.
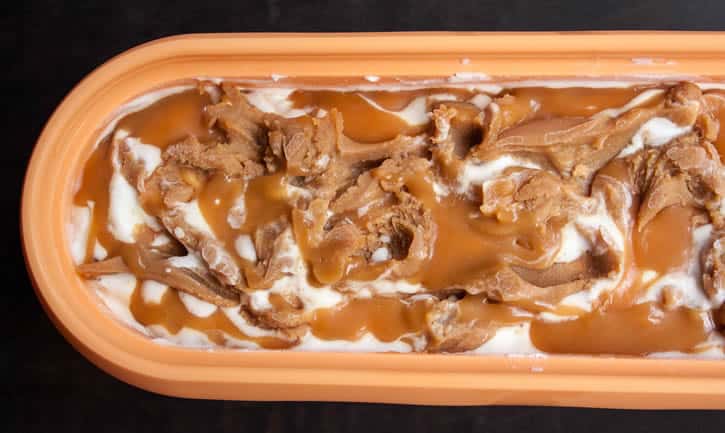
When that’s complete, you’ll layer the caramel and peanut butter sauces on the bottom of your ice cream container, spread a layer of ice cream on top, then repeat layers until your container is full. I bought these Tovolo ice cream containers last year, because, you know, I was going to make ice cream more than once a year ;) I have to tell you, they are the best containers I’ve ever used to store ice cream. The top comes off easily, the narrow shape is perfect for scooping and the rubberized bottom keeps the container from slipping while you’re scooping. It’s pretty much perfect. It’s not terribly moody or artistic for a photo shoot, but hey, there’s beauty in it’s functionality.

When we finally got to taste the ice cream last night…it was just AMAZING. My husband said it was the best I’d ever made. I thought it tasted exactly as I remembered from the ice cream shop…deeeelicious! This ice cream was a bit more work because of the sauces, but so worth it. Really, this is a must make! Seaport Salty Swirl Ice Cream. Because in Mystic, Connecticut…
sometimes it’s not just about the pizza :)
Seaport Salty Swirl Ice Cream
You'll need to plan ahead to make this ice cream since the base needs to refrigerate overnight. I made the base the day before and the sauces the day of serving. Once the ice cream is layered with the sauces, you'll need another four hours of freezing time.
Ingredients
For the ice cream base:
- 2 cups heavy cream
- 3/4 cup whole milk
- 3/4 cup sugar
- 1/8 teaspoon salt
- 1 teaspoon vanilla bean paste, optional
For the salted caramel sauce:
- 1 cup white sugar
- 3/4 cup unsalted butter, room temperature
- 1/2 cup heavy cream, room temperature
- 1 1/2 teaspoons sea salt, I used fleur de sel
For the mix ins:
- 1/4 cup chopped salted peanuts
- 1/2 cup chopped chocolate covered pretzels
For the peanut butter sauce:
- 1 cup creamy peanut butter
- 2 Tablespoons whole milk
- 2 Tablespoons heavy cream
- 4 Tablespoons honey
Instructions
- Prepare an ice bath in a bowl large enough to accommodate a medium heat proof bowl.
- Make the ice cream base by mixing the heavy cream, milk, sugar and salt in a medium sauce pan. Heat to 170 degrees F on an instant read thermometer. Do not boil.
- Remove from heat, stir in vanilla paste, if using, then pour mixture into a medium heat proof bowl (I used a pyrex bowl.)
- Place bowl into the ice bath to help it cool down to room temperature, keeping the water level below the rim of the bowl so it doesn't get into your mixture. Stir occasionally to aid in cooling. Cover and refrigerate overnight.
- Make the caramel sauce. In a heavy bottom sauce pan heat the one cup of white sugar over medium heat. Do not touch the sugar until you see all of the sides begin to melt. They may already look like they're turning a deep caramel color. Don't let this process go too far or your sugar will burn. Once you see the melted sides, use a spoon or heat proof spatula to pull the melted sides into the center. Stir it frequently until it reaches a deep amber color and becomes syrupy, lowering the heat if necessary.
- Once it becomes syrupy, remove the caramel from the heat and add the butter. Stir until it is completely melted. You may have clumps of caramel that form. Don't worry about it. Add the cream and the salt and combine as best you can, then return to the heat, stirring frequently until the mixture completely combines. If you had any clumps of caramel, they should melt and combine with the butter and cream as you heat it. Once your sauce has come together, remove from heat. I had a few tiny clumps of caramel left, so I strained my mixture into a mason jar to remove them. If you don't have that issue, just pour your sauce into a heat proof container to cool.
- Make the peanut butter sauce. Combine all ingredients for the peanut butter sauce in a sauce pan and warm until combined and smooth. You could also do this in the microwave. Allow to cool to room temperature.
- Once your ice cream base has been chilled overnight, pour into an ice cream maker and churn according to manufacturer's directions. When the ice cream is nearing the end of churning, add the chopped chocolate covered pretzels and peanuts and finish churning.
- Spoon a small layer of peanut butter and caramel sauce into the bottom of a freezer safe container. Spoon a layer of ice cream on top and lightly spread to even it out. Continue layering sauces and ice cream until container is full. I like to end with a layer of sauces.
- Cover the surface with plastic wrap to prevent freezer burn and seal the container with a lid, if you have one, or cover tightly with more plastic wrap or foil. Freeze until firm, about 4 hours.
Notes
*I mention heat proof containers a few times throughout the recipe. I used mason jars or pyrex bowls. If you pour a hot mixture into a glass container that isn't tempered, you will risk it cracking, which will ruin your container and your sauce. So choose your containers carefully.
*My peanut butter sauce cooked a bit too long while I was doing camera adjustments and it was more thick than saucy. I decided to use it that way so that I had soft spoonfuls of the mixture throughout my ice cream. I could have added a bit more milk or cream and heated gently to bring it back to a saucy consistency. Either way will work out fine, if it happens to you.
*The sauces will take some time to cool before you use them. They must be cooled to room temperature before you layer them with the ice cream or they will melt it. So don't even worry about churning your ice cream until your sauces have both cooled and are ready to use.
*You will have leftovers of both sauces. I had about half of each left over. These should be refrigerated and used within two weeks. They will get very thick in the refrigerator, but can be brought back to their saucy consistency with gentle heating. Do not overheat or bring to a boil.
*Since you will layer as much as you want into your ice cream based on preference, I left the full recipes in. I wouldn't halve the caramel, because I like having caramel sauce on hand for other recipes. The peanut butter sauce can be easily halved if you don't want left overs.
*If you want a short cut, use a good quality prepared salted caramel sauce. I would probably use Trader Joe's Fleur de Sel Caramel Sauce. I'm giving you a link so you know what it looks like. It's less expensive to buy it in the store. Feel free to use what you like. However, the homemade sauce is really good and adds lots of flavor.
Recipe slightly adapted from Scoop Adventures The Best Ice Cream of the 50 States
The Merchant Baker Copyright © 2015
Chris R.
Thursday 19th of July 2018
This sounds so yummy! How much ice cream does this make?
Ramona
Thursday 19th of July 2018
Chris, this ice cream is seriously some of the best I've had. Trust me when I tell you that it's worth the effort. This recipe will make a generous quart of ice cream. However, since you will likely have leftover sauce, you could make two batches of the base and use up the leftover caramel and peanut butter sauces to make another quart. It's so good, you will definitely wish you had made double :)